Enterprise Scale Deployment
WebSphere Portal V6
Search Tips
| Advanced Search
- Overview
- Horizontal Cluster w/portal
- Horizontal Cluster w/o portal
- Add a horizontal node to a cluster w/portal
- Add a horizontal node to a cluster w/o portal
- Vertical Cluster w/portal)- Installation
- Vertical Cluster w/o portal)- Installation
Overview
Here are some instructions for...
- Installing WebSphere Portal V6.0 in a WAS clustered configuration.
- Building a horizontal and vertical cluster for high availability,
- Deployment with WebSphere Process Server.
This chapter is specifically written for portal v6.0.0.0, WAS v6.0.2.9, and portal v6.0.1.1. The same approach could apply to any Portal 6.0.x, WAS v6.0.x and portal 6.0.x versions as well
Property files referenced are generally under...
/IBM/WebSphere/AppServer/profiles/profile_name
Locations:
| WAS_ROOT
| /IBM/WebSphere/AppServer
|
| <wsas_profile_root>
| /IBM/WebSphere/AppServer/profiles/profile_name
|
In a environment keep path names short to avoid size limitation, for example...
/Web/App/
Portal Considerations
The portal add on component to WAS allows portal to take advantage of the SOA architecture. Portal can be installed and clustered without portal, but then you would loose the SOA features.
Portal is installed and configured by default when using the portal Typical install path. However, one very important limitation exists with portal. portal does NOT allow a portal profile to be federated if a portal server already exists on the node. This limitation basically makes a node that has been installed by the portal installer using the Typical install path to be UNCLUSTERABLE. So to work around this you MUST install WebSphere Application Server and portal separately by using their native installers and then federate the empty profile and then install Portal onto the already existing, federated profile.
Horizontal Cluster w/portal - Installation
In a horizontal cluster topology members of a portal cluster exist on multiple physical machines representing each node, effectively and efficiently distributing the workload of a single logical portal image.

| dmgr2
| Deployment manager.
|
horizc2n1
horizc2n1
| nodes that host the business logic. Clustered for load balancing and failover.
|
| dbdom7
| RDBMS server for the portal database for all nodes and the deployment manager.
|
| dbids | LDAP server (IBM Tivoli Directory Server V6).
|
Installation Steps
- Download software
- Install WAS and portal on the dmgr
- Install WAS and portal on the primary cluster node
- Prepare the dmgr an node1 for the portal install
- Install portal onto the managed node1
- Configure primary node1 to an external database
- Create the cluster definition
- Install WAS and portal on on other cluster nodes.
- Install portal onto the managed node, node2 and subsequent nodes
- Add node2 and subsequent nodes to the cluster definition
- Configure portal node1, Portal node2 and the dmgr for LDAP security with realm support
- Configure the cluster to use remote web servers
- Configure a WebSphere Edge Server or an IP sprayer for load balancing the system (Optional)
- Configure the portal Cluster to use a second LDAP Directory. (Optional)
- Configure the portal cluster to share the database with a second clustered environment (Optional)
WebSphere Application Server Installation on dmgr
Remember that install WAS/portal from their native installers and federate the node BEFORE using the portal installer to install portal.
- Install WAS dmgr by running the installer...
<cd_root>/W-1/windows/ia32/ifpackage/WAS/install.exe
Make sure the installer screen is titled
Welcome to WebSphere Application Server Network Deployment (WAS), V6
This title means that we can use this installer to install either, dmgr or WAS profiles. If the title is
WebSphere Application Server v6.0
...you are using an installer that only has the ability to install WAS profiles and not dmgr profiles.
If you are installing from downloaded code, run the program from a local drive, not a mapped network drive.
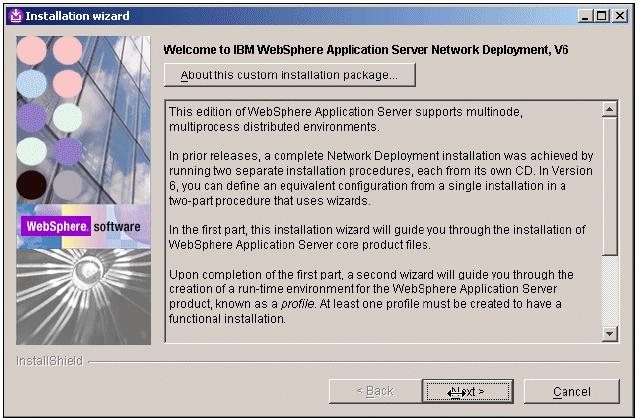
- Accept the License agreement and click next
- The Installation Wizards performs a pre-requisite check for you, when this runs successfully.click Next, otherwise check the Operating System if it meets the requirements for WAS
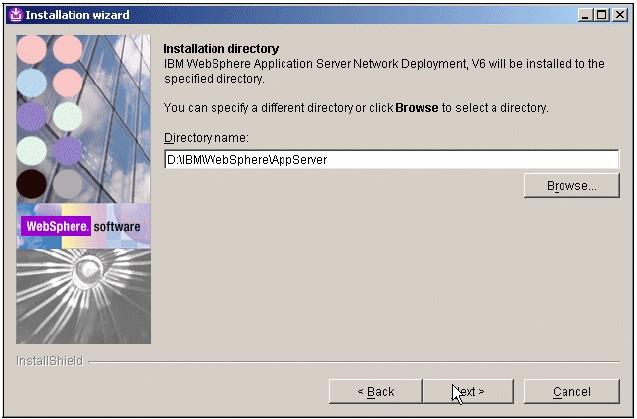
- If installing on Windows, when asked for the install location, shorten the default path. There is a path name limitation in Windows. Windows cannot handle path names longer than 256 characters. For example:
D:\IBM\WebSphere\ApplicationServer
...and click Next...
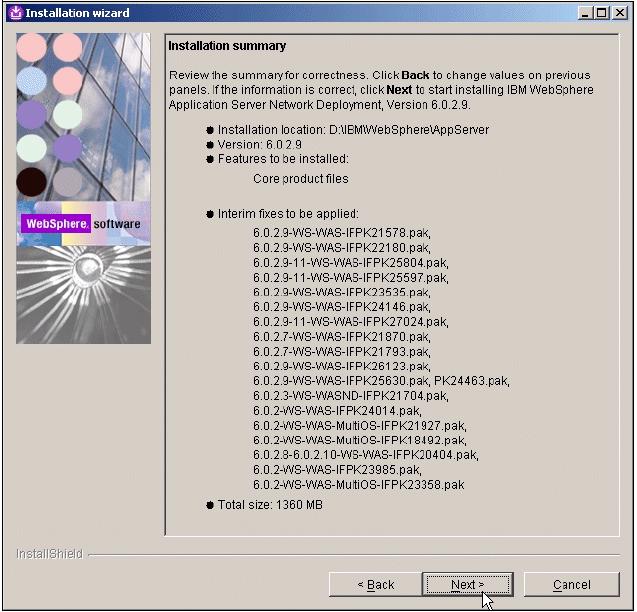
- The Installation Wizard displays the installation summary including interim fixes to be applied
- Review the options in the installation summary window and click Next
- The WAS installer from the portal CDs will automatically upgrade WAS to 6.0.2.9
- The WAS installer from the portal CDs will also automatically apply these WAS and portal iFixes required for an install of portal 6.0.0.0
- PK21578
- PK22180
- PK25804
- PK25597
- PK23535
- PK24146
- PK27024
- PK21870
- PK21793
- PK26123
- PK25630
- PK24463
- PK21704
- PK24014
- PK21927
- PK18492
- PK20404
- PK23985
- PK23358
We can find WAS fixes by accessing the support web site and searching for the fix.
- You should be prompted during the install (with a panel near the end) if you would like to create a profile, at this time choose NOT to create a profile by making sure the "Launch the profile creation wizard" checkbox remains UNCHECKED. You will create a portal profile at the end of the portal installation and click Next.

Portal Installation on dmgr
- Install portal 6.0.1.1 by running the installer from...
<cd_root>/W-2/windows/ia32/WBI/install.bat
Ensure you use the install.bat file and NOT the install.exe to install portal
- The Installation Wizards performs a pre-requisite check for you, when this runs successfully. click Next, otherwise check the Operating System if it meets the requirements for portal
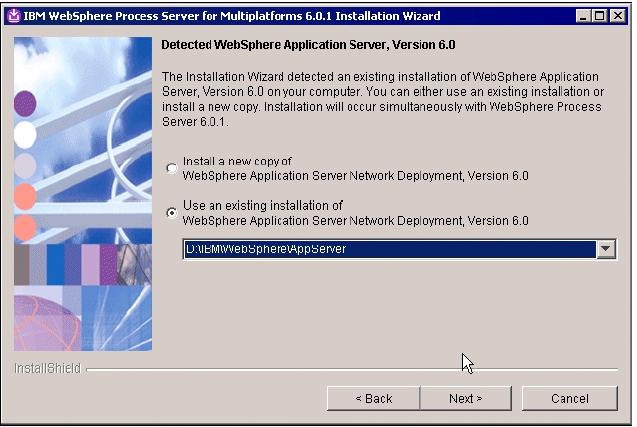
- In the "Detected WebSphere Application Server" screen, ensure you use the existing WAS you just installed and click Next
- Review the options in the installation summary window and click Next.
- In the "Installation complete" screen, you want to create a profile now, ensure the...
Launch the profile Wizard
...checkbox is CHECKED and click Next to launch the portal profile creation wizard

If you have to launch the portal profile creation wizard manually, ensure you launch the portal profile creation wizard and NOT the WAS profile creation wizard. The portal profile creation wizard script is located at...
WAS_ROOT/bin/ProfileCreator_wbi/pcatWindows.exe
- In the...
Welcome to the WebSphere ESB Profile Wizard
...click Next
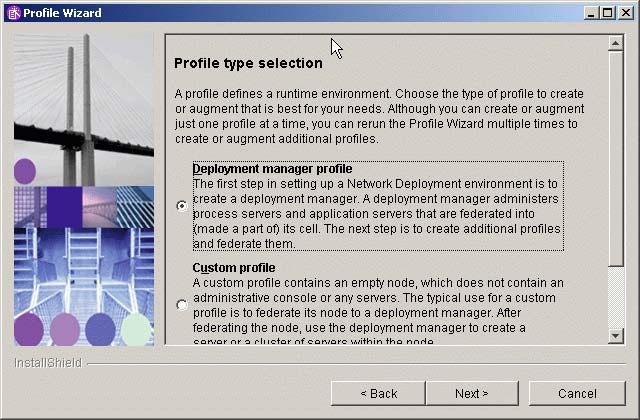
- After the profile creation wizard is launched, ensure the "Deployment manager profile" radio button is selected on the "Profile type selection" panel and click "Next"
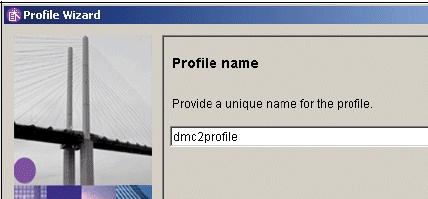
- In the "Profile name" screen, enter a profile name for the portal Instance, this name can be different for each node and the dmgr, in the setup you choose the node Name as the profile Name and click Next
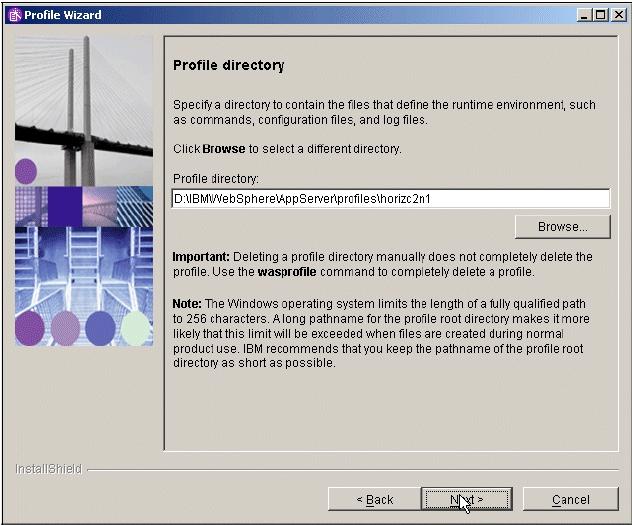
- In the "Profile directory" screen, verify the directory name and click Next
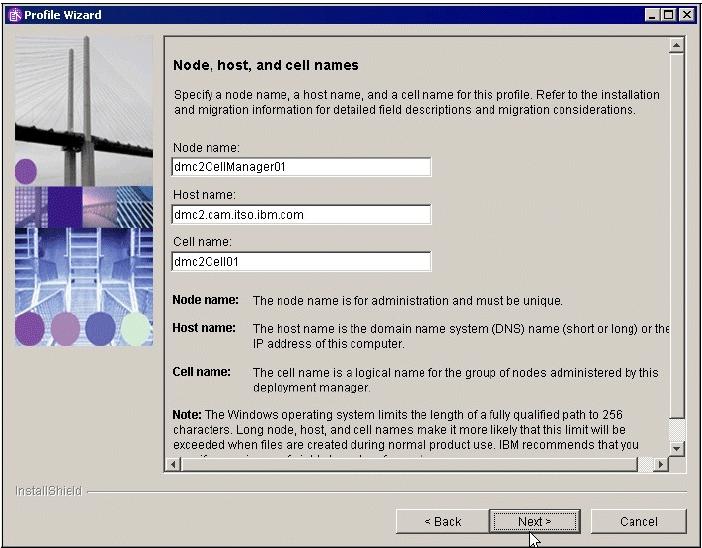
- In the "Node,host, and Cell Names" screen, Check the value of node, Host and Cellname and click Next
- In the "Port value assignment" screen, Check the values of Ports and click Next
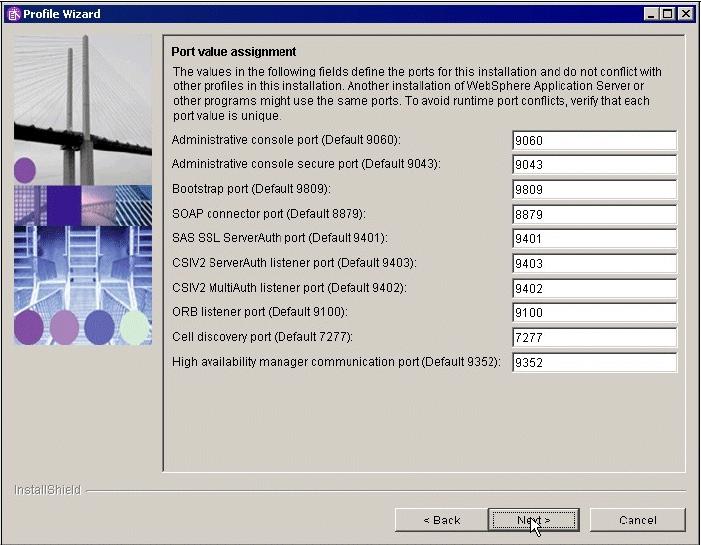
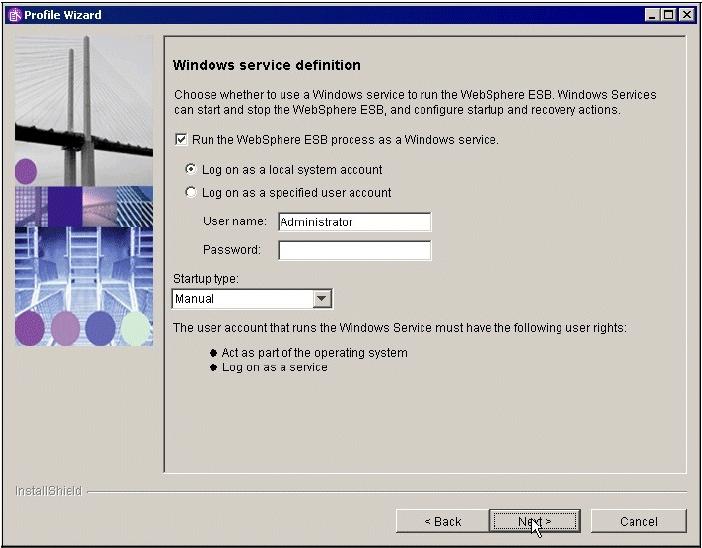
- In the "Windows Service Definition" screen, we can configure portal to run as a server, in the Setup you do not want to run the portal as a Windows Service, because of the longer startup time of Windows System, so leave the defaults and Click
Next
- In the "Services Component Architecture configuration" screen, leave as default, and click Next
- In the "Profile Summary" screen, check the values and the click Next

In the "Profile creation is complete" screen, check if the creation was successful and Click
Finish
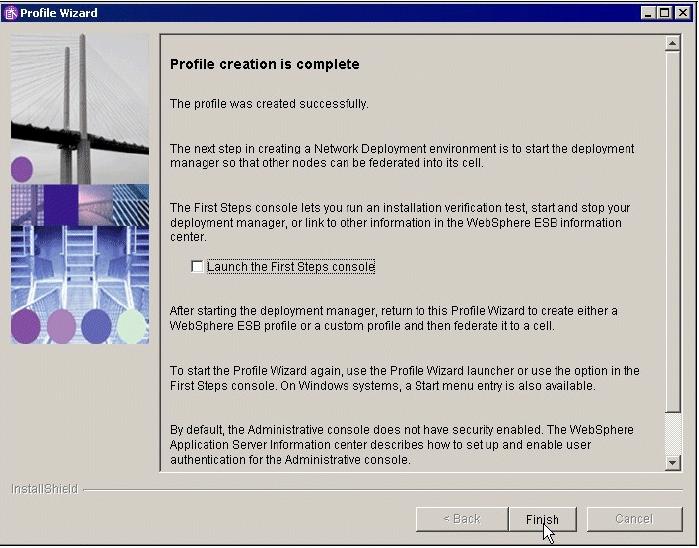
After the dmgr profile is created apply the remaining WAS and portal iFixes required for portal 6.0.0.0. These iFixes need to be applied to the dmgr so that both the dmgr and the portal nodes have the same level of WAS and portal, including the same iFixes.
Obtain the current WAS update installer shipped with the CDs at...
<cd_root>/W-Setup/was6_fixes/win/updateinstaller
Copy to the updateinstaller directory...
[was_root]\AppServer\
...of the file system
Copy the necessary fixes to...
[was_root]\AppServer\updateinstaller
These fixes can be found on the portal CDs at...
<cd_root>/W-Setup/wps6_fixes/win/updateinstaller/maintenance
- IY82199
- IY83206
- JR23774
- JR24221
- JR24190
Copy the maintenance dir to...
[was_root]\AppServer\UpdateInstaller
If the Installation of the JR24190 Fix fails, then restart the Windows Server and uninstall and install the Fix again.
Java SDK 1.4.2 SR4 Cumulative Fix – this JDK should be installed with the install. We can verify the level of the WAS JDK by running this command:
WAS_ROOT/java/bin/java –version
If the Java SDK has not the correct version we can find the Cumulative Fix at:
http://www-1.ibm.com/support/docview.wss?rs=180&uid=swg24011104
Copy the maintenance directory to...
WebSphere\AppServer\UpdateInstaller\sdk
...and use the Update Installer that is already copied
Start the WAS update installer by running...
WAS_ROOT/updateinstaller/update.exe
...to apply the remaining WAS and portal iFixes that are required for portal, but were not installed as part of the WAS install.
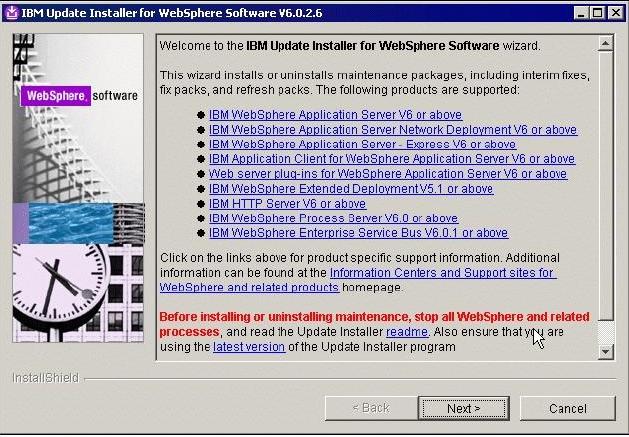
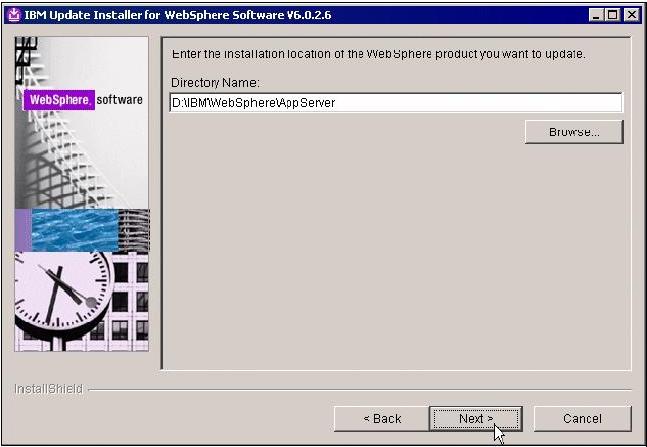
Enter the directory location of the AppServer and click Next
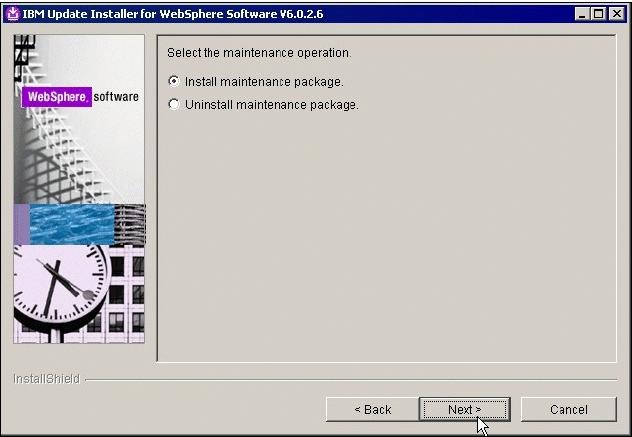
Select Install Maintenance Package and click Next
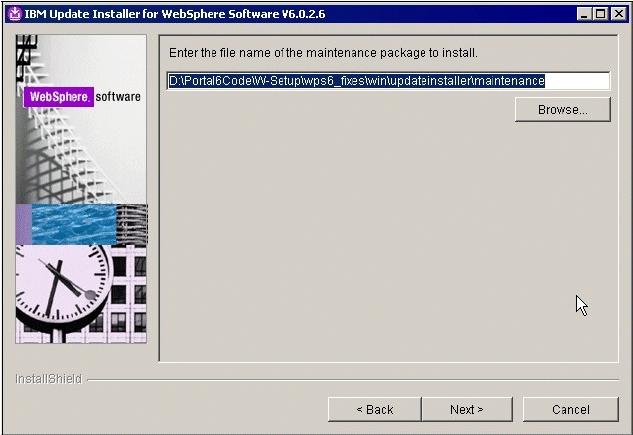
Browse for the first maintenance package to install and click Next
First one should be IY82199
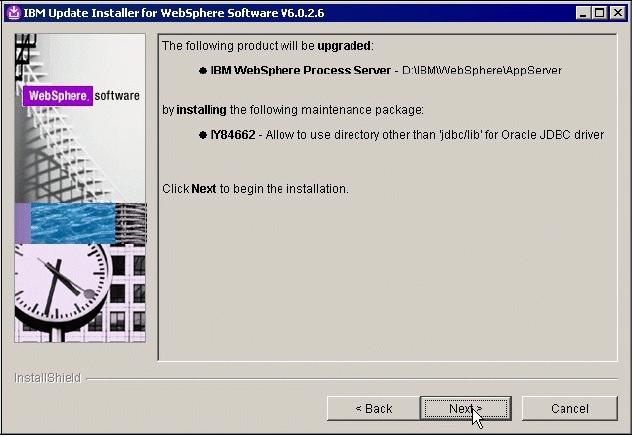
In the "Confirmation screen" verify the maintenance Package and click Next
In the "Success screen" verify that the maintenance package has installed successfully and Click Relaunch to start the Update Installer again for the next maintenance package
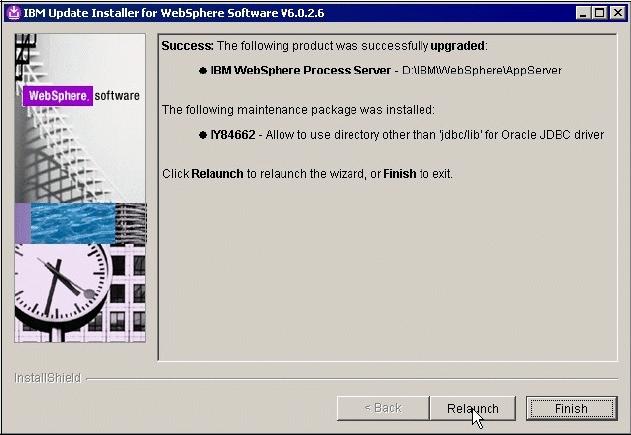
Important: Fixes are installed one at a time by the portal Update Installer. Iterate steps 21-25 for each maintenance package. Copy the necessary fixes to...
[was_root]\AppServer\updateinstaller
Open a command prompt and navigate to the
\IBM\WebSphere\AppServer\profiles\<profilename>\bin
Start dmgr by entering the command:
startmanager
You should see...
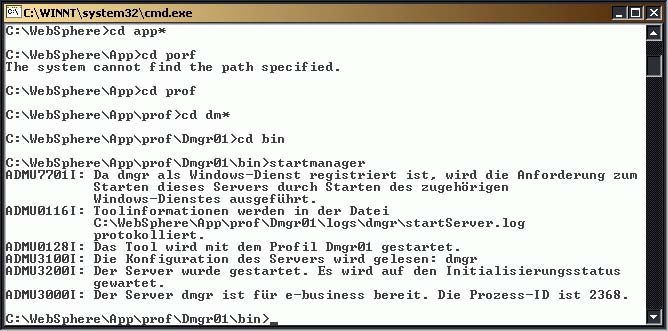
Open a Web Browser and enter the URL for the dmgr, for example:
http://<fullyqualifiedhostname>:9060/ibm/console
The port number is printed out at the end of the dmgr install or refer to the SystemOut.log.
you should see the Login Screen of the dmgr Admin console
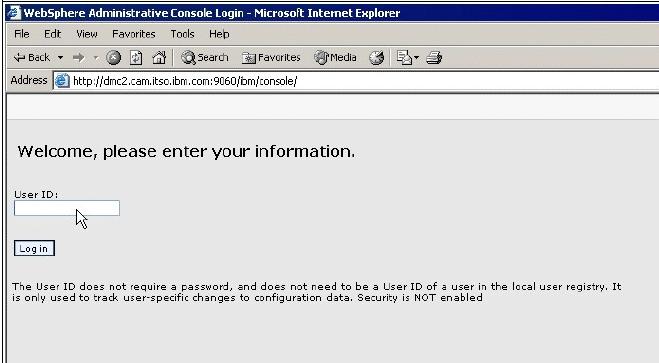
The default port for the WAS AdminConsole has changed to 9060 in WAS 6.x
Installation of WAS and portal on the primary cluster node, node1
This guide explicitly defines the required approach to build a portal cluster which has been installed on portal. To do this install Portal into an already federated WAS/portal profile. Because of this requirement, you MUST install WAS/portal from their native installers and federate the node BEFORE using the portal installer to install Portal
Important: At this time install only the pRIMARY NODE (node1).
If you will be using the same machine for the dmgr and node1 you will not be required to install another instance of WAS. You only need to create an additional profile on the existing instance of WAS that was installed previously for the dmgr profile. If only creating an additional profile is what you require, then start the profile Wizard manually, the portal profile creation wizard script is located at...
WAS_ROOT/bin/ProfileCreator_wbi/pcatWindows.exe
...and proceed with "Step 7 After the profile creation wizard is launched. "
WebSphere Application Server Installation on node1
- Install WAS on node1 by running the installer from...
<cd_root>/W-1/windows/ia32/ifpackage/WAS/
- Make sure the installer screen is titled...
Welcome to IBM WebSphere Application Server ND, V6
This title means that we can use this installer to install either, dmgr or WAS profiles. If the title is "WebSphere Application Server v6.0", you are using an installer that only has the ability to install WAS profiles and not dmgr profiles:
- In the "Accept the license agreement" screen, accept the license and click Next
- The Installation Wizards performs a pre-requisite check for you, when this runs successfully. click Next, otherwise check the Operating System if it meets the requirements for WAS
- If installing on Windows, when asked for the install location, shorten the default path. There is a path name limitation in Windows. Windows cannot handle path names longer than 256 characters. For example:
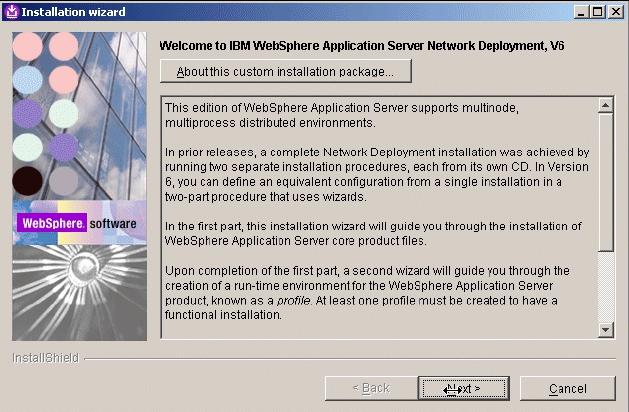
D:\IBM\WebSphere\ApplicationServer
...in a production environment use the shortest pathname that is possible and click Next
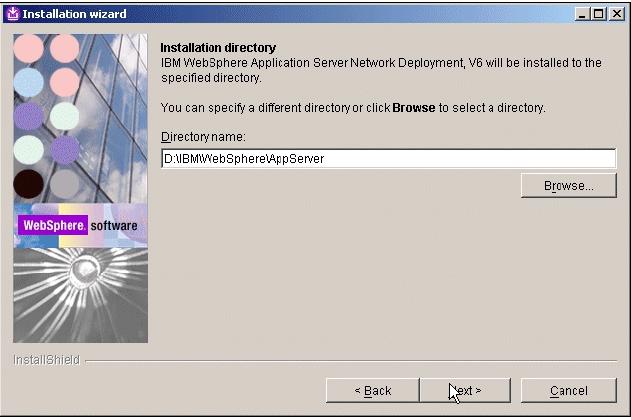
- The Installation Wizard displays the installation summary including interim fixes to be applied
Review the options in the installation summary window and click Next.
The WAS installer from the portal CDs will automatically upgrade WAS to 6.0.2.9
The WAS installer from the portal CDs will also automatically apply these WAS and portal iFixes required for an install of portal 6.0.0.0
- PK21578
- PK22180
- PK25804
- PK25597
- PK23535
- PK24146
- PK27024
- PK21870
- PK21793
- PK26123
- PK25630
- PK24463
- PK21704
- PK24014
- PK21927
- PK18492
- PK20404
- PK23985
- PK23358
We can find WAS fixes by accessing this URL and searching for the fix:
http://www-306.ibm.com/software/webservers/appserv/was/support/
- In the "Installation complete" screen, ensure the "Launch the profile creation wizard" checkbox remains UNCHECKED. You will create a portal profile at the end of the portal install and click Next
- Close the Installation wizard by Click Finish
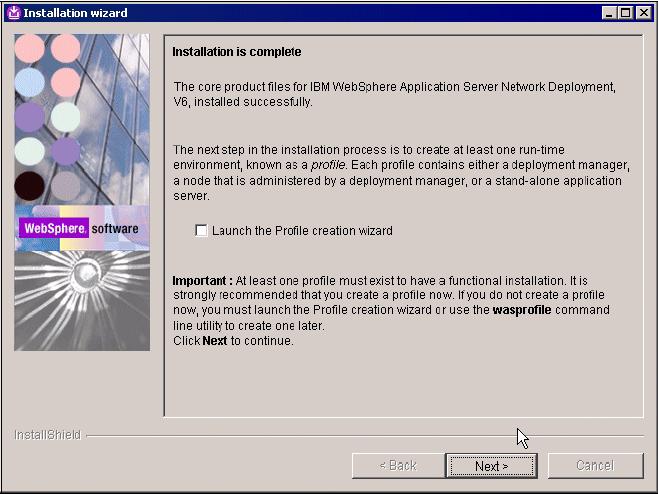
Portal Installation on node1
- Install portal 6.0.1.1 by running the installer from...
<cd_root>/W-2/windows/ia32/WBI/install.bat
- Ensure you use the install.bat file and NOT the install.exe to install portal
- The Installation Wizards performs a pre-requisite check for you, when this runs sucessfully. click Next, otherwise check the Operating System if it meets the requirements for WAS
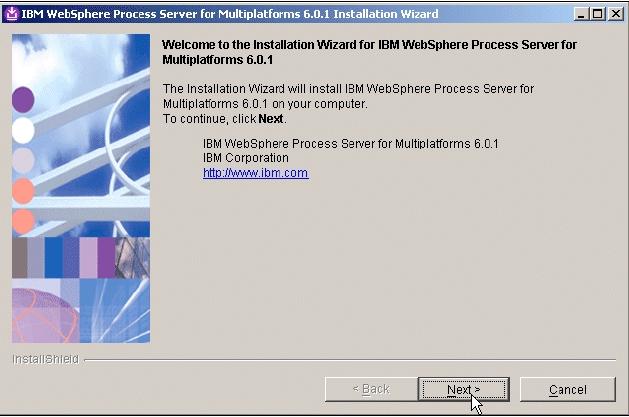
- In the "Detected WebSphere Application Server" screen, ensure you use the existing WAS you just installed and click Next
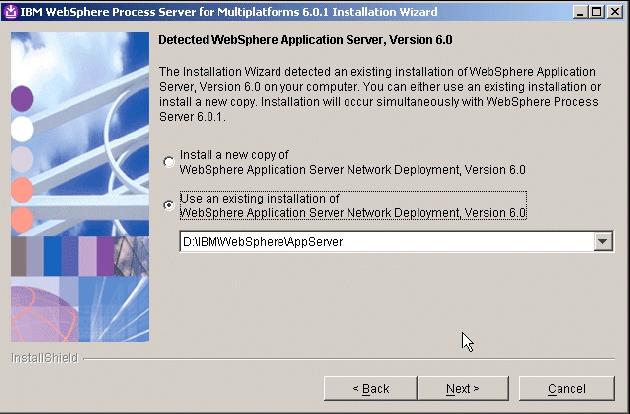
- Review the options in the installation summary window and click Next.
- In the "Installation complete" screen, you want to create a profile now, ensure the "Launch the profile Wizard" checkbox is CHECKED and click Next to launch the portal profile creation wizard

- If you have to launch the portal profile creation wizard manually, ensure you launch the portal profile creation wizard and NOT the WAS profile creation wizard. The portal profile creation wizard script is located at...
WAS_ROOT/bin/ProfileCreator_wbi/pcatWindows.exe
- In the...
Welcome to the profile creation wizard
...screen, click Next
- After the profile creation wizard is launched, ensure the "Custom profile" radio button is selected on the "Profile type selection" panel and click "Next":
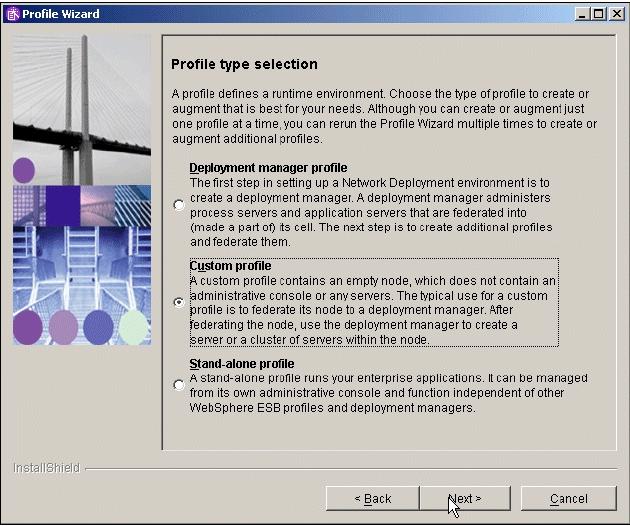
- In the "Federation" screen, you will decide if you would like to have the profile creation wizard to automatically federate the Custom profile after creation. Allow the profile creation wizard to federate the Custom profile. To do this, ensure the...
Federate this node later using the addNode command
...checkbox remains UNCHECKED.
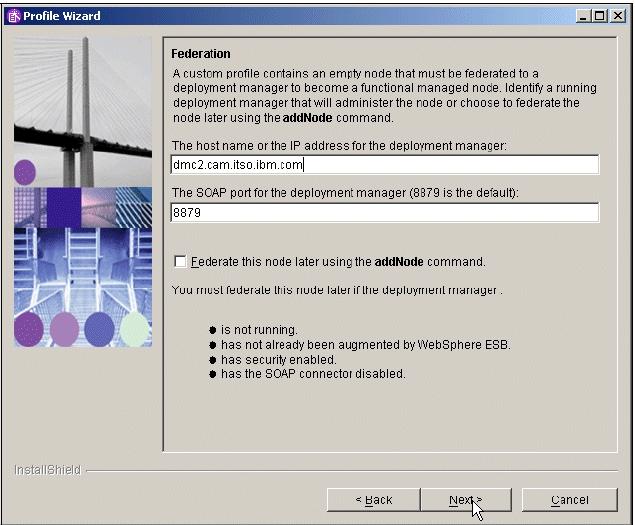
Specify the Full Qualified Hostname of the dmgr Server, for example:
dmc2.cam.itso.ibm.com
Specify also the SOAP Port of the dmgr, the default value is 8879 and click Next
Ensure that the clocks are synchronized to within 5 minutes of each other on node1 machine and the dmgr machine. If the clocks are not within 5 minutes, the addNode process will fail.Also check if there is an active firewall in the network and if the SOAP Port is accessible. If addNode process will fail you start it again, after fixing the problem.
- In the "Profile name" screen, enter a profile name for the portal Instance, this name can be different for each node and the dmgr, in the setup you choose the node Name as the profile Name and click Next
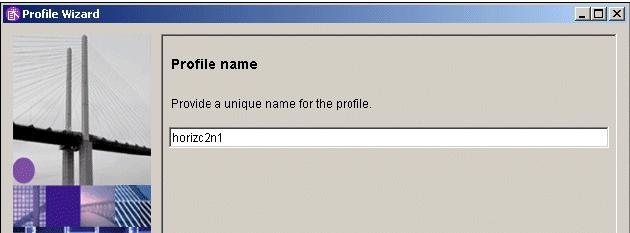
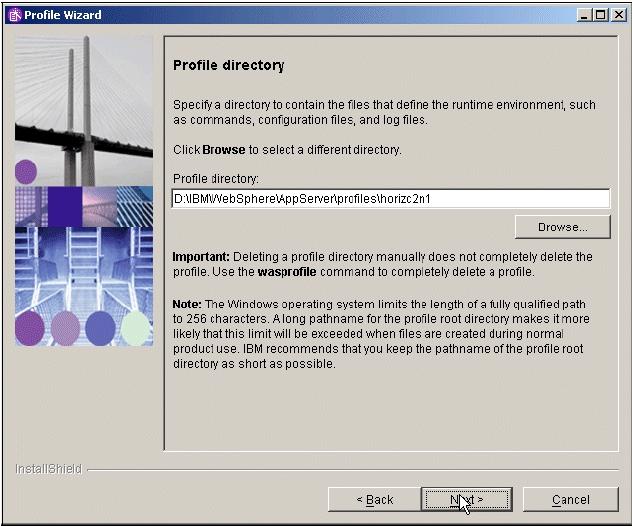
- In the "Profile directory" screen, verify the directory name, in a production enviroment use the shortest pathname that is possible and click Next
- In the "Node and Host Names" screen, Check the value and length of node, you recommend only 8 characters and Hostname and click Next

- In the "Port value assignment" screen, Check the values of Ports and click Next
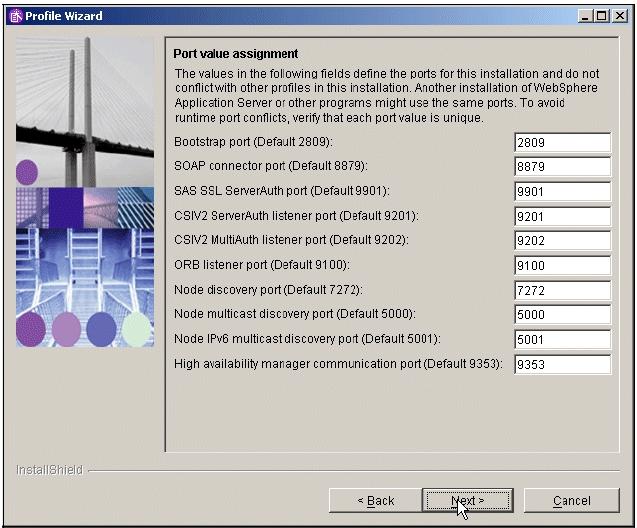
- In the "Profile Summary" screen, check the values and the click Next
- In the "Profile creation is complete" screen, check if the creation was successful and Click Finish.
- For validation of the successful Federation, logon to the Admin Console of the dmgr
- Click...
System administration | Cells | Local Topology
...and you should see the federated node in the list...
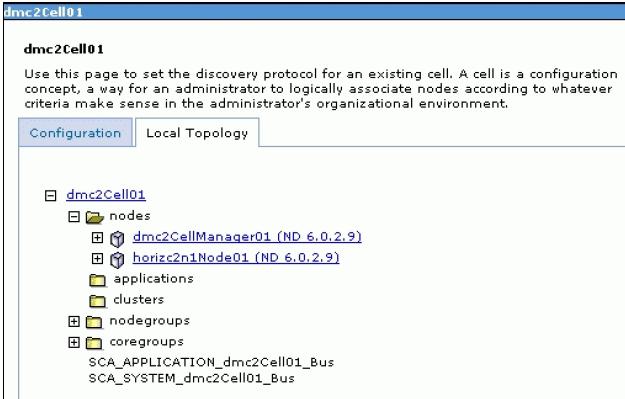
- After the Custom profile is created and federated to the dmgr, apply the remaining WAS and portal iFixes required for portal 6.0.0.0, this fixes may changed, verify on the Support WebSite for the actual fixes.
- Obtain the current WAS update installer shipped with the CDs at...
<cd_root>/W-Setup/was6_fixes/win/updateinstaller
- Copy the updateinstaller directory to...
[was_root]\AppServer\
- Copy the necessary fixes to...
[was_root]\AppServer\updateinstaller
These fixes can be found on the portal CDs at...
<cd_root>/W-Setup/wps6_fixes/win/updateinstaller/maintenance
copy the maintenance dir to...
[was_root]\AppServer\UpdateInstaller
- IY82199
- IY83206
- JR23774
- JR24221
- JR24190
Hint: If the Installation of the JR24190 Fix fails, then restart the Windows Server and uninstall and install the Fix again.
Java SDK 1.4.2 SR4 Cumulative Fix – this JDK should be installed with the install. We can verify the level of the WAS JDK by running this command:
WAS_ROOT/java/bin/java –version
If the Java SDK has not the correct version we can find the Cumulative Fix at:
http://www-1.ibm.com/support/docview.wss?rs=180&uid=swg24011104
Copy the maintenance directory to WebSphere\AppServer\UpdateInstaller\sdk and use the Update Installer that is already copied
- Start the WAS update installer by running the WAS_ROOT/updateinstaller/update.exe to apply the remaining WAS and portal iFixes that are required for portal, but were not installed as part of the WAS install.
- Enter the directory location of the AppServer and click Next
- Select Install Maintenance Package and click Next
- Browse for the first maintenance package to install and click Next
First one should be IY82199
- In the "Confirmation screen" verify the maintenance Package and click Next
- In the "Success screen" verify that the maintenance package has installed sucessfully and
Click Relaunch to start the Update Installer again for the next maintenance package.
Fixes are installed one at a time by the portal Update Installer. You will
have iterate steps 20-24 for each maintenance package that were listed in 19., "Copy
the necessary fixes to the...
[was_root]\AppServer\updateinstaller directory"
Prepare the dmgr and node1 for the portal install
- Update the dmgr machine with required WMM JAR files. These files are located on the Setup CD provided as part of the installation package for portal. Copy the following files from the...
<cd_root>/W-Setup/dmgr_wmmjars
...directory on the Setup CD to...
/WAS_ROOT/lib
...on the deployment manager machine and to the primary node:
* wmm.jar
* wmm.ejb.jar
* wp.wire.jar
Important: If this will be the first portal node you will install into the cell, proceed to the next step and continue with the primary node installation. If you have already federated other managed nodes into the cell, also copy these JAR files to the /WAS_ROOT/lib directory on each of those managed nodes, regardless of whether you intend to install portal on the nodes.
- Change the time-out request for the Simple Object Access Protocol (SOAP) client for the dmgr and the node1. The default, in seconds, is 180.
- On the dmgr machine locate the...
dmgr_profile_root/properties/
...directory and edit the soap.client.props file. Change the line to
com.ibm.SOAP.requestTimeout=6000
- On the WAS node1 machine locate go to...
<wsas_profile_root>/properties/
...and edit the soap.client.props file. Change the line to...
com.ibm.SOAP.requestTimeout=6000
- Ensure the nodeagent is running on node1 so the following changes are synchronized to the node.
We can start or stop the nodeagent by going to...
IBM/WebSphere/Appserver/profiles/<Profile_Name>/bin
...and running the following commands...
startnode.bat
stopnode.bat
- Login to the dmgr AdminConsole and change the time-out values for the deployment manager by navigating to:
System Administration | dmgr | Web container transport chains
- Increase the timeout values for each entry listed in the Web container transport chains section by clicking on each entry.
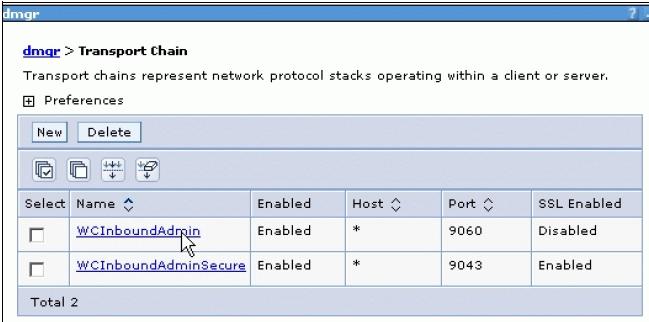
After clicking on an entry, complete the following steps to increase the timeout values:
- Click HTTP Inbound Channel.
- Change the Read timeout value to 180.
- Change the Write timeout value to 180.
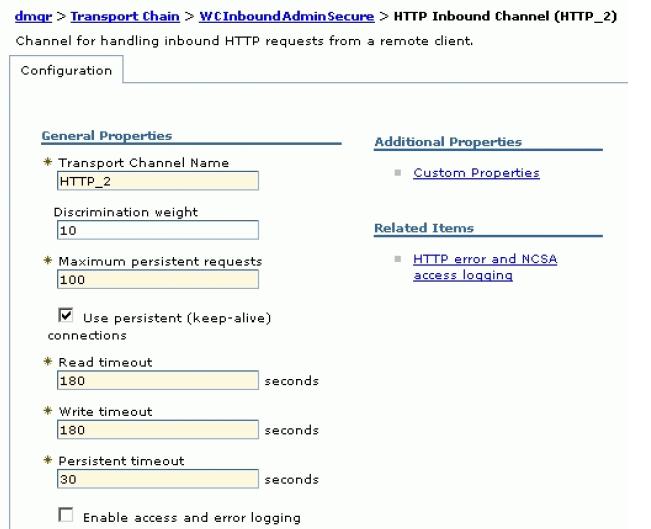
- Click Apply and change also the settings for second entry, WCInboundAdmin
-
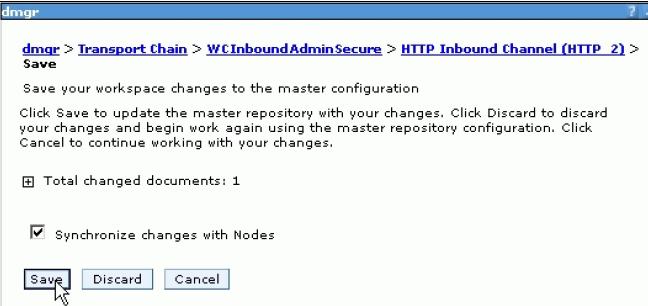
Save the configuration changes

-
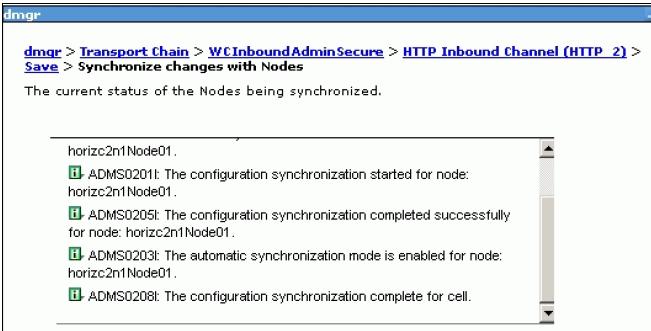
Synchronize with the node
-
Check if the Synchronization completed sucessfully
- Change the timeout request period for the Java Management Extensions (JMX) connector.
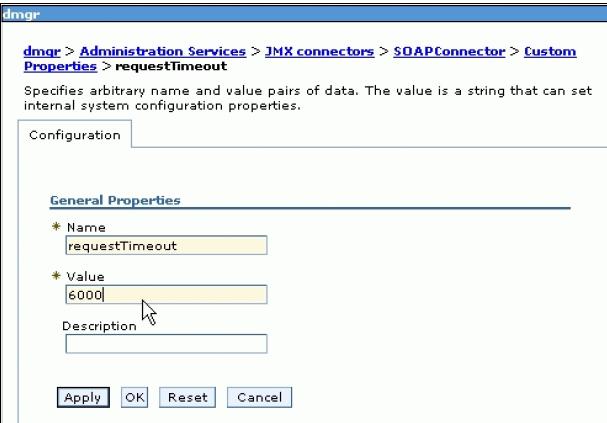
- Click...
System administration | dmgr | Administration Services | JMX connectors | SOAPConnector | Custom Properties
- Select the requestTimeout property, and increase the value from 600 to 6000 and Click
Apply
- Save the configuration changes and synchronize with the node
- Disable automatic synchronization between this node and the deployment manager.
- Restart the dmgr and the nodeagent
On the dmgr, go to...
\IBM\WebSphere\Appserver\profiles\<Profile_Name>\bin
...and run...
stopmanager
startmanager
On primary node1
stopnode
startnode
Install portal onto the managed node, node1
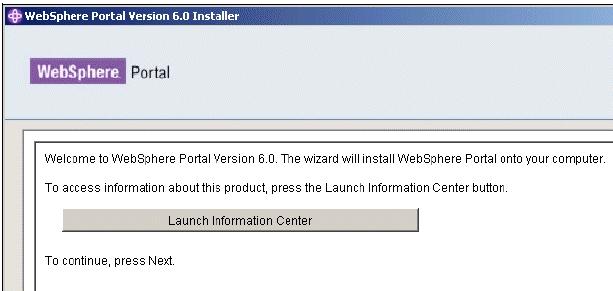
- Start the portal installer from...
<cd_root>/W-Setup/install.bat
- In the "Accept the license agreement" screen, accept the license and click Next
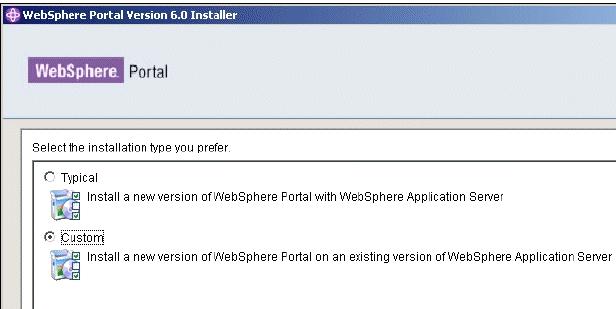
- In the "Installation Type" screen, Select Custom as the install type and click Next
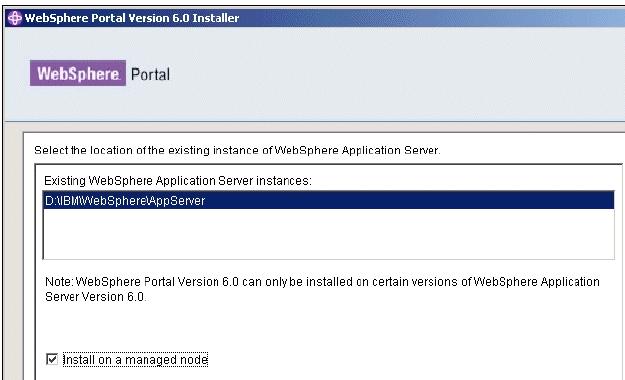
- In the "Select the Location of the existing instance" screen, Select the existing WebSphere AppServer install location and check the box next to "Install on a managed node" and Click Next
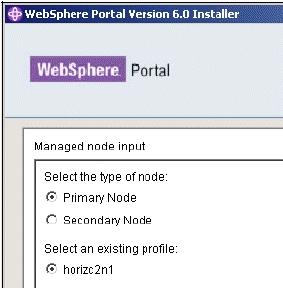
- In the "Managed node input" screen, Select primary node and select the desired profile that you wish to install portal onto and click Next
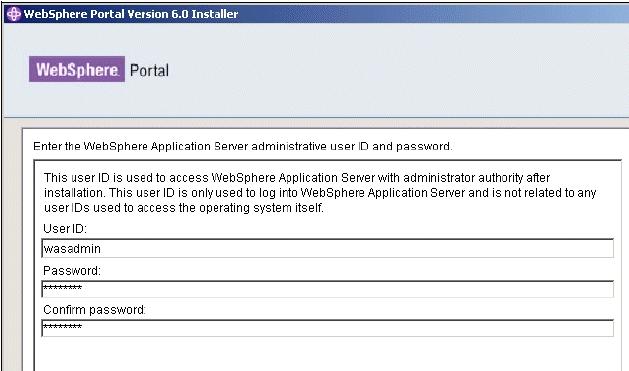
- In the "WebSphere application Server admin user id" screen, define a WAS Admin User and password. This is a new panel in the portal installer because with portal v6 the install will enable security by default to the WMM database. Use the default values like wasadmin and a password you want, if you switch to a LDAP Server in a later step, or if the User Registry should stay in WMM you should us a different user because of security issues and then click Next
- In the "portal install path" screen, define the desired location for portal to be installed and click Next.
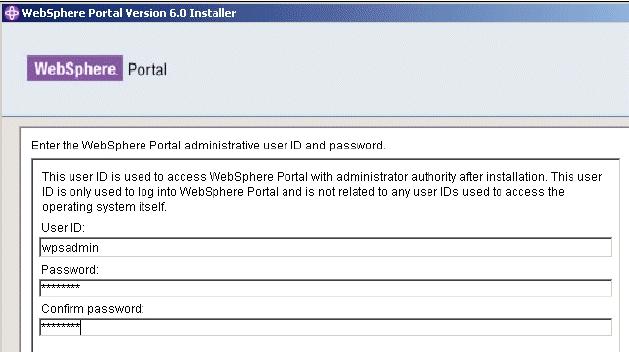
- In the "portal Server Admin User" screen, define the portal Admin User and password.Use the default values like wpsadmin and a password you want, if you switch to a LDAP Server in a later step, or if the User Registry should stay in WMM, you should use a different user because of security issues and the click Next
- In the "Select the products to run as a service" screen, decide whether you want WAS and portal to run as a service. In this guide you choose NOT to run either as a Windows service, because of the longer startup time for windows with WP as a service
- In the "portal is ready to install" screen, review Summary panel and click Next to begin the install
- When Installation has been successfully completed, notice the information like port
number that is been provided and Click Finish

- Verify the portal install by accessing it through a browser and login with the portal Admin
User ID a screen like shown in Figure 3-53 should be displayed.By default
Portal is installed onto port 9080:
http//<fullyqualifiedhostname>:9080/wps/portal
- After the portal install completes successfully re-enable auto-sync
Hint: During the portal Installation the Security for Cell has been enabled automatically. For login into the Admin Console you have to use the was admin id and password now.
To re-enable automatic synchronization between this node and the deployment manager:
- Log in to the administrative console for the dmgr.
- Click...
System Administration | node Agents | node_name | File Synchronization Service.
- Select the Automatic Synchronization check box.
- Save the changes and synchronize with the node.
- Stop portal using the command
stopserver WebSphere_Portal
Restart the node agent.
Configure primary node1 to an external DB2 database
This procedure details DB setup steps for WAS and portal with a DB2 database. See the infocenter for specific commands for your database.
In this scenario you are using only one database and not a JCR database domain split.
- Ensure the dmgr is running
- Install a supported db2 server on remote machine dedicated to the data store.
- Install db2 admin client on primary node1 and the dmgr. You may also install the client on node2 if you wish at this point but do not go on with the rest of the node2 installation.
- Run the following commands to create the portal database on the db2 server:
In the example below you use portalDB as the database. Modify the script for the DB2 User Name and PW.
db2 "CREATE DB wpsdb using codeset UTF-8 territory us COLLATE USING UCA400_NO PAGESIZE 8192"
db2 "UPDATE DB CFG FOR wpsdb USING applheapsz 4096"
db2 "UPDATE DB CFG FOR wpsdb USING app_ctl_heap_sz 1024"
db2 "UPDATE DB CFG FOR wpsdb USING stmtheap 8192"
db2 "UPDATE DB CFG FOR wpsdb USING dbheap 2400"
db2 "UPDATE DB CFG FOR wpsdb USING locklist 1000"
db2 "UPDATE DB CFG FOR wpsdb USING logfilsiz 1000"
db2 "UPDATE DB CFG FOR wpsdb USING logprimary 12"
db2 "UPDATE DB CFG FOR wpsdb USING logsecond 20"
db2 "UPDATE DB CFG FOR wpsdb USING logbufsz 32"
db2 "UPDATE DB CFG FOR wpsdb USING avg_appls 5"
db2 "UPDATE DB CFG FOR wpsdb USING locktimeout 30"
db2 "CONNECT TO wpsdb USER db2admin USING password"
db2 "CREATE BUFFERPOOL ICMLSFREQBP4 SIZE 1000 PAGESIZE 4 K"
db2 "CREATE BUFFERPOOL ICMLSVOLATILEBP4 SIZE 8000 PAGESIZE 4 K"
db2 "CREATE BUFFERPOOL ICMLSMAINBP32 SIZE 8000 PAGESIZE 32 K"
db2 "CREATE BUFFERPOOL CMBMAIN4 SIZE 1000 PAGESIZE 4 K"
db2 "CREATE REGULAR TABLESPACE ICMLFQ32 PAGESIZE 32 K MANAGED BY SYSTEM USING ('ICMLFQ32') BUFFERPOOL ICMLSMAINBP32"
db2 "CREATE REGULAR TABLESPACE ICMLNF32 PAGESIZE 32 K MANAGED BY SYSTEM USING ('ICMLNF32') BUFFERPOOL ICMLSMAINBP32"
db2 "CREATE REGULAR TABLESPACE ICMVFQ04 PAGESIZE 4 K MANAGED BY SYSTEM USING ('ICMVFQ04') BUFFERPOOL ICMLSVOLATILEBP4"
db2 "CREATE REGULAR TABLESPACE ICMSFQ04 PAGESIZE 4 K MANAGED BY SYSTEM USING ('ICMSFQ04') BUFFERPOOL ICMLSFREQBP4"
db2 "CREATE REGULAR TABLESPACE CMBINV04 PAGESIZE 4 K MANAGED BY SYSTEM USING ('CMBINV04') BUFFERPOOL CMBMAIN4"
db2 "CREATE SYSTEM TEMPORARY TABLESPACE ICMLSSYSTSPACE32 PAGESIZE 32 K MANAGEDBY SYSTEM USING ('icmlssystspace32') BUFFERPOOL ICMLSMAINBP32"
db2 "CREATE SYSTEM TEMPORARY TABLESPACE ICMLSSYSTSPACE4 PAGESIZE 4 K MANAGED BYSYSTEM USING ('icmlssystspace4') BUFFERPOOL ICMLSVOLATILEBP4"
db2 "DISCONNECT jcrdb"
db2 "TERMINATE"
- Open a DB2 command line processor on the primary node1 and the dmgr machine (Start |Programs |IBM DB2 |Command LineTools |Command Line Processor).
- Enter the following command:
db2 => catalog tcpip node nodename remote fullyqualifiedDB2servername server port
Where nodename is the name of eight characters or fewer that you assign to the server, and port is the connection port used by DB2.
For example:
db2 => catalog tcpip node dbdom7 remote dbdom7.cam.itso.ibm.com server 50000
In this example, dbdom7 is designated as the node name (to be used in the rest of the commands) and 50000 is the connection port (the default for TCP/IP connections). The client always uses the same connection port as the DB2 server. We can verify the connection port for the DB2 server by opening a command prompt and issuing the netstat -a command on the DB2 Server Machine. You should see a port in the 50000 range.
- Enter the following command (as appropriate) to catalog the databases that are hosted on the DB2 server.
db2 => catalog database databasename at node nodename
For example:
db2 => catalog database wpsdb at node dbdom7
If you incorrectly catalog a database, we can uncatalog it...
db2 =>uncatalog database database_name
- When you have verified that all of the databases have been cataloged correctly, test the connectivity to the database by entering the command:
db2 => connect to databasename user DB2administratorname using password
For example:
db2 => connect to wpsdb user db2admin using password
- Update the CLI Driver Settings on the primary node1 and on the dmgr
- Locate the following file:
db2home/sqllib/db2cli.ini
- Edit the file by adding the following to the end of the file:
* For Fix Pack 11:
[COMMON] DYNAMIC=1
An empty line is required after the dynamic=1 at the end of the file.
* For Fix Pack 12:
[COMMON] ReturnAliases=0
An empty line is required after the ReturnAliases=0 at the end of the file.
Configure the database using the ConfigWizard:
This example uses the ConfigWizard tool. Before running the ConfigWizard populate the wpconfig.properties with the WasPassword before running the task.
Also be aware that the ConfigWizard will write all the database password values in the wpconfig_dbdomain.properties file after completion with the string, "ReplaceWithYourPassword". This important to note because future tasks may require that these password be either provided at the command line with the –D option or defined correctly in the wpconfig.properties files.
- In portal 5.1x a helper file existed for the database-transfer task. Portal V6 does NOT have a helper file for database-transfer. The reason for this is because of the new architecture of the wpconfig files. Portal V6 uses a wpconfig_dbdomain.properties file to contain most of the database specific properties and replaces the need for a separate helper file.
- Make a copy of the original wpconfig_dbdomain.properties file and wpconfig_dbtype.properties file.
- Edit the files with the database values to use with the ConfigWizard. The ConfigWizard is designed in portal V6 to read directly from these files for wpconfig_dbtype.properties and for wpconfig_dbdomain.properties
Table 3-1 DB Settings in wpconfig_dbtype.properties
| Field
| Example Value
| Comments
|
| DBSafeMode
| false
| This only applies to database-specific tasks. If this property is set to true, database-specific tasks, such as create/modify/drop database, will not be performed. The property should be used if a pre-configured database (from a previous installation) already exists. If the property is set to false, the database will be updated and the pre-existing database configuration will be overwritten. Recommended value: false Default value: false
|
| db2.DBDriver
| COM.ibm.db2.jdbc.app.DB2Driver
| The name of class that SqlProcessor will use to import SQL files.
|
| db2.DbLibary
| D:/IBM/SQLLIB/java/db2java.zip
| Depends on the installation directory of the DB2 Administration Client |
In the table Table 3-2 below substitute the
appropriate name for the dbdomain value
Example: release.DbType
The available dbdomains are now:
- release
- customization
- community–JCR–WMM
- feedback
- Likeminds
- Designer (TechPreview and cannot be moved)
- Sync (TechPreview and cannot be moved)
Table 3-2 DB Settings in wpconfig_dbdomain.properties
| Field
| Example Value
| Comment
|
| dbdomain.DbType
| db2
| The type of database used to store information for portal.
|
| dbdomain.DbName
| wpsdb
| The name of the portal domain database and schema
|
| dbdomain.DbUrl
| jdbc:db2:wpsdb
| Database URL used to access the portal database with JDBC. The value must conform to standard JDBC URL syntax.
|
| dbdomain.DbUser
| db2admin
| User ID for the database administrator.
|
| dbdomain.DbPassword
| password
| Password for the database administrator |
- Make sure nodeagent is started and portal has been stopped with the command:
/IBM/WebSphere/AppServer/bin/serverstatus -all -username <wasadminuser> -password <wasadminpwd>
- Start the ConfigWizard from...
wp_root/config/wizard/configwizard.bat
- In the...
Welcome to the Wizard
...screen, click Next
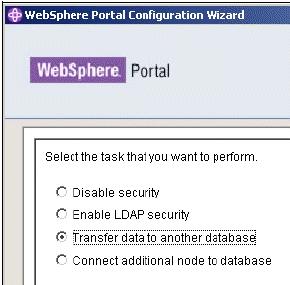
- In the "Select the task that you want to perform" screen, select Transfer data to another database, and click Next
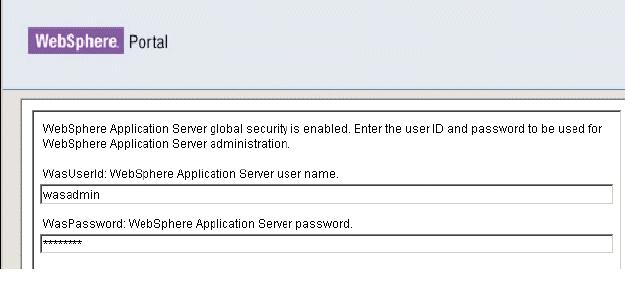
- In the "WebSphere Application Server global security" screen, provide the WAS Admin User and password and click Next
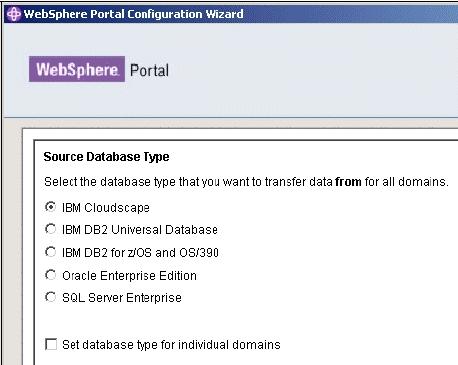
- In the "Source Database Type" screen, select the Source database type "Cloudscape" and click Next
- In the "Target Database Type" screen, select the appropriate Target database type and click Next
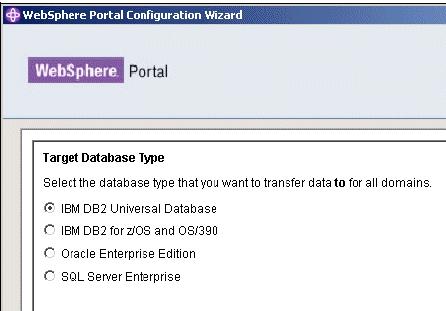
- Verify the values pulled by the ConfigWizard from the wpconfig files and click Next

- Verify the values pulled by the ConfigWizard from the wpconfig files and manually enter the password and click Next
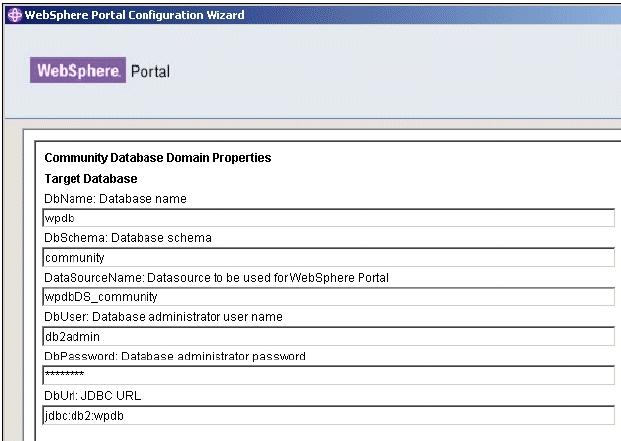
- Verify the values pulled by the ConfigWizard from the wpconfig files and manually enter the password and click Next
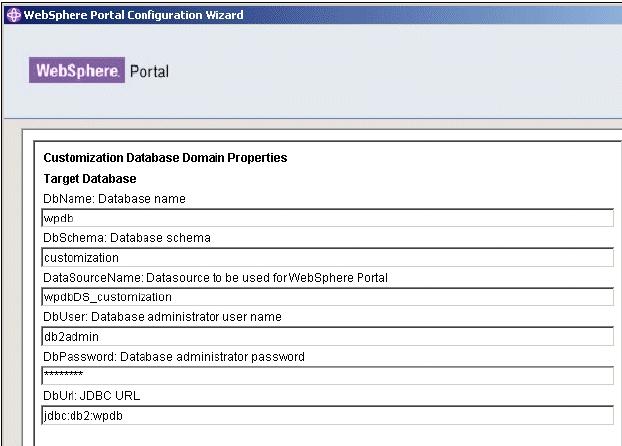
- Verify the values pulled by the ConfigWizard from the wpconfig files and manually enter the password and click Next
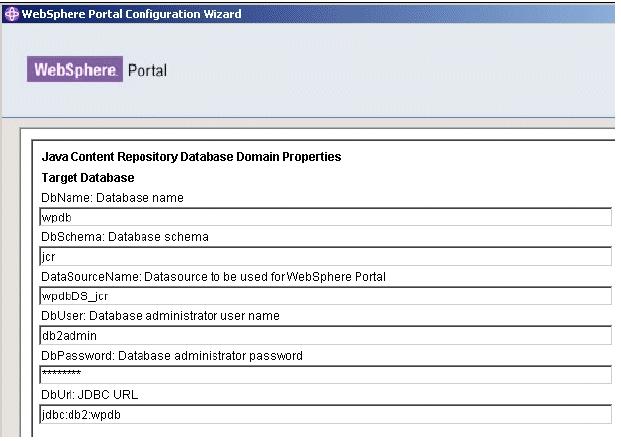
- Verify the values pulled by the ConfigWizard from the wpconfig files and manually enter the password and click Next
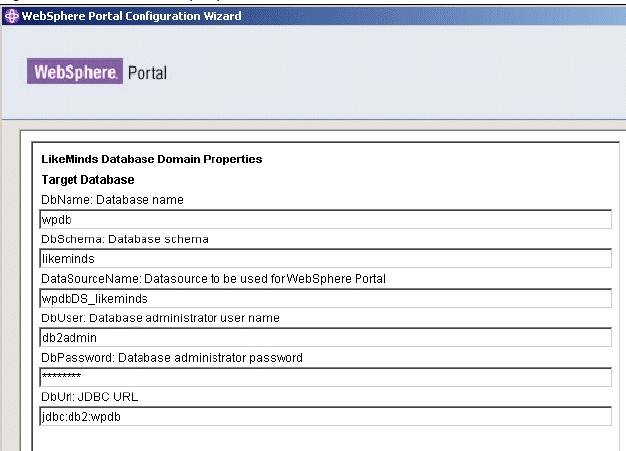
- Verify the values pulled by the ConfigWizard from the properties file and manually enter the password and click Next
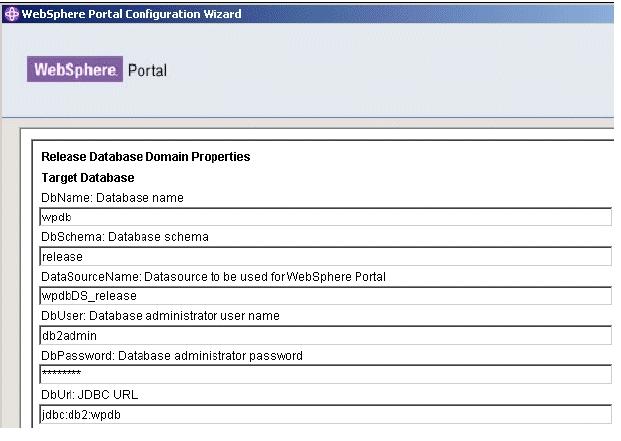
- Verify the values pulled by the ConfigWizard from the wpconfig files and manually enter the password and click Next
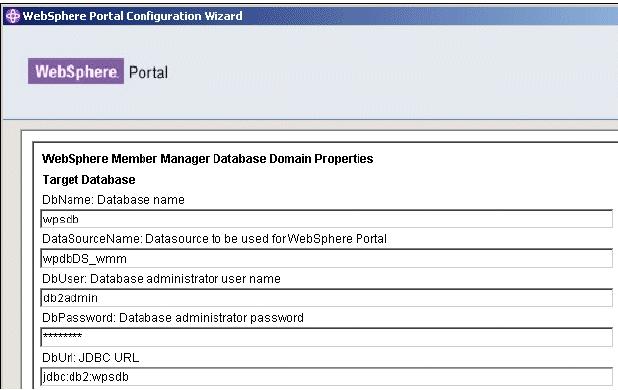
- In the "Review the Summary" screen, verify the settings and click Next to start the database-transfer task.
- In the "Wizard Completed Successfully" screen, Check if the script completed successfully and click Finish to close the Configuration Wizard
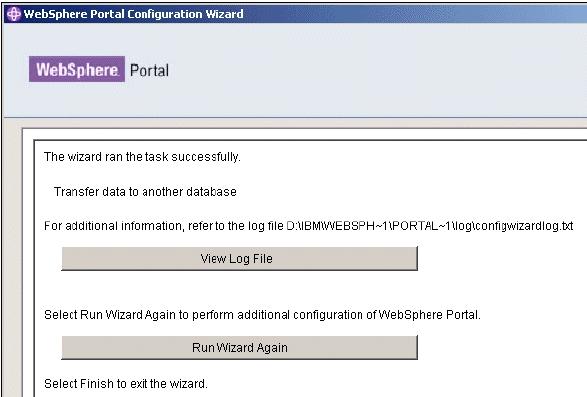
- After the task completes successfully, check if portal is started, if is not started start and verify the portal by rendering the portal from a browser
The default portal URL is...
http://<fullqualifiedhostname>:9080/wps/portal
Important: Due to an architecture change in the way that portal uses the WAS datasources, we can no longer test the portal datasources successfully through the WAS AdminConsole after the portal install. Attempting to test the connection will fail, but this is not an indication of a problem and Portal will still function.
Testing the JDBC Data Connection on the dmgr
- Adding a new Cell Level (or scope) WebSphere Variable through the dmgr AdminConsole will allow the Test Connection feature to work. Follow the instructions below to create the additional WebSphere Variable:
- Click Resources | JDBC Providers
- Clear out the entries for node and Server and click Apply
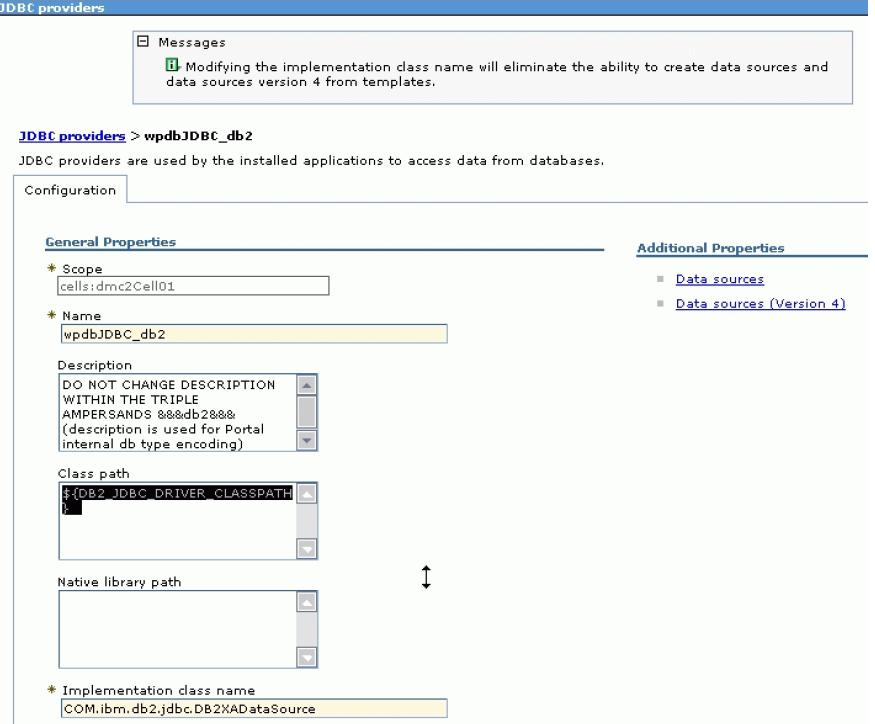
- Click the DB2 JDBC Provider. In this example its called, wpdbJDBC_db2
Make note of the WebSphere variable defined in the Class Path text box
- Click Environment>WebSphere Variables
- Set the scope to the node level of node1 by clicking Browse nodes, choosing node1, and click OK. Then click Apply.
- Scroll down until you find the variable DB2_JDBC_DRIVER_CLASSPATH. Notice in the
3rd column how the scope is defined down to the node level

- This variable has been created at the node level (or scope) and create one identical to this one at the Cell level (or scope)
- Clear out the entry for node in the Scope section at the top and click Apply
- Click the New button and create a variable with the same Name and Value as the DB2_JDBC_DRIVER_CLASSPATH that was defined at the node level. This may require moving the actual jdbc driver to the dmgr machine.
- Click Apply. Save the changes and synchronize with the nodes. Notice how the scope is defined only to the cell level.
- Restart the dmgr. Now attempts to test the datasource connections now should be successful
Creation of the cluster definition
The next step after transferring the database to Database System is creating the Cluster definition.
- Edit the wpconfig.properties to match the Settings for the new portal Cluster
Definition
Table 3-3 Cluster properties in wpconfig.properties
| Field
| Example Value
| Comments
|
| WasPassword
| wpsadmin
| You must add the PortalAdminPwd and the WasPassword values to the wpconfig.properties file and all the database password values to the wpconfig_dbdomain.propert ies file or supply these values on the command line. This is because of what was described before in that the ConfigWizard replaces all the password values with the string, "ReplaceWithYourPassword " for security reasons. If you don´t want to provide the pW in the file, you have to add the "-DWasPassword=password " option when running the cluster-setup script
|
| PortalAdminPwd
| wpsadmin
|
|
| PrimaryNode
| true
| Verify that value for this node is true
|
| Clustername
| PortalCluster
| Specify the cluster name you want to use when creating the cluster. Do not use spaces or special characters in the cluster name |
Important: If you wish to change the name of the cluster to something other than the default in the wpconfig.properties file, you MUST change is now BEFORE the cluster definition is created. This can be changed by editing the wpconfig.properties file and changing the ClusterName property.
- Edit the wpconfig_dbdomain.properties to match the Settings for the new portal cluster definition
- Set all PW for the db admin user
- Check the others Entries
- Check that dmgr and node are started with the command:
cd D:\IBM\WebSphere\AppServer\profiles\profile_name\bin\
serverstatus -all -username <wasadmin> -password <waspwd>
- Start WebSphere_Portal when not already started, with the command:
- Create the cluster definition...
cd D:\IBM\WebSphere\AppServer\profiles\profile_name\bin\
startserver WebSphere_Portal wp_root/config/portalconfig.bat cluster-setup >cluster-setup.log
Check the log file if the build was successful.
- Restart dmgr, nodeagent and WebSphere_Portal to load the new configuration
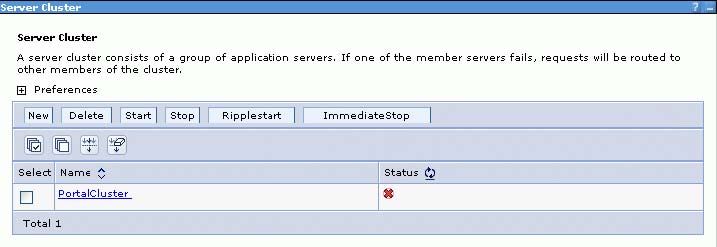
- To check if the cluster definition and Creation was successful, Login to the Admin console of the dmgr and browse to
- Server | Clusters A entry with the "ClusterName" should be available
- As a checkpoint in the process, you now have a 1 node cluster configured to an external database and using the WMM database for security.
Install WAS and portal on other cluster nodes
Important: If you already have a portal Cluster up and running and you want to add an additional node to the cluster proceed with the steps in section Adding a Horizontal node to a Cluster (with portal.
This section explicitly defines the required approach to build a portal cluster which has been installed on portal. To do this install Portal into an already federated WAS/portal profile. Because of this requirement, you MUST install WAS/portal from their native installers and federate the node BEFORE using the portal installer to install Portal.
WebSphere Application Server Installation on node2 and subsequent nodes
- Install WAS on node2 by running the installer from...
<cd_root>/W-1/windows/ia32/ifpackage/WAS/install.exe
Make sure the installer screen is titled...
Welcome to IBM WebSphere Application Server ND, V6
This title means that we can use this installer to install either, dmgr or WAS profiles. If the title is "WebSphere Application Server v6.0", you are using an installer that only has the ability to install WAS profiles and not dmgr profiles.
- In the "Accept the license agreement" screen, accept the license and click Next
- The Installation Wizards performs a pre-requisite check for you, when this runs successfully. click Next, otherwise check the Operating System if it meets the requirements for WAS.
- If installing on Windows, when asked for the install location, shorten the default path. There is a path name limitation in Windows. Windows cannot handle path names longer than 256 characters. For example:
D:\IBM\WebSphere\ApplicationServer
...and click Next
- The Installation Wizard displays the installation summary including interim fixes to be applied Review the options in the installation summary window and click Next.
The WAS installer from the portal CDs will automatically upgrade WAS to 6.0.2.9 The WAS installer from the portal CDs will also automatically apply these WAS and portal iFixes required for an install of portal 6.0.0.0
- PK21578
- PK22180
- PK25804
- PK25597
- PK23535
- PK24146
- PK27024
- PK21870
- PK21793
- PK26123
- PK25630
- PK24463
- PK21704
- PK24014
- PK21927
- PK18492
- PK20404
- PK23985
- PK23358
We can find WAS fixes by accessing this URL and searching for the fix:
http://www-306.ibm.com/software/webservers/appserv/was/support/
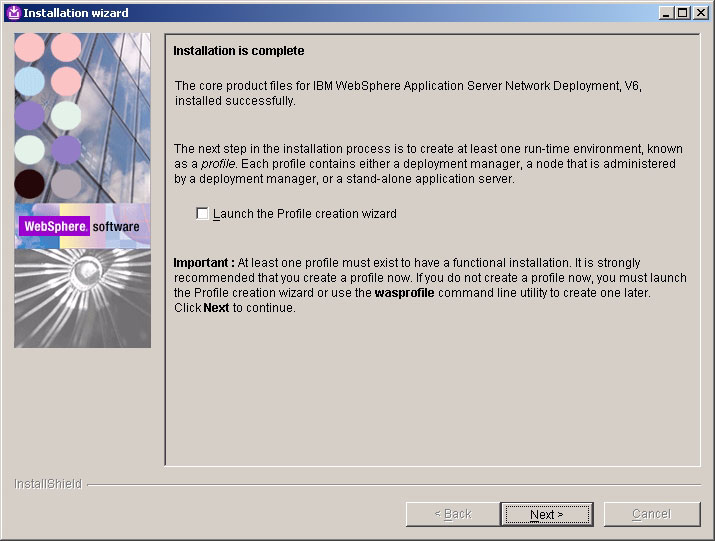
- In the "Installation complete" screen, ensure the "Launch the profile creation wizard" checkbox remains UNCHECKED. You will create a portal profile at the end of the
portal install and click Next
- Close the Installation wizard by Click Finish
Portal Installation on node2
- Install portal 6.0.1.1 by running the installer from...
<cd_root>/W-2/windows/ia32/WBI/install.bat
- Ensure you use the install.bat file and NOT the install.exe to install portal
- The Installation Wizards performs a pre-requisite check for you, when this runs successfully. click Next, otherwise check the Operating System if it meets the requirements for WAS.
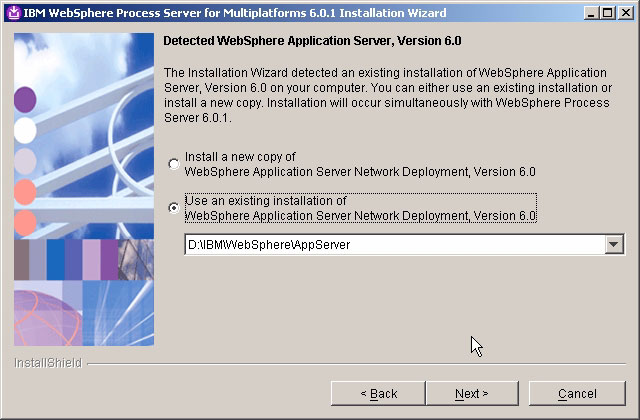
- In the "Detected WebSphere Application Server" screen, ensure you use the existing WAS you just installed and click Next
- Review the options in the installation summary window and click Next.
- In the "Installation complete" screen, you want to create a profile now, ensure the "Launch the profile Wizard" checkbox is CHECKED and click Next to launch the portalprofile creation wizard
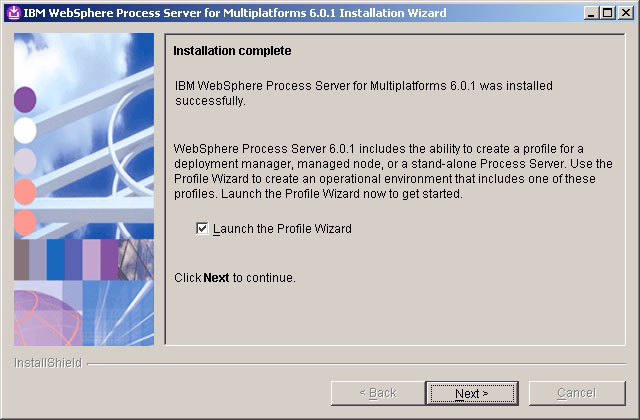
- If you have to launch the portal profile creation wizard manually, ensure you launch the portal profile creation wizard and NOT the WAS profile creation wizard. The portal profile creation wizard script is located at...
WAS_ROOT/bin/ProfileCreator_wbi/pcatWindows.exe
- In the...
Welcome to the profile creation wizard
...screen, click Next
- After the profile creation wizard is launched, ensure the "Custom profile" radio button is selected on the "Profile type selection" panel and click "Next"
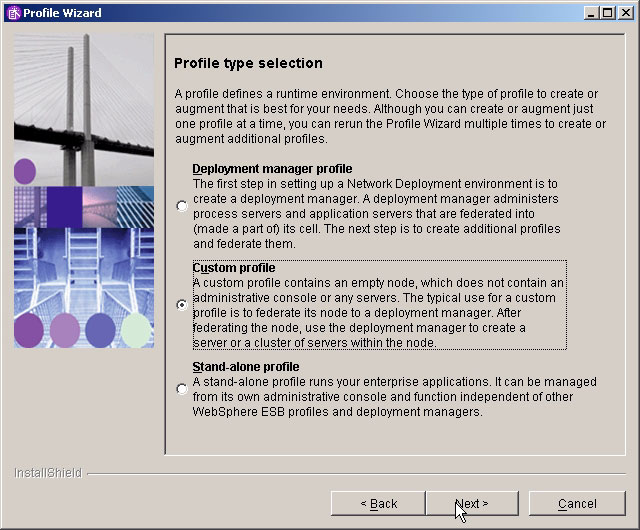
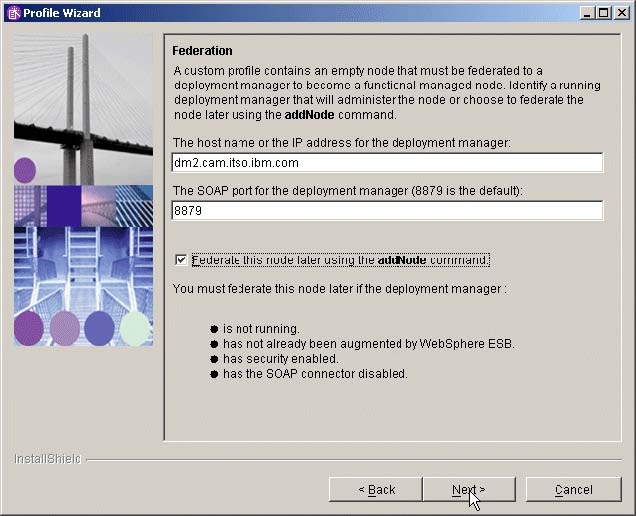
- In the "Federation" screen, enter the values and click Next
- Enter the DeploymentManager Name where the node should be added later on into the cell
- Ensure the...
Federate this node later using the addNode command
...checkbox is checked, Because security is enabled in the cluster, you will not be able to use the automatic federation feature on secondary nodes.
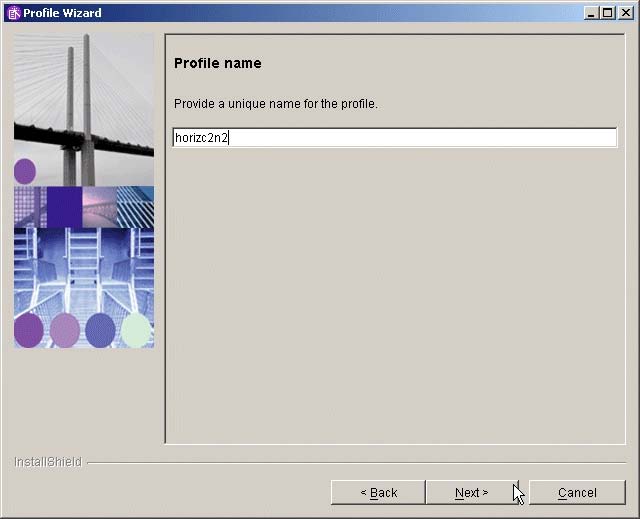
- In the "Profile name" screen, enter a profile name for the portal Instance, this name can be different for each node and the dmgr, in the setup you choose the node Name as the profile Name and click Next
- In the "Profile directory" screen, verify the directory name and click Next
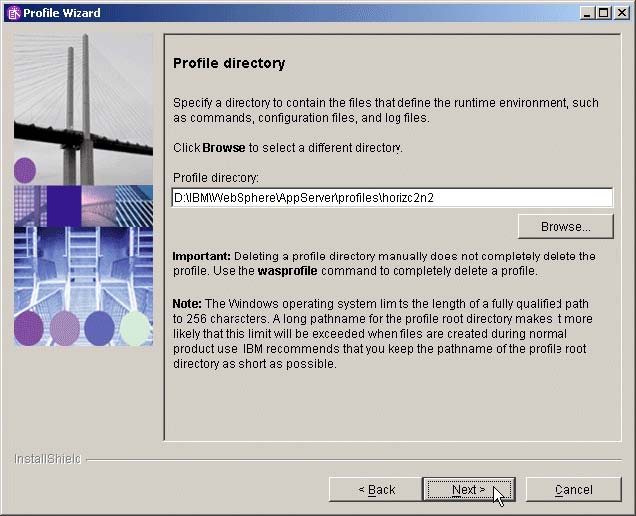
- In the "Node and Host Names" screen, Check the value of node and Hostname and Click Next

- In the "Profile Summary" screen, check the values and the click Next
- In the "Profile creation is complete" screen, check if the creation was successful and Click Finish.
- After the profile is created you will federate the node using the addNode command. Before running the addNode command ensure the dmgr has been started. To add a node to the deployment manager cell, issue the addNode.bat command (on one line) on the command line of the node to be added:
$WAS_ROOT/profiles/profile/bin/addNode.sh dmgr_host dmgr_port -username admin_user_id -password admin_password >addnode.log
...where...
| deployment_manager_host
| dmgr host name.
|
| deployment_manager_port
| dmgr SOAP connector-address. Default is 8879.
|
| admin_user_id
| WebSphere Application Server administrative user name. Optional if security is disabled. Required if security is enabled.
|
| admin_password
| administrative user password.
|
Example:
addNode.bat dmc2.cam.itso.ibm.com.abc.com 8879 –username <wsas_id> -password <wsas_pwd> >addnode.log
To run the addNode command here you MUST supply username and password because security has been enabled on the dmgr.
See the appropriate ND Information Center for details on the addNode command.
http://publib.boulder.ibm.com/infocenter/wasinfo/v6r0/index.jsp?topic=/com.i bm.websphere.nd.doc/info/welcome_nd.html
Ensure that the clocks are synchronized to within 5 minutes of each other on node1 machine and the dmgr machine. If the clocks are not within 5 minutes, the addNode process will fail.
- After the AddNode is created and federated to the dmgr, apply the remaining WAS and portal iFixes required for portal 6.0.0.0.
- Obtain the current WAS update installer shipped with the CDs at...
<cd_root>/W-Setup/was6_fixes/win/updateinstaller
- Copy the updateinstaller directory to...
[was_root]\AppServer\
- Copy the necessary fixes to...
[was_root]\AppServer\updateinstaller
These fixes can be found on the portal CDs at...
<cd_root>/W-Setup/wps6_fixes/win/updateinstaller/maintenance
...copy the maintenance dir to...
[was_root]\AppServer\UpdateInstaller
- IY82199
- IY83206
- JR23774
- JR24221
- JR24190
Java SDK 1.4.2 SR4 Cumulative Fix – this JDK should be installed with the install. We can verify the level of the WAS JDK by running this command:
WAS_ROOT/java/bin/java –version
If the Java SDK has not the correct version we can find the Cumulative Fix at:
http://www-1.ibm.com/support/docview.wss?rs=180&uid=swg24011104
Copy the maintenance directory to WebSphere\AppServer\UpdateInstaller\sdk and use the Update Installer that is already copied
Hint: If the Installation of the JR24190 Fix fails, then restart the Windows Server and uninstall and install the Fix again.
- Start the WAS update installer by running the WAS_ROOT/updateinstaller/update.exe to apply the remaining WAS and portal iFixes that are required for portal, but were not installed as part of the WAS install.
- Enter the directory location of the AppServer and click Next
- Select Install Maintenance Package and click Next
- Browse for the first maintenance package to install and click Next
First one should be IY82199
- In the "Confirmation screen" verify the maintenance Package and click Next
- In the "Success screen" verify that the maintenance package has installed successfully and click Relaunch to start the Update Installer again for the next maintenance package.
Install portal onto the managed node, node2 and subsequent nodes
-
Before installing portal move the WMM jars. Update the secondary node with required WMM jar files. These files are located on the Setup CD provided as part of the installation package for portal. Copy the following files from the...
<cd_root>/W-Setup/dmgr_wmmjars
...directory on the Setup CD to the WAS_ROOT/lib directory on the secondary node:
- wmm.jar
- wmm.ejb.jar
- wp.wire.jar
- Ensure the time-out request for the Simple Object Access Protocol (SOAP) client for node2 has been increased to 6000. The default, in seconds, is 180. Within the directory...
D:\IBM\WebSphere\AppServer\profiles\horizc2n2\properties
...edit the soap.client.props file. Change the line to
com.ibm.SOAP.requestTimeout=6000
- Begin the portal install by using this command:
<cd_root>/W-Setup/install.bat -W startPortalServerSequence.active=false
- In the "Accept the license agreement" screen, accept the license and click Next
- In the "Installation Type" screen, Select Custom as the install type and click Next
- In the "Select the Location of the existing instance" screen, Select the existing WebSphere AppServer install location and check the box next to "Install on a managed node" and click Next
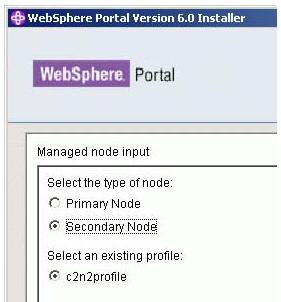
- In the "Managed node input" screen, Select Secondary node and select the desired profile that you wish to install portal onto and click Next
- The result of Installing as a Secondary node is an empty portal.
- In the "WebSphere application Server admin user id" screen, define a WAS Admin User and password. This is a new panel in the portal installer because with portal v6 the install will enable security by default to the WMM database. Use the default values like wasadmin and a password you want and the click Next.
- You should use the same UserID and Password as for the primary node.
- In the "portal install path" screen, define the desired location for portal to be installed and click Next.
- In the "portal Server Admin User" screen, define the portal Admin User and password.Use the default values like wpsadmin and a password you want and the click Next
You should use the same UserID and Password as for the primary node.
- In the "Select the products to run as a service" screen, decide whether you want WAS and portal to run as a service. In this guide you choose NOT to run either as a Windows service, because of the longer startup time for windows with WP as a service
- In the "portal is ready to install" screen, review Summary panel and click Next to begin the install
- When Installation has been successfully completed, notice the information like port number that is been provided and click Finish
Important: Do not attempt to verify that portal is operational after installation. Because you installed as a secondary node, no enterprise applications or portlets will be installed onto the portal instance on the secondary node. This will make the portal to not be operational until it is added to the cluster.
Add node2 and subsequent nodes to the cluster definition
Important: Next you will run the cluster-setup task to add node2 to the cluster. It is important to know that with portal v6 the connect-database task has been integrated into the cluster-setup task. If the PrimaryNode property is defined as False, the cluster-setup task will perform the connect-database to point the secondary node to the existing cluster database. Therefore during this step you will be required to ensure that the database properties are correct in the wpconfig.properties files.
- Install the DB2 Admin Client on node2
- Open a DB2 command line processor on the Secondary node and subsequent nodes (Start |Programs |IBM DB2 |Command LineTools |Command Line Processor).
- Enter the following command:
db2 => catalog tcpip node nodename remote fullyqualifiedDB2servername server
port
Where nodename is the name of eight characters or fewer that you assign to the server, and port is the connection port used by DB2.
For example:
db2 => catalog tcpip node dbdom7 remote dbdom7.cam.itso.ibm.com server 50000
In this example, dbdom7 is designated as the node name (to be used in the rest of the commands) and 50000 is the connection port (the default for TCP/IP connections). The client always uses the same connection port as the DB2 server. We can verify the connection port for the DB2 server by opening a command prompt and issuing the netstat -an command. You should see a port in the 50000 range.
- Enter the following command (as appropriate) to catalog the databases that are hosted on the DB2 server.
db2 => catalog database databasename at node nodename
For example:
db2 => catalog database wpsdb at node dbdom7
If you incorrectly catalog a database, we can uncatalog it...
db2 =>uncatalog database database_name
- When you have verified that all of the databases have been cataloged correctly, test the connectivity to the database by entering the command:
db2 => connect to databasename user DB2administratorname using password
For example:
db2 => connect to wpsdb user db2admin using password
- Update the CLI Driver Settings on the node2
- Edit the wpconfig.properties in directory...
/IBM/WebSphere/PortalServer/config
...to match the Settings for the portal cluster definition
- Make a backup of the original wpconfig_dbdomain.properties and wpconfig_dbtype.properties files on node2 and subsequent nodes in directory...
/IBM/WebSphere/PortalServer/config
- Copy the wpconfig_dbdomain.properties and wpconfig_dbtype.properties from node1 to node2 to ensure the same database configuration. Check if the Values meet the node2, special in the wpconifg_dbtype.properties file value in field db2.DbLibary
- Again, in portal v6 the connect-database task has been integrated into the cluster-setup task. So, now because of this run the validate database tasks. If the passwords are defined in the wpconfig_dbdomain.properties file, the –D options below are not required at the command line.
Table 3-4 Cluster properties in wpconfig.properties
| Field
| Example Value
| Comments
|
| WasPassword
| wpsadmin
| You must add the PortalAdminPwd and the WasPassword values to the wpconfig.properties file and all the database password values to the wpconfig_dbdomain.propert ies file or supply these values on the command line. This is because of what was described before in that the ConfigWizard replaces all the password values with the string, "ReplaceWithYourPassword " for security reasons
|
| PortalAdminPwd
| wpsadmin
|
|
| PrimaryNode
| false
| Verify that value for this node is false, because is not the primary node
|
| Clustername
| PortalCluster
| ClusterName should be the name of the cluster created when running the cluster-setup task on the primary node, node1
|
| Field
| Example Value
| Comments
|
| ServerName
| WebSphere_Portal_2
| ServerName is REQUIRED to be changed from WebSphere_Portal. The cluster-setup task is written to automatically remove the WebSphere_Portal server during the action-remove-appserver-w ps task. |
portalconfig.bat validate-database-driver portalconfig.bat validate-database-connection-wps -DDbPassword=password portalconfig.bat validate-database-connection-jcr -DJcrDbPassword=password portalconfig.bat validate-database-connection-feedback -DFeedbackDbPassword=password portalconfig.bat validate-database-connection-likeminds -DLikemindsDbPassword=password portalconfig.bat validate-database-connection-wmm -DWmmDbPassword=password
- Check that dmgr and node are started with the command:
cd D:\IBM\WebSphere\AppServer\bin\
serverstatus -all -username <wasadmin> -password <waspwd>
- Start WebSphere_Portal when not already started, with the command:
D:\IBM\WebSphere\AppServer\bin\startserver WebSphere_Portal
- Create the cluster definition...
wp_root/config/portalconfig.bat cluster-setup >cluster-setup.log
Check the log file if the Build was successful.
- Restart dmgr, nodeagent and WebSphere_Portal to load the new configuration
- To check if the cluster definition and Creation was successful, Login to the Admin console of the dmgr and browse to...
Server | Clusters | "PortalCluster" | ClusterMember
The entry with the "WebSphere_Portal_2" should be available

- Verify the portal install by accessing it through a browser. By default portal is installed onto port 9081 for each secondary node:
http//<fullqualifiedhostname>:9081/wps/portal
Configure portal nodes and the dmgr for LDAP security with realm support
To have the flexibility to configure realm support and virtual portals in the future, use enable-security-wmmur-ldap to enable security. If you have no plans for these features running this task will NOT cause a problem. Another security enablement option includes running enable-security-ldap.
- Stop the WebSphere_Portal Server Instances on all nodes by logging on to the primary node and running disable-security.
- Verify node agents and dmgr are started.
- Make a copy of the original helper file. Edit the /wp_root/config/helpers/security_disable.properties helper file. Change the following properties to match the current security configuration:
wmm.DbPassword
WasPassword
WasPassword Change the following properties to match what you desire the portal id/pwd to be after disabling security:
PortalAdminId
PortalAdminPwd
PortalAdminGroupId
- Run the config wizard to disable security. Invoke the config wizard by running the following script, wp_root/config/wizard/configwizard.bat. Again, make sure the task is ran on the Primary node.
- In the "Welcome" screen click Next
- In the "Select the Task" screen, choose Disable security and click next
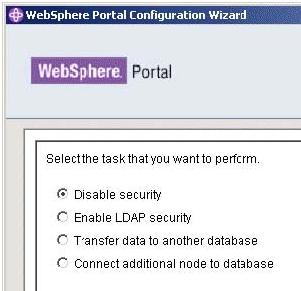
- In the "WAS global security" screen, enter the WAS Admin password and click next
- In the "Helper File Location" screen, select the proper location of the helper file and click
next

- In the "Usernames and Passwords" screens, enter the WMM database ID password and
click next

- Review the summary panel and click next to start the task
- In the "Wizard Completed Successfully" screen, Check if the script completed successfully and click Finish to close the Configuration Wizard
- After the disable-security task finishes, ensure all portal servers are stopped and ensure the nodeagents and the dmgr are running before running the enable-security-wmmur-ldap task
- Browse to the helper files /wp_root/config/helpers/ and create a backup copy of the original security helper file. Edit the security helper file to change all the LDAP values to match the LDAP configuration, in the environment it is IBM Directory Server,
Table 3-5 Security helper file properties
| Property
| Description
|
| IBM WebSphere Application Server properties
|
| WasUserid
| Distinguished name in the LDAP directory for the WebSphere Application Server administrator. This can be the same name as the portal server administrator (PortalAdminId). Example: uid=wpsadmin,cn=users,ou=firebrigade,dc=IBM,dc=com
|
| WasPassword
| Password for the WasUserid name.
|
| Database Properties
|
| wmm.DbPassword
| Connection information for wmm db
|
| Portal server configuration properties
|
| PortalAdminId
| Distinguished name of the portal server administrator in the LDAP directory. This name must be a member of the portal server administrators group defined by the PortalAdminGroupId property.
This account must include a value for the mail attribute. If the account does not have a value for the mail attribute, enabling LDAP security will fail. Example: uid=wpsadmin,cn=users,ou=firebrigade,dc=IBM,dc=com
|
| PortalAdminPWD
| Password for the portal server administrator.
Do not include the following characters in the password because they can cause authentication failures: ! @ ( ) # $ %
|
| PortalAdminGroupIdShort
| The short form of the portal server administrators group name. Example: wpsadmins
|
| Portal server security properties
|
| LTPAPassword
| Password used to encrypt and decrypt the LTPA keys.
|
| LTPATImeout
| Time period in minutes at which an LTPA token expires. Example: 120
|
| Property
| Description
|
| SSORequiresSSL
| Indicates whether single sign-on is enabled only for HTTPS Secure Socket Layer (SSL) connections. Type false. If you want to configure SSL, do so only after you have enabled LDAP security and verified the LDAP directory configuration.
|
| SSODomainName
| Domain name for all single sign-on hosts. Example: cam.itso.ibm.com
|
| General global security properties
|
| useDomainQualifiedUserNames
| Indicates whether to qualify user names with the security domain within which they reside (true or false). The default value (false) is recommended for most environments.
|
| cacheTimeout
| Timeout for the security cache. The default value (600) is recommended for most environments.
|
| issuePermissionWarnings
| Indicates whether during application deployment and application start, the security run time emits a warning if applications are granted any custom permissions (true or false). The default value (true) is recommended for most environments.
|
| activeProtocol
| Authentication protocol for RMI/IIOP requests when security is enabled. The default value (BOTH) is recommended for most environments.
|
| activeAuthmechanism
| The authentication mechanism when security is enabled. The default value (LTPA) is recommended for most environments.
|
| LDAP properties
|
| LookAside
| We can either install with LDAP only or with LDAP using a Lookaside database. The purpose of a Lookaside database is to store attributes which cannot be stored in the LDAP server; this combination of LDAP plus a Lookaside database is needed to support the Database user registry. Value type: * true - LDAP + Lookaside database * false - LDAP only Default value: false
|
| LDAPHostName
| The host name for the LDAP server. Example: dbids.cam.itso.ibm.com
|
| LDAPPort
| The LDAP server port number. Typically, you type 389. Do not type 636, the port typically used for SSL connections. If you want to configure an SSL port for LDAP, do so after you have enabled LDAP security and verified the LDAP directory configuration.
|
| Property
| Description
|
| LDAPAdminUId
| Distinguished name in the LDAP directory that portal server and WebSphere Member Manager use to bind to the directory. The level of access given this name determines the level of access that Workplace Collaboration Services has to the directory. This name does not have to contain a uid attribute.
Give this account read-only access to prevent users from using the Sign-up link to register accounts in the directory and from using the Edit My Profile link to change attributes in the directory, such as their e-mail addresses. Example: uid=ldapadmin,cn=users,dc=IBM,dc=com
|
| LDAPAdminPwd
| Password for the name assigned to the LDAPAdminUId property.
|
| LDAPServerType
| Do not change; leave as IBM_DIRECTORY_SERVER.
|
| LDAPBindID
| Distinguished name that WebSphere Application Server uses to bind to the directory. Example: uid=wpsadmin,cn=users,ou=firebrigade,dc=IBM,dc=com
|
| LDAPBindPassword
| Password for the LDAPBindID name.
|
| Advanced LDAP properties
|
|
| LDAPSuffix
| The LDAP suffix for the directory server. This property determines the naming context at which to begin directory searches for users and groups. Tip: For Domino as LDAP this value is typical empty Example: dc=IBM,dc=com
|
| LDAPUserPrefix
| The leftmost attribute of user names in the directory. Type the value in lowercase characters. Example: uid
|
| LDAPUserSuffix
| The naming context at which to begin searches for user names in the directory. Example: cn=users Do not include the LDAPSuffix value as part of this value. For example, do not type cn=users,dc=IBM,dc=com.
|
| LDAPGroupPrefix
| The leftmost attribute of group names in the directory. Type the value in lowercase characters. Example: cn
|
| LDAPGroupSuffix
| The naming context at which to begin searches for group names in the directory. Tip: For Domino as LDAP this value is typical empty Example: cn=groups Do not include the LDAPSuffix value as part of this value. For example, do not type cn=groups,dc=IBM,dc=com.
|
| LDAPUserObjectClass
| The object class used for users. Example: inetOrgPerson
|
| Property
| Description
|
| LDAPGroupObjectClass
| The object class used for groups. Example: groupOfUniqueNames
|
| LDAPGroupMember
| Attribute used for the members of groups. Example: uniqueMember
|
| LDAPUserFilter
| The filter used to search for user accounts. The filter must include the following text: (&(|(<userprefix>=%v)(mail=%v))(objectclass= <userobjectclass>)), where <userprefix> is the value specified for the LDAPUserPrefix property and <userobjectclass> is the value specified for the LDAPUserObjectClass property. Example: (&(|(uid=%v)(mail=%v))(objectclass=inetOrgPerson))
|
| LDAPGroupFilter
| The filter used to search for groups accounts. The filter must include the following text: (&(<groupprefix>=%v)(objectclass=<groupobjectclass>)), where <groupprefix> is the value specified for the LDAPGroupPrefix property and <groupobjectclass> is the value specified for the LDAPGroupObjectClass property. Example: (&(cn=%v)(objectclass=groupOfUniqueNames))
|
| LDAPGroupMinimumAttributes
| Attributes loaded for group searches and related to performance. Leave this property blank.
|
| LDAPUserBaseAttributes
| Attributes loaded for user login-related to performance. Type givenName,sn,preferredLanguage. Also type the following values to allow users, for example, calendar users, to set international time and date preferences in the Edit My Profile page: ,ibm-regionalLocale,ibm-timeZone, ibm-preferredCalendar,ibm-firstDayOfWeek, ibm-firstWorkDayOfWeek
|
| LDAPUserMinimumAttributes
| Attributes loaded for user searches and related to performance. Leave this property blank.
|
| LDAPsearchTimeout
| Value in seconds for the amount of time the LDAP server has to respond before canceling a request. Example: 120
|
| LDAPreuseConnection
| Indicates whether LDAP connections are reused (true or false). If the environment uses a front-end server to spray requests to multiple back-end LDAP directory servers, type false. If the environment does not use an intermediate server but instead authenticates directly with the LDAP directory server, type true.
|
| LDAPIgnoreCase
| Indicates whether LDAP searches are case-sensitive (true or false).
|
| PDM LDAP Properties
|
|
| WpsContentAdministrators
| The group ID for the WebSphere Content Administrator group Example: cn=wpsContentAdministrators,cn=groups,ou=firebrigade,dc=IBM,dc =com
|
| WpsContentAdministratorsShort
| The WebSphere Content Administrators group ID Example: wpsContentAdministrators
|
| Property
| Description
|
| WpsDocReviewer
| The group ID for the WebSphere Document Reviewer group Example: cn=wpsDocReviewer,cn=groups,ou=firebrigade,dc=IBM,dc=com
|
| WpsDocReviewerShort
| The WebSphere Document Reviewer group ID. Example: wpsDocReviewer
|
| WCM LDAP Properties
|
|
| WcmAdminGroupId
| The group ID for the Web Content Management Administrators group. The fully qualified distinguished name (DN) of a current administrative user for the WebSphere Application Server. For LDAP configuration this value should not contain spaces. Example: cn=wcmadmins,cn=groups,ou=firebrigade,dc=IBM,dc=com
|
| WcmAdminGroupIdShort
| The Web Content Management Administrators group ID Example = wcmadmins |
- Import the contents of the helper file into the wpconfig.properties file by issuing this command:
wp_root/config/portalconfig -DparentProperties="<full_path_to_helper_file>" -DSaveParentProperties=true
- Open the wpconfig.properties file and make sure the WpsHostName and WpsHostPort are correct
- Run the following task to validate the LDAP values:
portalconfig.bat validate-wmmur-ldap
- Run the following task on the primary node ONLY to configure the LDAP security settings for both WAS/WP nodes and the dmgr. This will enable security on the entire cluster:
portalconfig.bat enable-security-wmmur-ldap >enable.log
Hint: For enabling LDAP with Realm support we cannot use the Configuration Wizard.
- Because you enabled security using the enable-security-wmmur-ldap task that enables realm support, you are required to manually edit the wmmWASAdmin.xml file on the dmgr. If this file is not edited with the shortname you will not be able to run the stopServer.bat or the serverStatus.bat on the nodes using the shortname as the username, rather you will be required to use the full LDAP DN.
The current...
dmgr_profile_root/config/wmm/wmmWASAdmin.xml
...should look something like this:
Example 3-1
?xml version="1.0" encoding="UTF-8"?>
<wmmWASAdmins>
<admin logonId=" uid=wpsadmin,cn=users,ou=firebrigade,dc=IBM,dc=com" logonPassword="anvu7zPZ7jbrZLa4h89Tfg==" uniqueUserId=" uid=wpsadmin,cn=users,ou=firebrigade,dc=IBM,dc=com"/> </wmmWASAdmins>
Add another line between the <wmmWASAdmins> tag that includes the shortname. Since both IDs will have the same password we can simply copy the current <admin logonId> tag entry and modify it like below:
Example 3-2
<?xml version="1.0" encoding="UTF-8"?>
<wmmWASAdmins>
<adminlogonId=" uid=wpsadmin,cn=users,ou=firebrigade,dc=IBM,dc=com" logonPassword="anvu7zPZ7jbrZLa4h89Tfg==" uniqueUserId="uid=wpsadmin,cn=users,ou=firebrigade,dc=IBM,dc=com"/><adminlogonId="wpsadmin" logonPassword="anvu7zPZ7jbrZLa4h89Tfg==" uniqueUserId="uid=wpsadmin,cn=users,ou=firebrigade,dc=IBM,dc=com"/>
</wmmWASAdmins>
- Perform a full synchronization to ensure all the security settings are pushed from the dmgr to the nodes. Restart the dmgr and the nodeagents on each node. The nodeagents will have to be stopped by providing the full LDAP DN on the command line. After they restart the new config settings should take affect and then they should be able to be stopped using the shortname.
- Stop WebSphere_Portal on the second node
- Update...
wp_root/config/wpconfig.properties
...on each secondary node in the cluster with the same LDAP user registry information you used to configure the primary node.
Update wpconfig.properties by moving the LDAP helper file from node1 to node2 and running the following command:
wp_root/config/portalconfig -DparentProperties="<full_path_to_helper_file>" -DSaveParentProperties=true
- Complete the security configuration by logging on to each secondary node
and running...
...where portal_admin_id is the fully qualified distinguished name (DN) of the portal administrator, for example...
uid=wpsadmin,cn=users,ou=firebrigade,dc=IBM,dc=com
- Restart the portal server cluster member on each secondary node.
- Verify the new security settings by rendering the dmgr AdminConsole and portal from a browser.
Configure portal to use a remote Web server
With WAS 6, the Web server architecture has changed significantly. The Web server is now listed as a separate Server in the AdminConsole and can be managed from there as well.
Details on how to configure a Web server to WAS 6 can be found in the WAS InfoCenter at the following links:
- Install the Web server on a remote machine/<cd root>/W-9/IHS/install.exe
- Install the plug-in on a remote machine...
/<cd_root>/W-9/plugin/install.exe
- During the Installation of the WebSphere Plug-in on the Web Server a script has been created. By running this script, all the WebServer settings will be automatically added to the dmgr Server
- Move configurewebserver1.bat script from plugin_root/bin (Example: C:\WebSphere\Plugins\bin) to the WAS_ROOT/bin on the dmgr machine.
- Edit the...
dmgr_profile_root/properties/soap.client.props
...file temporarily and add the current userid and password for the following properties:
- com.ibm.SOAP.loginUseridcom.ibm.SOAP.loginPassword
- Open a Command Prompt on the dmgr and browse to WAS_ROOT/bin, run the bat file by entering the command:
configurewebserver1.bat
This script creates the Web server node in the AdminConsole
The script also tries to map all the existing Enterprise Applications (EAs) to the Web server entry, but may fail on some Windows environments because of the fact that some of the portal EAs have more than 256 characters in their paths.
The results are that after this fails the node and server entry are created successfully, but none of the EAs are mapped to the Web server. This means that when you regenerate the Web server plugin it does not know about any of the EAs. Therefore, none of the EAs are listed in the plugin-cfg, which means that if the plugin is moved to Web server, it will not be able to serve the EAs.
- If the script runs successfully logout and login back into the dmgr
AdminConsole to see the changes before moving to Step 8
If you are on Windows and the script fails because of the 256 character limit, follow the following procedure to manually map the EAs to the Web server.
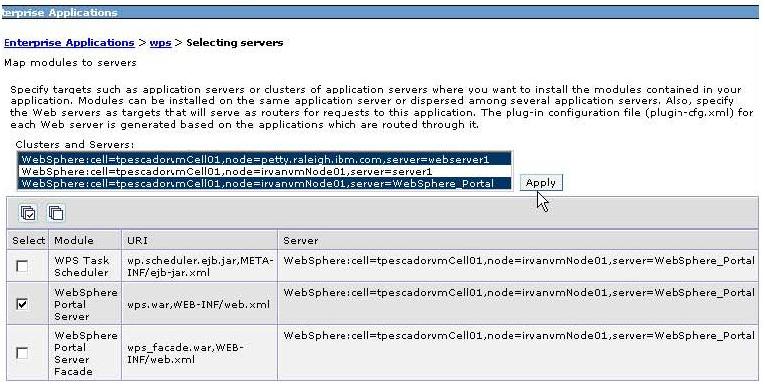
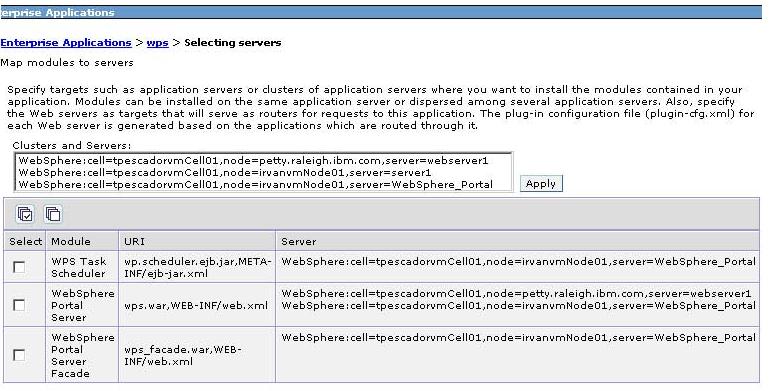
- Then regenerate the plug-in by navigating to...
Servers | Web servers
Select the webserver1 entry and click Generate Plug-in...
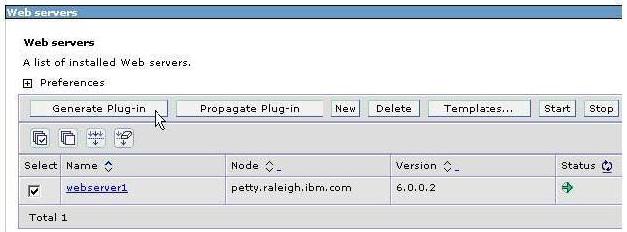 <
<
- Copy the plug-in from the dmgr ...
dmgr_profile_root/profile_name/config/cells/cellname/nodes/nodename/server s/webserver1/plugin-cfg.xml
...to the remote Web server path.
plugin_root/config/webserver1
- Change the WpsHostName and WpsHostPort properties in the wpconfig.properties on all nodes to reflect the Web server values
- the dmgr, Web server and portal
- Verify the portal can be accessed through the Web server.
At this point the cluster setup is finished.
Optional Steps after Cluster Creation:
- Configure a WebSphere Edge Server or an IP Sprayer for load balancing the system (This is not described in this book.)
- Configure the portal Cluster to us a second LDAP Directory as described in
Chapter 4, "Multiple LDAP Directory Support"
- Configure the portal Cluster to share the Database with a second Clustered Environment as described in
Chapter 5, "Database Domains"
.
Horizontal Cluster w/o portal
In a horizontal cluster topology members of a portal cluster exist on multiple physical machines representing each node, effectively and efficiently distributing the workload of a single logical portal image.
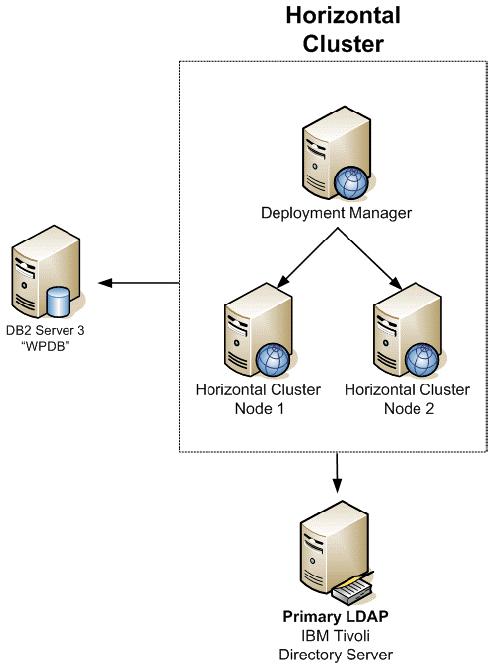
Installation Steps
- Install WAS on the dmgr machine
- Install portal on the primary cluster node machine
- Configure portal with an external database
- Create cluster definition
- Install portal on a secondary node
- Connect secondary node to the database server
- Add secondary node to the cluster definition
- Configure nodes and dmgr with LDAP security
- Configure the Cluster to use remote Web Servers
- Configure WebSphere Edge Server or an IP Sprayer
- Configure the portal cluster to use a second LDAP directory
- Configure the portal cluster to share the database with a second portal cluster.
Procure Software
Here is an example of software we can download for an AIX system...
- Portal V6.0 and Workplace Web Content Management V6.0 - WebSphere Application Server Network Deployment for AIX, V6.0.2.9 (A-1) Multilingual (C949TML)
- Portal V6.0 and Workplace Web Content Management V6.0 - portal Install V6.0 (A-Setup) Multilingual (C93LQML)
- Portal V6.0 and Workplace Web Content Management V6.0 - portal Server (Disc 1 of 2), V6.0 (A-3) Multillingual (C93LSML)
- Portal V6.0 and Workplace Web Content Management V6.0 - portal Server (Disc 2 of 2), V6.0 (A-4) Multillingual (C93M4ML)
- WebSphere Application Server Network Deployment V6.0 Application Server, IBM HTTP Server, Web server plug ins, Application Clients for AIX, 32bit-support, Multilingual (C5886ML)
Note that you download the C5886ML distro because the C949TML distro does not contain LaunchPad.sh and associated plugin utilities, which are required components for the WAS install on the dmgr machine.
After downloading, to install, rename each package. For example,...
mkdir A-1
cp C949TML.zip A-1
cd A-1
unzip C949TML.zip
Install WAS on the dmgr
WAS is automatically installed as part of the portal installation. However, for enterprise class environments, set up a dedicated machine for hosting the dmgr.
A WAS on the dmgr machine must be installed to the same product revision level as the WAS levels used on the cluster nodes and must have the same corrective service levels applied.
If you are installing portal and the dmgr on the same machine, create separate profiles for the portal server (WebSphere_Portal) and the deployment manager (server1).
If you are planning to install two separate copies of WAS on the same machine for the deployment manager and portal on the same machine, review the coexistence requirements.
First install the dmgr by following the procedure below:
- Install the WAS (dmgr) by running the installer from...
<cd_root>/W-1/windows/ia32/ifpackage/WAS/install.exe
Make sure the installer screen is titled...
Welcome to WebSphere Application Server ND, V6
This title means that we can use this installer to install either, dmgr or WAS profiles. If the title is "WebSphere Application Server v6.0", you are using an installer that only has the ability to install WAS profiles and not dmgr profiles.
If you are installing from downloaded code, run the program from a local drive, not a mapped network drive.
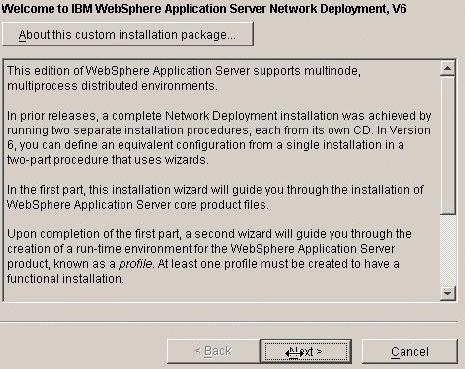
- Accept the License agreement and click next
- The Installation Wizards performs a pre-requisite check for you, when this runs successfully. click Next, otherwise check the Operating System if it meets the requirements for WAS as discussed in System Requirements.
- If installing on Windows, when asked for the install location, shorten the default path. There is a path name limitation in Windows. Windows cannot handle path names longer than 256 characters. For example:
D:\IBM\WebSphere\ApplicationServer
and click Next
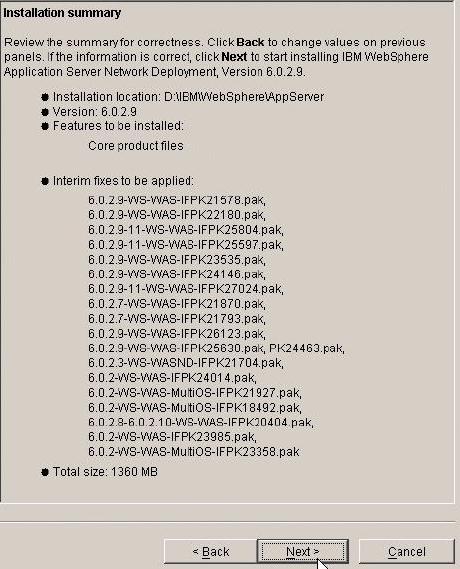
- The Installation Wizard displays the installation summary including interim fixes to be applied
- The WAS installer from the portal CDs will automatically upgrade WAS to 6.0.2.9
- The WAS installer from the portal CDs will also automatically apply these WAS and portal iFixes required for an install of portal 6.0.0.0
Review the options in the installation summary window and click Next
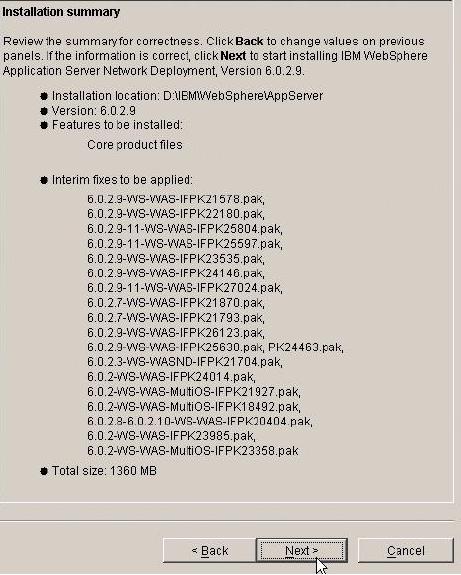
- PK21578
- PK22180
- PK25804
- PK25597
- PK23535
- PK24146
- PK27024
- PK21870
- PK21793
- PK26123
- PK25630
- PK24463
- PK21704
- PK24014
- PK21927
- PK18492
- PK20404
- PK23985
- PK23358
We can find WAS fixes by accessing this URL and searching for the fix:
– http://www-306.ibm.com/software/webservers/appserv/was/support/
- You should be prompted during the install (with a panel near the end) if you would like to create a profile, at this time choose to create a profile by making sure the "Launch the profile creation wizard" checkbox remains CHECKED and click Next
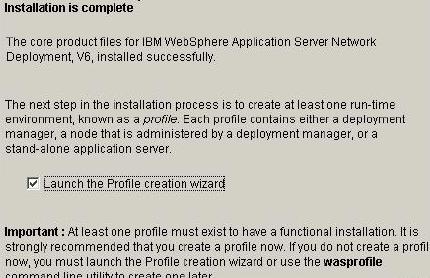
- In the...
Welcome to Profile Creation Wizard
...click Next
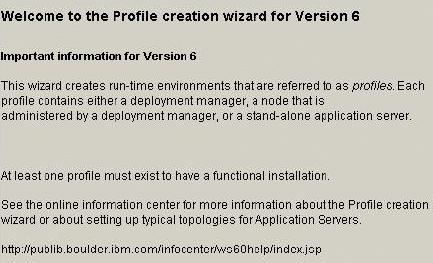
- In the "Profile Selection" Screen, select the Create a deployment manager profile and
click Next
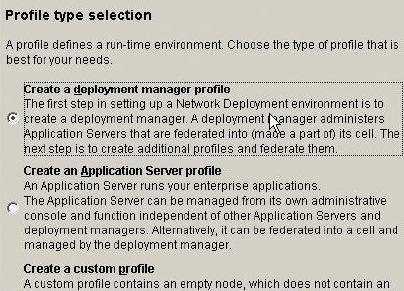
- In the "Profile name" screen, enter a profile name for the WebSphere Application Server Instance, this name can be different for each node and the dmgr, in the setup you
choose the node Name as the profile Name and click Next
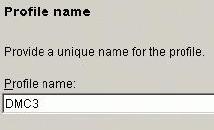
- In the "Profile directory" screen, verify the directory name and click Next
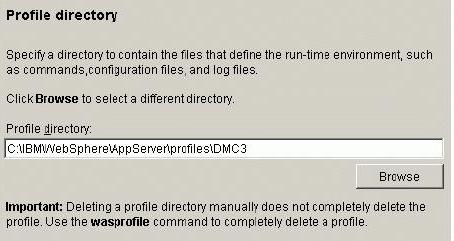
- In the "Node,host, and Cell Names" screen, Check the value of node, Host and Cellname
and click Next
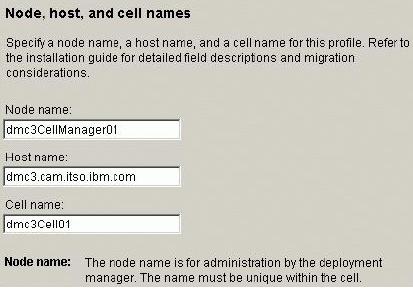
- In the "Port value assignment" screen, Check the values of Ports and click Next
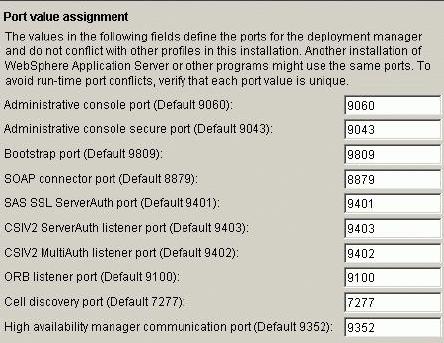
- In the "Windows Service Definition" screen, we can configure WAS to run as a service, in the Setup you do not want to run the WebSphere Application Server as a Windows Service, because of the longer startup time of Windows System, so leave the defaults and
click Next as sown in Figure 3-102
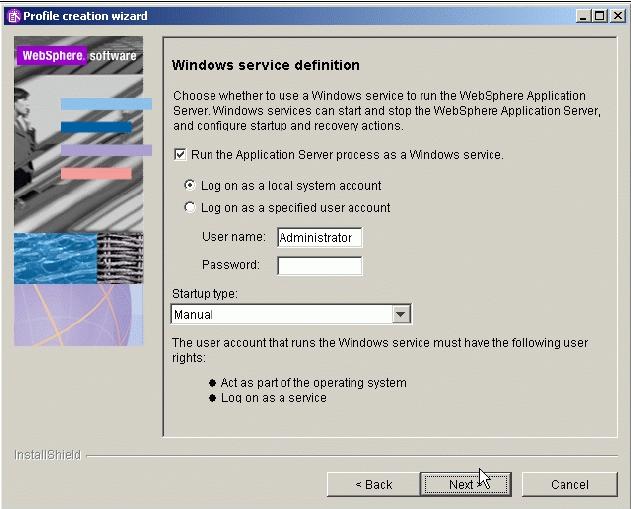
- In the "Profile Summary" screen, check the values and the click Next
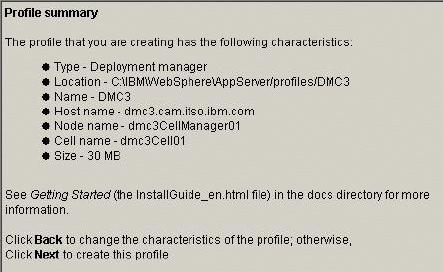
- In the "Profile creation is complete" screen, check if the creation was successful and click
Finish
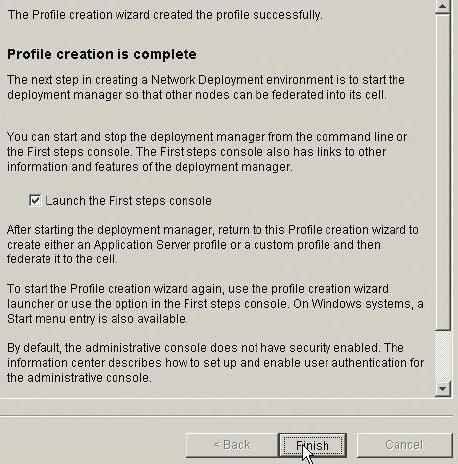
Now the installation steps for the dmgr Server are completed and we can proceed to install the primary node.
Install portal on the primary cluster node, node1
The following section provides step by step instructions on installing portal without portal.
If you are installing from downloaded code, run the program from a local drive, not a mapped network drive.
- Launch install.bat script in W-Setup folder of the portal 6 Gold code
- In the "License Agreement" screen, select "I accept the terms in the license agreement" and click Next
- In the "Installation Type" screen, select "typical" and click Next

- In the "Installation directory" screen, enter the directory where you want to install WebSphere Application Server. If the directory that you specify does not exist, it will be created. For example:
D:\IBM\WebSphere\ApplicationServer
...and click Next
- In the "Properties for this instance" screen, verify the cell name, node name and host name of WebSphere Application Server information, and click Next
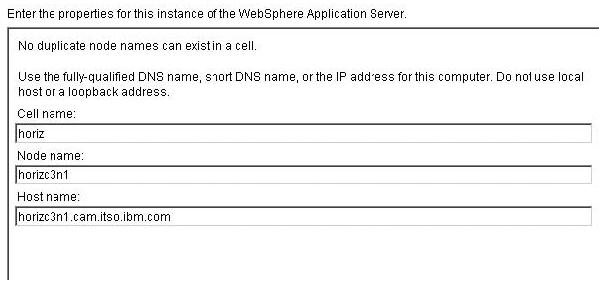
- In the "Was administrative user" screen, enter the user ID and password for the WebSphere Application Server administrator and click Next
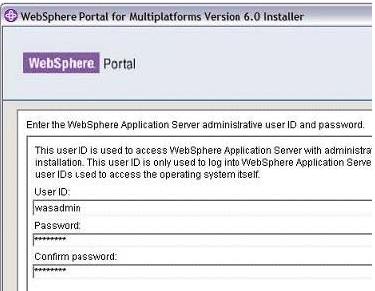
- In the "Install Business Process Support", select "Do not install portal", otherwise you will not be able to add that node to a managed cell or use it as part of a cluster at a later time., if you want to enable the Business Process Support refer to "Horizontal Cluster (includes portal)- and Configuration steps" and click Next
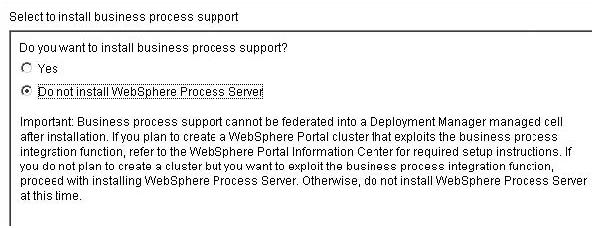
- In the "Installation directory" screen, enter the directory where you want to install portal Server. If the directory that you specify does not exist, it will be created. For example:
D:\IBM\WebSphere\PortalServer
...and click Next
- In the "Portal administrative user" screen, enter the user ID and password for the
portal Server administrator and click Next
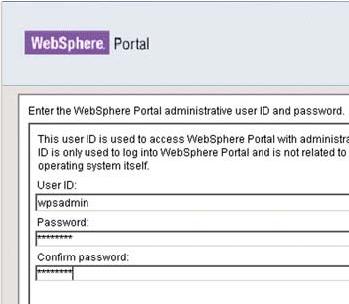
- In the "Windows Service Definition" screen, we can configure portal to run as a service, in the Setup you do not want to run the portal Server as a Windows Service, because of the longer startup time of Windows System, so leave the defaults and click
Next

- In the "portal is ready to install" screen, review Summary panel and click Next to begin the install
- When Installation has been successfully completed, notice the information like port number that is been provided and click Finish
- Verify that portal is running by opening the following URL in a browser:
http://example.com:port_number/wps/portal
...where example.com is the fully qualified host name of the machine that is running portal and port_number is the port number that is displayed on the confirmation panel. For example,
http://horizc3n1.cam.itso.ibm.com:10038/wps/portal
Configure primary node1 to an external database
Configure primary node1 to an external database as described in section Configure primary node1 to an external database.
Summary of the Steps that are covered in the section Configure primary node1 to an external database:
- Install db2 admin client on primary node1 and the dmgr
- Create the DB that you want to use for portal
- Catalog the DB on the primary node1 and the dmgr
- Configure the database using the ConfigWizard
- Create a new JDBC Resource and a WebSphere Variable for the dmgr
Create cluster definition
The following steps will result on node1 federation into the cluster and connectivity with dmgr.
See also:
- Increase the ConnectionTimeOut value for the WebSphere_Portal application server and the deployment manager.
On some machine configurations, portal components might cause a timeout exception when the node is being added to the WebSphere Application Server ND cell. Increasing the timeout value eliminates the risk of this happening.
- Start the WebSphere Administrative Console on node1, via
Start | Programs | IBM WebSphere | Application Server ND v6 | Profiles | wp_profile | Administrative Console
- Log into the administrative console for the portal node.
- To change the timeout values for the WebSphere_Portal application server, click...
Servers | Application Servers | WebSphere_Portal | Web container settings | Web container transport chains
- Increase the timeout values. For each entry listed in the web container transport chains section, complete the following steps to increase the timeout values:
- Click HTTP Inbound Channel.
- Change the Read timeout value to 180.
- Change the Write timeout value to 180.
- Save the configuration changes.
- Start the WebSphere Administrative Console on dmgr, via
Start | Programs | IBM WebSphere | Application Server ND v6 | Profiles | <ProfileName> | Administrative Console
- Log into the administrative console for the deployment manager.
- To change the timeout values for the deployment manager, click...
System Administration | dmgr | Web container transport chains.
- Increase the timeout values for the deployment manager as you did above for the portal node. You might find that there are fewer entries listed on the deployment manager than on the application server node. It is not necessary to add additional entries to the deployment manager configuration; simply update those timeout values that are already listed.
- Change the timeout request period for the JMX connector on the dmgr
- Restart the WebSphere_Portal application server and the deployment manager.
- Change the timeout request period for the Simple Object Access Protocol (SOAP) client. The default, in seconds, is 180. Edit the soap.client.props file in the was_profile_root/properties directory:
Change the line to:
com.ibm.SOAP.requestTimeout=6000
- Change to the following directory:
portal_server_root/config
- Copy Member Manager files to the dmgr machine:
- Create the wasextarchive.jar file, which contains the Member Manager binaries. From the portal node...
cd portal_server_root/config directory
portalconfig.bat archive-was-ext
- Copy the wasextarchive.jar file to the installation root folder of the dmgr machine.
IBM/WebSphere/AppServer as WAS_ROOT
The wasextarchive.jar file is located in the following directory on the primary node:
portal_server_root/config/work
- Stop the deployment manager by issuing the following command from the WAS_ROOT/bin directory on the dmgr machine:
IBM/WebSphere/AppServer/bin/stopManager.bat
- Extract the contents of the wasextarchive.jar file to the app_server_root directory on the dmgr machine.
Run the following command from the WAS_ROOT directory:
java\bin\jar -xvf wasextarchive.jar
- Verify that the WAS_ROOT/lib directory contains files that start with wmm*.
- Restart the deployment manager by issuing the following command from the WAS_ROOT/bin directory:
IBM/WebSphere/AppServer/bin/startManager.bat
- Ensure that the database software required for the Member Manager domain is installed.
- Log in to the deployment manager administrative console, and click
Resources | JDBC Providers
- Click on the JDBC provider that contains the Member Manager data source.
- In the Classpath field, note the name of the environment variable specified. For example, ${ DB2_JDBC_DRIVER_CLASSPATH}.
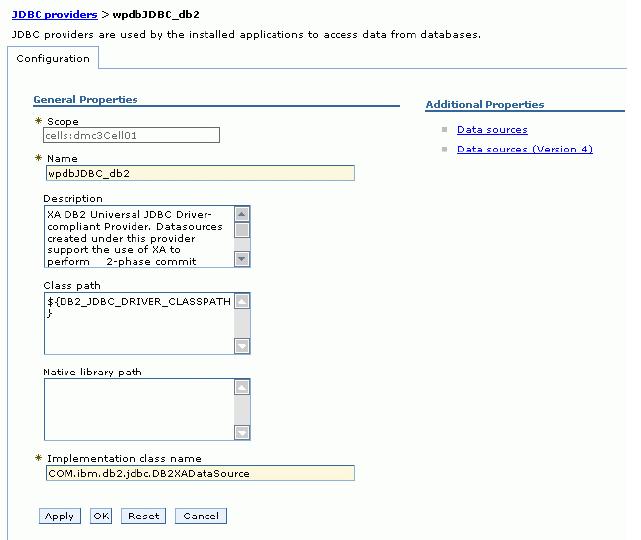
- Select Environment |WebSphere Variables in the navigation tree.
- Select the deployment manager node to filter the list of variables
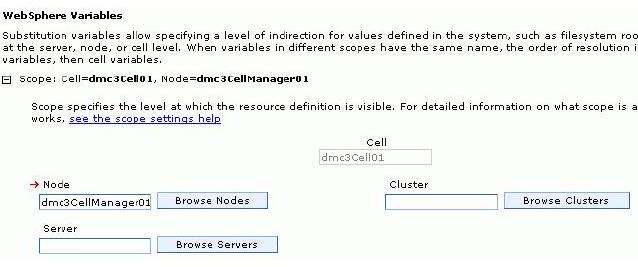
- You need to Create a new WebSphere Variable, to do this click New and Enter the following values
- Enter the name of the variable previously specified by the JDBC provider (${ DB2_JDBC_DRIVER_CLASSPATH}).
- In the Value field, enter the directory and name of the ZIP or JAR file that contains the JDBC driver class. For example: db2_install/java/db2java.zip.
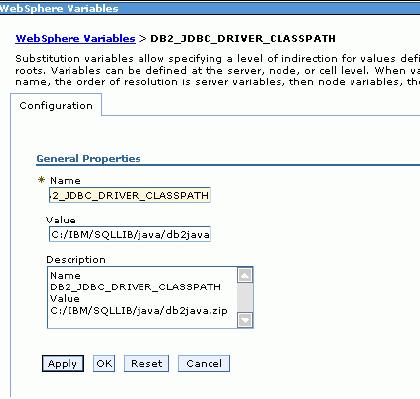
- Save the changes to the deployment manager configuration.
- Configure the dmgr machine with the same security setting for the node by completing the following steps:
- Edit the <wsas_profile_root>/bin/setupCmdLine.bat script to increase theJava heap size. Increasing the Java heap size enables the addNode and removeNode commands to add or remove large applications without failing. Edit the file, and add the following line (on one line) to the bottom of the script:
SET JVM_EXTRA_CMD_ARGS= -Djava.security.properties=$WAS_HOME/java/jre/lib/security/java.security -Xms256m -Xmx1024
- Increase the heap for the DeploymentManager process:
a. Open the Administrative Console.
- Validate whether this installation of portal supports federation into a managed cell. Run the pre-node-federation task
cd portal_server_root/config
portalconfig.bat pre-node-federation
If the task succeeds, continue to the next step. However, if the task fails, this indicates that the portal was installed with the business process integration feature provided by portal. This installed configuration does not support federation into a managed cell.
- If you require business process support and need to federate the portal server, reinstall portal according to the instructions for installing into a
managed node, these steps are described in "Horizontal Cluster (includes
portal) - Installation".
- If federate the portal server but do not require business process support, we can install portal on an unmanaged node and choose not to install business process support during installation. This installed configuration allows for subsequent federation into a managed cell.
- Add the node to the deployment manager cell by entering the addNode command. Ensure that you include the -includeapps parameter.
Before running the addNode.bat command ensure the dmgr has been started
To add a node to the deployment manager cell, issue the addNode.bat command (on one line) on the command line of the node to be added:
WAS_ROOT\bin\addNode.bat dmgr_host dmgr_port -username admin_user_id -password admin_password -includeapps >addnode.log
where: deployment_manager_host is the dmgr host name. deployment_manager_port is the dmgr SOAP connector-address. The
default value is 8879.
admin_user_id is the WebSphere Application Server administrative user name. This parameter is optional but is required if security is enabled. admin_password is the administrative user password. This parameter is optional but is
required if security is enabled. Example:
addNode.bat dmc3.cam.itso.ibm.com 8879 –username wpsadmin -password password -includeapps >addnode.log
To run the addNode command here you MUST supply username and password because security has been enabled on the dmgr.
See the appropriate ND Information Center for details on the
addNode command.
http://publib.boulder.ibm.com/infocenter/wasinfo/v6r0/index.jsp?topic=/com.ibm.webspher e.nd.doc/info/welcome_nd.html
Ensure that the clocks are synchronized to within 5 minutes of each other on node1 machine and the dmgr machine. If the clocks are not within 5 minutes, the addNode process will fail.
- Update the deployment manager configuration for the new portal.
The post-portal-node-federation-configuration task requires complete and accurate database information in the wpconfig_dbdomain.properties file. Before running the task, ensure that the database properties are correct and that password values are specified.
a. Run the post-portal-node-federation-configuration task. Run the following command from the portal_server_root/config directory:
portalconfig.bat post-portal-node-federation-configuration
-DWasPassword=password > postportalfederation.log
b. Check the log file if the task ended successful.
c. Restart the node agent on the portal node.
i. Open the administrative console on the dmgr, and click
System Administration | node Agents.
ii. Select the check box beside the node agent that you want to restart, and click
Restart

d. Restart the deployment manager.
• Stop the deployment manager.
IBM/WebSphere/AppServer/bin/stopManager.bat
• Start the deployment manager.
IBM/WebSphere/AppServer/bin/startManager.bat
- After the primary node is installed and running as a managed node under deployment manager control, create the cluster
- Edit the wpconfig.properties in folder portal_server_root/config/ to match the Settings
for the new portal cluster definition
| Field
| Example Value
| Comments
|
| WasPassword
| wpsadmin
| You must add the PortalAdminPwd and the WasPassword values to the wpconfig.properties file and all the database password values to the wpconfig_dbdomain.propert ies file or supply these values on the command line. This is because of what was described before in that the ConfigWizard replaces all the password values with the string, "ReplaceWithYourPassword " for security reasons
|
| PortalAdminPwd
| wpsadmin
|
|
| PrimaryNode
| true
| Verify that value for this node is true
|
| Clustername
| PortalCluster
| Specify the cluster name you want to use when creating the cluster. Do not use spaces or special characters in the cluster name |
If you wish to change the name of the cluster to something other than thedefault in the wpconfig.properties file, you MUST change is now BEFORE the clusterdefinition is created. This can be changed by editing the wpconfig.properties file and changing the ClusterName property.
- Check that dmgr and node are started with the command:
cd D:\IBM\WebSphere\AppServer\bin\
serverstatus -all -username <wasadmin> -password <waspwd>
- Start WebSphere_Portal when not already started, with the command:
cd D:\IBM\WebSphere\AppServer\bin\
startserver WebSphere_Portal
Important: The cluster-setup task requires complete and accurate database information in the wpconfig_dbdomain.properties and wpconfig_dbtype.properties files. Before running the task, ensure that the database properties are correct and that password values are specified
- Create the cluster definition...
wp_root/config/portalconfig.bat cluster-setup >cluster-setup.log
Check the log file if the Build was successful.
- Restart dmgr, nodeagent and WebSphere_Portal to load the new configuration
- To check if the cluster definition and Creation was successful, Login to the Admin console of the dmgr and browse toServer | Clusters A entry with the "ClusterName" should be available

- As a checkpoint in the process, you now have a 1 node cluster configured to an external database and using the WMM database for security.
Install portal on node2 and subsequent nodes
Install portal on node2 and subsequent nodes as described in section Installation of portal on the primary cluster node, node1
If you already have a portal Cluster up and running and you want to add an additional node to the cluster proceed with the steps in section Adding a Horizontal node to a Cluster w/o portal
Use the same User ID and Password for the WebSphere Application Server and the portal Server as you did for primary node1
Add node2 and subsequent nodes to the cluster definition
The following steps will result on node2 federation into the cluster, connectivity with dmgr and connectivity with the database.
See also:
- Install the DB2 Admin Client on node2 and subsequent nodes
- Open a DB2 command line processor on the node2 (Start |Programs |IBM DB2 |Command Line Tools |Command Line Processor).
- Enter the following command:
db2 => catalog tcpip node nodename remote fullyqualifiedDB2servername server port
Where nodename is the name of eight characters or fewer that you assign to the server, and port is the connection port used by DB2.
For example:
db2 => catalog tcpip node dbdom7 remote dbdom7.cam.itso.ibm.com server 50000
In this example, dbdom7 is designated as the node name (to be used in the rest of the commands) and 50000 is the connection port (the default for TCP/IP connections). The client always uses the same connection port as the DB2 server. We can verify the connection port for the DB2 server by opening a command prompt and issuing the netstat -an command. You should see a port in the 50000 range.
- Enter the following command (as appropriate) to catalog the databases that are hosted on the DB2 server.
db2 => catalog database databasename at node nodename
For example:
db2 => catalog database wpsdb at node dbdom7
If you incorrectly catalog a database, we can uncatalog it...
db2 =>uncatalog database database_name
- When you have verified that all of the databases have been cataloged correctly, test the connectivity to the database by entering the command:
db2 => connect to databasename user DB2administratorname using password
For example:
db2 => connect to wpsdb user db2admin using password
- Update the CLI Driver Settings on the node2
- Make a backup of the original wpconfig_dbdomain.properties and wpconfig_dbtype.properties files on node2 and subsequent nodes
- Copy the wpconfig_dbdomain.properties and wpconfig_dbtype.properties from node1 to node2 to ensure the same database configuration. Check if the Values meet the node2, special in the wpconifg_dbtype.properties file value in field db2.DbLibary
- Test the database connection by running the validate database tasks. If the passwords are defined in the wpconfig_dbdomain.properties file, the –D options below are not required at the command line.
portalconfig.bat validate-database-driver portalconfig.bat validate-database-connection-wps -DDbPassword=password portalconfig.bat validate-database-connection-jcr -DJcrDbPassword=password portalconfig.bat validate-database-connection-feedback -DFeedbackDbPassword=password portalconfig.bat validate-database-connection-likeminds -DLikemindsDbPassword=password portalconfig.bat validate-database-connection-wmm -DWmmDbPassword=password
- Change the timeout request period for the Simple Object Access Protocol (SOAP) client. The default, in seconds, is 180. Edit the soap.client.props file in the was_profile_root/properties directory:
Change the line to:
com.ibm.SOAP.requestTimeout=6000
- Validate whether this installation of portal supports federation into a managed cell. Run the pre-node-federation task.
Run the following command from the portal_server_root/config directory:
portalconfig.bat pre-node-federation
If the task succeeds, continue to the next step. However, if the task fails, this indicates that the portal was installed with the business process integration feature provided by portal. This installed configuration does not support federation into a managed cell.
- If you require business process support and need to federate the portal server, reinstall portal according to the instructions for installing into a
managed node, these steps are described in "Horizontal Cluster (includes
portal) - Installation"
- If federate the portal server but do not require business process support, we can install portal on an unmanaged node and choose not
to install business process support during installation. This installed configuration
allows for subsequent federation into a managed cell.
- Add the portal application server on the secondary node to the deployment manager cell by entering the addNode command. Do not include the -includeapps parameter.
Before running the addNode.bat command ensure the dmgr has been started
To add a node to the deployment manager cell, issue the addNode.bat command (on one line) on the command line of the node to be added:
WAS_ROOT\bin\addNode.bat dmgr_host dmgr_port -username admin_user_id -password admin_password >addnode.log
where: deployment_manager_host is the dmgr host name.
deployment_manager_port is the dmgr SOAP connector-address. The default value is 8879.
Admin_user_id is the WebSphere Application Server administrative user name. This parameter is optional but is required if security is enabled.
admin_password is the administrative user password. This parameter is optional but is required if security is enabled. Example:
addNode.bat dmc3.cam.itso.ibm.com 8879 –username wpsadmin -password password >addnode.log
To run the addNode command here you MUST supply username and password because security has been enabled on the dmgr.
Ensure that the clocks are synchronized to within 5 minutes of each other on node2machine and the dmgr machine. If the clocks are not within 5 minutes, the addNode process will fail.
It is important not to use the -includeapps option. The applications will not be transferred as they are already in the deployment manager's master configuration. Applications stored in the master configuration are still only assigned to the primary node. In order to share them with a secondary node, the node must be added to the cluster.
- Update the PrimaryNode property value on the secondary node to indicate its status. Use a text editor to open the wpconfig.properties file.
portal_server_root/config/wpconfig.properties
Ensure that the following properties are uncommented and specify appropriate values:
PrimaryNode property: Because this node is a secondary node, set this property to false.
- Update the deployment manager configuration for the new portal.
The post-portal-node-federation-configuration task requires complete and accurate database information in the wpconfig_dbdomain.properties file. Before running the task, ensure that the database properties are correct and that password values are specified.
- Run the post-portal-node-federation-configuration task.
Run the following command from the portal_server_root/config directory:
portalconfig.bat post-portal-node-federation-configuration -DWasPassword=password > postportalfederation.log
- Check the log file if the task ended successful, if yes proceed with the next step.
- Restart the node agent on the portal node.
- Open the administrative console on the dmgr, and click
System Administration | node Agents
- Select the check box beside the node agent that you want to restart, and click Restart
- Update the PrimaryNode property value on the secondary node to indicate its status.
Edit the wpconfig.properties to match the Settings for the portal Cluster Definition
| Field
| Example Value
| Comments
|
| WasPassword
| wpsadmin
| You must add the PortalAdminPwd and the WasPassword values to the wpconfig.properties file and all the database password values to the wpconfig_dbdomain.propert ies file or supply these values on the command line. This is because of what was described before in that the ConfigWizard replaces all the password values with the string, "ReplaceWithYourPassword " for security reasons
|
| PortalAdminPwd
| wpsadmin
|
|
| PrimaryNode
| false
| Verify that value for this node is false, because is not the primary node
|
| Clustername
| PortalCluster
| ClusterName should be the name of the cluster created when running the cluster-setup task on the primary node, node1
|
| ServerName
| WebSphere_Portal_2
| ServerName is REQUIRED to be changed from WebSphere_Portal. The cluster-setup task is written to automatically remove the WebSphere_Portal server during the action-remove-appserver-w ps task. |
Important: The cluster member name you specify for this property must be unique within the cell and cannot have the same value as the ServerName property on the primary node or other secondary nodes.
- Check that dmgr and node are started with the command:
cd D:\IBM\WebSphere\AppServer\bin\
serverstatus -all -username <wasadmin>
-password <waspwd>
- Start WebSphere_Portal when not already started, with the command:
D:\IBM\WebSphere\AppServer\bin\startserver WebSphere_Portal
Note that portal 5.1.x used the connect-database task to connect node2 to the database. In Portal 6, the connect-database task has been incorporated into the cluster-setup task.
The cluster-setup task requires complete and accurate database information in the wpconfig_dbdomain.properties and wpconfig_dbtype.properties files. Before running the task, ensure that the database properties are correct and that password values are specified
- Create the cluster definition...
wp_root/config/portalconfig.bat cluster-setup >cluster-setup.log
Check the log file if the Build was successful.
- Restart dmgr, nodeagent and WebSphere_Portal_2 to load the new configuration
- To check if the Second node is a Member of the cluster definition was successful,
Login to the Admin console of the dmgr and browse to Server | Clusters | ClusterMembers
A entry with the "WebSphere_Portal_2" should be available
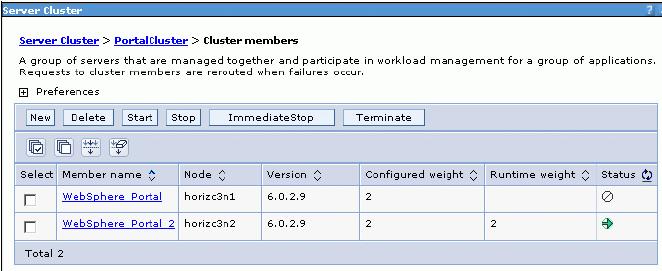
Because WebSphere Application Server typically creates unique ports for all servers, the default port number for the portal application server is changed when the node is added to the cluster. To determine the port number after creating the new cluster member, complete the following steps in the deployment manager administrative console.
- Click...
Servers > Application Servers
- Click the application server name for the secondary node.
- Click Ports under the Communications settings, and verify the port number listed for the WC_defaulthost port.
Configure portal nodes and the dmgr for LDAP security with realm support
Configure security as described in section Configure portal nodes and the dmgr for LDAP security with realm support:
Summary of the Steps that are covered in the section Configure portal nodes and the dmgr for LDAP security with realm support:
- Disable Security on the primary node
- Enable Security on the primary node
- Enable JCR Security on the Secondary node and Subsequent nodes
Configure portal to use remote Web Servers
Configure a remote Web Server as described in section Configure portal to use a remote Web server
Summary of the Steps that are covered in the section Configure portal to use a remote Web:
server"
:
- Install WebServers
- Install WebSphere Application Server plugin on the WebServers
- Add the WebServers to the dmgr cell
- Generate the WebSphere Plugin
At ths point the cluster setup is finished. If you want to add an additional node to the cluster proceed with the steps in section Adding a Horizontal node to a Cluster (with portal.
Optional Steps after Cluster Creation
- Configure a WebSphere Edge Server or an IP Sprayer for loadbalancing the system (This is not described in this book)
- Configure the portal Cluster to us a second LDAP Directory as described in
Chapter 4, "Multiple LDAP Directory Support".
- Configure the portal Cluster to share the Database with a second Clustered Enviroment as described in
Chapter 5, "Database Domains"
.
Adding a Horizontal node to a Cluster (with portal)
This section provides instruction on adding an additional node to an already defined cluster a
- Install db2 client on the node
- Open a DB2 command line processor on the node (Start |Programs |IBM DB2 |Command LineTools |Command Line Processor).
- Enter the following command:
db2 => catalog tcpip node nodename remote fullyqualifiedDB2servername server port
Where nodename is the name of eight characters or fewer that you assign to the server, and port is the connection port used by DB2.
For example:
db2 => catalog tcpip node dbdom7 remote dbdom7.cam.itso.ibm.com server 50000
In this example, dbdom7 is designated as the node name (to be used in the rest of the commands) and 50000 is the connection port (the default for TCP/IP connections). The client always uses the same connection port as the DB2 server. We can verify the connection port for the DB2 server by opening a command prompt and issuing the netstat -an command. You should see a port in the 50000 range.
- Enter the following command (as appropriate) to catalog the databases that are hosted on the DB2 server.
db2 => catalog database databasename at node nodename
For example:
db2 => catalog database wpsdb at node dbdom7
If you incorrectly catalog a database, we can uncatalog it...
db2 =>uncatalog database database_name
- When you have verified that all of the databases have been cataloged correctly, test the connectivity to the database by entering the command:
db2 => connect to databasename user DB2administratorname using password
For example:
db2 => connect to wpsdb user db2admin using password
- Update the CLI Driver Settings on the additional nodes
- Install WAS, and portal
- Create of the process Server profile
- After the profile is created you will federate the node using the addNode command
- Installation of the necessary fixes for portal
- Install portal onto the managed node, node2 and subsequent nodes"
- Stop WebSphere_Portal server on the new node and ensure that the nodeagent is running
- Update the wp_root/config/wpconfig.properties file on each additional node in the cluster with the same LDAP user registry information you used to configure the primary node.
Update the wpconfig.properties by moving the LDAP helper file from node1 to additional nodes and running the following command:
wp_root/config/portalconfig -DparentProperties="<full_path_to_helper_file>" -DSaveParentProperties=true
- Complete the security configuration by logging on to each secondary node and running...
Portal_admin_id is the fully qualified distinguished name (DN) of the portal administrator. For example...
uid=wpsadmin,cn=users,ou=firebrigade,dc=IBM,dc=com
- Restart the nodeagent on the additonal nodes.
- Edit the wpconfig.properties to match the Settings for the portal Cluster
Definition
Table 3-8 Clusterproperties in wpconfig.properties
| Field
| Example Value
| Comments
|
| WasPassword
| wpsadmin
| You must add the PortalAdminPwd and the WasPassword values to the wpconfig.properties file and all the database password values to the wpconfig_dbdomain.propert ies file or supply these values on the command line. This is because of what was described before in that the ConfigWizard replaces all the password values with the string, "ReplaceWithYourPassword " for security reasons
|
| PortalAdminPwd
| wpsadmin
|
|
| PrimaryNode
| false
| Verify that value for this node is false, because is not the primary node
|
| Clustername
| PortalCluster
| ClusterName should be the name of the cluster created when running the cluster-setup task on the primary node, node1
|
| ServerName
| WebSphere_Portal_3
| ServerName is REQUIRED to be changed from WebSphere_Portal. The cluster-setup task is written to automatically remove the WebSphere_Portal server during the action-remove-appserver-w ps task. |
- Make a backup of the original wpconfig_dbdomain.properties and wpconfig_dbtype.properties files on node2 and subsequent nodes
- Copy the wpconfig_dbdomain.properties and wpconfig_dbtype.properties from node1 to additonal nodes to ensure the same database configuration. Check if the Values meet the node , special in the wpconifg_dbtype.properties file value in field db2.DbLibary
- Again, in portal v6 the connect-database task has been integrated into the cluster-setup task. So, now because of this run the validate database tasks. If the passwords are defined in the wpconfig_dbdomain.properties file, the –D options below are not required at the command line.
portalconfig.bat validate-database-driver portalconfig.bat validate-database-connection-wps -DDbPassword=password portalconfig.bat validate-database-connection-jcr -DJcrDbPassword=password portalconfig.bat validate-database-connection-feedback -DFeedbackDbPassword=password portalconfig.bat validate-database-connection-likeminds -DLikemindsDbPassword=password portalconfig.bat validate-database-connection-wmm -DWmmDbPassword=password
- Check that dmgr and node are started with the command:
cd D:\IBM\WebSphere\AppServer\bin\
serverstatus -all -username <wasadmin> -password <waspwd>
- Start WebSphere_Portal when not already started, with the command:
D:\IBM\WebSphere\AppServer\bin\startserver WebSphere_Portal
- Create the cluster definition...
wp_root/config/portalconfig.bat cluster-setup >cluster-setup.log
Check the log file if the Build was successful.
- Restart dmgr, nodeagent and WebSphere_Portal to load the new configuration
- To check if the cluster definition and Creation was successful, Login to the Admin
console of the dmgr and browse toServer | Clusters | "PortalCluster" | ClusterMemberAn entry for "WebSphere_Portal_3" should be available.
- Because WebSphere Application Server typically creates unique ports for all servers, the default port number for the portal application server is changed when the node is added to the cluster. To determine the port number after creating the new cluster member, complete the following steps in the deployment manager administrative console.
Click...
Servers > Application Servers
Click the application server name for the secondary node. Click Ports under the Communications settings, and verify the port number listed for the
WC_defaulthost port.
- Regenerate the Web server plug-in as described in section Configure portal to use remote Web Servers" .
Regenerate the Web server plug-in using the deployment manager administrative console.
If you are using a remote Web server, copy the updated plug-in configuration file (plugin-cfg.xml) to the Web server's plug-in configuration directory. Stop and start the Web server. Restart all nodes in the cluster.
Now you sucessfully added an additional node to the cluster definition.
Adding a Horizontal node to a Cluster w/o portal)
This section provides instruction on adding an additional node to an already defined cluster
- Install db2 client on the node
- Open a DB2 command line processor on the node (Start |Programs |IBM DB2 |Command LineTools |Command Line Processor).
- Enter the following command:
db2 => catalog tcpip node nodename remote fullyqualifiedDB2servername server port
Where nodename is the name of eight characters or fewer that you assign to the server, and port is the connection port used by DB2.
For example:
db2 => catalog tcpip node dbdom7 remote dbdom7.cam.itso.ibm.com server 50000
In this example, dbdom7 is designated as the node name (to be used in the rest of the commands) and 50000 is the connection port (the default for TCP/IP connections). The client always uses the same connection port as the DB2 server. We can verify the connection port for the DB2 server by opening a command prompt and issuing the netstat -an command. You should see a port in the 50000 range.
- Enter the following command (as appropriate) to catalog the databases that are hosted on the DB2 server.
db2 => catalog database databasename at node nodename
For example:
db2 => catalog database wpsdb at node dbdom7
If you incorrectly catalog a database, we can uncatalog it...
db2 =>uncatalog database database_name
- When you have verified that all of the databases have been cataloged correctly, test the connectivity to the database by entering the command:
db2 => connect to databasename user DB2administratorname using password
For example:
db2 => connect to wpsdb user db2admin using password
- Update the CLI Driver Settings on the additional nodes
- Locate the following file:
db2home/sqllib/db2cli.ini
- Edit the file by adding the following to the end of the file:
* For Fix Pack 11:[COMMON]DYNAMIC=1
An empty line is required after the dynamic=1 at the end of the file.
* For Fix Pack 12:
[COMMON]ReturnAliases=0
An empty line is required after the ReturnAliases=0 at the end of the file.
- Install portal using the process described in section Installation of portal on node2 and subsequent nodes
-
Connect the additional node to the Database
-
Add the node to the Depolyment Manager Cell
- Stop WebSphere_Portal server on the new node and ensure that the nodeagent is running
- Update...
wp_root/config/wpconfig.properties file
...on each additional node in the cluster with the same LDAP user registry information you used to configure the primary node.
Update the wpconfig.properties by moving the LDAP helper file from node1 to additional nodes and running the following command:
wp_root/config/portalconfig -DparentProperties="<full_path_to_helper_file>" -DSaveParentProperties=true
- Complete the security configuration by logging on to each secondary node and running...
...where portal_admin_id is the fully qualified distinguished name (DN) of the portal administrator, for example...
uid=wpsadmin,cn=users,ou=firebrigade,dc=IBM,dc=com
- Restart the nodeagent on the additonal nodes.
- Update the PrimaryNode property value on the additional node to indicate its status. Edit the wpconfig.properties to match the Settings for the portal Cluster
Definition
Table 3-9 Clusterproperties in wpconfig.properties
| Field
| Example Value
| Comments
|
| WasPassword
| wpsadmin
| You must add the PortalAdminPwd and the WasPassword values to the wpconfig.properties file and all the database password values to the wpconfig_dbdomain.propert ies file or supply these values on the command line. This is because of what was described before in that the ConfigWizard replaces all the password values with the string, "ReplaceWithYourPassword " for security reasons
|
| PortalAdminPwd
| wpsadmin
|
|
| Field
| Example Value
| Comments
|
| PrimaryNode
| false
| Verify that value for this node is false, because is not the primary node
|
| Clustername
| PortalCluster
| ClusterName should be the name of the cluster created when running the cluster-setup task on the primary node, node1
|
| ServerName
| WebSphere_Portal_3
| ServerName is REQUIRED to be changed from WebSphere_Portal. The cluster-setup task is written to automatically remove the WebSphere_Portal server during the action-remove-appserver-w ps task. |
The cluster member name you specify for this property must be unique within the cell and cannot have the same value as the ServerName property on the primary node or other secondary nodes.
- Check that dmgr and node are started with the command:
cd D:\IBM\WebSphere\AppServer\bin\
serverstatus -all -username <wasadmin> -password <waspwd>
- Start WebSphere_Portal when not already started, with the command:
D:\IBM\WebSphere\AppServer\bin\startserver WebSphere_Portal
Important: The cluster-setup task requires complete and accurate database information in the wpconfig_dbdomain.properties and wpconfig_dbtype.properties files. Before running the task, ensure that the database properties are correct and that password values are specified
e. Create the cluster definition...
wp_root/config/portalconfig.bat cluster-setup >cluster-setup.log
Check the log file if the Build was successful.
- Restart dmgr, nodeagent and WebSphere_Portal_2 to load the new configuration
- To check if the Second node is a Member of the cluster definition was sucessful,
Login to the Admin console of the dmgr and browse toServer | Clusters | ClusterMembersA entry with the "WebSphere_Portal_3" should be available
- Because WebSphere Application Server typically creates unique ports for all servers, the default port number for the portal application server is changed when the node is added to the cluster. To determine the port number after creating the new cluster member, complete the following steps in the deployment manager administrative console.
Click...
Servers | Application Servers
Click the application server name for the secondary node. Click Ports under the Communications settings, and verify the port number listed for the WC_defaulthost port.
- Regenerate the Web server plug-in as described in section Configure portal to use a remote Web server. Regenerate the Web server plug-in using the deployment manager administrative console.
If you are using a remote Web server, copy the updated plug-in configuration file (plugin-cfg.xml) to the Web server's plug-in configuration directory. Stop and start the Web server. Restart all nodes in the cluster.
Now you sucessfully added an additional node to the cluster definition.
Vertical Cluster (includes portal) - Installation
With a vertical cluster...
- The members of cluster located on a single node.
- Install portal once. Create clones using Dmgr admin.
- Clones share portal installation files, have separate WAS configuration
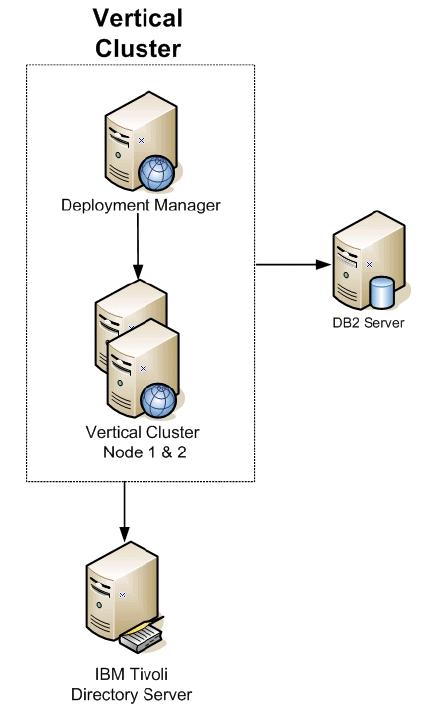
In the deployment:
| dmgr1
| This machine hosts as the WAS dmgr.
|
VerC1N1
VerC1N2
| These machines host the portal instances. Both machines are clustered for load balancing and failover.
|
| DBDOM7
| This machine hosts the RDBMS server for the portal database for all nodes.
|
| DBIDS
| This machine hosts the LDAP server (IBM TDS).
|
The process of creating a vertical cluster is virtually identical to the step previously outlined for creating a horizontal cluster. As with the horizontal cluster setup you do the following initial steps
- "Installation and upgrade WAS and portal on the dmgr (dmgr)."
- "Installation of WAS and portal on the primary cluster node, node1"
- "Prepare the dmgr and node1 for the portal install"
- "Install portal onto the managed node, node1"
- "Configure primary node1 to an external database"
- "Creation of the cluster definition"
- "Configure portal nodes and the dmgr for LDAP security with realm support"
- "Configure portal to use a remote Web server"
- "Optional Steps after Cluster Creation:"
The only difference being the process for creating a vertical cluster member on the primary node which is described below.
Adding a vertical cluster member on the primary node
Add vertical cluster members to share the workload demands of the cluster across multiple members running on the same physical machine.
- Access the administrative console on the deployment manager by opening a browser and entering...
http://DM01:9060/ibm/console
...in the address bar, where DM01 is the deployment manager node or host name. The port number might differ based on the installation.
- Click...
Servers | Clusters | cluster_name | Cluster members | New
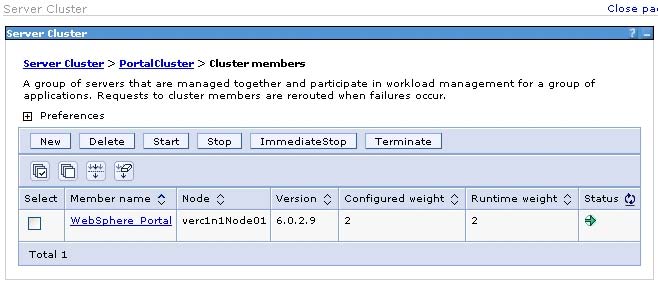
- Define the name of cluster member. Do not use spaces in the cluster member name.
- Select an existing node where portal is installed.
- Check the box Generate Unique HTTP Ports.
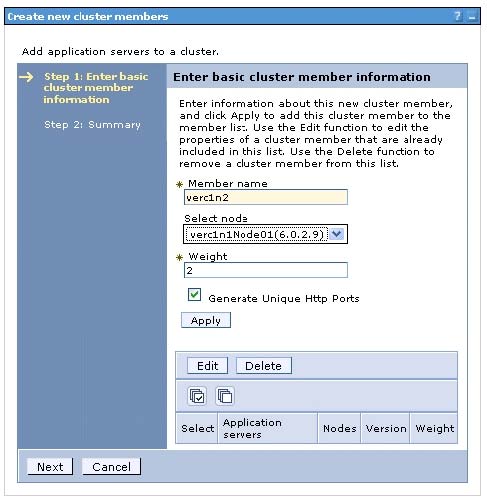
- Click Apply and then click Next to view the summary.:
If you are not using an external Web server in the clustered environment, update the virtual host entries for the new port created when adding a cluster member. We can do this by updating the default_host virtual host in the administrative console and adding a new alias entry for the port number (use an "*" wildcard character for the host name). Refer to the WebSphere Application Server information center for more information

- Click Finish, and save the changes.
- The new cluster topology can be viewed from the Servers | Cluster Topology view.
- The Servers | Application Servers view will list the new server cluster members.
- Start the server
- Save the changes and resynchronize the nodes.
- In the administrative console for the deployment manager, click Save on the task bar, and save the administrative configuration.
- Select System Administration | nodes, select the node from the list, and click Full Resynchronize
- Check the port Number for the Vertical Cluster Member and Create a host alias for it
- Navigate to...
Servers | Application Servers | VerticalClusterMember | Ports
...and check the port number for WC_defaulthost
- Create a host alias for port that is used by the Vertical Cluster Member that you checked in the previous step, in the Enviroment it is 9081.
- Navigate to...
Environment | Virtual Hosts | Default Host | Host Aliases | New
- In the Hostname field provide a * and in the port field the port that is used by the Vertical Cluster Member
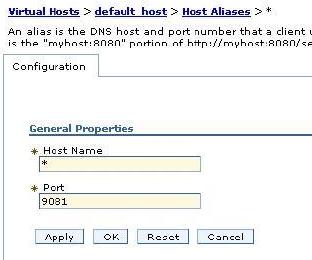
- The host aliases should now look like the Figure below
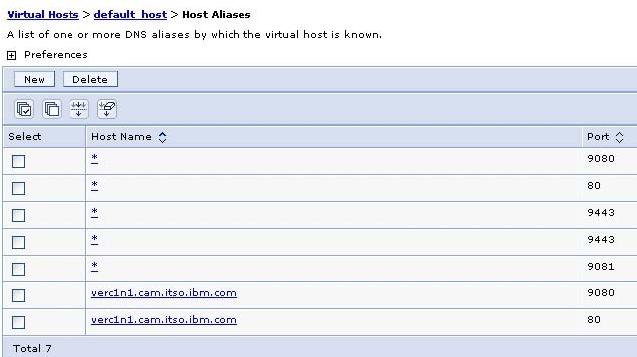
- Log in to the administrative console for WebSphere Application Server. If you are using the Web server in a clustered environment, open the administrative console for the deployment manager machine.
- Select...
Environment | WebSphere Variables
- Narrow the scope of the listed variables
- Click Browse nodes in the Scope field.
- Select the node containing the application server.
- Click Browse Servers.
- Select the application server for portal (for example,WebSphere_Portal) and click OK.
- Click Apply to update the list of variables.
- Update the value of the WCM_HOST with the fully qualified host name of the Web server.
- Update the value of the WCM_PORT with the port number used to access the Web server.
- Save the changes and resynchronize the nodes.
- In the administrative console for the deployment manager, click Save on the task bar, and save the administrative configuration.
- Select...
System Administration | nodes nodename | Full Resynchronize
- Restart the portal server.
- Regenerate the Web server plug-in.
- Regenerate the Web server plug-in using the deployment manager administrative console.
- If you are using a remote Web server, copy the updated plug-in configuration file (plugin-cfg.xml) to the Web server's plug-in configuration directory.
- Stop and start the Web server
Vertical Cluster w/o portal) - Installation
In the deployment:
| dmgr1
| This machine hosts as the deployment manager.
|
| VerC1N1 and VerC1N2
| nodes 1 and 2 hosted the business logic. After completion of the installation, both machines were clustered for load balancing and failover.
|
| DBDOM7
| This machine hosts the RDBMS server used by portal.
|
DBIDS represents the LDAP server (IBM Tivoli Directory Server V6), which hosted all directory information used by portal
The process of creating a vertical cluster w/o portal) is virtually identical to the step previously outlined for creating a horizontal cluster without Process Server. As with the horizontal cluster setup you do the following initial steps
- Installation WAS on the dmgr
- Installation of portal on the primary cluster node, node1
- Configure primary node1 to an external database
- Create cluster definition
- Configure portal nodes and the dmgr for LDAP security with realm support
- Configure portal to use remote Web Servers
- Optional Steps after cluster creation
The only difference being the process for creating a vertical cluster member on the primary node which is described below.
Adding a vertical cluster member on the primary node
Add vertical cluster members to share the workload demands of the cluster across multiple members running on the same physical machine.
- Access the administrative console on the deployment manager by opening a browser and entering http://DM01:9060/ibm/console in the address bar, where DM01 is the deployment manager node or host name. The port number might differ based on the installation.
- Click...
Servers | Clusters | clustername | Cluster members | New

- Define the name of cluster member. Do not use spaces in the cluster member name.
- Select an existing node where portal is installed.
- Check the box Generate Unique HTTP Ports.
- Click Apply and then click Next to view the summary.:

If you are not using an external Web server in the clustered environment, update the virtual host entries for the new port created when adding a cluster member. We can do this by updating the default_host virtual host in the administrative console and adding a new alias entry for the port number (use an "*" wildcard character for the host name).

- Click Finish, and save the changes.
- The new cluster topology can be viewed from the Servers | Cluster Topology view.
- The Servers | Application Servers view will list the new server cluster members.
- Start the server
- Save the changes and resynchronize the nodes.
- In the administrative console for the deployment manager, click Save on the task bar, and save the administrative configuration.
- Select...
System Administration | nodes | nodename | Full Resynchronize
- Check the port Number for the Vertical Cluster Member and Create a host alias for it
- Navigate to...
Servers | Application Servers | VerticalClusterMember | Ports
Check the port Number for WC_defaulthost
- Create a host alias for port that is used by the Vertical Cluster Member that you checked in the previous step, in the Enviroment it is 9081.
- Navigate to...
Environment | Virtual Hosts | Default Host | Host Aliases | New
- In the Hostname field provide a * and in the port field the port that is used by the
Vertical Cluster Member.


- Log in to the administrative console for WebSphere Application Server. If you are using the Web server in a clustered environment, open the administrative console for the deployment manager machine.
- Select Environment > WebSphere Variables.
- Narrow the scope of the listed variables
- Click Browse nodes in the Scope field.
- Select the node containing the application server.
- Click Browse Servers.
- Select the application server for portal. For example,...
WebSphere_Portal
...and click OK.
- Click Apply to update the list of variables.
- Update the value of the WCM_HOST with the fully qualified host name of the Web server.
- Update the value of the WCM_PORT with the port number used to access the Web server.
- Save the changes and resynchronize the nodes.
- In the administrative console for the deployment manager, click Save on the task bar, and save the administrative configuration.
- Select...
System Administration | nodes nodename | Full Resynchronize
- Restart the portal server.
- Regenerate the Web server plug-in.
- Regenerate the Web server plug-in using the deployment manager administrative console.
- If you are using a remote Web server, copy the updated plug-in configuration file (plugin-cfg.xml) to the Web server's plug-in configuration directory.
Stop and start the Web server
|


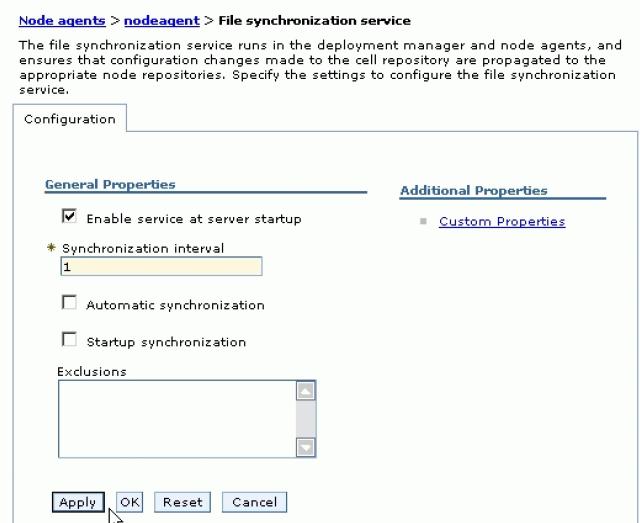


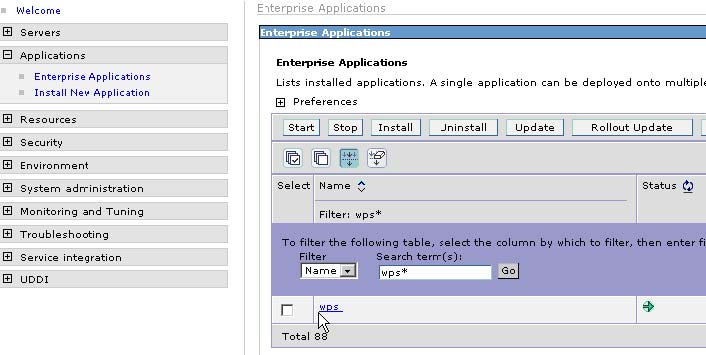
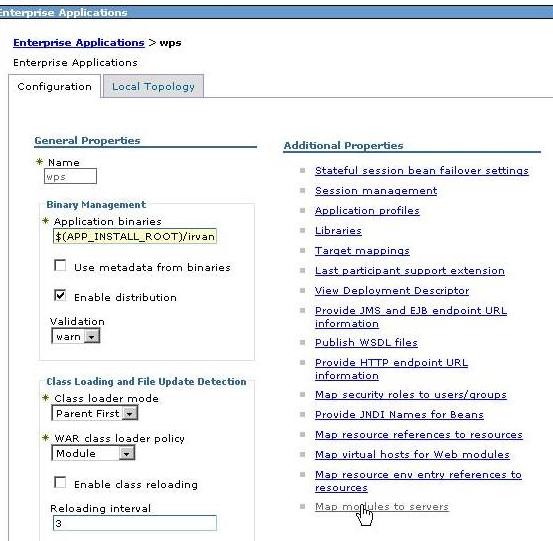


 <
<


