Tutorials > Payments > Develop a payment plug-in > Payment Service Provider Simulator
Test the Payment Service Provider Simulator
- Prerequisites
- Import the Payment Service Provider Simulator EAR file into the WebSphere Commerce Developer workspace
- Set up the Payment Service Provider Simulator database
- Configure the virtual host and transport chain of the Payment Service Provider Simulator Web service
- Add the Payment Service Provider Simulator project to the WebSphere Commerce Test Server
To verify that the Payment Service Provider Simulator is deployed successfully:
Procedure
- Open WebSphere Commerce Developer.
- Open the Java EE perspective.
- In the Servers view:
- Right-click WebSphere Commerce Test Server and select Start from the pop-up menu, or Restart > Start if the server is already started.
- Wait for the status of the server to change to Started.
- Right-click WebSphere Commerce Test Server and select Start from the pop-up menu, or Restart > Start if the server is already started.
- Select Window > Preferences.
- In the left navigator list, select Workbench > Capabilities.
- In the Capabilities list, select the Web Service Developer option.
- Click OK.
- In the Enterprise Explorer view, right-click Web Services >
Services > PSPSimService and select Test with Web Services Explorer from the pop-up menu.
- In the Web Services Explorer:
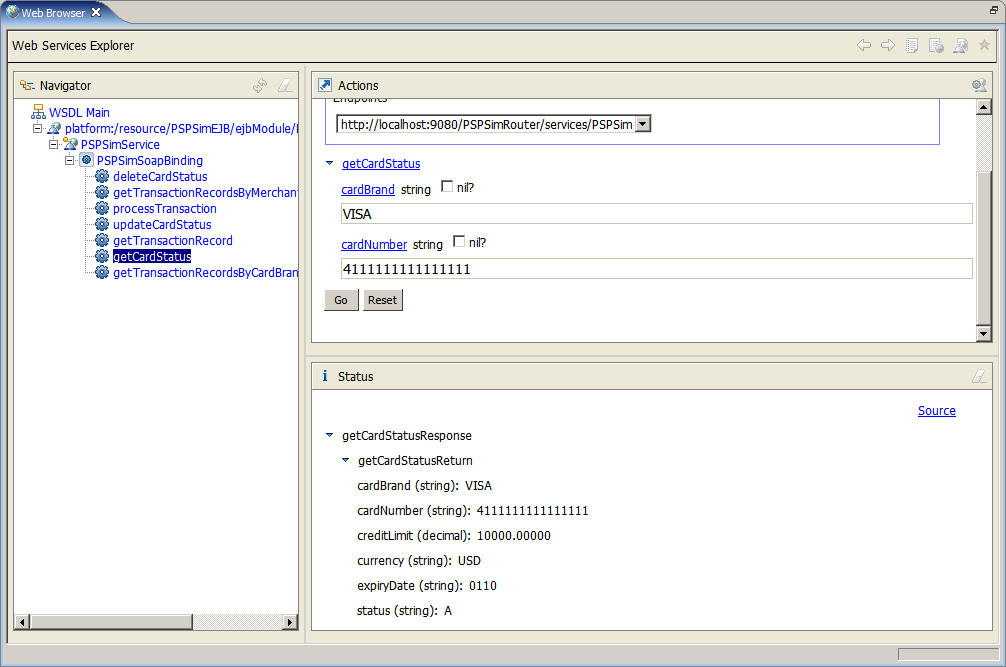
- In the Operations section, click getCardStatus.
- In the cardBrand field, type VISA.
- In the cardNumber field, type 4111111111111111.
- Click Go. If the Payment Service Provider Simulator is deployed successfully, you should see the following:
- In the Operations section, click getCardStatus.
- Close the Web Services Explorer.
Previous topic:
Add the Payment Service Provider Simulator project to the WebSphere Commerce Test Server
Next topic:
Generate the Payment Service Provider Simulator Web service client project