Tutorials > Payments > Develop a payment plug-in > Payment Service Provider Simulator
Set up the Payment Service Provider Simulator database
- Prerequisites
- Import the Payment Service Provider Simulator EAR file into the WebSphere Commerce Developer workspace
Procedure
- Download the ZIP file which contains the Payment Service Provider database.
- Unzip the file into a directory of the choice, for example C:\.
- Confirm that a directory named PSPSIMDB is created under the directory you choose in step 2.
- Open WebSphere Commerce Developer.
- Select the Java EE perspective.
- In the Enterprise Explorer view, double-click Enterprise Applications >
PSPSim > Deployment Descriptor: PSPSim.
- In the Application Deployment Descriptor editor:
- Select the Deployment tab.
- In the JDBC provide list list, select Derby JDBC Provider.
- In the Data source defined in the JDBC provider selected above list, select PSPSimDS.
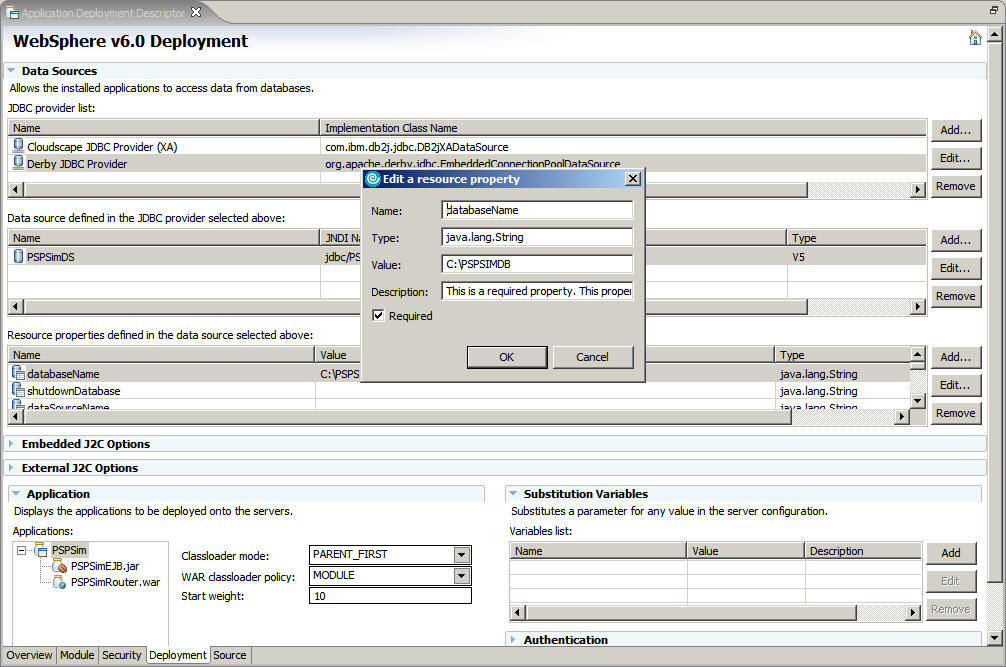
- In the Resource properties defined in the data source selected above list, select databaseName and click Edit.
- In the Value field, type the full path of the directory in step 3, for example C:\PSPSIMDB:
- Select the Deployment tab.
- Close the Application Deployment Descriptor editor and save the changes.
Previous topic:
Import the Payment Service Provider Simulator EAR file into the WebSphere Commerce Developer workspace
Next topic:
Configure the virtual host and transport chain of the Payment Service Provider Simulator Web service