Tutorial for a basic installation of MobileFirst Server
Tasks
- Install a database management system (DBMS)...
- Run the installer and follow the instructions.
- For Windows, when asked whether to install the IBM Secure Shell Server for Windows, say Yes. We must have a Secure Shell server installed and running so the MobileFirst tools can create the required databases.
- On Windows, the IBM Secure Shell Server for Windows or the Cygwin openssh package.
- On UNIX, the sshd daemon
- For DB2 set username and password for the DB2 administrator role
For MySQL, install MySQL on the computer and set username and password for the administrator. For some installations, when the administrator is root, there is no password. Proactively set if null, following instructions from the MySQL documentation.
- For Oracle, install the Oracle database on the computer. Install an ssh shell on the computer. On Windows, install cygwin and the openssh package. Start the ssh server. On Windows, we need administrator rights. In subsequent steps, we must have that Secure Shell server running.
- Run the installer and follow the instructions.
- Install Liberty Core
The installer for Liberty Core is provided as part of the package for MPF.
- Create a Liberty server
-
cd c:/IBM/WebSphere/Liberty/bin
./server.bat create MFPServerWe can also create server farm.
- Install MobileFirst Platform Server into the Liberty profile
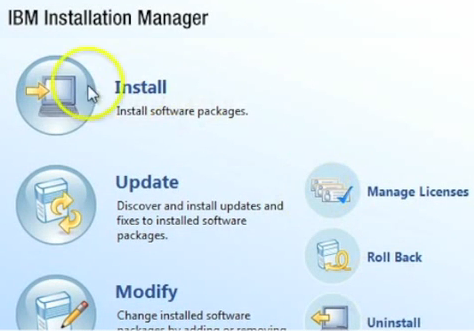
- Run IBM Installation Manager
- Add the MobileFirst Platform Server repository into Installation Manager preferences.

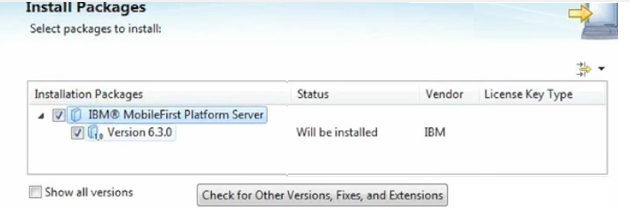
- Click Install and install MobileFirst Platform Server
- Set Installation Directory...

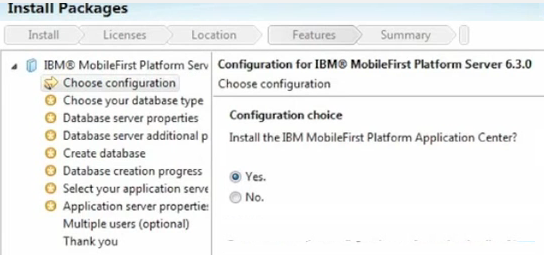
- Optional: In the "Configuration choice" panel, select to install Application Center.
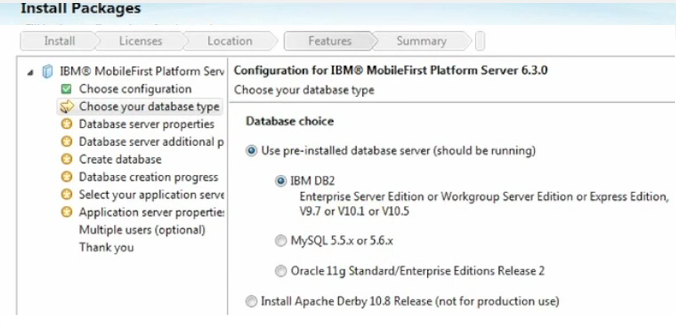
- Set a database management system for Application Center
Alternatively, we can create databases with Ant tasks.
- For IBM DB2:
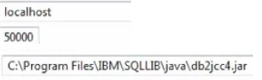
- In the Database Server Properties panel:
- Enter hostname
- Select db2jcc4.jar JAR file
-
/path/to/Java/db2jcc4.jar
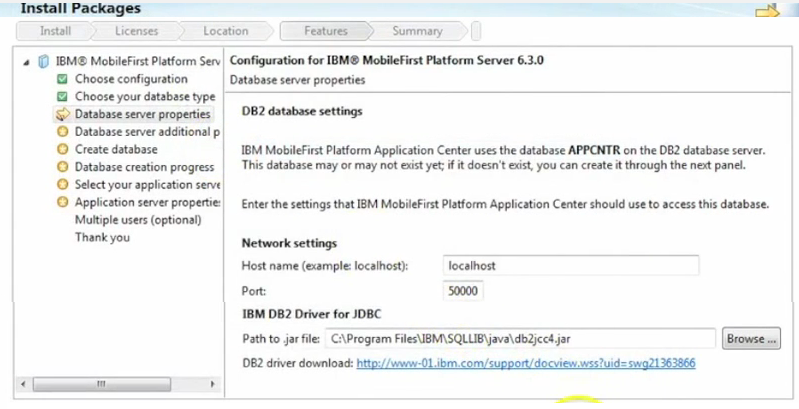
- Enter hostname
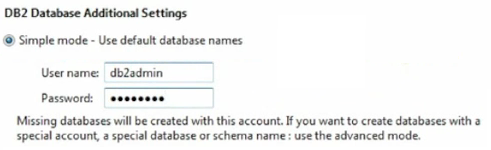
- In the Database Server additional properties panel, set Application center properties...
- Select Simple Mode.
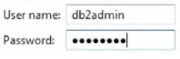
- Enter a database user and password. This user must already exist.

- In the Create database panel, enter the name and password of a user account on the database server that has DB2 privilege SYSADM or SYSCTRL.
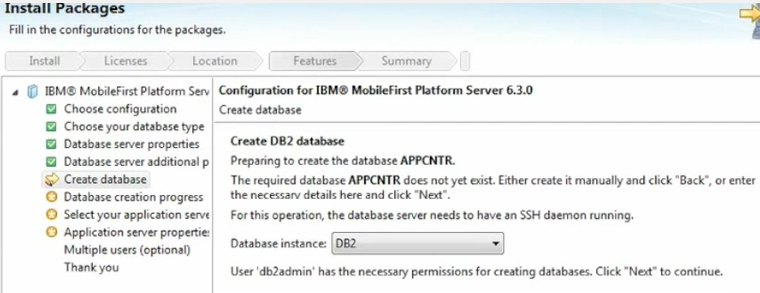
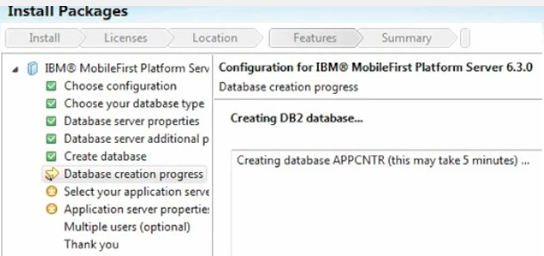
The installer creates the database.
For MySQL:
- In the Database server properties panel:
- Enter localhost as the host name.
- Enter the name of the JDBC JAR file for MySQL.
- In the Database server additional properties panel:
- Select Simple Mode.
- Enter a database user and password. This user is already created by the installer.
- In the Create database panel:
- Enter the name and password of a superuser account in the MySQL database server. The default superuser account is root.
- The installer creates the database.
For Oracle:
- In the Database server properties panel:
- Enter localhost as the host name.
- Enter the name of the JDBC JAR file for Oracle.
- In the Database server additional properties panel:
- Select Simple Mode.
- Enter a password for the user APPCENTER. This user is created by the installer.
- The installer creates a database if it does not already exist.
- In the Create database panel:
- For Administrator Login Name and Passwords, enter an administrator login name and password used to run an ssh session. The default Oracle Administrator Login name is oracle.
- If the database already exists, provide the password of the SYSTEM user used to create the user APPCENTER. If the database does not already exist, enter the passwords for the SYS and SYSTEM users created to manage the database.
- For Administrator Login Name and Passwords, enter an administrator login name and password used to run an ssh session. The default Oracle Administrator Login name is oracle.
- In the Database Server Properties panel:
- Set a database management system for Application Center
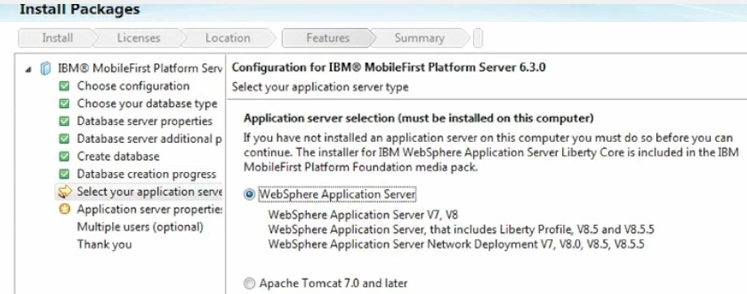
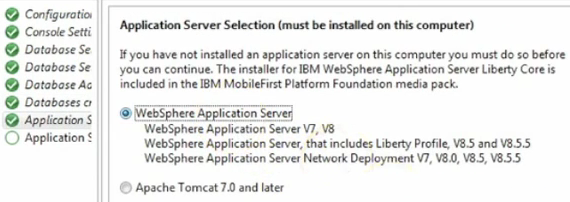
- In the Application server selection panel, select WebSphere Application Server.
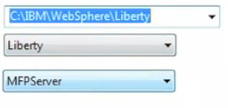
- In the Application server properties panel, select the installation directory
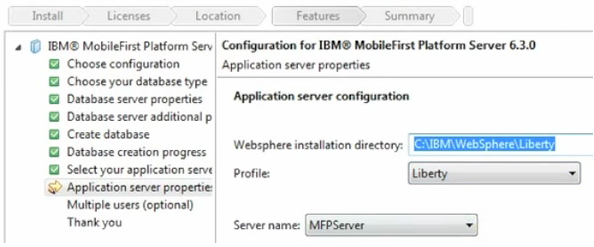
Select MFPServer as the server name.
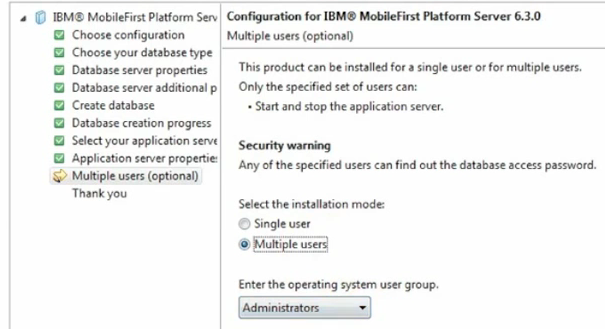
- In the Multiple users panel, select Multiple users
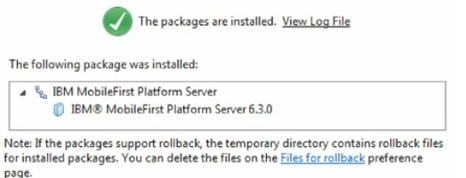
- Complete configuration
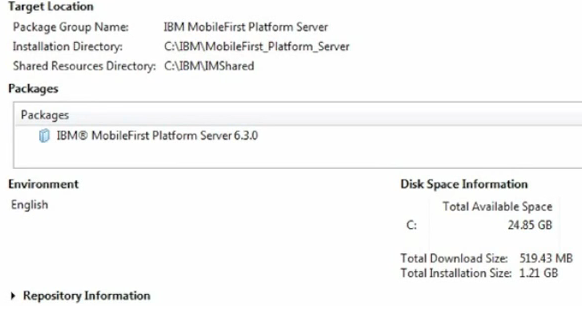
The files described in Distribution structure of MobileFirst Server are installed on your computer.
- Run IBM Installation Manager
- Install MobileFirst Server administration components
- administration services
- operations console
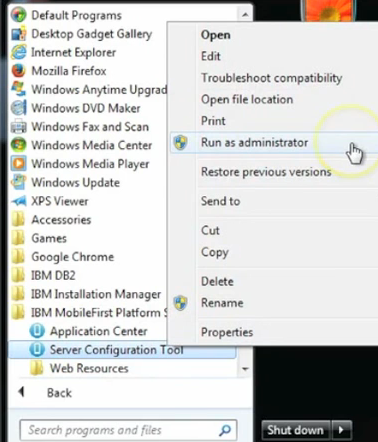
- Start the Server Configuration Tool.
- On Linux:
- Click the desktop menu...
-
IBM MobileFirst Platform Server | Server Configuration Tool
- Click the desktop menu...
- On Windows:
- Click...
-
Start menu | IBM MobileFirst Platform Server | Server Configuration Tool
- Click...
- On Mac OS X:
- In the Finder, double-click the file...
- MF_INSTALL/shortcuts/configuration-tool.sh
Restriction: MobileFirst Server is not supported for production use on Mac OS X.
MF_INSTALL is the directory where you install MobileFirst Server. mf_server is the shortcut for MobileFirst Server.
- In the Finder, double-click the file...
- On Linux:
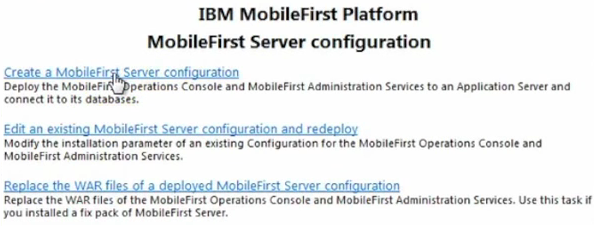
- Select Create a MobileFirst Server Configuration.
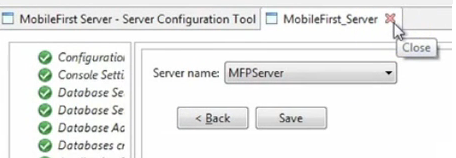
- Name the configuration MobileFirst_Server.

- Do not change the default entries in the Configuration Details panel.

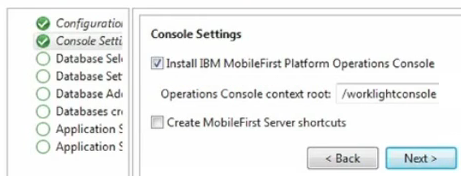
- Do not change the default entries in the Console Settings panel.
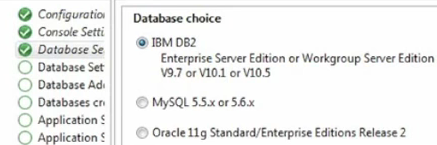
- In the Database Properties panel, select the database type.
- On the Database settings panel, enter hostname, port, and path to driver file.
- On the Additional database settings panel, enter admin user and password
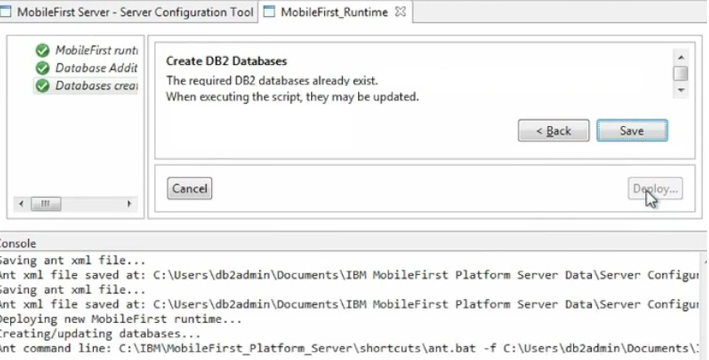
- On the Create DB2 Databases settings panel, select instance and verify credentials.
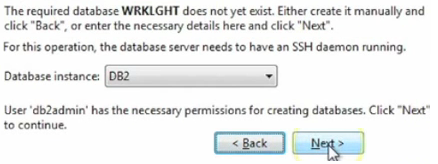
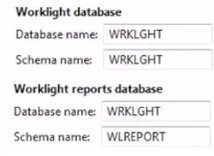
We are creating the WRKLGHT database.
- On Application Server panel, select your appserver.
- Set path to Liberty
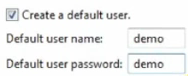
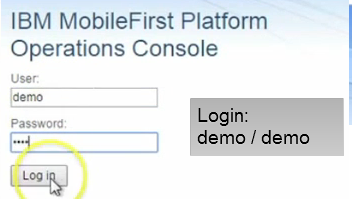
- Take note of the default password and login: demo (for both).
- When all the data is entered, click Deploy.
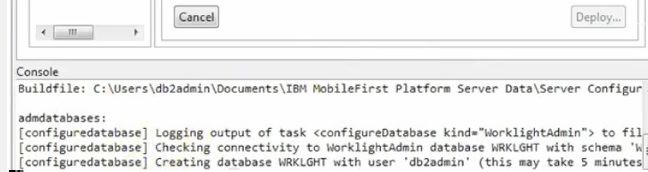
The log of the deployment operations appears in the console. The Configuration appears in the tree view. After the database operation is completed, a log file named databases appears in the tree view, under the Configuration and a log file named "install" appears in the tree view, under the Configuration.
- If successful, click Close
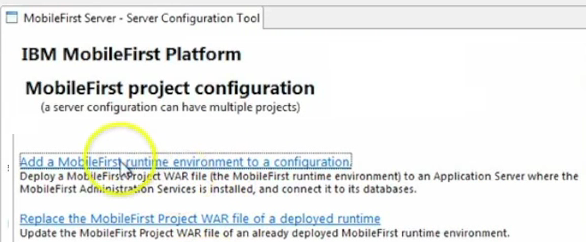
- Add a runtime environment
To add a runtime environment, we create a temporary MFP project using Studio.
- Install MobileFirst Studio on your computer.
- Start MobileFirst Studio.
- Create a MobileFirst project...
-
File | New | MobileFirst Project
- Assign the name MyFirstApp, and accept the default project template Hybrid Application.
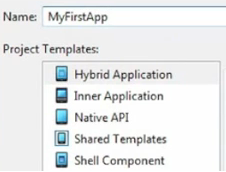
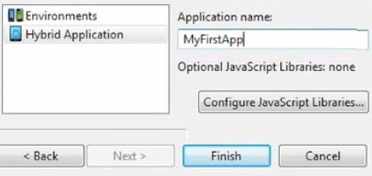
- In the next panel, name the application MyFirstApp, and then click Finish.
- The app opens...

- Install MobileFirst Studio on your computer.
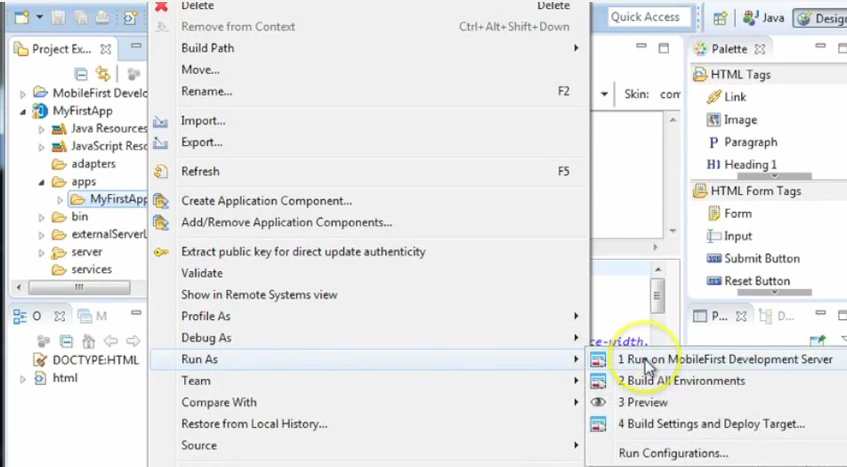
- Build the application.
- Select...
-
Project Explorer view | MyFirstApp | apps | MyFirstApp (right-click) | Run As | Run on MobileFirst Development Server
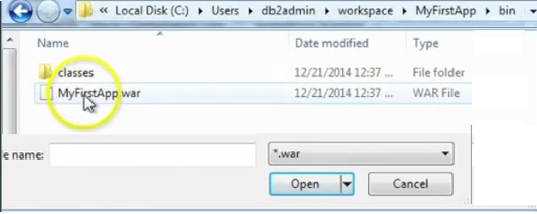
- In the Project Explorer view, open the bin folder created by this task.
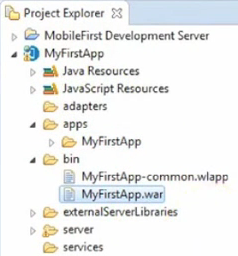
- Right-click MyFirstApp.war and click Properties.
If the path of the Eclipse workspace is...
-
C:\workspaces\WorklightStudioWorkspace
...the path to the WAR file is...
-
C:\workspaces\WorklightStudioWorkspace\MyFirstApp\bin\MyFirstApp.war
- Select...
- Deploy a MobileFirst runtime environment with the Server Configuration Tool.
This project uses the Server Configuration Tool, we can also deploy a project WAR file and configure the application server with Ant tasks.
- In the Server Configuration Tool, select...
-
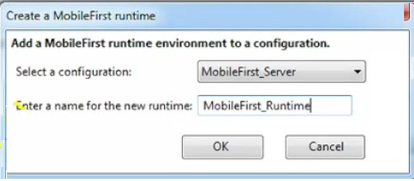
File | Add MobileFirst runtime environment
...and select configuration...
-
MobileFirst_Server
For...
-
Enter a name for the new runtime
...set...
-
MobileFirst_Runtime
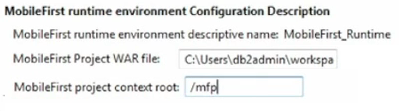
- In the MobileFirst runtime environment Configuration Description panel, load the WAR file created earlier.
- In the Database Properties panel, select DB and set properties...
- When all the data is entered, click Deploy.
- The log of the deployment operations appears in the console.
- The Runtime appears in the tree view.
- After the database operation is completed, a log file named databases appears in the tree view, under the Configuration.
- After the deployment to the application server is complete, a log file named install appears in the tree view, under the Configuration.
- In the Server Configuration Tool, select...
- Restart the Liberty server and open the operations console.
- Go to the Liberty installation directory.
- On Linux and UNIX systems:
- bin/server stop MFPServer
- On Windows systems:
- bin\server.bat stop MFPServer
- On Linux and UNIX systems:
- Restart the server:
- On Linux and UNIX systems:
- bin/server start MFPServer
- On Windows systems:
- bin\server.bat start MFPServer
- On Linux and UNIX systems:
- In the shortcut directory specified in the MobileFirst runtime environment Configuration Description panel of the Server Configuration Tool:
- On Linux and UNIX systems:
Run the mobilefirst-console.sh script.
- On Windows systems:
Double-click the file mobilefirst-console.url. (On Windows 7, this shortcut can appear as mobilefirst-console, with a file type of Internet Shortcut.)
You see the operations console. We can log in with the default user login and password created earlier (demo/demo).
- On Linux and UNIX systems:
- Go to the Liberty installation directory.
- Explore Application Center.
Application Center is now functional. The artifacts of the Application Center are deployed into the Liberty server, which now includes the features that Application Center requires, and a demonstration user account exists. The required database also exists.
- To test the Application Center, start the Liberty server.
- On UNIX and Linux systems:
- bin/server start MFPServer
- On Windows systems:
- bin\server.bat start MFPServer
- Open the Application Center using the program shortcut that the installer creates:
-
IBM MobileFirst Platform Server | Application Center
Alternatively, from browser, go to...
-
http://localhost:9080/appcenterconsole/
- Log in to the Application Center with the demonstration account credentials
-
login: demo
password: demo - Explore further using any of the following resources:
- See Configure the Application Center after installation.
- See Distribution structure of MobileFirst Server for a list of MobileFirst applications we can compile and upload to the Application Center.
These applications provide access to the Application Center for mobile devices.
- If we are considering a manual installation of Application Center, see Manual installation of Application Center.
- See Configure the Application Center after installation.
- To test the Application Center, start the Liberty server.
What to do next
- Deploy MobileFirst Server using the Server Configuration Tool.
- Deploy applications and adapters to MobileFirst Server.
- Administer MobileFirst applications.
- Deploy the project WAR file.
- Application server-side configuration parameters
- Configure a MobileFirst project in production using JNDI environment entries
- Review the options to deploy an IBM MobileFirst Platform Foundation project manually.
Parent topic: Install MobileFirst Server