Administer - Business Process Management
- Administer deployment environments
- Modify the deployment topology
- Modify deployment environment definition parameters
- Manage deployment environment resources
- Stop and restart the deployment manager
- Stop and restart a cluster member
- Administer the BPM document store
- Overview
- Get document store status
- Migrate document attachments to the BPM document store
- Manage tracing for the BPM document store
- Update the BPM document store application
- Modify configuration parameters
- Limitations in administering the BPM document store
- Administer Process Portal
- Process Portal dashboards: Authorization overview
- Enable Process Portal to run in an HTML frame
- Enable email for Process Portal notifications
- Configure IBM Connections integration for task notifications
- Configure Sametime Connect integration
- Create and maintain saved searches for Process Portal
- Reset the Process Portal start page for a user
- Set the Process Portal tab order for a user group
- Configure the My Team Performance dashboard (deprecated)
- Administer the Process Portal index
- Update the Process Portal index
- Configure the Process Portal index
- Administer Process Portal spaces
- Enable tracing for widgets in Process Portal spaces
- Review logs for messages
- Disable automatic wiring in Process Portal spaces
- Work with templates in Process Portal spaces
- Remove widgets from Process Portal spaces
- Cleanup procedures for Business Process Choreographer
- How time zones are handled in Business Process Choreographer
- Enable logging for Business Process Choreographer
- Use the administrative console to administer Business Process Choreographer
- Enable Common Base Events, the audit trail, and the task history using the administrative console
- Query and replay failed messages, using the administrative console
- Refresh people query results, using the administrative console
- Refresh people query results, using the refresh daemon
- Configure the cleanup service and cleanup jobs
- Administer the compensation service
- Use scripts to administer Business Process Choreographer
- Archive completed BPEL process and task instances
- Query and replay failed messages, using administrative scripts
- Refresh people query results, using administrative scripts
- Delete Business Process Choreographer objects
- Administer query tables
- Add support for shared work items
- Business Process Choreographer data migration script for shared work items
- Remove redundant indexes
- Administer the Process Center index
Administer deployment environments
- In the administrative console, click...
-
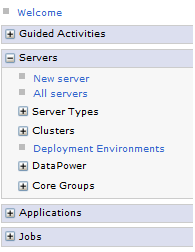
Servers > Deployment Environments
- To display the components of a deployment environment, click its name.

- For existing environments, select the check box next to the deployment environments to manage and click one of the following buttons:
Function Task Start or Stop Start and stop deployment environments - To add new deployment environments to the deployment manager, click New.
Modify the deployment topology
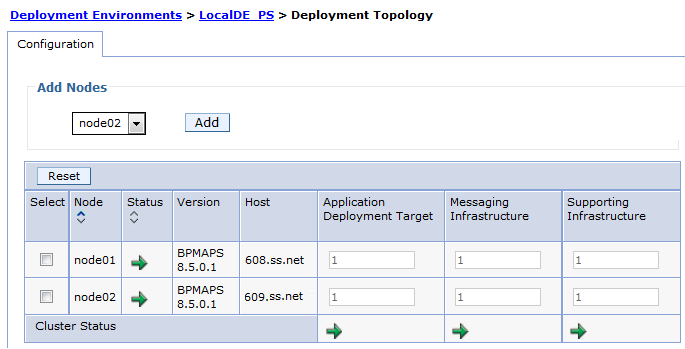
By adding nodes you can increase the overall work capacity of the system.
-
Servers | Deployment Environments | env_name | Additional Properties | Deployment Topology
Modify deployment environment definition parameters
- Identify the configuration type and the corresponding attributes.
AdminConfig selects default parameters based on the common database (CommonDB).
- Query an existing configuration object to obtain a configuration ID to use.
- Modify the existing configuration object or create a new one.
- Save the configuration.
-
$AdminConfig Save
Manage deployment environment resources
From the dmgr console, click...
- Servers | Deployment Environments
Start or stop nodes...
The Deployment Environment Configuration page lists:
- Name
- Pattern
- Description
- Status
- Functions
- Links

| Deployment Topology | Change the configuration of a deployment environment based on IBM-supplied patterns. |
| Deferred Configuration | Determine any manual steps needed to complete the configuration of this deployment environment.
|
| Related Items | Authentication Aliases |

Stop and restart the deployment manager
-
cd DMGR_PROFILE/bin
./stopManager -username wasadmin -password password
./startManager
Stop and restart a cluster member
Before stopping, prevent new work from entering the cluster member. For example...
- Remove the cluster member from plugin_cfg.xml
- For IIOP traffic, set the runtime weight to zero for the cluster member.
Stop cluster member...
- Servers | Server Types | WebSphere application servers | server | Stop
Stop cluster...
-
Servers | Clusters | WebSphere application server clusters | cluster | Stop
Start cluster member...
- Servers | Server Types | WebSphere application servers | server | Start
Start cluster...
-
Servers | Clusters | WebSphere application server clusters | cluster | Start
Administer the BPM document store
BPM document store technical user
A run-as technical user is required for creating default configurations for the domain, object store, and document class definition. A technical user is also required when BPM connects to the BPM document store using CMIS. Credentials are saved in an authentication alias mapped to the BPM role type...
-
EmbeddedECMTechnicalUser
The default authentication alias is DeAdminAlias. The technical user must have the WAS administrator role.
Change the password of the technical user
The credentials of the technical user are saved in an authentication alias. The password of the technical user in the authentication alias must be changed together with the password in the user repository where the technical user is defined (such as FileRegistry or LDAP).
The BPM document store may still use the old credentials for a short period of time (less than a minute). Access to the BPM document store may fail in this short timeframe.
Change the technical user
To change the password or change the technical user, it is not sufficient to simply change the authentication alias. The BPM document store is protected against access from unknown users. New technical users must first be authorized.
-
AdminTask.maintainDocumentStoreAuthorization('[-deName myDEname -add cn=newTechnicalUser,o=defaultWIMFileBasedRealm]')
To list currently authorized principals...
- AdminTask.maintainDocumentStoreAuthorization('[-deName myDEname -list]')
After the new technical user is authorized, you can modify the authentication alias with the new principal name and password.
To remove access for old user...
- AdminTask.maintainDocumentStoreAuthorization('[-deName myDEname -remove cn=oldTechnicalUser,o=defaultWIMFileBasedRealm]')
Change the authentication alias
To change the authentication alias mapped to the EmbeddedECMTechnicalUser role:
- AdminTask.updateDocumentStoreApplication('[-deName myDEname]')
If your new authentication alias uses a different user than the original user, also follow the instructions in the above section "Changing the technical user."
Reconfiguring the user registry
Authorization to the BPM document store is based on unique IDs. If the BPM document store was initialized during initial server startup, only the same user (with the same unique ID) can manage the BPM document store, and access its documents. If you change your user registry configuration ( by removing the file-based repository in order to use only an LDAP server in federated repositories), a user with the same user ID and password in LDAP will not have access to the BPM document store. This is also true if you simply delete a user and recreate one with the same user ID. In this situation, you lose access to the BPM document store, and you need to rollback the configuration change.
Duplicate users are not permitted in federated repositories, which means that you cannot connect to an LDAP server that contains the same users that you have in your file-based repository. You need to remove the file-based and add LDAP. A user in LDAP with the same user ID does not have access to the BPM document store. As a result, you may choose to authorize all authenticated users to work with the BPM document store for the duration of reconfiguration (while access has been shut down through the HTTP server).
You can use the special key word #AUTHENTICATED-USERS to authorize all users to the BPM document store who successfully authenticate:
- AdminTask.maintainDocumentStoreAuthorization('[-deName De1 -add #AUTHENTICATED-USERS]')
After this configuration has been completed, you can safely re-configure your user registry without losing access to the BPM document store. After the configuration change is complete and the cell is restarted, you can authorize a new user and remove the old user as well as the #AUTHENTICATED-USERS entry.
Get BPM document store status
The getDocumentStoreStatus command is used to obtain:
- The availability of the BPM document store.
- The status of document migration to the BPM document store.
- The status of the IBM_BPM_DocumentStore application and whether it is up-to-date in comparison to the authentication alias and the EAR file version.
To get status...
-
AdminTask.getDocumentStoreStatus('[-deName myDeName]')
CWTDS2018I: The BPM document migration has not yet started. '{0}' documents need to be migrated.
Migrate document attachments to the BPM document store
The startDocumentStoreMigration command is used to migrate document attachments from the BPM database to the BPM document store. The migration of document attachments to the BPM document store is considered to be a required BPM post-migration task, and it should be done after the database migration has been completed.
The original versions of the document attachments will continue to reside in the BPM database until all documents have been migrated.
After the migration is complete, use either coaches or heritage coaches to work with BPM documents in the BPM document store.
When document attachments are being migrated to the BPM document store, they are temporarily stored twice in the BPM database. Ensure the database has sufficient storage to accommodate the twice-stored documents before starting the document migration.
The BPM document store must be used with a Federated Repositories user registry. If you migrate your documents to the BPM document store, and you later change to another form of user registry, such as a stand-alone LDAP registry or a custom registry, you may lose access to your documents.
The BPM document store restricts document size to 1 gigabyte or less. If the content of any document attachment in the BPM database exceeds 1 gigabyte, you cannot migrate the document attachment to the BPM document store. The document attachment will remain in the BPM database, but a reference to the document attachment will be created in the BPM document store. You can access the content of the document attachment through APIs and CMIS operations as if the document had been completely migrated.
To migrate document attachments to the BPM document store:
- Run the getDocumentStoreStatus command.
This wsadmin command returns the command syntax that can be used as well as the status of any document migration:
AdminTask.getDocumentStoreStatus('[-deName myDeName]')
CWTDS2018I: The BPM document migration has not yet started. '{0}' documents need to be migrated.To pass more parameters for the command:
cd profile_root/bin/
./wsadmin -user my_user_name -password my_password -lang jython -c "print AdminTask.getDocumentStoreStatus('[-deName myDeName]')"For example:
-
cd DMGR_PROFILE/bin
./wsadmin -user tw_admin -password tw_admin -lang jython -c "print AdminTask.getDocumentStoreStatus('[-deName De1]')" - Run the startDocumentStoreMigration command.
This wsadmin command returns the command syntax that can be used:
AdminTask.startDocumentStoreMigration('[-deName myDeName]')
To specify other parameters for the command:
-
cd profile_root/bin/
./wsadmin -user my_user_name -password my_password -lang jython -c "print AdminTask.startDocumentStoreMigration('[-deName myDeName]')"For example:
cd DMGR_PROFILE/bin
./wsadmin -user tw_admin -password tw_admin -lang jython -c "print AdminTask.startDocumentStoreMigration('[-deName De1]')" - Run the getDocumentStoreStatus command again to check the status of the document migration. If the migration is proceeding successfully or has completed successfully, the command will return one of the following messages:
CWTDS2019I: The BPM document migration is running. '{0}' of '{1}' documents are already migrated.
CWTDS2020I: The BPM document migration is running. '{0}' of '{1}' documents are already migrated. A cleanup is currently in progress.
CWTDS2021I: The BPM document migration has finished. '{0}' documents were migrated.If one or more documents fail to migrate successfully, the getDocumentStoreStatus command may return one of the following messages:
CWTDS2022I: The BPM document migration has stopped with an error. '{0}' of '{1}' documents are already migrated. For '{2}' documents, the migration failed.
CWTDS2023I: The migration failed for document '{0}'. Details: '{1}'. - If a message indicates that one or more of the documents has failed to migrate successfully, complete one of the following steps:
- If all of the documents failed to migrate successfully, check the migration configuration and the logs for a general problem, such as a problem with the database connection.
- If the logs indicate an OutOfMemoryError condition, try increasing the heap size of the JVM for the period of time in which the migration will take place. Alternatively, try reducing the maximum number of documents that can be migrated in parallel to the BPM document store.
- If the logs indicate transaction timeouts, there may be very large documents that failed to migrate within one transaction. Try raising the transaction timeout temporarily by following the instructions in the topic "Transaction service settings." Alternatively, you can run the startDocumentStoreMigration command with the -keepFailedDocuments option.
- If some of the documents failed to migrate successfully, you can choose to retain the content of these documents in the BPM database, and only create references for the documents in the BPM document store. The legacy document APIs and ECM operations will continue to work with the documents in the BPM database. To retain the content of the documents in the BPM database, and only create references for the documents in the BPM document store, run the startDocumentStoreMigration command with the -keepFailedDocuments option:
AdminTask.startDocumentStoreMigration('[-deName myDeName -keepFailedDocuments]')
After the document migration has completed, the database tables LSW_BPD_INSTANCE_DOCUMENTS and LSW_BPD_INSTANCE_DOC_PROPS should be empty in the Process Server database. However, if the database contained documents larger than 1 gigabyte or if the -keepFailedDocuments option was used, the database may contain a few remaining rows. If you want, you can optionally reorganize the tables to release the disk space that was used by the deleted table rows. For example, for DB2 databases, you can reorganize the tables using the REORG and RUNSTATS commands.
Manage tracing for the BPM document store
The maintainDocumentStoreTrace command is used to enable or disable tracing for an individual component or all components of the BPM document store.
Update the BPM document store application
The updateDocumentStoreApplication command is used to update the installed application IBM_BPM_DocumentStore in a deployment target. An update of the application is generally required if an iFix has been installed for the BPM document store or if the role type mapping has changed for the embedded ECMTechnicalUser.
Modify configuration parameters
The BPM document store has some configuration parameters that can be read and modified using wsadmin scripting.
These configuration parameters are:
- cmisUrl
- numberOfParallelDocumentMigrationWorker
The cmisURL parameter is used to customize the CMIS URL used by the BPM server. By default, the value of the parameter is not set and a local HTTPS connection is used with /fncmis as the context root. For performance reasons, you could replace the cmisUrl with an unencrypted local URL:
http://local_Http_Proxy_Server_In_Secure_Network_Zone/fncmis
However, the credentials of the technical user will be sent in an HTTP basic authentication header and WS-Security Username Token over this connection. As a result, using an unencrypted URL is discouraged from a security perspective.
The numberOfParallelDocumentMigrationWorker parameter specifies the maximum number of documents that can be migrated in parallel to the BPM document store. By default, the value of this parameter is set to 10.
Examples of how to read and modify the configuration properties for the BPM document store using wsadmin scripting are shown in the following examples:
-
// List all BPM document stores. If there is only one deployment environment, then there is only one document store.
docStores = AdminUtilities.convertToList(AdminConfig.list("BPMDocumentStore"))
// Read the first BPM document store
docStore = docStores[0]
// Show one specific attribute of the BPM document store
AdminConfig.showAttribute(docStore, "cmisUrl")
// Update one specific attribute of the BPM document store
AdminConfig.modify(docStore, [ ["cmisUrl", "new value"] ])
AdminConfig.modify(docStore, [ ["numberOfParallelDocumentMigrationWorker" ,5] ])
// Save the configuration
AdminConfig.save()
Limitations in administering the BPM document store
The document store is only available when Federated Repositories is used as the user registry
An exception may be thrown during document store logging and tracing operations
Although the BPM document store is not available in these situations, you can continue to work with your document attachments in the BPM database or you can configure an external ECM system for storing your documents. In either situation, the legacy document APIs will continue to be used. Any ECM operations that specify the BPM document store as a server will fail.
The document store is only available when Federated Repositories is used as the user registry
The BPM document store is only available when Business Process Manager is configured to use Federated Repositories as the user registry. If you are using a different user registry configuration, you should disable the autostart mechanism of the IBM_BPM_DocumentStore application.To use the BPM document store with your LDAP users and groups, configure LDAP as a repository in Federated Repositories instead of using stand-alone LDAP as the user registry.
An exception may be thrown during document store logging and tracing operations
When the server is started or the BPM document store commands maintainDocumentStoreTrace or updateDocumentStoreApp are run, the following SystemErr exception may be logged:-
[3/19/13 23:31:12:548 PDT] 00000084 SystemErr R log4j:WARN No appenders could be found for logger (filenet_error.api.com.filenet.apiimpl.util.ConfigValueLookup).
[3/19/13 23:31:12:548 PDT] 00000084 SystemErr R log4j:WARN Please initialize the log4j system properly.
[3/19/13 23:31:14:482 PDT] 00000084 SystemErr R log4j:WARN Configuring default logging to the file E:\IBM\WebSphere\AppServer\profiles\Custom01\FileNet\testDE1.AppCluster.WIN-E6GDL89KDJDNode01.0\p8_server_error.log
[3/19/13 23:31:49:536 PDT] 00000084 SystemErr R log4j:WARN No appenders could be found for logger (filenet_error.api.com.filenet.apiimpl.util.ConfigValueLookup).
[3/19/13 23:31:49:536 PDT] 00000084 SystemErr R log4j:WARN Please initialize the log4j system properly.
[3/19/13 23:33:25:867 PDT] 00000108 SystemErr R SLF4J: Class path contains multiple SLF4J bindings.
The exception is caused by the tracing and logging mechanism used with the BPM document store. The exception does not result in any operational problems and can be safely ignored.
Administer Process Portal
You can configure various aspects of the Process Portal environment, such as setting up access to various functions, and creating saved searches.
Process Portal dashboards: Authorization overview
Process Portal includes a Process Performance and a Team Performance dashboard. Users must be authorized to access the dashboards and for the management actions that are available in each of the dashboards.
Access to Process Portal dashboards
Access to the Team Performance and Process Performance dashboards is determined by the teams who are assigned to the dashboards in the Process Portal application. These teams and the default security groups that are assigned to them are defined in the System toolkit. You can change the default security groups or members of the team in the Process Admin Console.
Default authorization for each of the dashboards.
| Dashboard | Team | Security groups in the team |
|---|---|---|
| Process Performance | Process Owner | tw_process_owners tw_allusers
All users typically need access to the dashboard so they can navigate to the details for a process instance. To restrict access to process owners only, use the Process Admin Console to remove the tw_allusers group from the Process Portal snapshot (Installed Apps > Team Bindings). |
| Team Performance | Managers | tw_managers
The tw_managers group includes the tw_allusers group by default. To restrict access to a set of manager users only, use the Process Admin Console to remove the tw_allusers group and include a set of managers...
|
Actions in the Process Performance dashboard
To manage a process and its instances, users require authorization to access the individual process and they must be authorized for actions on the process and its instances.
Required authorization...
| Action | Authorization |
|---|---|
| Access the dashboard for a specific process and its instances | A member of the team that is assigned to the Expose Performance Metrics setting for the business process in Process Designer. |
| Act on a process instance, for example, change the projected path or the instance due date | A member of the security group that is assigned to the following Process Portal action policies:
See Configuration properties for Process Portal action policies . |
In addition, some features in the dashboards are available only when certain settings are applied to the business process in Process Designer. See Enable process instance management.
Actions in the Team Performance dashboard
To manage the work for a team, users must be a member of a team of managers and they must be authorized for some actions on tasks.
Required authorization...
| Action | Authorization |
|---|---|
| Access the dashboard for a specific team and its members | A member of a team of managers defined in Process Designer. See Defining team managers. |
| Change the due date or the priority of a task | A member of the security group that is assigned to the following Process Portal action policies:
See Configuration properties for Process Portal action policies |
The System Data toolkit also contains an All Users team. The Managers of All Users team is the manager team for the All Users team and the teams in the sample that is delivered with BPM.
The tw_allusers_managers group is the security group for the Managers of All Users team. This security group includes the tw_admins group by default. Members of the tw_admins group can therefore see the All Users team and the sample teams in the Team Performance dashboard. To remove the tw_admins group or add members to the tw_allusers_managers group, use the Process Admin Console.
Enable Process Portal to run in an HTML frame
By default, login pages and index pages cannot be displayed inside an HTML frame. Enable Process Portal to run inside an HTML frame by changing the variable...
- com.ibm.bpm.social.enableRunInFrame
When someone tries to display a Process Portal frame inside an HTML frame, login pages and index pages are configured by default to automatically redirect the browser to display the page itself instead of the frame. The configuration alleviates security concerns. However, your configuration might have legitimate requirements to display Process Portal pages inside HTML frames.
For v8.5.0.1, the team might want to view Process Portal data inside a Microsoft SharePoint site.
- Open the administrative console and click...
-
Resources > Resource Environment | Resource Environment Provider | Mashups_ConfigService | Additional Properties | Custom properties
- Change the variable...
- com.ibm.bpm.social.enableRunInFrame = true
- Click OK and then save your changes to the master configuration.
- Restart the application server instance.
Process Portal can run inside an HTML frame.
For v8.5.0.1 you can view data from Process Portal inside a Microsoft SharePoint site.
Enable email for Process Portal notifications
Process Portal users can set their preferences to receive an email notification when a new task is assigned to them. The configuration works for all types of email. To use this capability, enable the email environment to send notifications.
Verify the following components are stopped:
- Process Center server
- Process Server
If Process Portal users are using email with an IBM Lotus Domino V9 server, they can complete Process Portal tasks directly from their email notifications. To make sure the integration is set up correctly, complete the following prerequisite tasks:
- Configure single sign-on with an LTPA token on IBM WAS and IBM Lotus Domino.
- Verify the Domino server is set up properly by following the steps in the IBM Lotus Domino documentation:
- Create an XML file that you import into IBM Lotus Domino
Customize the following example:
<?xml version="1.0" encoding="UTF-8"?> <webcontextConfiguration version="1.1"> <palleteItem contributeTabOnStartup="false" contributeToSideshelfOnStartup="false" description="Embedded Experience OpenSocial gadget used to display Coach" hideThumbnail="false" imageUrl="" providerId="com.ibm.rcp.toolbox.opensocial.provider.internal.OpenSocialPalleteProvider" singletonSidebar="false" url="http://bpm80.swg.usma.ibm.com:9080/ProcessPortal/gadgets/OpenSocial/BPMOpenSocialGadget.xml" viewImageUrl=""> <preferences/> <data> <object-capabilities url="http://[hostname]:[WC_defaulthost port]/ProcessPortal/gadgets/OpenSocial/BPMOpenSocialGadget.xml"> <grant-feature id="opensocial-data"/> <grant-feature id="opensocial-templates"/> <grant-feature id="opensocial-1.0"/> <grant-feature id="dynamic-height"/> <grant-feature id="embedded-experiences"/> <grant-feature id="open-views"/> <grant-feature id="settitle"/> <grant-feature id="osapi"/> <grant-feature id="content-rewrite"/> <grant-feature id="embedded-experiences-render"/> <grant-feature id="core"/> </object-capabilities> </data> </palleteItem> </webcontextConfiguration> - Set up Domino Web SSO authentication between the iNotes server and IM server Part of overall topic for setting up iNotes and IM.
- Configure the component
- Complete the configuration
- Set up SSO in IBM Lotus Notes.
- Create an XML file that you import into IBM Lotus Domino
- Add the email server to the trusted servers list to prevent problems with sizing in Process Portal.
- The email facility (used for task notification, task assignment, and so on) must be configured to use a local SMTP server that is listening on the default port (25) and does not require authentication. This local SMTP server can then be used to forward emails to any other external SMTP that requires authentication.
- If you are using BPM V8.5.0.0,
complete the following additional tasks:
- Make sure that SSO is configured with the same domain in both BPM and IBM Lotus Domino. The BPM domain specified in 99Local.xml must match your Domino server. If the domain does not match, edit 100Custom.xml.
Update the domain in the <gadget-link> tab that is in the <email> element; for example, <gadget-link>http://bpm80.swg.usma.ibm.com:9080/ProcessPortal/gadgets/OpenSocial/BPMOpenSocialGadget.xml</gadget>.
Edit the files according to the following procedure.
- Use the same security protocol for both the BPM server and the email server prevents an issue where Process Portal users see a blank task completion view in email. For example, use HTTPS for both the BPM server and the email server, or use HTTP for both the BPM server and the email server. If the environment uses HTTPS for one of the servers, and HTTP for the other server, copy the BPM server URLs from 99Local.xml under the <email> section and paste them into 100Custom.xml. Then edit the URLs so the SSL protocol matches your email server.
For editing 100Custom.xml, follow the instructions in The 99Local.xml and 100Custom.xml..
- Make sure that SSO is configured with the same domain in both BPM and IBM Lotus Domino. The BPM domain specified in 99Local.xml must match your Domino server. If the domain does not match, edit 100Custom.xml.
Update the domain in the <gadget-link> tab that is in the <email> element; for example, <gadget-link>http://bpm80.swg.usma.ibm.com:9080/ProcessPortal/gadgets/OpenSocial/BPMOpenSocialGadget.xml</gadget>.
Edit the files according to the following procedure.
The entries in the email properties section in the 99Local.xml configuration file define the properties for your email environment. Make all required modifications to 100Custom.xml.
Do not edit 99Local.xml.
If you are using BPM V8.5.0.1...
- Open 99Local.xml and locate the email properties section.
- Open 100Custom.xml and copy and paste the email properties section into 100Custom.xml.
- In the <email> element, insert values appropriate for the environment.
- <smtp-server> element - Valid SMTP server.
- <default-from-address> element - Valid email address.
Values set for the <email> element in 100Custom.xml.
<server merge="mergeChildren">
 <email merge="mergeChildren">
  <!-- SMTP server that mail should be sent to -->
  <smtp-server merge="replace">smtp.example.com</smtp-server>
  <valid-from-required merge="replace">true</valid-from-required>
  <default-from-address merge="replace">username@example.com</default-from-address>
  <send-external-email merge="replace">true</send-external-email>
 </email>
</server>
Save changes.
- To force URLs included in emails to go through a network router, see the following scenario keys...
- SERVER_EMAIL_GADGET_LINK
- SERVER_EMAIL_PORTAL_LINK
- SERVER_EMAIL_PORTAL_PROCESS_INFO_LINK
- SERVER_EMAIL_PORTAL_RUN_TASK_LINK
- SERVER_EMAIL_TEMPLATE_CLIENT_LINK
- Restart the cluster.
If you are using BPM V8.5.0.0...
- Open 99Local.xml and locate the email properties section.
- Open 100Custom.xml and copy and paste the email properties section into 100Custom.xml.
- In the <email> element, insert values appropriate for the environment.
- <smtp-server> element - Valid SMTP server.
- <default-from-address> element - Valid email address.
- To change the URL for the Process Portal Server, modify the BPMVirtualHostInfo configuration object
You might change the BPMVirtualHostInfo configuration object to be sure a fully qualified host name is used for the BPM server, to change the default transport protocol setting to use HTTPS instead of HTTP, or if your Domino server is on a different domain than the Process Portal server.
For example:
cd INSTALL_HOME/bin ./wsadmin -conntype NONE -lang jython wsadmin>print AdminConfig.showall(AdminConfig.list('BPMVirtualHostInfo')) [port -1] [transportProtocol https] wsadmin>AdminConfig.modify(AdminConfig.list('BPMVirtualHostInfo'),[['port','9443']]) wsadmin>AdminConfig.modify(AdminConfig.list('BPMVirtualHostInfo'),[['hostname','myhostname.ibm.com']]) wsadmin>AdminConfig.modify(AdminConfig.list('BPMVirtualHostInfo'),[['transportProtocol','https']]) wsadmin>print AdminConfig.showall(AdminConfig.list('BPMVirtualHostInfo')) [hostname myhostname.ibm.com] [port 9443] [transportProtocol https] wsadmin>AdminConfig.save() - Restart the cluster.
If the email gadget fails to render in the Notes Client or iNotes, verify the following items:
- SSO has been configured properly between the Domino server and the BPM server.
- Check the Domino server error logs.
The Domino server logs can be found in...
-
Domino_root/data/domino/workspace/logs
If you see an error similar to the following error, import the BPM certificate into the Domino server:
-
Certificate, OU=Cellname, OU=Dmgr, O=IBM, C=US, is not trusted. Validation failed with error 3659.
To import the certificate into the Domino server:
- Import an Internet certifier into the Domino Directory.
- Create an Internet cross-certificate in the Domino Directory from a certifier document.
To have process participants receive email notifications, ask them to update their user preferences.
Configure IBM Connections integration for task notifications
Process Portal users can set their preferences to receive a notification in IBM Connections when a new task is assigned to them. To use this capability, configure the integration with IBM Connections.
To have Process Portal users receive notifications about tasks in IBM Connections, have IBM Connections V4 or later. You can use only business cards in IBM Connections.
BPM must be configured to use the same user repository the Connections server uses.
When configuring IBM Connections, consider the following guidance:
- Verify the Connections user ID specified in the Connections Server profile in Process Designer has authority to post to the Connections stream, which means the user is a member of the trustedExternalApplication security role in the WidgetContainer application running on Connections.
- Verify the Connections access role is configured properly on the Connections server. Follow the steps in Configure widgets and select the option...
- Use SSO token
This ensures that users can open tasks from links in the task notifications visible in the Connections stream.
- Verify the correct port is specified in the Process Designer IBM Connections server definition.
If no port is specified, the default port 443 is used.
- Verify the Connections HTTP server is running.
- Verify the BPM domain specified in 99Local.xml matches the Connections server.
- Verify the same realm name is set for the BPM server and the Connections server.
- Add the Connections server to the trusted servers list to prevent problems with sizing in Process Portal.
- If you are using BPM V8.5.0.0, using the same security protocol for both the BPM server and the Connections server prevents an issue where Process Portal users see a blank task completion view in IBM Connections server.
For example, use HTTPS for both the BPM server and the Connections server, or use HTTP for both the BPM server and the Connections server. If the environment uses HTTPS for one of the servers, and HTTP for the other server, copy the relevant BPM server URLs from 99Local.xml under the <connections-task-notification> section and paste them into 100Custom.xml. Then edit the URLs so the SSL protocol matches the Connections server.
To configure the integration for task notifications in IBM Connections:
- Configure the BPM server to use the same LDAP server the Connections server uses.
- Enable SSO for the BPM server.
- In the administrative console, select...
-
Security | Global Security | Authentication cache settings | Web and SIP security | Single sign-on (SSO) | Enabled | Interoperability Mode | Web inbound security attribute
Make sure to include the correct domain name and change the cookie names to match the environment.
Add a period before the domain name, for example .ibm.com.
- In the administrative console, select...
- Configure cross-cell security for the BPM server and the Connections server.
- Extract the root SSL certificate from the Connections server.
- Select...
-
Security | SSL certificate and key management | Key stores and certificates | DefaultTrustStore | Signer certificates | Retrieve from port
- Set the host name and SSL port (the admin host secure port) of the remote Process Center server.
- Specify an alias to use for the root signer.
- Click Retrieve signer information and verify the retrieved signer information is correct.
Save the root signer in the local truststore.
To retrieve the root signer of the Process Portal server, repeat the previous steps on the Connections server.
- Select...
- Export the LTPA key from the Connections server, and import it into the keystore of the Process Portal server.
Sharing LTPA keys is required for configuring cross-cell security for the BPM server and the Connections server.
When multiple cells are involved, one set of LTPA keys is shared among them. Therefore, administrators must plan which set of LTPA keys to use in the organization and ensure the automatic LTPA key generation is turned off. Otherwise, if a new set is generated, the cells can become unsynchronized.
- In the administrative console of the remote IBM Connections server, select...
-
Security | Global Security | Authentication | LTPA
- In the Cross-cell single sign-on section, type a new password and a fully qualified key file name.
- Click Export keys.
- Transfer the exported key file in binary mode to the file system of the local Process Portal server by repeating the previous steps on the administrative console of the Process Portal server and clicking Import keys.
- In the administrative console of the remote IBM Connections server, select...
- Verify that cross-cell security is configured correctly.
- Log in to the Connections server.
- In the same browser session, launch the URL for the BPM server.
If security is configured correctly, you are not prompted to log in to the BPM server.
- Extract the root SSL certificate from the Connections server.
- If you are using BPM V8.5.0.1, and you want to customize the URLs of links to gadgets, configure the optional scenario key SERVER_ACTIVITY_STREAM_IMAGE_LINK and the SERVER_TASK_NOTIFICATION_GADGET_LINK.
By default, links to widgets are generated using the EXTERNAL_CLIENT scenario key, which points to the BPM server or, if you have one, the web server.
- Enable task notifications in IBM Connections on the server by editing 100Custom.xml.
- Insert the following code in the <server> section of the file:
<connections-task-notification merge="mergeChildren">
<!-- Change the value to true in order to enable connections task notification-->
<enable-connections-task-notification merge="replace">true</enable-connections-task-notification>
</connections-task-notification>
- If you are using BPM V8.5.0.0
and if the Connections server and the BPM server are on different domains, edit the <connections-task-notification> section of 100Custom.xml to use the Connections server instead of the BPM server:
change
- <gadget-link>http:/bpm_host.ibm.com:9081/ProcessPortal/gadgets/OpenSocial/BPMOpenSocialGadget.xml</gadget-link>
to
- <gadget-link>http://bpm_host.other_domain.com:9081/ProcessPortal/gadgets/OpenSocial/BPMOpenSocialGadget.xml</gadget-link>
- Restart the deployment manager, nodes, and clusters.
- Insert the following code in the <server> section of the file:
In Process Designer, enable the Connections integration.
For all Process Portal users, make sure the email addresses in their BPM user profiles match the email addresses in their IBM Connections user profiles.
So that process participants receive notifications in IBM Connections, ask them to update their user preferences.
Configure Sametime Connect integration
Before you begin, start Process Portal.
Requirements...
- The two environments must share a common user registry, and it must be available as a base entry in the BPM federated repositories.
- To support the use of short names and email addresses for system login, the federated repository entry must contain login properties of either uid, mail, or uid;mail
- The two environments must share the same federated repositories realm name.
- The two environments must share an LtpaToken for single sign-on functionality. This requires that common domain names and interoperability mode are enabled globally.
- You must import LTPA keys from one environment to the other.
- If you use SSL communication, it must be enabled on all the servers in the configuration, including the Process Center server, Process Server, and Sametime Connect server. Normal SSL configuration is required, including certificate exchange across all servers.
If you are using BPM V8.5.0.1 to configure Sametime Connect integration:
- Configure BPM and Sametime Connect to share the same user registry and the same federated repositories realm name.
- Configure BPM and Sametime Connect to share an LtpaToken for SSO functionality, which would include common domain names and interoperability mode to be enabled in...
-
Global security | Single sign-on (SSO)
- Import LTPA keys from one environment to the other.
For example, either import the Sametime Connect LTPA keys into BPM or import the BPM LTPA keys into Sametime Connect.
- Configure the Sametime Proxy Server so the domain specified in the SSO settings is in the allowed list of domains.
All subsequent access to Process Portal, and Sametime Connect must be done through a host name that ends in this domain name.
- Log in to the Sametime System Console as the Sametime administrator and select...
-
Sametime Servers | Sametime Proxy Servers | server_name
- In the Domain list of Sametime Proxy Server section, enter the same domain name used in the WAS SSO settings, for example, ibm.com.
- Click OK and restart all the WAS-based Sametime servers.
- Log in to the Sametime System Console as the Sametime administrator and select...
- Configure the Process Portal endpoint.
Configure the PROCESS_PORTAL_JS scenario key to use the strategy...
...and point to a virtual host information object that identifies the Process Portal server.
See the entry for PROCESS_PORTAL_JS.
- Restart the BPM servers.
f you are using BPM V8.5.0.0 to configure Sametime Connect integration:
- Configure BPM and Sametime Connect to share the same user registry and the same federated repositories realm name.
- Configure BPM and Sametime Connect to share an LtpaToken for SSO functionality, which would include common domain names and interoperability mode to be enabled in...
-
Global security | Single sign-on (SSO)
- Import LTPA keys from one environment to the other.
For example, either import the Sametime Connect LTPA keys into BPM or import the BPM LTPA keys into Sametime Connect.
- Configure the Sametime Proxy Server so the domain specified in the SSO settings is in the allowed list of domains. All subsequent access to Process Portal, and Sametime Connect must be done through a host name that ends in this domain name.
- Log in to the Sametime System Console as the Sametime administrator.
- Click...
-
Sametime Servers | Sametime Proxy Servers | server_name
- In the Domain list of Sametime Proxy Server section, enter the same domain name used in the WAS SSO settings, for example, ibm.com.
- Click OK and restart all the WAS-based Sametime servers.
Process Portal is now configured for Sametime Connect. When you use Process Portal, you see the standard Sametime Connect icons and team member information integrated within the expert and participant information.
In Process Designer, enable the process applications to expose in Process Portal for Sametime Connect integration.
Create and maintain saved searches for Process Portal
By saving searches, you can provide Process Portal users with customized views of their tasks, for example, to include specific business data. Saved searches are displayed in the Saved Searches tab of the Process Portal interface. In addition, the Tasks and Processes widgets in Business Space use saved searches to list process instances, and tasks.
The Saved Search Admin BPM system application (SSA) contains the human service that allows users to saved searches. The human service is exposed as an administrative service, in order for it to appear within the Process Admin console.
To enable the globalization of saved search names, use localization keys for the Process Portal application. Define the keys in Process Designer by expanding Process Portal, clicking Setup, and opening the resource bundle group called ProcessPortal. Consider the following guidance:
- Do not use special characters (for example: * or !)other
than a period.
- Start the saved search name with a letter.
- Do not use more than 30 characters.
- After you add a key to a resource bundle group to use in a saved search, restart Process Center and restart the server.
- For Process Server, use a resource bundle group that is in the default Process Portal version. Restart Process Server after the snapshot is activated.
- If you define a value for a localization key, define a default value. Defining a default value prevents the problem of the Organize
tabs list displaying blank items for the saved search names when Process Portal users sign in with a language that is not part of the Process Portal globalization
plan.
- Use localization keys in the following format:
- savedsearch.label.name_of_saved_search
- In the Server Admin area of the Process Admin Console, click Saved Search Admin.
Save a search.
- In the Select Search section, select Define New Search, click Select, and name the saved search.
- Choose the columns that are displayed in the search results by clicking Add in the Columns section.
- Set the search conditions by clicking Add in the Conditions section. The search conditions determine which tasks are shown on the Saved Searches tab in Process Portal.
- Select the columns to sort the results by, and then select the sort order.
- Go to the Search Organized By list and select Task.
If you select ProcessInstance from the list, only the first task of the process instance that matches the search criteria is returned.
- Test the search to make sure that it returns the results that you were expecting by clicking Search.
- To make the search available in Process Portal, and Business Space, click...
-
Save New Search
- Update an existing saved search. Select a search from the list in the Select Search section and click Select. Change the search criteria, and save the search.
Process Portal users see the new or updated saved search the next time their Saved Searches content is refreshed.
Reset the Process Portal start page for a user
The My Tasks > Open Tasks view is the Process Portal default start page. Users can bookmark a different view or page as their start page, and then return to using the default start page as needed.
Although users can reset their own start page in Process Portal, sometimes, it might be necessary for someone with administrative privileges to reset the start page on a user's behalf.
- In the Server Admin area of the Process Admin Console, click...
-
User Management | Bulk User Attribute Assignment | View by Attribute | Portal Default Page attribute
- Enter the user ID for the user in the User field, and click Search. The current value for the user's Process Portal start page is shown, for example:
-
/tasks/queries?query=name_of_saved_search
- Reset the start page to the Process Portal default start page.
In the Specify a Value and Assign it to the Selected Users section, delete the entry in the Value field, and click Assign.
The next time the user logs on to Process Portal, the My Tasks > Open Tasks view is displayed as the user's start page.
Set the Process Portal tab order for a user group
To modify the Process Portal tab order for users, use Bulk User Attribute Assignment. Users can reorder tabs in Process Portal, and the order is saved when they log out. However, someone with administrative privileges might need to apply a tab order for all users in a group so that all users see the same dashboards and saved searches in the same order. To apply the tab order from one user to all users in a selected user group, copy the attribute value from the user and paste it in as the value for a user group.
- In the Server Admin area of the Process Admin Console, click...
-
User Management | Bulk User Attribute Assignment | View by User
- To copy the tab order from a user, select the user ID, and copy the value for the user's Portal Dashboard Display Order attribute.
For example, if you decide the order of the tabs that you saved when you logged in to Process Portal should be the order that all users in a group see by default, select the user ID and copy the attribute value.
- Click View by Attribute, and then select the attribute...
-
Portal Dashboard Display Order
- Select the name of the user group.
- In the section...
-
Specify a Value and Assign it to the Selected Users
...delete any existing entry, and paste the entry that you copied in step 3 into the attribute value for the tab order.
- Click Assign.
The next time that users in the user group log in to Process Portal, the tabs are displayed in the new order. Users in the group still can reorder tabs as they like, but the default order is what you specified.
Configure the My Team Performance dashboard (deprecated)
You can configure certain aspects of the My Team Performance dashboard, for example, which tasks are visible to team managers and the maximum number of tasks that is displayed in the task list.
These configuration settings apply only to the deprecated My Team Performance dashboard (known as the My Team Performance scoreboard in releases earlier than BPM V8.0). This dashboard is deprecated in BPM V8.5 and not enabled by default.
Verify the following components are stopped:
- Process Center server
- Process Server
To configure the dashboard settings, update...
-
PROFILE_HOME/config/cells/cell/nodes/node/servers/server/process-server/config/100Custom.xml
Dashboard settings.
- <my-team-performance-task-visibility-for-user-assigned-tasks>
- <my-team-performance-task-visibility-for-related-groups>
- These elements control who can see tasks in the dashboard. The default value for both elements is false.
When the default is set for both elements, the manager can see tasks that are assigned to the manager's groups, regardless of whether the tasks are claimed.
To include tasks that are assigned directly to users in the manager's groups, even if the tasks were not initially assigned to the group, set the value of the element for user-assigned tasks to true.
To include tasks that are assigned to related groups, set the value of the element for related groups to true. A related group is a group that any user in a manager's group also belongs to.
If you change the default value of the following element, the performance of the scoreboard might be affected because more groups must be queried for the list of assigned tasks.
- <my-team-performance-max-task-list-size>
- This element controls the maximum number of tasks that is displayed in the task list. The default value is 1000. You can change this value. However, the larger the value, the longer it takes to populate the list.
- Open the 99Local.xml and 100Custom.xml files in a text editor.
Do not edit 99Local.xml. Change only 100Custom.xml.
- Copy the appropriate section from 99Local.xml to 100Custom.xml.
<properties>
  <server merge="mergeChildren">
   <portal merge="mergeChildren">
    <my-team-performance-task-visibility-for-user-assigned-tasks merge="replace">false</my-team-performance-task-visibility-for-user-assigned-tasks>
    <my-team-performance-task-visibility-for-related-groups merge="replace">false</my-team-performance-task-visibility-for-related-groups>
    <my-team-performance-max-task-list-size merge="replace">1000</my-team-performance-max-task-list-size>
   </portal>
  </server>
</properties>
Save changes.
- Start Process Center server or Process Server.
Administer the Process Portal index
The Process Portal index allows process participants who are working in Process Portal to search business processes for instance data. The index is also used to provide data for the charts in the Process Performance and Team Performance dashboards.
Indexing is enabled by default. Process instances and tasks are indexed according to a time interval that you can specify. To change the indexing behavior, edit 100Custom.xml. If a problem occurs with the index, commands are available for updating and rebuilding it.
Tasks and process instances are indexed in the following situations:
- Tasks
- A task is assigned.
- A task is completed and the business data is updated.
- The due date or at-risk date of a task is changed.
- The priority of a task is changed.
- Process instances
- An instance is started, completed, suspended, resumed, terminated, or restarted.
- An instance failed.
- The due date or at-risk date of an instance is changed.
For example, business data for a process instance that exists when a task, and its corresponding process instance activity are completed gets indexed with both the task, and instance. Process participants can find the task or instance by searching the instance business data. If a task form consists of several Coaches but only one Coach is complete, the updates from this Coach are not searchable until all the Coaches in the task form are complete.
By default, the previous tasks in a process instance are not re-indexed when later tasks are completed and the business data for the process instance is updated. To have the updated business data to be searchable from previously completed tasks, change the value of the <task-index-update-completed-tasks> configuration setting to true in 100Custom.xml. If the process instance has a lot of previous tasks, re-indexing these tasks might degrade the system performance.
To make particular business data searchable in Process Portal, use Process Designer to make the appropriate process instance variable available in the search and to set the search alias name used to search for the business data.
Update the Process Portal index
If a problem occurs with the Process Portal index, you might need to run a command to rebuild it. You can also update the index for an instance or task, or remove an instance or task from the index.
Index administration
In a network deployment environment, all cluster members on the same node share the index by default. Run the commands for updating the index on the deployment manager. To specify where the command runs, include the -host host_name parameter of the node and the -port SOAP_port parameter of an application cluster member. Repeat the command for each node in the cluster. The default values for these parameters are -host localhost -port 8880.
Rebuilding the index
If there are problems with the index or searches in Process Portal, you might need to rebuild the index. To rebuild the index...
- processIndexFullReIndex.sh -user DeAdmin_user -password DeAdmin_user -host host_name -port SOAP_port
The command deletes the existing index and creates a new index. While the index is being built, the search facility in Process Portal is unavailable.
For compatibility with previous releases of Process Portal, the taskIndexFullReIndex command is still available. However, this command produces the same result as the processIndexFullReIndex command.
Freeing up space in the index by removing deleted tasks and instances
When tasks and instances are deleted from the database, they are also automatically deleted from the index. You can, however, manually delete tasks and instances from the index that were previously deleted from the database.
To remove the deleted tasks and instances from the index:
- processIndexRemoveDeleted.sh -user DeAdmin_user -password DeAdmin_user -host host_name -port SOAP_port
For compatibility with previous releases of Process Portal, the taskIndexRemoveDeletedTasks command is still available. However, this command produces the same result as the processIndexRemoveDeleted command.
Update the index for a specific instance or task
If you do not change the default configuration settings in 100Custom.xml, the index is updated every 10 seconds. However, you can also trigger updates to the index when a specific instance or task is updated, for example, if you doubt the correctness of the search index record for a specific instance or task.
To update the index...
- For instances
- processIndexUpdateInstance.sh -user DeAdmin_user -password DeAdmin_user -host host_name -port SOAP_port taskID
- For tasks
- taskIndexUpdate.sh -user DeAdmin_user -password DeAdmin_user -host host_name -port SOAP_port taskID
The index is updated for the specified instance or task, regardless of its state. For example, if the specified task is in the completed state and the value for the <task-index-update-completed-tasks> element in 100Custom.xml is set to false, the index is still updated for the task.
Delete a specific instance or task
To delete a specific instance or task from the index.
- For instances
- processIndexDeleteInstance.sh -user DeAdmin_user -password DeAdmin_user -host host_name -port SOAP_port taskID
- For tasks
- taskIndexDeleteTask.sh -user DeAdmin_user -password DeAdmin_user -host host_name -port SOAP_port taskID
Configure the Process Portal index
You can change where the index is stored by modifying an environment variable. To change the index behavior, such as the length of the update interval or including completed tasks in the index, edit 100Custom.xml.
The index allows process participants in IBM Process Portal to search for tasks or process instances that contain particular metadata or instance data. The index is also used for historic data in the Process Performance and Task Performance dashboards.
Set the location of the index
The location of the index is determined by the value of the BPM_SEARCH_TASK_INDEX environment variable. This variable has cell scope on a stand-alone server and cluster scope on a cluster.
- On a cluster
The default location is...
-
$BPM_SEARCH_TASK_INDEX_ROOT/cluster
So that an index does not have to be maintained for each cluster member, one index can be shared across nodes. The index can be maintained in only one cluster member at a time, which is enforced by a locking strategy on the index. To set up the index, use a shared network storage solution for your index and change the value of the cell scoped BPM_SEARCH_TASK_INDEX_ROOT variable to point to the common location.
For a cluster member to have a separate index, you can change the value of the cell scoped BPM_SEARCH_TASK_INDEX_ROOT variable to point to a different location.
To locate the environments variables, in the administrative console click...
-
Environment | WebSphere Variables
- On a stand-alone server
The default location of the task index is...
-
BPM_SEARCH_TASK_INDEX_ROOT/WAS_SERVER_NAME
If the BPM_SEARCH_TASK_INDEX variable is not set, the location defaults to...
-
USER_INSTALL_ROOT/searchIndex/task/WAS_SERVER_NAME
which results in one index per server.
To change the index location, in the administrative console click...
-
Environment | WebSphere Variables
If the BPM_SEARCH_TASK_INDEX variable does not exist, define it with cell scope then set the value to the new location.
Change the index behavior
The index configuration includes the following default settings:
- Indexing is enabled.
- The index is updated every 5 seconds.
- For tasks, the index is updated only for open tasks; it is not updated for completed tasks.
To change the index behavior, perform the following actions:
- Edit 100Custom.xml for the appropriate server:
-
<process_center_profile>/config/cells/<Cell>/nodes/<node>/servers/<server>/process-server/config/system/100Custom.xml
- Add or edit the following code snippet as required:
<search-index> <task-index-enabled>true</task-index-enabled> <task-index-update-interval>5</task-index-update-interval> <task-index-update-completed-tasks>false</task-index-update-completed-tasks> <task-index-store-fields>false</task-index-store-fields> <task-index-work-manager>wm/default</task-index-work-manager> <task-index-include-system-tasks>falsetrue</task-index-include-system-tasks> <process-index-instance-completion-best-effort>false</process-index-instance-completion-best-effort> </search-index> - In the <search-index> section, modify the appropriate task index tags for the configuration settings to change.
XML tag Configuration setting description <task-index-enabled> Whether indexing is enabled. Default is true. If the index does not exist, it is created. To turn off indexing, change the value to false. If the index does not exist, it is not created. If indexing is turned off, the search field in the Process Portal user interface is hidden.
<task-index-update-interval> Time between index updates in seconds. The specified interval determines when the state of the instance variables is captured for tasks that completed since the last index update. Only those tasks that are completed during the current interval are searchable with the latest instance data. The default value for the update interval is 5 seconds. The minimum value is one second.
<task-index-update-completed-tasks> Whether the index is updated for completed tasks. Default is false, which means that only information about open tasks is updated. If set to true, instance-level updates, such as business data that is updated later in the process, is propagated to completed tasks. <task-index-store-fields> Whether the actual field values are stored as separate fields. Default is false, which means the actual field values are not stored as separate fields. Change to true for debugging purposes, as it improves the readability for people and it allows queries by other search tools. <task-index-work-manager> JNDI name of the work manager used by the indexing process to manage the search index. The default value is wm/default, which is the default work manager for WebSphere Application Server. To improve the performance of the index creation, in the administrative console you can create a dedicated work manager with a greater number of available threads. You can then use this tag to switch to the new work manager.
<task-index-include-system-tasks> Whether system tasks are indexed. To enable system tasks to be displayed in Gantt charts in Process Portal, ensure the value of this tag is set to true. If the value of this tag is to false, system tasks are not displayed in Gantt charts. <process-index-instance-completion-best-effort> Whether completion dates are created when instances that are migrated from previous versions of BPM are indexed. The default setting is false. If set to true, the last completion date of the associated tasks is used for the instance completion date. If no associated tasks exist, the last modified time stamp of the instance is used as the completion date.
Save changes.
- Restart the server to activate the changes.
Administer Process Portal spaces
Administering spaces involves enabling tracing, working with templates, and removing widgets.
Enable tracing for widgets in Process Portal spaces
Enable trace on the application server instance where Business Space is installed.
- Open the administrative console and click...
-
Resources | Resource Environment | Resource Environment Provider | Mashups_ConfigService | Additional Properties | Custom properties | isDebug
- Change the Value field to true, and then click OK.
- Click traceConfig.
In the Value field, add the components to trace, separated by commas with no spaces in between.
For Business Space
-
com.ibm.mm.iwidget.*,com.ibm.mashups.*,com.ibm.bspace.*
For IBM Business Monitor.
-
com.ibm.wbimonitor.*
Browser performance degradation can occur when too many components are listed.
- Click OK and then save your changes to the master configuration.
- Restart the application server instance.
A debugging console is displayed at the bottom of the page the next time you log in to Process Portal spaces.
When tracing has been enabled in addition to the Debug Console, Firebug Lite is also loaded. Because Firebug Lite opens as a pop-up window, you might receive an error message if your browser has been configured to block pop-ups. This can be resolved by disabling the pop-up blocker for your space URL and then restarting the browser.
To save a copy of the trace file, click Save in the debugging console.
Review logs for messages
You can review logs for information or error messages to see what is happening in Process Portal spaces. When an important event or error occurs, an information or error marker is displayed. When you click the marker, the System Message window is opened to display the message for the event or error.
The event or error is also recorded using the logging capabilities of WebSphere Application Server.
You can review these messages in log files in the following locations.
- Check the log files in profile_root/logs/ffdc.
- Check the log files in profile_root/logs/server.
Disable automatic wiring in Process Portal spaces
Widgets in a space communicate with each other using wires. When you add widgets to a page in a space, they are automatically wired to each other in certain situations. If you prefer to determine how widgets interact with one another, you can disable automatic wiring. When you add widgets to a page, they are automatically wired to one another when the following conditions apply:
- Automatic wiring is enabled. This setting is the default wiring configuration.
- The definitions for the two widgets allow them to be automatically wired.
- Event names sent by one widget match event names received by the other widget.
- One of the two widgets is already on the page and the user adds the other widget to the page.
You can disable this automatic wiring by changing a setting in a configuration file.
- Change the autoWiringDefaultEnabled setting to false in the configuration file.
- For a stand-alone server:
- profile_root\BusinessSpace\node\server\mm.runtime.prof\config\ConfigService.properties
- For a cluster:
- deployment_manager_profile_root\BusinessSpace\cluster\mm.runtime.prof\config\ConfigService.properties
- For a stand-alone server:
- Run the updatePropertyConfig command in the wsadmin environment of the profile.
For Windows, the value for the propertyFileName parameter must be the full path to the file, and all backslashes must be double, for example:
- AdminTask.updatePropertyConfig('[-serverName server -nodeName node -propertyFileName "profile_root\\BusinessSpace\\node\\server\\mm.runtime.prof\\config\\ConfigService.properties" -prefix "Mashups_"]')
- For a stand-alone server:
Jython:
AdminTask.updatePropertyConfig('[-serverName server -nodeName node
-propertyFileName "profile_root\BusinessSpace\node\server
\mm.runtime.prof\config\ConfigService.properties" -prefix "Mashups_"]')
AdminConfig.save()
Jacl:
$AdminTask updatePropertyConfig {-serverName server -nodeName node -propertyFileName "profile_root\BusinessSpace\node\server \mm.runtime.prof\config\ConfigService.properties" -prefix "Mashups_"} $AdminConfig save - For a cluster:
Jython:
AdminTask.updatePropertyConfig('[-clusterName cluster -propertyFileName
 "deployment_manager_profile_root\BusinessSpace\cluster\mm.runtime.prof\
config\ConfigService.properties" -prefix "Mashups_"]')
AdminConfig.save()
Jacl:
$AdminTask updatePropertyConfig {-clusterName cluster -propertyFileName
 "deployment_manager_profile_root\BusinessSpace\cluster\mm.runtime.prof\
config\ConfigService.properties" -prefix "Mashups_"}
$AdminConfig save
- For a stand-alone server:
- Run $AdminConfig save.
Work with templates in Process Portal spaces
If you log in to a space using a superuser ID, you can manage the templates that are available to users.
Create templates in Process Portal spaces
If you have the appropriate role, you can create templates that other users can use to create their spaces.
The ID that you use to log into a space must belong to the superuser role.
- Create a space and its pages.
- Apply a layout style to each page and add widgets to the pages. Configure the widgets where necessary or appropriate.
- When the space is ready, click Manage Spaces. The Space Manager opens.
- For the space, click Actions > Save as Template.
When a user creates a space based on a template, the list of templates includes the template that you created. The name of the template is the same as the name of the space used to create it.
Update templates for Process Portal spaces
If you have the appropriate role, you can update an existing template.
The ID that you use to log into a space must belong to the superuser role.
When you update a template, you are creating another version of the template. The original template and the updated version coexist. When you open the Template Manager or when you create a space, you see both versions. However, both versions will have the same name. You can resolve this problem by performing one or more of the following actions before you make your update:
- Delete the original template. To preserve a copy of the old version, export the template first. You can then import the old version when you need it.
- Rename the space used to create the template. For example, if you have a space named Shipping and you rename it to something like Shipping 2.0, when you update the template, there will be a template named Shipping and one named Shipping 2.0.
- Update the description of the space to provide a version and perhaps describe what has changed.
- Update the space that was used to create the template. If you do not have the space that was used to create the template any longer, you can create a space based on the template to update.
- When the space is ready, click Manage Spaces. The space opens.
- For the space, click Actions > Save as Template.
Delete templates in Process Portal spaces
If you have the appropriate role, you can delete templates so they are no longer available.
The ID that you use to log into a space must belong to the superuser role.
To preserve a copy of the template first, export the template before you delete it. You can then import the backup template when you need it.
- In the banner, click Actions > Manage Templates. The Template Manager opens.
- For the existing template, click Actions > Delete.
- In the confirmation window, click Yes.
Export templates from Process Portal spaces
If you have the appropriate role, you can export templates so they are available for importing at a later time.
The ID that you use to log into a space must belong to the superuser role.
- In the banner, click Actions > Manage Templates. The Template Manager opens.
- For the existing template, click Actions > Export.
- In the confirmation window, click Yes. The file name for the exported template reflects the name of the template itself.
Import templates into Process Portal spaces
If you have the appropriate role, you can import templates that have been previously exported.
The ID that you use to log into a space must belong to the superuser role.
When you import a template file that you created in a space in BPM Advanced, version 7, the import process adds it to the list of templates in the Template Manager. If you import a version 6 template file, it is added as a space instead of as a template. To re-create the template, an administrator can use the Actions menu in the Space Manager to save the space as a template.
- In the banner, click Actions > Manage Templates. The Template Manager opens.
- Click Import Template.
- Use the window that opens, select the space and import it.
Remove widgets from Process Portal spaces
You can remove widgets from a space by uninstalling them or by disabling them.
Disable widgets in Process Portal spaces
You can disable a widget by unregistering it. An unregistered widget is no longer available to users. Related widgets are grouped into a catalog. To disable a widget, you edit its definition in the catalog XML file, and then update the space. Disabling the widget prevents it from displaying on the widget palette and on pages while maintaining the code.
Disable the widget instead of uninstalling it allows the product to update the widget with enhancements and fixes so that it is at the correct level if you enable it again. If the product changes the catalog containing the widget, you might have to re-disable the widget.
- Navigate to the profile_root/BusinessSpace/node/server/widgets/installs.timestamp directory and open the catalog file containing the widget definition.
Save a copy of the file as a backup.
- Comment out the catalog entry (from <entry> to </entry>)
for the widget you want to disable. Ensure the file is still a valid XML file after the change.
Save the edited catalog file to an empty directory. The name of the file must be catalog_name.xml where name can be any name.
- At a command prompt, change directories to the profile_root/bin or cluster_root/bin directory.
- Enter wsadmin.bat -conntype NONE and then enter the appropriate command:
- To disable a widget in a stand-alone server:
- $AdminTask updateBusinessSpaceWidgets {-nodeName node -serverName server -catalog fullpath}
- To disable a widget in a cluster:
- $AdminTask updateBusinessSpaceWidgets {-clusterName cluster -catalog fullpath}
fullpath is the path to the directory containing the edited catalog file.
For information on updateBusinessSpaceWidgets, see updateBusinessSpaceWidgets command.
- To disable a widget in a stand-alone server:
- Enter Exit.
- To see the changes in the browser, logout of the space, clear the cache in the browser, and then log in again.
Uninstall custom widgets individually from Process Portal spaces
Use this procedure to uninstall a custom widget from a space that is not the only widget defined in its catalog. You can move a widget from a space in one of the following ways:
- Disable the widget, which deregisters the widget so that it is no longer available to users but it keeps the widget code on the server. To remove a widget provided by BPM Advanced, this is the way to do it. For information, see disablingwidgets.html.
- Uninstall the custom widget and the catalog that contains it, completely removes the widget (along with all of the other widgets in the catalog) and the catalog. For information, see Uninstall custom widgets and catalogs.
- Uninstall the custom widget individually, removes the widget from its catalog but maintains the catalog. Do not choose this method if you are uninstalling the last widget defined in the catalog. Instead, uninstall the widget and its catalog using the procedure in Uninstall custom widgets and catalogs.
When the custom widget is installed, the following actions occur:
- The EAR for the widget is installed in the profile_root/installedApps/node directory.
- The catalog file for the widget is added to, or updated in the profile_root/BusinessSpace/node/server/mm.runtime.prof/config directory. This action registers the widget. The catalog in your file is also added to the default catalog using an include tag.
- The endpoints used by the widget (if it uses them and needs custom endpoints) are added or updated in the profile_root/BusinessSpace/node/server/mm.runtime.prof/endpoints directory.
- The help files for the widget (if it uses the information center for its help) are added to the profile_root/config/BusinessSpace/help/eclipse/plugins directory.
When you individually uninstall a custom widget, you are deleting the widget files and removing the definition for that widget from its catalog file. You are also updating the endpoints and widget help if you include them in the uninstallation.
- Uninstall the WAR containing the widget.
- Edit the catalog XML (widget registration) file containing the widget and remove its entries. Copy the edited file into a catalog directory.
- If the widget has help, do the following steps:
- Copy the documentation plug-in containing the help from the profile_root/config/BusinessSpace/help/eclipse/eclipse/plugins directory.
- Edit the navigation XML file and delete the entries for the widget.
- Open the doc.zip file and delete the help files for the widget. If there are hyperlinks in other files to the widget help, edit these files to delete the links.
- Copy the documentation plug-in into a help/eclipse/plugins directory.
If you have other documentation plug-ins that have hyperlinks to the plug-ins that you are deleting, you need to update the other plug-ins separately. See the final step in for information.
- Copy the documentation plug-in containing the help from the profile_root/config/BusinessSpace/help/eclipse/eclipse/plugins directory.
- Compress the catalog and help directories. Check the structure of the .zip file contains the following items:
- catalog\catalog_name.xml
- help\eclipse\plugins\*
- At a command prompt, change directories to the profile_root/bin or cluster_root/bin directory.
- Enter wsadmin.bat -conntype NONE and then enter the appropriate command:
- For uninstalling the widgets from a non-clustered environment: $AdminTask
updateBusinessSpaceWidgets {-nodeName node -serverName server -widgets fullpath}
- For uninstalling the widgets from a clustered environment:$AdminTask updateBusinessSpaceWidgets {-clusterName cluster -widgets fullpath}
fullpath is the name and location of the .zip file that you created.
For information on updateBusinessSpaceWidgets, see updateBusinessSpaceWidgets command.
- For uninstalling the widgets from a non-clustered environment: $AdminTask
updateBusinessSpaceWidgets {-nodeName node -serverName server -widgets fullpath}
- Enter Exit
- Log in to Process Portal, and delete the widget from any templates and spaces that use it. If you do not delete the widget, a placeholder image and a message the widget is unavailable are displayed.
Uninstall custom widgets and catalogs in Process Portal spaces
You can uninstall a custom catalog and the widgets that it contains from a space. Custom widgets are widgets that your organization has developed. You can remove a custom widget in one of the following ways:
- Disable the widget.
This deregisters the widget so that it is no longer available to users but it keeps the widget code on the server.
- Uninstall the custom widget and the catalog that contains it, which removes all of the widgets in the catalog and the catalog.
- Uninstall the custom widget individually, which removes the widget from its catalog but maintains the catalog. Do not choose this way if you are uninstalling the last widget defined in the catalog. Instead, install the widget and its catalog. For information, see uninstallingasinglewidget.html.
When a custom widget is installed, the following actions occur:
- The EAR for the widget is installed in the profile_root/installedApps/node directory.
- The catalog file for the widget is added to, or updated in the profile_root/BusinessSpace/node/server/mm.runtime.prof/config directory. This action registers the widget. The catalog in your file is also added to the default catalog using an include tag.
- The endpoints used by the widget (if it uses them and needs custom endpoints) are added or updated in the profile_root/BusinessSpace/node/server/mm.runtime.prof/endpoints directory.
- The help files for the widget (if it uses the information center for its help) are added to the profile_root/config/BusinessSpace/help/eclipse/plugins directory.
When you uninstall one or more custom widgets and their catalog, you are deleting the widget files and the catalog file, removing the reference to the catalog file from the default catalog, and updating the documentation to remove the help plug-ins for the widgets. A command is provided for the uninstallation.
- If you do not have the .zip file that was used install the custom widget and its catalog, you need to re-create
it:
- Create an ear directory. Copy the EAR files for your custom widgets into the directory.
- Create a catalog directory and copy the catalog XML (widget registration) file into it.
- Create a help directory and copy the documentation plug-ins into it if there are any documentation plug-ins.
If you have other documentation plug-ins that have hyperlinks to the documentation plug-ins that you are deleting, update those plug-ins separately. See the final step in Create a documentation plugin for information.
- Compress the .ear file, catalog, and help directories. Check the structure of the .zip file contains the following items:
- ear\widgets_name.ear (one or more EAR files)
- catalog\catalog_name.xml
- help\eclipse\plugins\*
- At a command prompt, change directories to the profile_root/bin or cluster_root/bin directory.
- Enter wsadmin.bat -conntype NONE and then enter the appropriate command:
- For uninstalling the widgets from a non-clustered environment:
-
$AdminTask uninstallBusinessSpaceWidgets {-nodeName node -serverName server -widgets fullpath}
- For uninstalling the widgets from a clustered environment:
-
$AdminTask uninstallBusinessSpaceWidgets {-clusterName cluster -widgets fullpath}
fullpath is the name and location of the .zip file that you created.
The command deletes the EARs, catalog file, and documentation plug-ins contained in the .zip file.
- For uninstalling the widgets from a non-clustered environment:
- Enter Exit
- Log in to Process Portal, and delete the widget from any templates and spaces that use it. If you do not delete the widget, a placeholder image and a message the widget is unavailable are displayed.
Administer Business Process Choreographer
You can administer Business Process Choreographer using the administrative console or using scripts.
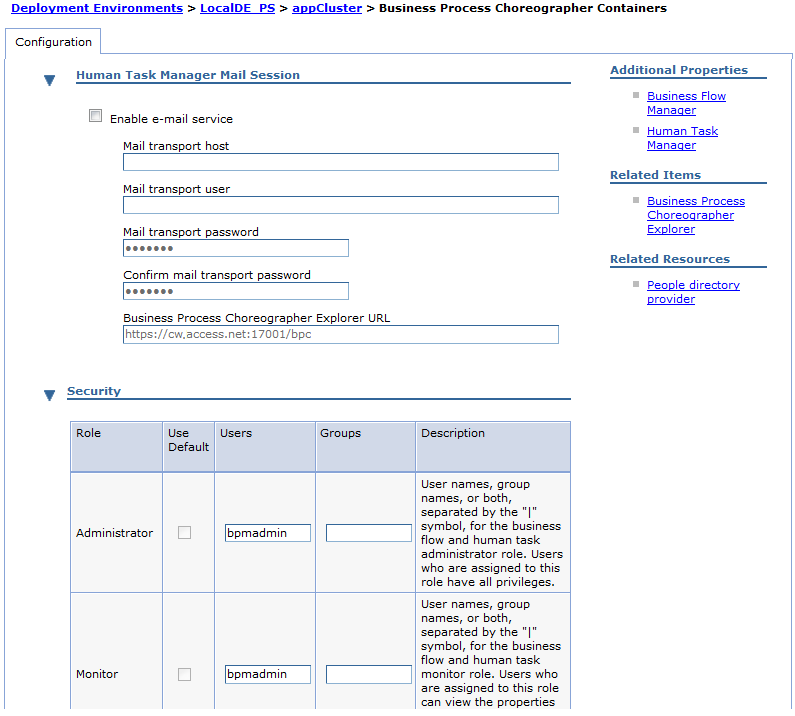
Cleanup procedures for Business Process Choreographer
An overview of the runtime objects that can be deleted from the database after they are no longer needed, and the tools available.
Types of tools available for deleting objects
Depending on which types of objects you want to delete, you can use one or more of the following tools:
- The cleanup service.
- The cleanup daemon for deleting shared work items and unused cached people query results.
- The administrative console.
- Administrative scripts to delete objects.
- The modeling tool.
- Failed Event Manager.
- Business Process Choreographer Explorer.
- Business Process Choreographer APIs.
Objects that can be deleted and tools to use
The following Business Process Choreographer database objects can be deleted when they are no longer needed.
- API-accessible objects
- You can write your own cleanup tool that uses the Business Process Choreographer APIs to delete process instances, task instances, and task templates that were created at run time using the APIs. Templates that are part of an enterprise application cannot be deleted using the APIs. For general information about using the APIs, refer to Developing client applications for BPEL processes and tasks.
- Process and task templates
- Templates can be deleted in the following ways:
- Run a script to delete templates:
- Run a script to delete templates:
- Process and task instances
- Instances can be deleted from the Business Process Choreographer database in the following ways:
- Use the administrative console to configure the cleanup service to schedule jobs that periodically delete eligible instances, which
- Run a script to delete completed instances:
- Set the appropriate properties in the business model, using Integration Designer:
- For business processes:
- The property Automatically delete the BPEL process after completion can have the value Yes, No, or On successful completion. If this property has the value No or On successful completion, it makes sense to configure a cleanup job to delete the process instances.
- For human tasks:
- The property Auto deletion mode can have the value On completion, or On successful completion (which is the default). Deletion will only take place, and you can only change the value for Auto deletion mode, if the property Duration until task is deleted either has the value Immediate or a defined interval. If the property Duration until task is deleted has the value Never, automatic deletion is disabled, the Auto deletion mode property cannot be changed, and it makes sense to configure a cleanup job to delete the human tasks. Otherwise, if Duration until task is deleted does not have the value Never, and Auto deletion mode has the value On successful completion, then it makes sense to define a cleanup job to delete the human tasks that do not complete successfully.
- For applications that were deployed using the Process Center, perform Undeploy process application snapshots.
- To delete a few instances, it can be convenient to use the Business Process Choreographer Explorer, which you can use to check details about the instances before you delete them.
You can use more than one of these techniques for deleting instances. In which case, an instance is deleted by the first attempt to delete it.
- Audit log entries
- You can delete audit log entries by running the deleteAuditLog.py script.
- Hold queue
- Messages that cannot be processed are placed on the hold queue, this includes messages for instances that were deleted. You can empty the hold queue by replaying the messages in the queue, which causes any messages for deleted instances to be discarded.
- Query and replay failed messages, using the administrative console describes how to replay messages using the Business Process Choreographer pages, and using the failed event manager page.
- Query and replay failed messages, using administrative scripts
- Shared work items
-
You can delete unused shared work items by running the cleanupUnusedStaffQueryInstances.py script with the -cleanupSharedWorkItems option
By default, the cleanup daemon for deleting shared work items and unused cached people query results regularly deletes unused shared work items. You can change the schedule on the Human Task Manager configuration and runtime pages in the administrative console. You can also modify the cleanup daemon's behavior using the administrative console to set the following Human Task Manager custom properties:
Human Task Manager custom property Description SharedWorkItemCleanup.Interval This property uses the WebSphere crontab format to control the schedule. The default value of 0 0 3 * * ? causes the daemon to run every night at three o'clock. To disable the daemon, set the value to the value DURATION_INFINITE. This schedule applies to both the cleanup of shared work items and the cleanup of unused cached people query results. SharedWorkItemCleanup.Timeout Specifies the maximum number of seconds the shared work item cleanup can take. If this custom property is not set, the default used is 3600 seconds (one hour). - People queries
- You can delete unused people queries by running the cleanupUnusedStaffQueryInstances.py script.
By default, unused cached people query results are deleted by the cleanup daemon for deleting shared work items and unused cached people query results. The schedule is shared with the shared work item cleanup, which you can change on the Human Task Manager configuration and runtime pages in the administrative console or by changing the Human Task Manager custom property SharedWorkItemCleanup.Interval. You can also use the administrative console to change the timeout and slice size by setting the following Human Task Manager custom properties:
Human Task Manager custom property Description UnusedStaffCleanup.Timeout Specifies the maximum number of seconds the people query cleanup can take. If this custom property is not set, the default used is 3600 seconds (one hour). UnusedStaffCleanup.SliceSize The number of unused people query results that are deleted in each transaction. If this custom property is not set, the default value of 500 is used. If the performance of deleting the unused people queries is too slow, you can optionally improve the performance by adding a new database index on the table STAFF_QUERY_INSTANCE_T for the column IS_SHAREABLE.
How time zones are handled in Business Process Choreographer
When times are displayed or passed as parameters, the time zone used depends on the client, interface, or parameter name being used.
Depending on the client that you are using, times are displayed in your browser in the local time of the client or the server.
For administrative scripts, time parameters end with the postfix Local or UTC, which indicates whether the times are interpreted as being in the scripting client's local time or in Coordinated Universal Time (UTC). By using the Local version of the time parameters you can avoid having to perform any calculations to adjust for time zones and daylight saving time.
| Client or interface | Time zone used or displayed |
|---|---|
| Administrative console | Server local time zone |
| Business Process Choreographer Explorer | Client local time zone |
| Business Space | Client local time zone |
| Administrative scripts | UTC or the scripting client's local time |
| APIs | UTC |
For example, the deleteCompletedProcessInstances script can be given time stamp values for the -validFromUTC, -completedAfterLocal, -completedAfterUTC, -completedBeforeLocal, and -completedBeforeUTC parameters. The parameter name suffixes show whether the time must be specified in UTC or in the scripting client's local time.
For time zones where daylight saving time is observed, the local times displayed are adjusted for daylight saving time if the date and time being displayed falls in the period when daylight saving is observed.
The administrative script parameter -validFromUTC is used to distinguish between different template versions and must always be specified exactly to the second. For other script parameters that take a time, like -completedAfterLocal, -completedAfterUTC, -completedBeforeLocal, and -completedBeforeUTC, if you specify a date with no time, it defaults to 00:00:00.
Enable logging for Business Process Choreographer
Enable Common Event Infrastructure (CEI) events for Business Process Choreographer.
To monitor BPEL process events using IBM Business Monitor, your BPEL process must be enabled to emit Common Event Infrastructure (CEI) events. You specify this when modeling your BPEL process. As a minimum, to be able to monitor a BPEL process, hthe "Process Started" event must be emitted. For a list of CEI events that you can monitor, see Business process events. For information about how to enable a BPEL process to emit CEI events, refer to the IBM Integration Designer Information Center.
To use a Jython script to enable CEI logging for the Business Process Choreographer, perform setStateObserver.py administrative script.
To enable CEI logging for Business Process Choreographer, using the administrative console, perform Enable Common Base Events, the audit trail, and the task history using the administrative console.
Common Event Infrastructure events for your BPEL processes and activities are emitted.
Use the administrative console to administer Business Process Choreographer
Describes the administrative actions that can be performed using the administrative console.
Enable Common Base Events, the audit trail, and the task history using the administrative console
Use this task to enable Business Process Choreographer events to be emitted to the Common Event Infrastructure as Common Base Events, or stored in the audit trail, or both. You can also use this task to exploit task history data using either Business Space or the Task Instance History REST interface. You can change the state observers settings for the Business Flow Manager or the Human Task Manager, permanently on the Configuration tab, or temporarily on the Runtime tab. Any choices you make on these Configuration or Runtime tabs affect all applications executing in the appropriate container. For changes to affect both the Business Flow Manager and the Human Task Manager, change the settings separately for them both.
Change the configured logging infrastructure, using the administrative console
Use this task to change the state observer logging for the task history, audit log, or common event infrastructure logging for the configuration. Choices made on the Configuration tab are activated the next time the cluster is started. The chosen settings remain in effect whenever the cluster is restarted.
Make changes to the configuration, as follows:
- Display the Business Flow Manager or Human Task Manager pane.
- Click...
-
Servers | Clusters | WebSphere application server clusters | cluster | Configuration | Business Process Manager | Business Process Choreographer
- Choose one of the following options:
- For BPEL processes, click Business Flow Manager.
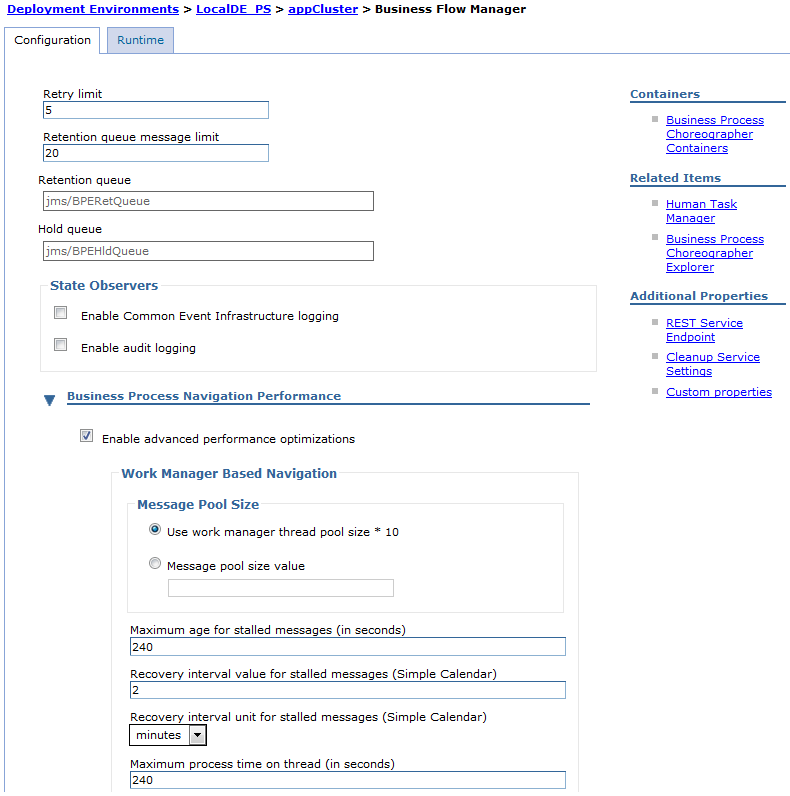
- For human tasks, click Human Task Manager.
- For BPEL processes, click Business Flow Manager.
- Click...
- On the Configuration tab, in the General Properties section, select the logging to be enabled. The state observers are independent of each other:
- Enable Common Event Infrastructure logging
- Select this check box to enable event emission that is based on the Common Event Infrastructure.
- Enable audit logging
- Select this check box to store the audit log events in the audit trail tables of the Business Process Choreographer database.
- Enable task history
- This option is only available for the Human Task Manager. Select this check box to display task history data in Business Space, or to retrieve task history data using the Task Instance History REST interface.
- Accept the change.
- Click OK.
- In the Messages box, click Save.
- To enable IBM Business Monitor to monitor Service Component Architecture (SCA) events, you must set a custom property.
- In the administrative console, click...
-
Servers | Clusters | WebSphere application server clusters | cluster | Business Process Manager | Business Process Choreographer | Business Flow Manager | Custom Properties

- Click New to add a new custom property.
- Enter the name Compat.SCAMonitoringForBFMAPI and the value true.
Save the changes. The setting will be activated the next time that you restart the server.
- In the administrative console, click...
The state observers are set, as you required.
Restart the cluster where Business Process Choreographer is configured.
Configure the logging infrastructure for the session, using the administrative console
Use this task to change the state observer logging for the task history, audit log, or common event infrastructure logging for the session.
Choices made on the Runtime tab are effective immediately.
- Display the Business Flow Manager or Human Task Manager pane.
- Click Servers > Clusters > WebSphere application server clusters > cluster, then on the Configuration tab, in the Business Process Manager section, expand Business Process Choreographer.
- Choose one of the following options:
- For BPEL processes, click Business Flow Manager.
- For human tasks, click Human Task Manager.
- For BPEL processes, click Business Flow Manager.
- On the Runtime tab, in the General Properties section, select the logging to be enabled. The state observers are independent of each other:
- Enable Common Event Infrastructure logging
- Select this check box to enable event emission that is based on the Common Event Infrastructure.
- Enable audit logging
- Select this check box to store the audit log events in the audit trail tables of the Business Process Choreographer database.
- Enable task history
- This option is only available for the Human Task Manager. Select this check box to display task history data in Business Space, or to retrieve task history data using the Task Instance History REST interface.
- To enable IBM Business Monitor to monitor Service Component Architecture (SCA) events, you must set a custom property.
- In the administrative console, click...
-
Servers | Clusters | WebSphere application server clusters | cluster | Business Process Manager | Business Process Choreographer | Business Flow Manager | Custom Properties
- Click New to add a new custom property.
- Enter the name Compat.SCAMonitoringForBFMAPI and the value true.
- In the administrative console, click...
- For any changes made on the Runtime tab to remain in effect after the next server restart, select Save runtime changes to configuration.
- Click OK to accept the change.
The state observers are set, as you required.
Query and replay failed messages, using the administrative console
Check for and replay any messages for BPEL processes or human tasks that could not be processed.
When a problem occurs while processing a message, it is moved to the retention queue or hold queue. This task describes how to determine whether any failed messages exist, and to send those messages to the internal queue again.
- For the Business Flow Manager, the most flexible way to check and reply and messages on the hold queue, is to use the administrative console page for the failed event manager.
- Click Servers > Deployment Environments > env_name > Failed Event Manager > Search failed events, for Event type, select BFM hold then click OK.
- If the search results contains any messages, you can select any of them then either click Resubmit to replay the messages, or Delete to delete them from the hold queue without replaying them.
- Click Servers > Deployment Environments > env_name > Failed Event Manager > Search failed events, for Event type, select BFM hold then click OK.
- To check how many messages are in the hold and retention queues, and replay them using the Business Process Choreographer administrative console pages:
- Click Servers > Clusters > WebSphere application server clusters > cluster, then on the Configuration tab, in the Business Process Manager section, expand Business Process Choreographer.
- Choose one of the following options:
- For BPEL processes, click Business Flow Manager.
- For human tasks, click Human Task Manager.
The number of messages in the hold queue and retention queue are displayed on the Runtime tab under General Properties.
- For BPEL processes, click Business Flow Manager.
- If either the hold queue or the retention queue contains messages, you can move the messages to the internal work queue.
Click one of the following options:
- For BPEL processes: Replay Hold Queue or Replay Retention Queue
- For human tasks: Replay Hold Queue
When WebSphere administrative security is enabled, the replay buttons are only visible to users who have administrator or operator authority.
- For BPEL processes: Replay Hold Queue or Replay Retention Queue
Business Process Choreographer tries to service all replayed messages again.
Refresh the failed message counts
Use the administrative console to refresh the count of failed messages for BPEL processes or human tasks.
The displayed number of messages in the hold queue and in the retention queue, and the number of message exceptions, remain static until refreshed. This task describes how to update and display the number of messages on those queues and the number of message exceptions.
- Select the Business Process Choreographer administration page for the cluster.
Click Servers > Clusters > WebSphere application server clusters > cluster, then on the Configuration tab, in the Business Process Manager section, expand Business Process Choreographer.
- Refresh the message counts.
- Choose one of the following options:
- For BPEL processes, click Business Flow Manager.
- For human tasks, click Human Task Manager.
- For BPEL processes, click Business Flow Manager.
- On the Runtime tab, click Refresh Message Count.
- Choose one of the following options:
The following updated values are displayed under General Properties:
- For BPEL processes: The number of messages in the hold queue and in the retention queue
- For human tasks: The number of messages in the hold queue
- If any exceptions occurred while accessing the queues, the message text is displayed in the Message exceptions field.
On this page, you can also replay the messages in these queues.
Refresh people query results, using the administrative console
The results of a people query are static. Use the administrative console to refresh people queries. Business Process Choreographer caches the results of people queries, which have been evaluated against a people directory, such as a LDAP server, in the runtime database. If the people directory changes, you can force the people assignments to be evaluated again.
To refresh the people queries:
- Click Servers > Clusters > WebSphere application server clusters > cluster, then on the Configuration tab, in the Business Process Manager section, expand Business Process Choreographer, and click Human Task Manager.
- On the Runtime tab, click Refresh People Queries. All people queries are refreshed.
Remember: The refresh button is only visible to users who have administrator or operator authority. Refreshing the people query results in this way can cause a high load on the application and database. Consider using an administrative script instead.
Refresh people query results, using the refresh daemon
Use this method to change how often the people query results are refreshed, or to disable the automatic refreshing. People queries are resolved by the specified people directory provider. The result is stored in the Business Process Choreographer database. To optimize the authorization performance, the retrieved query results are cached. The cache content is checked for currency when the people query refresh daemon is invoked.
In order to keep people query results up to date, a daemon is provided that refreshes expired people query results on a regular schedule. The daemon refreshes all cached people query results that have expired.
- Open the custom properties page for the Human Task Manager:
- Click Servers > Clusters > WebSphere application server clusters > cluster, then on the Configuration tab, in the Business Process Manager section, expand Business Process Choreographer, and click Human Task Manager.
- Choose one of the following options:
- To change settings without having to restart the cluster, select the Runtime tab.
- To make changes that will only have an effect after the cluster is restarted, select the Configuration tab.
- In the field People query refresh schedule enter the schedule using the syntax as supported by the WebSphere CRON calendar. This value determines when the daemon will refresh any expired people query results. The default value is "0 0 1 * * ?", which causes a refresh every day at 1 am. To disable the daemon, delete the value. If you disable the daemon, you should use administrative scripts to refresh the queries.
- In the field Timeout for people query result enter a new value in seconds. This value determines how long a people query result is considered to be valid. After this time period, the people query result is considered to be no longer valid, and the people query will be refreshed the next time the daemon runs. The default is one hour.
- For any changes made on the Runtime tab to remain in effect after the next server restart, select Save runtime changes to configuration.
- Click OK.
Save the changes. To make your changes that you made on the Configuration tab effective, restart the cluster.
The new expiration time value applies only to new people queries, it does not apply to existing people queries.
Configure the cleanup service and cleanup jobs
Use the administrative console to configure and schedule cleanup jobs that periodically delete instances of BPEL processes and human tasks that are in particular states.
Identify times of the day and days of the week, when it would be best to schedule the cleanup service, for example, when there is the lowest load on the database. For each BPEL process and human task that you want the cleanup service to delete, decide which states make an instance a candidate for deletion, and decide how long an instance must be in one of those states before the next scheduled cleanup deletes them.
You want completed instances to be deleted automatically after keeping them for a while. There is a separate cleanup service for the Business Flow Manager and for the Human Task Manager. For each of them, you must first enable the service and define the service parameters, such as the schedule, maximum duration of the cleanup, and the database transaction size. Then you can define cleanup jobs for sets of templates and define the end states and the duration that an instance must be in to qualify for deletion.
The Human Task Manager cleanup service only deletes stand-alone human tasks, but when the Business Flow Manager cleanup service deletes a BPEL process, it also deletes all of the child processes and inline human tasks that are contained in the process. When security is enabled, the cleanup user ID specified for the Business Process Choreographer configuration must be in the business administrator role.
- Configure the cleanup service for the Business Flow Manager.
- To configure the cleanup service, in the administrative console, click...
-
Servers | Clusters | WebSphere application server clusters | cluster | Configuration | Business Process Manager | Business Process Choreographer | Business Flow Manager
- Choose one of the following options:
- To change settings without having to restart the cluster, select the Runtime tab.
- To make changes that will only have an effect after the cluster is restarted, select the Configuration tab.
- In the Additional properties section, click Cleanup Service Settings.
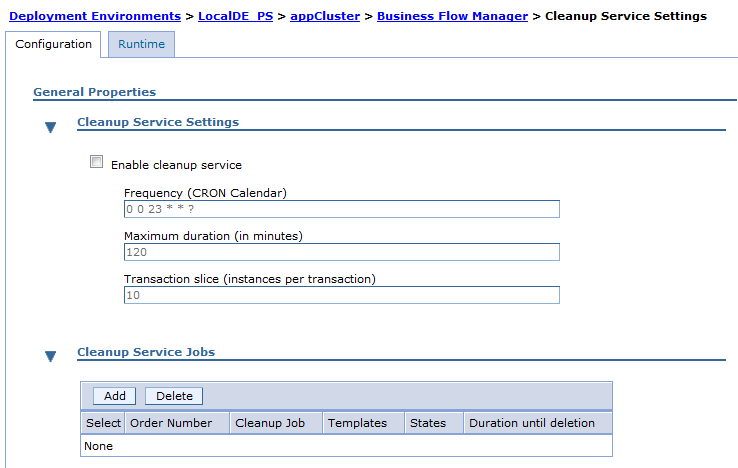
- If the cleanup service is not enabled, select Enable cleanup service. For a cluster configuration, the cleanup service will be scheduled to run on one of the cluster members of the cluster it is configured on.
- For Frequency, specify the time and frequency when the Business Flow Manager cleanup service will run. Enter a WebSphere crontab format string, which defines the start of a low load time slot. For example, to run the cleanup service every night at eleven o'clock,
use the default value of 0 0 23 * * ? .
- For Maximum duration, enter the maximum time the cleanup is allowed to run. The default is 120 minutes. Verify the maximum duration is shorter than the time interval specified by the frequency.
- For Transaction slice, enter the number of BPEL process instances that will be deleted in each database transaction. The default value is 10. Because the value affects the performance of the cleanup service, it is worth trying different values. Depending on the size of the human tasks being deleted, you might be able to increase the slice size to increase the performance. However, if you get transaction timeouts, you should reduce the value.
Save changes.
- To configure the cleanup service, in the administrative console, click...
- Add a new cleanup job for the Business Flow Manager.
- In the administrative console, on the Business Flow Manager page, click Cleanup Service Jobs.
- To create a new cleanup job, click Add.
- If this is not the only cleanup job, for Order Number, you can select a sequence number that determines the order the jobs will be run, starting with number zero.
- For Cleanup Job, enter a name for the job.
- For Templates, either enter the name of one or more BPEL process templates (one per line) whose instances (including any inline human tasks) will be deleted, or enter an asterisk ('*') to specify all BPEL process templates.
- For Restrict cleanup to instances in the following states, select one or more of the following states:
- FINISHED
- TERMINATED
- FAILED
- For Duration until deletion, specify how long an instance must be in one of the specified states before it becomes eligible for deletion by the cleanup job. Enter integers in the following fields: Minutes, Hours, Days, Months, and Years. The default is two hours.
- Click Apply or OK.
Save changes.
- If necessary, repeat this step to define more cleanup jobs for BPEL process instances.
- Configure the cleanup service for the Human Task Manager.
- To configure the cleanup service, in the administrative console, click...
-
Servers | Clusters | WebSphere application server clusters | cluster | Configuration tab | Business Process Manager | Business Process Choreographer | Human Task Manager
- If the cleanup service is not enabled, select...
-
Enable cleanup service
For a cluster configuration, the cleanup service will be scheduled to run on one of the cluster members of the cluster it is configured on.
- For Frequency, specify the time and frequency when the Human Task Manager cleanup service will run.
Enter a WebSphere crontab format string, which defines a low load time slot.
If the cleanup service for the Business Flow Manager is also enabled, specify a schedule that does not overlap with the time window defined by the values specified in steps 1.e and 1.f. For example, if the Business Flow Manager cleanup service starts every night at one o'clock, and can run for up to two hours, you can specify the cleanup service for the Human Task Manager runs every night at three o'clock by entering the value 0 0 3 * * ?.
- For Maximum duration, enter the maximum time the cleanup is allowed to run. The default is 120 minutes. Verify the maximum duration is shorter than the time interval specified by the frequency.
- For Transaction slice, enter the number of human task instances that will be deleted in each database transaction. The default value is 10. Because the value affects the performance of the cleanup service, it is worth trying different values. Depending on the size of the human tasks being deleted, you might be able to increase the slice size to increase the performance. However, if you get transaction timeouts, you should reduce the value.
Save changes.
- To configure the cleanup service, in the administrative console, click...
- Add a new cleanup job for the Human Task Manager.
- In the administrative console, on the Human Task Manager page, click Cleanup jobs.
- To create a new cleanup job, click Add.
- If this is not the only cleanup job, for Order Number, you can select a sequence number that determines the order the jobs will be run, starting with number zero.
- For Cleanup Job, enter a name for the job.
- For Templates, either enter the name of one or more stand-alone human task templates (one per line)
whose instances will be deleted, or enter an asterisk (*) to specify all stand-alone human task templates. To specify a namespace for a task template, append it in brackets, for example, myTaskTemplate (http://bpc/samples/task/).
The Human Task Manager cleanup service can also delete inline invocation tasks that are started using the Human Task Manager API.
- For Restrict cleanup to instances in the following states, select one or more of the following states:
- FINISHED
- TERMINATED
- FAILED
- INACTIVE
- EXPIRED
- For Duration until deletion, specify how long an instance must be in one of the specified states before it becomes eligible for deletion by the cleanup job. Enter integers in the following fields: Minutes, Hours, Days, Months, and Years. The default is two hours.
- Click Apply or OK.
Save changes.
- If necessary, repeat this step to define more cleanup jobs for stand-alone human task instances.
- If you made the changes on the Configuration tab, restart the cluster to activate the changes.
You have activated the cleanup services and defined cleanup jobs to delete completed instances. When the cleanup service starts and finishes, the messages CWWBF0118I and CWWBF0119I are written to the SystemOut.log file. When one cleanup job starts and finishes, the messages CWWBF0116I and CWWBF0117I are written to the SystemOut.log file. Progress updates of the cleanup processing are written with message CWWBF0120I to the SystemOut.log.
Administer the compensation service
Use the administrative console to start the compensation service automatically when the cluster members start, and to specify the location and maximum size of the recovery log. The compensation service must be started on an application server, when BPEL processes are run on that server. You must perform this server-level setup consistently for each cluster member. The compensation service is used to manage updates that might be made in a number of transactions before the process completes. When you set up a new application server, the compensation service is enabled by default.
In a high availability (HA) environment, each server in a cluster must have a unique compensation log and transaction log directory, so that multiple servers do not attempt to access the same log file. Also, each server in the cluster must be able to access the transaction and compensation log directories of the other servers in the cluster. To change the directory in which compensation logs are written, type the full path name of the directory in the Recovery log directory field.
You can use the administrative console to view and change properties of the compensation service for application servers.
- In the administrative console, click...
-
Servers | Clusters | WebSphere application server clusters | cluster | Configuration tab | Container Settings | Container Services | Compensation service. This action displays a panel with the compensation service properties.
- Verify the Enable service at server startup check box is selected for each server in the cluster.
- If necessary, change the compensation service properties.
- Click OK.
- To save your configuration, click Save in the Messages box of the administrative console window.
Use scripts to administer Business Process Choreographer
Describes the administrative actions that can be performed using scripts. There is no cross-cell support for the Business Process Choreographer administrative scripts. This means that you can connect the scripting client only to the deployment manager of the cell to which the node of the profile where the script runs belongs.
Archive completed BPEL process and task instances
The archive.py administrative script moves completed top-level BPEL process instances and human task instances, including their associated data, from a Business Process Choreographer database to an archive database.
Location
The archive.py script is located in the Business Process Choreographer admin directory:
-
install_root/ProcessChoreographer/admin
The configuration script is run using the wsadmin command.
- The script must be run in connected mode to your Business Process Choreographer configuration. The source and destination clusters and the deployment manager must be running.
- If the user ID does not have WebSphere system administrator authority, include the wsadmin -user and -password options to specify a user ID that has WebSphere system administrator authority.
-
 If you are not working with the default profile, use the wsadmin -profileName profile option to specify the profile.
- If the script is already running, further invocations will be serialized.
- install_root/bin/wsadmin.sh -f archive.py parameters
You can supply the following parameters:
-fromCluster fromClusterName
-toCluster   toClusterName
(-tasks | -processes)
(-all | [-finished] | [-terminated] | [-failed] | [-expired])
[(-templateName templateName [-nameSpace namespace] [ -validFromUTC timestamp ])]
[-kind ( todo | invocation | collaboration ) ]
[-completedAfterUTC  timestamp | -completedAfterLocal  timestamp ]
[-completedBeforeUTC timestamp | -completedBeforeLocal timestamp ]
[-startedBy userId | -createdBy userId]
[-slice numberOfEntities]
[-limit numberOfEntities]
- -fromCluster fromClusterName
- The name of the cluster where Business Process Choreographer is configured identifies the source database.
- -toCluster toClusterName
- The name of the cluster where Business Process Archive Manager is configured. This identifies the destination archive database
- -tasks | -processes
- Include one of these options to select whether tasks or processes will be moved to the archive. Specifying both will cause an error. Subprocesses are archived with the related process instances they belong to. Process templates and task templates are copied with the related instance that depend on them.
- -all | [-finished] [-terminated] [-failed] [-expired]
- Specifies which process instances are to be moved according to their state. The -all option means all end states; finished, terminated, failed, and expired. If you do not specify -all, you must specify one or more of the end states. The -expired option is only valid for the -tasks option.
The set of instances to be archived can be restricted further by specifying further parameters.
- -templateName templateName
- Optionally, specifies the name of the process or task template whose instances will be moved. If there are multiple templates sharing the same name but with different validFrom dates the instances for all templates with that name are moved unless use the -validFromUTC parameter to specify a particular template. If using the -tasks option, you can further restrict the instance selection by also specifying one or both of the -nameSpace and -kind parameters.
- -nameSpace nameSpace
- Optionally, specifies the namespace of the task template whose instances will be moved.
- -kind ( todo | invocation | collaboration )
- Optionally, restricts the archiving to a specific kind of task.
- -validFromUTC timestamp
- The date from which the template is valid in Coordinated Universal Time (UTC). This option can only be used with the templateName option. The timestamp string has the following format: 'yyyy-MM-ddThh:mm:ss' (year, month, day, T, hours, minutes, seconds). For example, 2009-11-20T12:00:00.
- -startedBy userId|-createdBy userId
- Optionally, only moves completed task instances that were created by a specified user, or process instances that were started by a specified user ID.
- -completedAfterLocal timestamp
- Optionally, specifies that only instances that completed after the given local time are archived. The timestamp string has the following format: 'yyyy-MM-ddThh:mm:ss' (year, month, day, T, hours, minutes, seconds). For example, 2009-11-20T12:00:00. If you only specify a date, the time will default to 00:00:00 local time on the servers.
- -completedAfterUTC timestamp
- Optionally, specifies that only instances that completed after the given time in Coordinated Universal Time are archived. The timestamp string has the following format: 'yyyy-MM-ddThh:mm:ss' (year, month, day, T, hours, minutes, seconds). For example, 2009-11-20T12:00:00. If you only specify a date, the time will default to 00:00:00 UTC.
- -completedBeforeLocal timestamp
- Optionally, specifies that only instances that completed before the given local time are archived. The timestamp string has the following format: 'yyyy-MM-ddThh:mm:ss' (year, month, day, T, hours, minutes, seconds). For example, 2009-11-20T12:00:00. If you only specify a date, the time will default to 00:00:00 local time on the servers.
- -completedBeforeUTC timestamp
- Optionally, specifies that only instances that completed before the given time in Coordinated Universal Time are archived. The timestamp string has the following format: 'yyyy-MM-ddThh:mm:ss' (year, month, day, T, hours, minutes, seconds). For example, 2009-11-20T12:00:00. If you only specify a date, the time will default to 00:00:00 UTC.
- -limit numberOfEntities
- This optionally specifies the maximum number of top-level instances that will be archived by the current script invocation. The default value is 1. If you invoke the script using the -limit 0 option, no instances will be archived, and only the consistency check and any necessary recovery actions will be performed.
Be careful increasing the value for numberOfEntities. After this script is started, it is not possible to stop it. Depending on the environment and the size of the BPEL processes, and the number of subprocesses and human tasks, each top-level process instance can take a long time to archive.
- -slice numberOfEntities
- Specifies how many object instances are copied or deleted in each database transaction. The default value is 1. Using larger slice sizes can result in better performance, but requires more database resources, such as locks, for the archiving operation.
If you are using an Oracle database, specifying a very large slice size, for example, 1000, can cause Oracle error ORA-01795.
The script reports which server the script is running on:
The archive operation is running on server 'runtimeClusterMember1' on node 'runtimeNode01'. Check the log files of the server to get information about the progress and results of the archiving operation.
When the script has finished, it outputs the following message:
- archive.py finished.
It also reports how many top-level instances were moved to the archive or a warning that no instances were archived. For example, one of the following messages is output:
-
- Top-level instances archived: 15
-
WARNING: The selection criterion returned no results.
No instances archived.
For more detailed information, check the SystemOut.log file on the cluster member where the workload manager ran the script.
Troubleshooting and recovery
Because the archiving script must be run connected to the Business Process Choreographer configuration the data will be archived from, that is where the API event handlers are called, and where events and audit log entries are generated.
After the script has been started, it cannot be stopped. Especially if you specify large value for the -limit parameter, the script might run for a long time before completing, which can cause the following warnings and errors:
- If you get the error java.net.SocketTimeoutException: Read timed out or ADMC0009E: The system failed to make the SOAP RPC call: invoke, it probably means that a SOAP connection timeout happened before the archiving finished. In this case, the archiving continues, and you must check the log file of the cluster member where the workload manager ran the script, to see if it completed successfully. You can ignore these timeout errors, but to prevent them you must increase the timeout values,
- If the archiving operation takes a long time, it is normal for warnings like ThreadMonitor W WSVR0605W: Thread "SoapConnectorThreadPool : 0" (00000032) has been active for 611322 milliseconds and may be hung. There is/are 1 thread(s) in total in the server that may be hung. to be written to the SystemOut.log file of the runtime deployment target. If the archiving operation completes, you will see another message like ThreadMonitor W WSVR0606W: Thread "SoapConnectorThreadPool : 0" (0000002d) was previously reported to be hung but has completed. It was active for approximately 3958253 milliseconds. There is/are 0 thread(s) in total in the server that still may be hung.
- If you get the error CWWBB0665E: Archiving error with Oracle error ORA-01795, reduce the size of the slice parameter.
If archiving fails for any reason, for example, because the server is restarted during archiving, any unfinished archiving is not automatically completed. You will have to invoke the script again.
Because the script works in two phases; first copying the selected instances to the target archive database, and then deleting the instances from the source database, if the script fails during archiving, it is possible that either the copying was not completed or the deleting was not completed. This can mean the same instances exist and are visible in both databases.
Having duplicate instances should not cause any problems, and will be corrected the next time the script is run. After you have fixed the problem that caused the failure, invoke the archive.py script again using the same invocation parameters. If you invoke the script using the -limit 0 option, no instances will be archived, and only the consistency check and any necessary recovery actions will be performed.
- If the copying phase did not complete, the script will delete the duplicate instances from the destination archive database.
- If the copying phase completed, but the deletion phase did not complete, the script will continue deleting the duplicate instances from the source database.
Restriction: The following restrictions apply:
- You cannot transfer objects from an archive database back to a Business Process Choreographer database, nor to another archive.
- The first time that you archive instances to a new archive database, the identity of the Business Process Choreographer configuration is written to the database, and in future, only instances from that configuration can be archived to that archive database.
- When instances are successfully moved to the archive, they are deleted from the Business Process Choreographer database, which generates a deletion event for the common event infrastructure (CEI) and the audit log. But it is not possible to identify the deletion event was caused by an archiving action rather than by some other delete action, for example, cleanup service, user initiated delete action, delete script, or automatic deletion after successful completion.
- You cannot archive to different archives at the same time. Parallel invocations of the archive.py script are serialized.
- You cannot archive a process instance that has the same process name as any other process instance in the archiving database.
- You cannot archive a process instance that has the same values for its correlation set as another process instance in the archiving database.
- If you archive instances of a process template, then undeploy and redeploy the identical process template with the valid from date unchanged, you cannot archive any new instances of that process template to the same archive database. This is not an issue for normal process template versioning, where a different valid from date is used.
However, even if one of the restriction prevents you from archiving certain process instances to one archive database, you can archive those process instances to a different archive database, for which the restriction conditions are not true.
Example invocation
To move up to 500 finished and terminated BPEL process instances from the database for the Business Process Choreographer configuration on cluster "ProcessCluster" that completed before the year 2010 to the archive database for the Business Process Archive Manager configured on cluster "SupportCluster", perform the following action.
install_root/bin/wsadmin.sh
    -f install_root/ProcessChoreographer/admin/archive.py
    -fromCluster ProcessCluster -toCluster SupportCluster
    -completedBeforeLocal 2010-01-01T00:00:00
    -processes
    -finished -terminated -limit 500
Query and replay failed messages, using administrative scripts
Use the queryNumberOfFailedMessages.py administrative script to determine whether there are any failed messages for BPEL processes or human tasks. If there are and failed messsages, use the replayFailedMessages.py administrative script , to retry processing them.
The following conditions must be met:
- Run the script in connected mode, that is, do not use the wsadmin -conntype none option.
- At least one cluster member must be running.
- If the user ID does not have operator authority, include the wsadmin -user and -password options to specify a user ID that has operator authority.
- If you are not working with the default profile, use the wsadmin -profileName profile option to specify the profile.
When a problem occurs while processing an internal message, this message ends up on the retention queue or hold queue. To determine whether any failed messages exist, and to send those messages to the internal queue again:
- Change to the Business Process Choreographer subdirectory where the administrative script is located.
- cd install_root/ProcessChoreographer/admin
- Query the number of failed messages on both the retention and hold queues.
install_root/bin/wsadmin.sh -f queryNumberOfFailedMessages.py
           -cluster clusterName            [ -bfm | -htm ]
Where:
- -cluster clusterName
- The name of the cluster where Business Process Choreographer is configured. In a multicluster setup, you must specify the application cluster because that is where Business Process Choreographer is configured.
- -bfm | -htm
- These keywords are optional and mutually exclusive. The default, if neither option is specified is to replay failed messages for both BPEL processes and human tasks. To create only replay the messages for BPEL processes, specify the -bfm option. To create only replay messages for human tasks, specify the -htm option.
- Replay all failed messages on the hold queue, retention queue, or both queues.
install_root/bin/wsadmin.sh -f replayFailedMessages.py
       -cluster cluster        -queue replayQueue        [ -bfm | -htm ]
Where:
- -cluster clusterName
- The name of the cluster where Business Process Choreographer is configured. In a multicluster setup, you must specify the application cluster because that is where Business Process Choreographer is configured.
- -queue replayQueue
- Optionally specifies the queue to replay. replayQueue can have one of the following values:
- holdQueue (this is the default value)
- retentionQueue (only valid when the -bfm option is specified)
- both (not valid when the -htm option is specified)
- -bfm | -htm
- These keywords are optional and mutually exclusive. The default, if neither option is specified is to replay failed messages for both BPEL processes and human tasks. To create only replay the messages for BPEL processes, specify the -bfm option. To create only replay messages for human tasks, specify the -htm option.
Refresh people query results, using administrative scripts
Use the refreshStaffQuery.py administrative script to refresh people queries because the results of a people query are static.
The following conditions must be met:
- Run the script in connected mode, that is, do not use the wsadmin -conntype none option.
- At least one cluster member must be running.
- If the user ID does not have operator authority, include the wsadmin -user and -password options to specify a user ID that has operator authority.
- If you are not working with the default profile, use the wsadmin -profileName profile option to specify the profile.
Business Process Choreographer caches the results of people queries, which have been evaluated against a people directory, such as a LDAP server, in the runtime database. If the people directory changes, you can force the people assignments to be evaluated again.
- Change to the Business Process Choreographer subdirectory where the administrative script is located.
- cd install_root/ProcessChoreographer/admin
- Force the people assignment to be evaluated again.
install_root/bin/wsadmin.sh -f refreshStaffQuery.py
       -cluster clusterName        [-processTemplate templateName |
       (-taskTemplate templateName [-nameSpace nameSpace]) |
        -userlist username{,username}...]
Where:
- -cluster clusterName
- The name of the cluster where Business Process Choreographer is configured. In a multicluster setup, you must specify the application cluster because that is where Business Process Choreographer is configured.
- -processTemplate templateName
- The name of the process template. People assignments that belong to this process template are refreshed.
- -taskTemplate templateName
- The name of the task template. People assignments that belong to this task template are refreshed. The refresh is not performed for the default user, but for the staff queries that model task roles. If the refresh fails, then the queries for the fallback user are not refreshed, for example, for the process administrators.
- -nameSpace nameSpace
- The target namespace of the task template.
- -userlist userName
- A comma-separated list of user names. People assignments that contain the specified names are refreshed. The user list can be surrounded by quotation marks. If the quotation marks are omitted the user list must not contain blanks between the user names.
If you do not specify any templateName nor userlist, all people queries that are stored in the database are refreshed. You might want to avoid this for performance reasons.
- If the script triggers long-running work, the script might fail if the connection timeout is not long enough to complete the action. Check the SystemOut.log file to see whether you need to restart the script. If the timeout happens often, consider increasing the value of the timeout property for the connector you are using, or adjusting the script parameters to reduce the amount of work done.
Delete Business Process Choreographer objects
Various database objects accumulate in a running system, for example, audit log entries, task, and process instances, task, and process templates, and people queries. Regularly running administrative scripts to delete objects that are no longer needed from the Business Process Choreographer databases can help prevent wasting storage space.
Delete audit log entries, using administrative scripts
Use the deleteAuditLog.py administrative script to delete some or all audit log entries for the Business Flow Manager.
Before you begin this procedure, the following conditions must be met:
- Run the script in connected mode, that is, do not use the wsadmin -conntype none option.
- At least one cluster member must be running.
- If the user ID does not have operator authority, include the wsadmin -user and -password options to specify a user ID that has operator authority.
- If you are not working with the default profile, use the wsadmin -profileName profile option to specify the profile.
You can use the deleteAuditLog.py administrative script to delete audit log entries for the Business Flow Manager from the database.
- Change to the Business Process Choreographer subdirectory where the administrative script is located.
- cd install_root/ProcessChoreographer/admin
- Delete the entries in the audit log table.
install_root\bin\wsadmin -f deleteAuditLog.py
       -cluster cluster        ( -all | -timeUTC timestamp | -timeLocal timestamp
              | -processtimeUTC timestamp | -processtimeLocal timestamp )
       [-slice size]
Where:
- -cluster clusterName
- The name of the cluster where Business Process Choreographer is configured. In a multicluster setup, you must specify the application cluster because that is where Business Process Choreographer is configured.
- -all
- Deletes all the audit log entries in the database. The deletion is done in multiple transactions. Each transaction deletes the number of entries specified in the slice parameter, or the default number.
- -timeLocal timestamp
- Use this option to specify the deletion cutoff date and local time on the server. Only audit log entries older than the time you specify for timestamp are deleted. Its format must be: YYYY-MM-DD['T'HH:MM:SS]. If you specify only the year, month, and day, the hour, minutes, and seconds are set to 00:00:00 local time on the server.
- -timeUTC timestamp
- Use this option to specify the deletion cutoff date and time in Coordinated Universal Time (UTC). Only audit log entries older than the time you specify for timestamp are deleted. Its format must be: YYYY-MM-DD['T'HH:MM:SS]. If you specify only the year, month, and day, the hour, minutes, and seconds are set to 00:00:00 UTC.
- -processTimeLocal timestamp
- Use this option to specify the deletion cutoff date and local time on the server. Only audit log entries that belong to a process that finished before the time you specify for timestamp are deleted. Its format must be: YYYY-MM-DD['T'HH:MM:SS]. If you specify only the year, month, and day, the hour, minutes, and seconds are set to 00:00:00 local time on the server.
- -processTimeUTC timestamp
- Use this option to specify the deletion cutoff date and time in UTC. Only audit log entries that belong to a process that finished before the time you specify for timestamp are deleted. Its format must be: YYYY-MM-DD['T'HH:MM:SS]. If you specify only the year, month, and day, the hour, minutes, and seconds are set to 00:00:00 UTC.
- -slice size
- Used with the -all parameter, size specifies the number of entries included in each transaction. The optimum value depends on the available log size for the database system. Higher values require fewer transactions but you might exceed the database log space. Lower values might cause the script to take longer to complete the deletion. The default value for the slice parameter is 250.
The -timeLocal, -timeUTC, -processTimeLocal, and -processTimeUTC options are mutually exclusive.
- If the script triggers long-running work, the script might fail if the connection timeout is not long enough to complete the action. Check the SystemOut.log file to see whether you need to restart the script. If the timeout happens often, consider increasing the value of the timeout property for the connector you are using, or adjusting the script parameters to reduce the amount of work done.
Delete BPEL process instances
Use the deleteCompletedProcessInstances.py administrative script to selectively delete from the Business Process Choreographer database or the Business Process Archive database any top-level BPEL process instances that have reached an end state of finished, terminated, or failed.
The following conditions must be met:
- Run the script in connected mode, that is, do not use the wsadmin -conntype none option.
- In the cluster where the Business Process Choreographer configuration or Business Process Archive Manager where you want to delete instances is configured, at least one cluster member must be running.
- If the user ID does not have operator authority, include the wsadmin -user and -password options to specify a user ID that has operator authority.
- If you are not working with the default profile, use the wsadmin -profileName profile option to specify the profile.
A top-level process instance is considered completed if it is in one of the following end states: finished, terminated, compensated, or failed. You specify criteria to selectively delete top-level process instances and all their associated data, such as instance custom properties, and subprocess instances, from the database.
- Change to the Business Process Choreographer subdirectory where the administrative script is located.
- cd install_root/ProcessChoreographer/admin
- Delete process instances from the database.
-
install_root/bin/wsadmin.sh -f deleteCompletedProcessInstances.py
  -cluster cluster   (-all | [-finished] [-terminated] [-failed] )
  [-templateName templateName
  [-validFromUTC timestamp]]
  [-startedBy userID]
  [(-completedAfterLocal timestamp)|(-completedAfterUTC timestamp)]
  [(-completedBeforeLocal timestamp)|(-completedBeforeUTC timestamp)]
Where:
- -cluster cluster
- The name of the cluster where Business Process Choreographer configuration or Business Process Archive Manager is configured.
- -all | [-finished] [-terminated] [-failed] ]
- Specifies which task instances are to be deleted according to their state. The -all option means all end states: finished, terminated, and failed. If you do not specify -all, you must specify one or more of the end states.
- -templateName templateName
- Optionally, specifies the name of the process template whose instances will be deleted. If you specify this option, also specify the nameSpace parameter. If there are multiple process templates with the same name but with different validFromUTC dates the instances for all process templates with that name are deleted unless use the validFromUTC parameter to specify a particular template.
- -validFromUTC timestamp
- The date and time from which the template is valid in Coordinated Universal Time (UTC). The string must have the following format: yyyy-MM-ddThh:mm:ss (year, month, day, T, hours, minutes, seconds). For example, 2005-01-31T13:40:50
- -startedBy userID
- Optionally, only deletes completed process instances that were started by the given User ID.
- -completedAfterLocal timestamp
- Optionally, specifies that only instances that completed after the given local time on the server are deleted. The format for the timestamp string is the same as for -validFromUTC, except the time part is optional for this parameter. If you specify only a date, the time defaults to 00:00:00 local time on the server.
- -completedAfterUTC timestamp
- Optionally, specifies that only instances that completed after the UTC time are deleted. The format for the timestamp string is the same as for -validFromUTC, except the time part is optional for this parameter. If you specify only a date, the time defaults to 00:00:00 local time on the server.
- -completedBeforeLocal timestamp
- Optionally, specifies that only instances that completed before the given local time on the server are deleted. The format for the timestamp string is the same as for -validFromUTC, except the time part is optional for this parameter. If you specify only a date, the time defaults to 00:00:00 local time on the server.
- -completedBeforeUTC timestamp
- Optionally, specifies that only instances that completed before the given UTC time are deleted. The format for the timestamp string is the same as for -validFromUTC, except the time part is optional for this parameter. If you specify only a date, the time defaults to 00:00:00 local time on the server.
For example, to delete all of the process instances running on cluster myCluster that are in the state finished, and were started by the user Anita:
wsadmin.sh -f deleteCompletedProcessInstances.py -cluster myCluster -finished -startedBy Anita -
- If the script triggers long-running work, the script might fail if the connection timeout is not long enough to complete the action. Check the SystemOut.log file to see whether you need to restart the script. If the timeout happens often, consider increasing the value of the timeout property for the connector you are using, or adjusting the script parameters to reduce the amount of work done.
The completed process instances have been deleted from the database associated with the Business Process Choreographer or Business Process Archive Manager configuration on the given cluster.
Delete completed task instances
Use the deleteCompletedTaskInstances.py administrative script to selectively delete from the Business Process Choreographer database or Business Process Archive database any top-level task instances that have reached an end state of finished, terminated, expired, or failed.
The following conditions must be met:
- Run the script in connected mode, that is, do not use the wsadmin -conntype none option.
- At least one cluster member must be running.
- If the user ID does not have operator authority, include the wsadmin -user and -password options to specify a user ID that has operator authority.
- If you are not working with the default profile, use the wsadmin -profileName profile option to specify the profile.
A top-level task instance is considered completed if it is in one of the following end states: finished, terminated, expired, or failed. You specify criteria to selectively delete top-level task instances and all their associated data, such as instance custom properties, escalation instances, subtask instances, and follow-on task instances, from the database.
Sometimes follow-on task instances form a chain of follow-on tasks; where all but the last task instance are in the forwarded state and the last task instance in the chain is in some other state. In this case, a top-level task instance that is in the forwarded state is considered to be completed if the last task instance in the chain is in one of the following end states: finished, terminated, expired, or failed.
Normally, an inline task instance is not considered to be a top-level task instance, and cannot be deleted using the deleteCompletedTaskInstances.py script because the inline task instance belongs to a BPEL process, which means use deleteCompletedProcessInstances.py to delete the completed process instance the inline task belongs to. However, any inline invocation task instance that was created using the Human Task Manager API or the Service Component Architecture (SCA) API is treated as a top-level task instance, and can be deleted using the deleteCompletedTaskInstances.py script.
- Change to the Business Process Choreographer subdirectory where the administrative script is located.
- cd install_root/ProcessChoreographer/admin
- Delete task instances from the database.
install_root/bin/wsadmin.sh -f deleteCompletedTaskInstances.py
     -cluster clusterName      (-all | [-finished] [-terminated] [-failed] [-expired] )
     [-templateName templateName -nameSpace nameSpace
     [-validFromUTC timestamp]]
     [-createdBy userID ]
     [(-completedAfterLocal timeStamp)|(-completedAfterUTC timeStamp)]
     [(-completedBeforeLocal timeStamp)|(-completedBeforeUTC timeStamp)]
Where:
- -cluster clusterName
- The name of the cluster where Business Process Choreographer or Business Process Archive Manager is configured.
- -all | [-finished] [-terminated] [-failed] [-expired]
- Specifies which task instances are to be deleted according to their state. The -all option means all end states: finished, terminated, failed, and expired. If you do not specify -all, you must specify one or more of the end states.
- -templateName templateName
- Optionally, specifies the name of the task template whose instances will be deleted. If you specify this option, also specify the nameSpace parameter. If there are multiple task templates with the same name but with different validFromUTC dates the instances for all task templates with that name are deleted unless use the validFromUTC parameter to specify a particular template.
- -nameSpace nameSpace
- Optionally, specifies the namespace of the task template to be deleted. If you specify this option, also specify the templateName parameter. If there are multiple task templates with the same name but with different validFromUTC dates the instances for all task templates with that name are deleted unless use the validFromUTC parameter to specify a particular template.
- -validFromUTC timestamp
- The date and time from which the template is valid in Coordinated Universal Time (UTC). The string must have the following format: yyyy-MM-ddThh:mm:ss (year, month, day, T, hours, minutes, seconds). For example, 2005-01-31T13:40:50
- -createdBy userID
- Optionally, deletes only completed task instances that were created by the given User ID.
- -completedAfterLocal timestamp
- Optionally, specifies that only instances that completed after the given local time on the server are deleted. The format for the timestamp string is the same as for -validFromUTC, except the time part is optional for this parameter. If you specify only a date, the time defaults to 00:00:00 local time on the server.
- -completedAfterUTC timestamp
- Optionally, specifies that only instances that completed after the UTC time are deleted. The format for the timestamp string is the same as for -validFromUTC, except the time part is optional for this parameter. If you specify only a date, the time defaults to 00:00:00 local time on the server.
- -completedBeforeLocal timestamp
- Optionally, specifies that only instances that completed before the given local time on the server are deleted. The format for the timestamp string is the same as for -validFromUTC, except the time part is optional for this parameter. If you specify only a date, the time defaults to 00:00:00 local time on the server.
- -completedBeforeUTC timestamp
- Optionally, specifies that only instances that completed before the given UTC time are deleted. The format for the timestamp string is the same as for -validFromUTC, except the time part is optional for this parameter. If you specify only a date, the time defaults to 00:00:00 local time on the server.
For example, to delete the task instances on cluster myCluster that are in the finished state, and were created by the user Erich:
wsadmin.sh -f deleteCompletedTaskInstances.py
           -cluster myCluster
           -finished
           -createdBy Erich
If Business Process Choreographer is configured on the cluster, the tasks will be deleted from the Business Process Choreographer runtime database. If Business Process Archive Manager is configured on the cluster, the same command will delete the specified tasks from the archive database associated with the Business Process Archive Manager. Be careful not to delete any instances from a runtime database that should actually be moved to an archive.
- If the script triggers long-running work, the script might fail if the connection timeout is not long enough to complete the action. Check the SystemOut.log file to see whether you need to restart the script. If the timeout happens often, consider increasing the value of the timeout property for the connector you are using, or adjusting the script parameters to reduce the amount of work done.
The completed task instances have been deleted from the database associated with the Business Process Choreographer or Business Process Archive Manager configuration on the given deployment target.
Delete process templates that are no longer valid
Use the deleteInvalidProcessTemplate.py administrative script to delete, from the Business Process Choreographer database, BPEL process templates that are no longer valid.
You must know both the name of the template and the ValidFromUTC value for the template to delete. If you do not have that information, perform Listing information about process and task templates first. The following conditions must be met:
- Run the script in the connected mode, that is, do not use the wsadmin -conntype none option.
- You must have either operator or deployer authority.
- At least one cluster member must be running.
- If you are not working with the default profile, use the wsadmin -profileName profile option to specify the profile.
The deleteInvalidProcessTemplate.py script removes from the database those templates, and all objects that belong to them, that are not contained in any corresponding valid application in the WebSphere configuration repository. This situation can occur if deploying an application was canceled or the application not stored in the configuration repository by the user. These templates usually have no impact. They are not shown in Business Process Choreographer Explorer.
There are rare situations in which these templates cannot be filtered. They must then be removed from the database with the following scripts.
You cannot use this script to remove templates of valid applications from the database. This condition is checked and a ConfigurationError exception is thrown if the corresponding application is valid.
- Change to the Business Process Choreographer subdirectory where the administrative script is located.
- cd install_root/ProcessChoreographer/admin
- Delete, from the database, process templates that are no longer valid.
install_root/bin/wsadmin.sh -f deleteInvalidProcessTemplate.py
         -cluster cluster          -templateName templateName          -validFromUTC timestamp
Where:
- -cluster clusterName
- The name of the cluster where Business Process Choreographer is configured. In a multicluster setup, you must specify the application cluster because that is where Business Process Choreographer is configured.
- -templateName templateName
- The name of the template to be deleted.
- -validFromUTC timestamp
- The date and time from which the template is valid in Coordinated Universal Time (UTC). The string must have the following format: yyyy-MM-ddThh:mm:ss (year, month, day, T, hours, minutes, seconds). For example, 2005-01-31T13:40:50
- If the script triggers long-running work, the script might fail if the connection timeout is not long enough to complete the action. Check the SystemOut.log file to see whether you need to restart the script. If the timeout happens often, consider increasing the value of the timeout property for the connector you are using, or adjusting the script parameters to reduce the amount of work done.
Delete human task templates that are no longer valid
Use the deleteInvalidTaskTemplate.py administrative script to delete, from the Business Process Choreographer database, human task templates that are no longer valid.
You must know both the name of the template and the ValidFromUTC value for the template to delete. If you do not have that information, perform Listing information about process and task templates first. The following conditions must be met:
- Run the script in the connected mode, that is, do not use the wsadmin -conntype none option.
- You must have either operator or deployer authority.
- At least one cluster member must be running.
- If you are not working with the default profile, use the wsadmin -profileName profile option to specify the profile.
The deleteInvalidTaskTemplate.py script removes from the database those templates, and all objects that belong to them, that are not contained in any corresponding valid application in the WebSphere configuration repository. This situation can occur if deploying an application was canceled or the application was not stored in the configuration repository by the user. These templates usually have no impact. They are not shown in Business Process Choreographer Explorer.
You cannot use this script to remove templates of valid applications from the database. This condition is checked and a ConfigurationError exception is thrown if the corresponding application is valid.
- Change to the Business Process Choreographer subdirectory where the administrative script is located.
- cd install_root/ProcessChoreographer/admin
- Delete, from the database, human task templates that are no longer valid.
install_root/bin/wsadmin.sh -f deleteInvalidTaskTemplate.py
     -cluster cluster      -templateName templateName      -validFromUTC timestamp      -nameSpace nameSpace
Where:
- -cluster clusterName
- The name of the cluster where Business Process Choreographer is configured. In a multicluster setup, you must specify the application cluster because that is where Business Process Choreographer is configured.
- -templateName templateName
- The name of the template to be deleted.
- -validFromUTC timestamp
- The date and time from which the template is valid in Coordinated Universal Time (UTC). The string must have the following format: yyyy-MM-ddThh:mm:ss (year, month, day, T, hours, minutes, seconds). For example, 2005-01-31T13:40:50
- -nameSpace nameSpace
- The target namespace of the task template.
- If the script triggers long-running work, the script might fail if the connection timeout is not long enough to complete the action. Check the SystemOut.log file to see whether you need to restart the script. If the timeout happens often, consider increasing the value of the timeout property for the connector you are using, or adjusting the script parameters to reduce the amount of work done.
Remove unused people query results, using administrative scripts
Use the cleanupUnusedStaffQueryInstances.py administrative script to remove unused people query results from the database.
The following conditions must be met:
- Run the script in the connected mode, that is, do not use the wsadmin -conntype none option.
- At least one cluster member must be running.
- If the user ID does not have operator authority, include the wsadmin -user and -password options to specify a user ID that has operator authority.
- If you are not working with the default profile, use the wsadmin -profileName profile option to specify the profile.
Business Process Choreographer maintains lists of user names in the runtime database for people queries that have been evaluated. Although the BPEL process instances and human tasks that used the people queries have finished, the lists of user names are maintained in the database until the corresponding process application is undeployed.
If the size of the database is affecting performance, you can remove the unused lists of people that are cached in the database tables.
- Change to the Business Process Choreographer subdirectory where the administrative script is located.
- cd install_root/ProcessChoreographer/admin
- Remove the unused lists of people.
install_root/bin/wsadmin.sh -f cleanupUnusedStaffQueryInstances.py
  -cluster cluster
    [-cleanupSharedWorkItems]
Where:
- -cluster clusterName
- The name of the cluster where Business Process Choreographer is configured. In a multicluster setup, you must specify the application cluster because that is where Business Process Choreographer is configured.
- -cleanupSharedWorkItems
- Specify this optional parameter if you also want the script to delete unused shared work items.
The number of entries deleted from the database is displayed.
Administer query tables
Use the administrative script, manageQueryTable.py script to administer query tables in Business Process Choreographer, which were developed using the Query Table Builder. Unlike predefined query tables, which are available by default, you must deploy composite and supplemental query tables on Process Server before you can use them with the query table API. When query tables are deployed, the query table definition is stored in the Business Process Choreographer database. Additional database artifacts are not created in the current version of Process Server. Any changes to composite and supplemental query tables, including deployment, update, and undeployment, are visible to the query table API without restarting the server.
Query tables are deployed on a stand-alone server running or in a cluster with at least one member running. The undeployment of supplemental and composite query tables is performed also on running servers. For supplemental query tables, the related physical database objects, typically a database view or database table, must be created if they do not exist before the usage of the query table.
For supplemental query tables, the user, or administrator, is responsible for providing the related database table or view.
For composite query tables, the information is composed of the existing database tables or views that relate to the predefined or supplemental query tables. Data is not duplicated in the current version of Process Server.
Supplemental query tables which are referenced by deployed composite query tables must not be updated or undeployed.
Use manageQueryTable.py you can update composite and supplemental query tables and get their XML definitions. You can also get a list of query tables that are available on your system. For supplemental query tables, the related physical database objects, typically a database view or a database table, must be created if they do not exist before the usage of the query table.
Deploy composite and supplemental query tables
Use the manageQueryTable.py administrative script to deploy supplemental and composite query tables before using them in Business Process Choreographer. Before query tables can be used with the query table API they must be deployed on the related Business Process Choreographer container. Query tables do not need to be started, and the server or cluster does not need to be restarted for them to be available after deployment.
The following conditions must be met:
- Run the script in connected mode, that is, do not use the wsadmin -conntype none option.
- At least one cluster member must be running.
- If the user ID does not have administrator or deployer authority, include the wsadmin -user and -password options to specify a user ID that has administrator or deployer authority.
- If you are not working with the default profile, use the wsadmin -profileName profile option to specify the profile.
To deploy composite and supplemental query tables in Business Process Choreographer.
- Change to the Business Process Choreographer subdirectory where the administrative script is located.
-
install_root/ProcessChoreographer/admin
- To deploy a query table file or a JAR file:
install_root/bin/wsadmin.sh -f manageQueryTable.py
       -cluster clusterName        -deploy qtdFile | jarFile
Where:
- -cluster clusterName
- The name of the cluster where Business Process Choreographer is configured. In a multicluster setup, you must specify the application cluster because that is where Business Process Choreographer is configured.
- -deploy qtdFile | jarFile
- The file name, including the fully qualified path, of either the query table definition XML file to be deployed or a JAR file that contains the definitions. Use this option to deploy a query table.
 On Windows, use either "/" or "\\\\" as the path separator. For example, to specify the file c:\temp\myQueryTable.qtd you must specify it as c:/temp/myQueryTable.qtd or c:\\\\temp\\\\myQueryTable.qtd.
Example
- wsadmin.sh -f manageQueryTable.py -cluster myCluster -deploy sample.qtd
Undeploy composite and supplemental query tables
Use the manageQueryTable.py administrative script to remove composite and supplemental query tables in Business Process Choreographer.
The following conditions must be met:
- Run the script in connected mode, that is, do not use the wsadmin -conntype none option.
- At least one cluster member must be running.
- If the user ID does not have administrator or deployer authority, include the wsadmin -user and -password options to specify a user ID that has administrator or deployer authority.
- If you are not working with the default profile, use the wsadmin -profileName profile option to specify the profile.
- Ensure that no applications are running that reference a query table that is to be undeployed. If a supplemental query table is undeployed, it must not be referenced, as attached query table, by any composite query table.
To undeploy composite and supplemental query tables in Business Process Choreographer.
- Change to the Business Process Choreographer subdirectory where the administrative script is located.
-
install_root/ProcessChoreographer/admin
- Undeploy the query table:
install_root/bin/wsadmin.sh -f manageQueryTable.py
       -cluster clusterName        -undeploy queryTableName
Where:
- -cluster clusterName
- The name of the cluster where Business Process Choreographer is configured. In a multicluster setup, you must specify the application cluster because that is where Business Process Choreographer is configured.
- -undeploy queryTableName
- The name of the query table. Use this option to undeploy a query table.
Example
- wsadmin.sh -f manageQueryTable.py -cluster myCluster -undeploy COMPANY.SAMPLE
Update composite and supplemental query tables
Use the manageQueryTable.py administrative script to update composite and supplemental query tables in Business Process Choreographer. Updates to query tables can be made while applications are running, and they are available after the update, without restarting the cluster.
The following conditions must be met:
- Run the script in connected mode, that is, do not use the wsadmin -conntype none option.
- At least one cluster member must be running.
- If the user ID does not have operator, administrator, or deployer authority, include the wsadmin -user and -password options to specify a user ID that has operator, administrator, or deployer authority.
- If you are not working with the default profile, use the wsadmin -profileName profile option to specify the profile.
To update composite and supplemental query tables in Business Process Choreographer.
- Change to the Business Process Choreographer subdirectory where the administrative script is located.
-
install_root/ProcessChoreographer/admin
- Update the query table using either a query table definition XML file or a JAR file that contains the definitions. If property files are already deployed, they will be overwritten.
install_root/bin/wsadmin.sh -f manageQueryTable.py
       -cluster clusterName          -update definition qtdFile | jarFile
Where:
- -cluster clusterName
- The name of the cluster where Business Process Choreographer is configured. In a multicluster setup, you must specify the application cluster because that is where Business Process Choreographer is configured.
- -update definition qtdFile | jarFile
- The file name, including the fully qualified path, of either the query table definition XML file to be updated or a JAR file that contains the definitions. Use this option to update an existing query table. On Windows, use either "/" or "\\\\" as the path separator. For example, to specify the file c:\temp\myQueryTable.qtd you must specify it as c:/temp/myQueryTable.qtd or c:\\\\temp\\\\myQueryTable.qtd.
If a JAR file is provided, it can contain multiple QTD files and property files for each QTD file, which contain display names and descriptions. Use the Query Table Builder to export query table definitions as a JAR file.
Example
Enter the following command:wsadmin.sh -f manageQueryTable.py -cluster myCluster
-update definition sample_v2.qtd
Retrieve a list of query tables
Use the manageQueryTable.py administrative script to get a list of query tables that are available in Business Process Choreographer. You can list predefined, supplemental, and composite query tables.
Before you begin this procedure, the following conditions must be met:
- Run the script in connected mode, that is, do not use the wsadmin -conntype none option.
- At least one cluster member must be running.
- If the user ID does not have administrator or deployer authority, include the wsadmin -user and -password options to specify a user ID that has administrator or deployer authority.
- If you are not working with the default profile, use the wsadmin -profileName profile option to specify the profile.
To get a list of query tables in Business Process Choreographer.
- Change to the Business Process Choreographer subdirectory where the administrative script is located.
-
install_root/ProcessChoreographer/admin
- To list query tables in the command prompt window:
Enter the following command:
install_root/bin/wsadmin.sh -f manageQueryTable.py
       -cluster clusterName        -query names
       -kind (composite | predefined | supplemental)
Where:
- -cluster clusterName
- The name of the cluster where Business Process Choreographer is configured. In a multicluster setup, you must specify the application cluster because that is where Business Process Choreographer is configured.
- -kind (composite | predefined | supplemental)
- The type of the query table to be listed whether composite, predefined, or supplemental. If there are no query tables of the selected kind, none is returned.
Example
Enter the following command:wsadmin.sh -f manageQueryTable.py -cluster myCluster
-query names -kind composite
Retrieve the XML definitions of query tables
Use the manageQueryTable.py administrative script to get the XML definition of composite and supplemental query tables in Business Process Choreographer.
Before you begin this procedure, the following conditions must be met:The following conditions must be met:
- Run the script in connected mode, that is, do not use the wsadmin -conntype none option.
- At least one cluster member must be running.
- If the user ID does not have operator, administrator, or deployer authority, include the wsadmin -user and -password options to specify a user ID that has operator, administrator, or deployer authority.
- If you are not working with the default profile, use the wsadmin -profileName profile option to specify the profile.
Note: You cannot use the script to retrieve the XML definitions of predefined query tables. The XML format of query table definitions is not a published interface. You cannot manually change the definition of a query table definition. To do this, load the query table definition into the Query Table Builder and apply the modifications there.
To retrieve the XML definition of composite and supplemental query tables.
- Change to the Business Process Choreographer subdirectory where the administrative script is located.
-
install_root/ProcessChoreographer/admin
- To list the XML definition of a query table in the command prompt window.
Enter the following command:
install_root/bin/wsadmin.sh -f manageQueryTable.py
       -cluster clusterName        -query definition
       -name queryTableName
Where:
- -cluster clusterName
- The name of the cluster where Business Process Choreographer is configured. In a multicluster setup, you must specify the application cluster because that is where Business Process Choreographer is configured.
- -name queryTableName
- The name of the query table, in uppercase, whose XML definition is to be listed.
Example
wsadmin.sh -f manageQueryTable.py -cluster myCluster
           -query definition -name COMPANY.SAMPLE
Add support for shared work items
If you migrated your Business Process Choreographer configuration from Version 7.0.0.2 or earlier, you can improve the database performance by activating shared work items. Any new Business Process Choreographer configurations automatically support shared work items.
Depending on how many work items you currently have in your Business Process Choreographer database, and how many hours per day you can run the work item migration script, this task might take several days to complete.
- Optional: Reduce the number of work items in your system by completing one or more of the following steps:
- Delete BPEL process instances
- Delete completed task instances
- If you configured a Business Process Archive Manager to archive instances from this Business Process Choreographer configuration, complete the actions that are described in Archive completed BPEL process and task instances.
- At a time when there is a low load on the database, run the migrateWI.py script to shared work items for existing work items.
- Decide on the maximum duration in minutes, duration, that you want the script to run for.
- Change to the directory where the migrateWI.py script is located:
-
install_root/ProcessChoreographer/admin
- Run the script by starting wsadmin with the following parameters:
 -conntype NONE
 [-profileName profile]
 [-tracefile trace_file]
  -f migrateWI.py
  -migrateToWISharing
 [-duration duration]
 [-slice slice_size]
 -cluster clusterName [[-dbUser userID] -dbPassword password]
 [-dbSchema schema]
You must run the script on the node of a cluster member, and not on the deployment manager. Because wsadmin overwrites its trace file, use the -tracefile option to specify a file name and location for the trace file for the work item data migration. You do not need to stop the cluster. See Business Process Choreographer data migration script for shared work items.
- When the script finishes, it reports a summary of the migration status of the work items that belong to each type of entity:
- The total number in the system.
- The number that were migrated.
- The number that still must be migrated.
- The percentage that are completed.
For example:
                  Entities  Migrated  Not migrated  Completed EventInstance          7602      7602             0       100%
WorkBasket                0         0             0       100%
TaskInstance          29883     29883             0       100%
EscalationInstance     4227      4227             0       100%
BusinessCategory          0         0             0       100%
ActivityInstance      52572     52572             0       100%
ProcessInstance        7602      3036          4566        39%
--------------------------------------------------------------
Total                101886     97320          4566        95%
- If the script finished with less than 99% completed (that is, more than 1% of the total number of entities and their corresponding work items in the system still need to be processed), repeat step 2.
- If the script finished with 99% or more completed, activate the shared work item support.
- Stop the cluster where Business Process Choreographer is configured.
- Now run the script a final time to process any remaining work items and switch into shared work item mode, by starting wsadmin with the following parameters:
 -conntype NONE
 [-profileName profile]
 [-tracefile trace_file]
  -f migrateWI.py
  -setMode WS_SHARING_ACTIVE_MODE
  -cluster clusterName [[-dbUser userID] -dbPassword password]
 [-dbSchema schema]
- Success is indicated by the following message:
- migrateWI.py finished with warnings.
In case of problems, you might get a message similar to the following one:
Exception received:
java.lang.IllegalStateException: Mode: WS_SHARING_ACTIVE_MODE
migrateWI.py finished, result = WARNING.
- Restart the cluster.
The Business Process Choreographer configuration is using shared work items and has better performance for many database queries.
Optionally, you can perform any of the following steps:
- Use the administrative console to change the default cleanup times and retention periods for unused shared work items. You can change these settings on the Runtime or Configuration tab for the Human Task Manager.
- Delete unused staff query interfaces and unused work item patterns, by running the cleanupUnusedStaffQueryInstances.py script.
- If you do not use any queries that must run against the non-shared work items, you can free up space in the database by customizing and running a copy of the dropClassicWIIndexes.sql script to drop the indexes on the WORK_ITEM_T table.
- The script is in the following location.
-
install_root/BPM/dbscripts/database_type/Tuning
- Make a copy of the script file dropClassicWIIndexes.sql.
- Edit your copy.
- Replace all occurrences of the string @SCHEMA@ with the name of your schema. If you use an implicit schema, you must delete the string @SCHEMA@., including the trailing dot.
- If you are using an Oracle database, replace all occurrences of the string @INDEXTS@ with the name of the index table space.
Save changes.
- Run your edited copy of the script. In the database client command line processor, enter one of the following commands:
- For DB2 : db2 -tf
dropClassicWIIndexes.sql
- For Oracle: sqlplus dbUserID/dbPassword@database_name
@dropClassicWIIndexes.sql
- For Microsoft SQL Server: sqlcmd -U dbUserID -P dbPassword -e -i dropClassicWIIndexes.sql
If there are any errors, or failure is indicated in the database client output, fix the reported errors and repeat this step.
- For DB2 : db2 -tf
dropClassicWIIndexes.sql
Business Process Choreographer data migration script for shared work items
If you migrated from version 7.0.0.2 or earlier, you can optionally activate support for shared work items, which should improve performance. You must use the migrateWI.py script to migrate data and activate the support.
This topic only describes this migration script. For details about activating shared work items, see Add support for shared work items.
Location
This script is in the Business Process Choreographer subdirectory for administration scripts:- install_root/ProcessChoreographer/admin/migrateWI.py
- install_root/ProcessChoreographer/admin/migrateWI.py
Restrictions
- Run the script in disconnected mode to avoid connection timeout problems.
- When use the -setMode option, the cluster that hosts the Business Process Choreographer configuration must be stopped.
- You must run the database migration script on the node of a cluster member, and not on the deployment manager.
- Depending on the quantity of data and the power of the database server, the migration process can take several hours.
Command syntax
Run the script by starting wsadmin with the following parameters:
 -conntype NONE
 [-profileName profile]
 [-tracefile trace_file]
  -f migrateWI.py
 (-migrateToWISharing | -setMode WS_SHARING_ACTIVE_MODE | -getMode)
 [-duration duration]
 [-slice slice_size]
 -cluster clusterName [[-dbUser userID] -dbPassword password]
 [-dbSchema schema]
Because wsadmin overwrites its trace file, use the -tracefile option to specify a file name and location for the trace file for the work item data migration.
Parameters
- -cluster clusterName
- Specifies the Business Process Choreographer configuration, for which the work items in the database will be migrated to shared work items.
- -dbPassword password
- The password is required.
- -dbSchema schema
- This parameter is not required if you have configured an explicit schema. Use this parameter to override the configured schema qualifier. If no -dbSchema is provided, the schema name from the data source is used, and if no explicit schema is configured for the data source, the implicit (default) schema is used:
- For DB2 the implicit schema is the user ID used to connect to the database, so if you specify the -dbUser parameter, and you are using an implicit schema based on a different user ID, then you must specify the -dbSchema parameter to prevent the wrong user ID being used as the implicit schema.
- For Microsoft SQL Server, the implicit schema is "dbo".
- For DB2 the implicit schema is the user ID used to connect to the database, so if you specify the -dbUser parameter, and you are using an implicit schema based on a different user ID, then you must specify the -dbSchema parameter to prevent the wrong user ID being used as the implicit schema.
- -dbUser userID
- The optional user ID to authenticate with the database. If no -dbUser is provided, the default used is the user ID of the BPM_DB_ALIAS that is associated with the jdbc/BPEDB data source. This BPM_DB_ALIAS normally has the following naming convention: BPCDB_scope_Auth_Alias. If no BPM_DB_ALIAS is set, then no user qualifier is used to connect to the database. If the default user ID does not have sufficient permissions, use this option to specify a user ID that does have the necessary permissions.
- -duration minutes
- When using the -migrateToWISharing option, you can optionally use the -duration parameter to specify the maximum duration, in minutes, the script will run for. The default is 1. The maximum possible value is 34560, which is equivalent to 24 days.
- -getMode
- This option displays the current state of operation of the shared work item migration. It returns one of the following values.
- WS_INITIAL_MODE
- Indicates the schema for the Business Process Choreographer database has not been upgraded for shared work items. After running the upgradeSchemaSharedWIs.sql script, the mode changes to WS_MIGRATION_MODE.
- WS_MIGRATION_MODE
- In this mode, the database schema has been updated, and existing work items must be migrated to shared work items by running the migrateWI.py script with the -migrateToWISharing option. Finally, when nearly all work items have been migrated, running the migrateWI.py script with the -setMode WS_SHARING_ACTIVE_MODE option migrates any remaining work items and switches the mode to WS_SHARING_ACTIVE_MODE.
- WS_SHARING_ACTIVE_MODE
- In this mode, the shared work item optimization is active.
- -migrateToWISharing
- The -migrateToWISharing option causes the script to shared work items for non-shared work items. The script should be run using this option, more than once if necessary, until all or nearly all work items have been created as shared work items. Only then, should you switch the system to using shared work items by running this script again, but using the -setMode WS_SHARING_ACTIVE_MODE option. The options -migrateToWISharing and -setMode are mutually exclusive. When use the -migrateToWISharing option, you can also specify any of the optional parameters -duration and -slice.
- -profileName profileName
- This specifies the name of the migration target profile where you run the migrateWI.py script. It is either the profile of a single server, or of a cluster member, but never the deployment manager. The parameter is optional, but if you have more than one profile in the migration target Process Server installation it is best to supply the parameter to be sure the script runs in the context of the correct profile, which ensures, for example, the correct data source is used.
- -setMode WS_SHARING_ACTIVE_MODE
- The -setMode WS_SHARING_ACTIVE_MODE option causes the script to switch the system to using shared work items. You must stop the server or cluster that hosts the Business Process Choreographer configuration before you run the script with this option. The options -migrateToWISharing and -setMode are mutually exclusive.
- -slice slice
- When using the -migrateToWISharing option, you can optionally use the -slice parameter to specify the transaction size, which can be between 10 and 50000. The default value is 50. Optimum values depend on many factors including the size of the database objects, and the size of the transaction log. In general, smaller values make the script run slower.
Remove redundant indexes
If you migrated your system from WebSphere Process Server Version 7.0.x or earlier, your Business Process Choreographer database contains some indexes that speed up specific types of API queries. However, if you do not use any of those queries, the indexes are redundant. Removing the redundant indexes reduces the size of the database, eliminates the processing necessary to maintain the indexes, and therefore helps improve the performance of the database.
Check whether any of applications use the Business Flow Manager or Human Task Manager's query or query table APIs. Only perform this procedure if one of the following conditions is true:
- No applications use the query or query table APIs.
- Some applications use the query or query table APIs, but it does not matter the applications get slower response times from the database for those queries.
Because the script can take a long time to run and increases the load on the database, choose a time to run the script when your Business Process Choreographer database system is under a low load.
- Change to the directory where the tuning script for the database is located. Enter one of the commands:
-
cd install_root/BPM/dbscripts/database_type/Tuning
Where database_type is the type of the database system.
- Make a copy of the optionalUpgradeIndexes.sql script, for example, named myOptionalUpgradeIndexes.sql.
- Edit your myOptionalUpgradeIndexes.sql script copy.
- Replace all occurrences of the string @SCHEMA@ with the name of your schema.
If you use an implicit schema, you must delete the string @SCHEMA@., including the trailing dot.
- If you are using an Oracle database, replace all occurrences of the string @INDEXTS@ with the name of the index table space.
Save changes.
- Replace all occurrences of the string @SCHEMA@ with the name of your schema.
- At a time when there is either a low load on the Business Process Choreographer database (BPEDB) or when your cluster is stopped, run your edited myOptionalUpgradeIndexes.sql script. In the database client command-line processor, enter one of the following commands:
- For DB2 : db2 -tf myOptionalUpgradeIndexes.sql
- For Oracle: sqlplus dbUserID/dbPassword@database_name
@myOptionalUpgradeIndexes.sql
- For Microsoft SQL Server: sqlcmd -U dbUserID -P dbPassword -e -i myOptionalUpgradeIndexes.sql
If the cluster is still running, there is an increased probability of deadlocks occurring while the script is running.
- For DB2 : db2 -tf myOptionalUpgradeIndexes.sql
- If any errors are displayed:
- You can ignore any error messages that report that certain indexes do not exist. This is either because you customized the schema so the indexes were never created, or some of the indexes were already removed.
- If there are any other types of errors, fix the problem, then try running the script again.
- If you configured a Business Process Archive Manager, you can run the script against the archive database (BPARCDB) to remove the same redundant indexes from the archive database. If there are any problems, make sure the schema qualifier in the script matches that of the archive database.
The redundant indexes were removed from the Business Process Choreographer database, which means that many database statements should have better performance.
Administer the Process Center index
You use the Process Center index to conduct searches on the Process Center repository.
The Process Center index is used to conduct searches on the Process Center repository. The index is automatically created and maintained when the server is started. After that, the system updates the index at regular intervals to reflect any changes made to the repository. You can configure the update interval and index location to better suit the installation. Also, commands are provided for you to manually re-create or update the index.
Manually recreate or update the Process Center index
You can manually re-create or update the Process Center index when the server is running.
The Process Center index is kept in the file system of the machine the server is running on. You do not need to back up the profile or the database before running the artifactIndexFullReindex or artifactIndexUpdate commands, and you can run the commands when the server is running.
Recreating the index in a network deployment environment
To re-create the index in a network deployment environment:
- From the command prompt, change to the deployment manager profile bin subdirectory where the command is located.
- cd install_root/profiles/process_center_Dmgr_profile/bin
- Enter the following command:
- artifactIndexFullReindex - userId -p password -host hostName -port port
hostName is the host name of the application cluster member on the node and port is the server SOAP port.
Update the index in a network deployment environment
To update the index in a network deployment environment:
- From the command prompt, change to the deployment manager profile bin subdirectory where the command is located.
- cd install_root/profiles/process_center_Dmgr_profile/bin
- Enter the following command:
- artifactIndexUpdate - userId -p password -host hostName -port port
hostName is the host name of the application cluster member on the node and port is the server SOAP port.
There is one index created for each node. To update the index, you must issue the command for each node. Run the command from the deployment manager and point it using the -host and -port parameters to a cluster member running on each node of the installation. This will update the index for each node; there is no need to run the command locally on the node.
Configure the Process Center index
You can configure the indexing process to automatically update the index on a preset schedule. You can also set the index location, and you can disable indexing altogether.
To change the Process Center index update interval, or to disable indexing, create or edit 100Custom.xml that is located in the following directory:
<process_center_profile>/config/cells/<Cell>/nodes/<node>/servers/<server>/process-server/config/system
Add or edit the following code snippet as needed:
<search-index merge="replace">
 <artifact-index-enabled>true</artifact-index-enabled>
<artifact-index-update-interval>60</artifact-index-update-interval>
</search-index>
- Set the update interval
- To set an update interval, reconfigure this line: <artifact-index-update-interval>60</artifact-index-update-interval>.
- The update is set in seconds. Change the number "60" to the number of seconds for the interval at which the Process Center index will perform an update.
Restriction: The minimum update interval is 30 seconds. If you attempt to set a value of less than 30, the index defaults to 30 seconds.
- Disable the index
- To disable indexing, reconfigure this line: <artifact-index-enabled>true</artifact-index-enabled>.
- A value of false stops reindexing. If the index does not exist, it will not be created. A value of true means that reindexing does occur at the specified interval. If the index does not exist, it is created.
Set the index location
To change the Process Center index location, log in to the administrative console and select Environment > WebSphere Variables.
- Set the location for a cluster server
- Edit the BPM_SEARCH_ARTIFACT_INDEX variable. For a cluster member, set the scope to the cluster level. The default is $<BPM_SEARCH_ARTIFACT_INDEX_ROOT>/<clusterName>
- Set the location for a stand-alone server
- For a stand-alone server, set the scope to the cell level. The default is $<BPM_SEARCH_ARTIFACT_INDEX_ROOT>/$<WAS_SERVER_NAME>. If the variable is not set, the location defaults to $<USER_INSTALL_ROOT>/searchIndex/artifact/$<WAS_SERVER_NAME>.