WebSphere Lombardi Edition 7.2 > Manage the Process Center repository
Manage snapshots
Snapshots record the state of library items within a process application or workspace at a specific point in time. You can create snapshots in the Process Center Console or in the Designer view. Snapshot management, such as deploying, exporting, and archiving, is performed in the Process Center Console.
In addition to the topics covered in this section, you can refer to the following topics for more information about managing snapshots:
| To learn how to... | See... |
|---|---|
| Install snapshots of process applications | Install process applications: online Process Servers |
| Import and export snapshots of process applications | Import and export process applications from the Process Center Console |
| Import and export snapshots of toolkits | Import and export toolkits from the Process Center Console |
| Archive snapshots of process applications | Archiving process applications in the Process Center Console |
| Archive snapshots of toolkits | Archiving toolkits in the Process Center Console |
You can create snapshots of the process applications and toolkits that you have created or to which you have write or administrative access. See Manage access to the Process Center repository for more information.
Before performing any of the following tasks, start Lombardi Authoring Environment and open the appropriate view as explained in Start Lombardi Authoring Environment.
Lombardi does not require unique snapshot names. However, you cannot install a snapshot of a process application in a runtime environment if a snapshot with the same name has already been installed. This is also true for snapshots in different workspaces.
Create new snapshots in the Process Center Console
- Select the Process Apps or Toolkits tab.
- Select the process application or toolkit for which you want to create a snapshot.
-
Click the Create New Snapshot option as shown in the following image.
If multiple workspaces exist, select the workspace that you want from the drop-down menu and then click the Create New Snapshot option.

-
Enter a name for the snapshot and click Save. The description is optional.
-
The resulting snapshot is displayed in the Process Center Console:

The snapshot records the current state of the library items within the workspace. You can install the snapshot and you can also compare and archive snapshots as explained below.
Create new snapshots in the Designer view
-
Make sure the process application or toolkit for which you want to create a snapshot is open in the Designer view. You can check the currently open process application or toolkit :
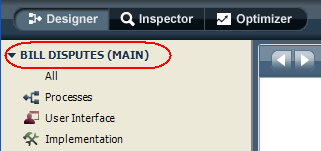
If workspaces are enabled, the workspace name is displayed in parentheses after the process application or toolkit. In the preceding example, the currently open process application is Billing Disputes and the open workspace is Main.
-
Click the snapshot icon highlighted in the following image:

-
Enter a name for the snapshot and click OK.
The Designer displays the newly created snapshot, named Midway Playback, in the Revision History tab :

To learn how to compare snapshots in the Designer view, see the following procedure.
To learn how to create snapshots from previous points in time, see Create snapshots from the revision history in the Designer view
Comparing snapshots in the Designer view
-
To view new or changed library items in each snapshot, click the icon shown in the following image:

In the preceding example, one new process called Test Beta was added to the library for the Midway playback snapshot. This is the only change or addition made since the original snapshot, Initial playback.
To return to the list of snapshots, click the snapshot icon in the Revision History header.
-
To view the state of an entire process application or toolkit as of a particular snapshot, click the indicator shown in the following image:

The Designer displays a message in the toolbar to indicate that it is showing the contents of the entire process application as they existed when the snapshot called Initial playback was created. While this message is displayed, you can examine the library contents, but you cannot make changes. To get back to the current state of your process application or toolkit, click the indicator shown in the following image:

When you are back in the current state, you can change and add library items.
Create snapshots from the revision history in the Designer view
In addition to capturing snapshots of your ongoing efforts in the
Designer view, you can also create snapshots from previous points in time using
the entries in the revision history. For example, if you need to snapshot your
project as it existed before several new items were added, you can use the
revision history to locate the point in time that meets your needs.
-
To view the detailed revision history, click the icon shown in the following image:

-
Find the point in time at which you want to create a snapshot and click the corresponding snapshot icon in the Revision History as shown in the following example:

-
In the Take Snapshot dialog box, type a name for the snapshot and click OK.
The revision history displays the new snapshot, which you can install on a test or production server, export to a different Process Center, or use in other ways
Activating snapshots in the Process Center Console
If you want exposed library items within particular snapshots to display in Lombardi Process Portal while those items are being developed and reside on the Process Center Server, you need to activate the snapshot that contains the version of the items that you want to display. For example, if you are developing a BPD and you want to start the BPD using the New icon in the Process Portal Inbox, you need to activate the snapshot that contains the version of the BPD that you want to start. Doing so enables you to start and run the BPD on Lombardi Process Portal for testing and other purposes.
See also: Exposing a Human service
Exposed BPDs and data from the current working version (tip) are always available. Activation is required only when you want to access a snapshot version of an item or data that resides on the Process Center Server.
When you install snapshots of process applications on Process Servers in other environments, such as test and production environments, those snapshots are active by default. You can deactivate installed snapshots and perform other configuration tasks
To activate or deactivate a snapshot, you must be a repository administrator, an administrator for the selected process application or toolkit, or the user who created the process application or toolkit.
- In the Process Center Console, select the Process Apps or Toolkits tab.
-
Click to select the process application or toolkit for which you want to activate a snapshot.
If multiple workspaces exist, select the workspace that you want from the drop-down menu.
-
Find the snapshot that you want and click Activate :

Now when you start Lombardi Process Portal by directing your browser to http://[host_name]:[port]/portal, providing the name of the host on which Lombardi Process Center Server is installed and the port designated for the server during installation, you can access the exposed library items in the activated snapshot. Using the previous example, you can start the exposed BPD using the New icon in the Process Portal Inbox.
To deactivate a snapshot, follow the preceding steps and click the Deactivate option.
Archiving snapshots in the Process Center Console
If a snapshot is no longer used, you can archive it. When you archive a snapshot, it no longer appears in the list of snapshots for the process application or toolkit in the Process Center Console. You must restore a snapshot if you want to edit it or perform any other actions on it.
To archive a snapshot, you must have write or administrative access to the process application.
- Select the Process Apps or Toolkits tab.
-
Select the process application or toolkit for which you want to archive snapshots.
If multiple workspaces exist, select the workspace that you want from the drop-down menu.
-
Find the snapshot that you want and click Archive :

- When prompted, click the Archive button to confirm your selection.
-
To view or restore archived snapshots, click the Archived filter as shown in the following image:

Parent topic: Manage the Process Center repository