WebSphere Lombardi Edition 7.2 > Manage the Process Center repository
Manage and using toolkits
You can create toolkits to enable Authoring Environment users to share library items across process applications. The following figure shows how process applications can share library items from one or more toolkits:

In the preceding figure notice that toolkits can also share library items from other toolkits.
If a user has access to a toolkit, he can create a dependency on the toolkit and use the library items within it for his process development efforts. See the following sections to learn how to create and maintain toolkits, as well as how to use them during process development.
Before performing any of the following tasks, you should:
- Start Lombardi Authoring Environment and open the appropriate view as explained in Start Lombardi Authoring Environment.
- To create and import toolkits, you must have access to the Process Center repository. See Manage access to the Process Center repository for more information.
About Lombardi System Data toolkit
During Lombardi installation, the System Data toolkit is imported into the Process Center repository. Each process application and toolkit that you create automatically includes a System Data toolkit dependency so that you have access to the assets that all Lombardi projects require, such as standard variable types, standard charts for reports, and so on. You cannot edit or change the library items in the System Data toolkit, but you can open the toolkit and view the items within it.
See:
Create toolkits in the Process Center Console
- Select the Toolkits tab.
-
Click the Create New Toolkit option shown in the following image:

-
In the Create New Toolkit dialog, enter a name and an acronym for your toolkit.
The acronym for a toolkit must be unique and is limited to seven characters. Lombardi uses the acronym as an identifier for this toolkit and the library items that it contains. For example, when manipulating the items within the toolkit using the Lombardi JavaScript API, you can use the acronym to specify the namespace of the items.
Providing a description is optional. When you enter a description, you can view it in the Process Center Console by clicking the question mark next to the toolkit name.
-
To create library items in the toolkit or perform other edits, click the Open in Designer option shown in the following image:

To move or copy library items from another process application or toolkit into this toolkit
To take advantage of workspaces in this toolkit,
Cloning toolkits in the Process Center Console
- Select the Toolkits tab.
- In the list of toolkits, click on the toolkit that you want to clone.
-
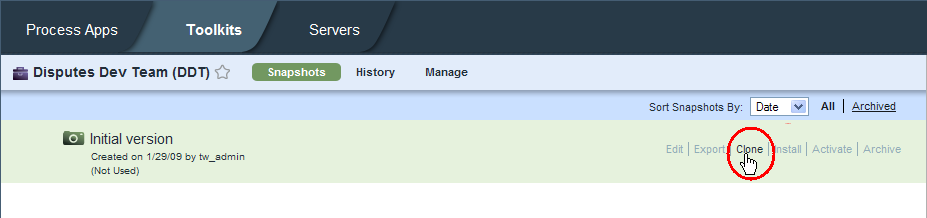
Click the Clone option next to the snapshot that you want to use as the basis for your new toolkit :
The Process Center Console opens the Toolkits tab and displays the cloned toolkit with COPY added to the end of the original name and the number 2 added to the end of the original acronym.
To change the name and acronym of the cloned toolkit, click the toolkit to open it, click the Manage option, and then edit the text in the appropriate fields.
To create library items in the toolkit or perform other edits, click the Open in Designer option.
To take advantage of workspaces in this toolkit,
Move or copying library items to a toolkit in the Designer view
You can copy or move library items to an existing or new toolkit
Imported toolkits are immutable, which means that no one can change the items within an imported toolkit.
Create a toolkit dependency in the Designer view
When you create a dependency on a toolkit, you can use the library items from that toolkit for the implementation of the process steps you are building in your current project. For example, after creating a dependency on a toolkit that includes several services, the Designer view automatically makes those services available when a developer is choosing the implementation for an activity.
To create a dependency on a toolkit, one or more snapshots of that
toolkit must exist. If not, the library items within the toolkit are not
available for re-use.
-
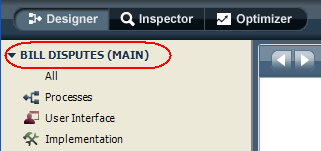
Make sure the process application or toolkit for which you want to create a toolkit dependency is open in the Designer view. You can check the currently open process application or toolkit :
If workspaces are enabled, the workspace name is displayed in parentheses after the process application or toolkit. In the preceding example, the currently open process application is Bill Disputes and the open workspace is Main.
-
Click the plus sign next to Toolkits in the library as shown in the following image:
-
From the Add Dependency dialog, click to select the snapshot of the toolkit that you want.
You should choose the snapshot that includes the version of the library items that you need to re-use in your current project.
-
Now when you expand the Toolkits entry in the library, you should see the toolkit snapshot that you added. You can then click to expand the toolkit to see the library items within it :
Double-clicking an item category, such as Processes, shows the processes included. The library items that you see are automatically made available for re-use throughout your current project.


Update a toolkit dependency in the Designer view
-
If you create a toolkit dependency and that toolkit is subsequently updated, the Designer view displays the icon shown in the following image, letting you know that a more recent snapshot of the toolkit is available:
- Click the icon and select
one of the following options:
Upgrade dependency tocurrent_snapshot_name Select this option to ensure that you have the most recent version of the library items within the toolkit. Ignore this new version of dependency Select this option if you know you do not want to use the updated versions of the library items in this toolkit.
You can change the version of a toolkit dependency at any time by right-clicking the toolkit in the library and choosing Change version of dependency from the pop-up menu. In the Change Dependency dialog, select the snapshot that you want.
When you update or change the version of a toolkit dependency, library items from the toolkit that are currently in use are automatically updated. For example, if a service from the toolkit is the implementation for an activity and that service changes from one snapshot to the next, the changes are automatically reflected in your implementation. The same is true if you change a dependency to an older version of a toolkit.
Delete a toolkit dependency in the Designer view
-
Make sure the process application or toolkit that contains the dependency you want to remove is open in the Designer view. You can check the currently open process application or toolkit :
If workspaces are enabled, the workspace name is displayed in parentheses after the process application or toolkit. In the preceding example, the currently open process application is Bill Disputes and the open workspace is Main.
-
Expand the Toolkits entry in the library:
- Right-click the toolkit in the library and choose Remove dependency from the pop-up menu.

When you delete a toolkit dependency, you must be sure to update implementations of library items from the toolkit. For example, if a service from the toolkit is the implementation for an activity, the implementation for that activity is missing or broken as soon as you remove the toolkit dependency. Missing implementations are marked with alert icons in the properties for an affected activity.
Archiving toolkits in the Process Center Console
If you archive a toolkit and that toolkit has existing dependencies
in the Designer, those dependencies remain in tact, including implementations
that rely on library items within the toolkit. However, you should not use
archived toolkits when creating toolkit dependencies in the Designer view since
archived items are not considered part of the active Lombardi library.
- Select the Toolkits tab.
- In the list of toolkits, click on the toolkit that you want to archive.
-
Click the Manage option shown in the following image:
-
Click the Archive Toolkit option as shown in the following image:
- When prompted, click the Archive button to confirm that you want to archive this toolkit.
-
To view or restore archived toolkits, click the Archived filter in the Toolkits tab as shown in the following image:


Import and export toolkits from the Process Center Console
You can import toolkits from other Lombardi libraries and you can also export toolkits from the Process Center Console.
- Select the Toolkits tab.
-
Click the Import Toolkit option shown in the following image:
-
In the Import Toolkit dialog, click the Browse button to locate the Lombardi export (.twx) file that you want to import.
Toolkits that you import should have unique acronyms. If an acronym is not unique, import completes with a warning. However, attempts to install snapshots that include references to a toolkit with a non-unique acronym will fail with an error.
-
Click the Next button to import the selected .twx file.
In the Import Toolkit dialog, click to expand the sections that show the snapshots that will be imported and the snapshots that are already available (and will not be imported).
-
Click the Import button.
When the import is complete, the imported toolkit is included in the list in the Toolkits tab. You can grant access to other users as described in Manage access to process applications and toolkits.

Repository administrators can see a log of all imports by clicking the Admin option at the top-right of the Process Center Console and then clicking Import and Export Log.
Imported toolkits are immutable, which means that no one can change the items within an imported toolkit. The user who imports a toolkit has administrative access to that toolkit. The following table describes the type of access that the toolkit administrator can grant to other users and groups.
| Read | Users with Read access can clone the imported toolkit or copy items from the toolkit to a different toolkit or process application. |
| Write | Users with Write access have all the capabilities included with Read access plus they can import a new version of the toolkit and archive older versions of the toolkit. Write access also enables users to restore previously archived versions. |
| Admin | Users with Admin access have all the capabilities included with Write access plus they can grant or remove administrative access to the toolkit. |
- Select the Toolkits tab.
- In the list of toolkits, click on the toolkit that you want to export.
-
Find the snapshot that you want to export.
If a snapshot does not exist, create one by clicking Create New Snapshot as shown in the following image:
-
Click the Export option for the snapshot as shown in the following image:
-
Locate the directory to which you want to save the export (.twx) file, name the file, and then save it.
The exported file can be imported into any Process Center repository.


Repository administrators can see a log of all exports by clicking the Admin option at the top-right of the Process Center Console and then clicking Import and Export Log.
Parent topic: Manage the Process Center repository