Installing IBM TDI
The TDI installer allows us to install TDI 7.1 in its entirety, only those TDI components that we need, upgrade a previous version of TDI (versions 6.0, 6.1, 6.1.1 or 7.0), or add features to an existing TDI 7.1 installation.
IBM TDI does not support the Configuration Editor (CE) on the following operating systems:
- HP-UX Integrity*
- Solaris Opteron
- z/OS
- i5/OS
- Linux PPC
- Linux 390
Installing TDI 7.1 uninstalls a previous version; the uninstall does not remove any files that the user has created. User created files are still available after the new installation completes. Configuration files such as global.properties and am_config.properties are migrated to TDI 7.1, keeping any custom configuration changes that have been made. The TDI 7.1 installation continues to use the features available in previous versions of TDI:
- Administration and Monitoring Console (AMC)
- Configuration Editor (CE)
- Examples
- IBM User Interface Help System built on Eclipse
- Java API Documentation
- Runtime Server
For the remainder of this IBM TDI V7.1 Installation and Administrator Guide, the variable TDI_install_dir refers to the installation directory
location chosen by the user on the Destination
Panel during installation. See Default installation locations for
information on where TDI is usually installed.
We can launch the IBM TDI 7.1 Installer by using one of the following
methods:
Notes:
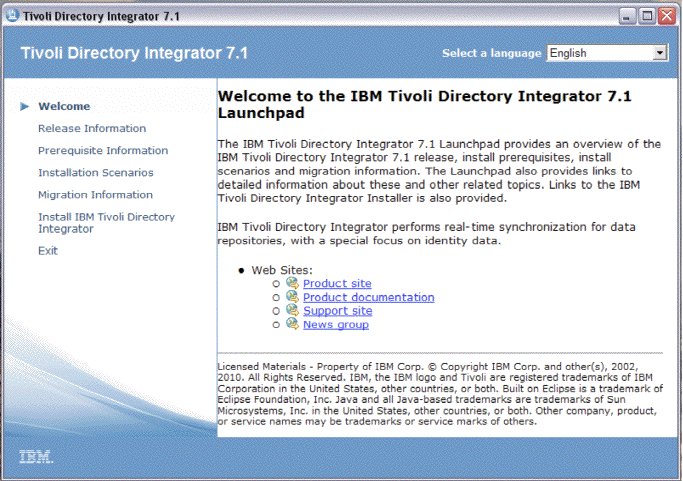
The following options on the left are TDI Launchpad
windows:
This window is not available
on Linux PPC and Linux 390 platforms.
Contrary
to expectations, a 32-bit installer does not work on 64-bit Windows. Currently, there is
no supported way of installing a 32-bit version of TDI on
a 64-bit version of Windows.
Once we have launched the installer (using the Launchpad or
by starting the platform-dependent installer directly), you
are ready to begin the process of Using the platform-specific TDI installer.
Non-administrators can install TDI, with the following caveats: users installing TDI must
have write privileges to the installation location; non-administrators
do not see the "Register AMC as a service" and "Register
Server as System Service" windows, and non-administrator
Configuration Editor shortcuts differ from administrator Configuration
Editor shortcuts.
The platform-specific TDI installer
is launched either form the Launchpad or from the command line. The TDI installer can be used to install a new copy of TDI, add a feature to an existing instance of TDI, or upgrade a previous version of TDI. The default install location on your computer
for TDI varies with the platform.
During installation, the Installer will log its actions
in files residing in the system’s temporary files directory, typically /tmp or /var/tmp on
UNIX platforms.
In addition to being unavailable on the i5/OS operating system, TDI supports
neither the Configuration Editor (CE) nor the Configuration Editor
Update Site on the following operating systems:
InstallAnywhere 2009 TDI supports installation on i5/OS. The i5/OS platform does
not support a GUI interface (Launchpad). i5/OS supports the command
line installation -console option. See Installing using the command line.
The following TDI features are not available on i5/OS, and are not listed as installable features during -console installation:
Prior to installing TDI, certain software must already be installed
on the i5/OS operating system running TDI.
TDI requires the IBM J9 32-bit JVM on all versions
of i5/OS. If the J9 32-bit JVM is not found, an error message displays:
If we see this message, cancel the installation, install the IBM J9 VM, and begin
the installation again.
If us choose the embedded Web platform feature, the install will
check to make sure that LWI 8.1 (v7r1 or v6r1) is resident on the
target machine.
For i5/OS V6R1 the installer will check that the following items
are installed:
For i5/OS V7R1 the installer will check that the following items
are installed:
If these PTFs or products are not found, an error message appears:
The installer and uninstaller on i5/OS are called
INST_TDI.SH and uninstaller.sh, respectively.
To begin installing on i5/OS:
Another i5/OS difference is on the TDI Solutions directory
panel. On i5/OS, there is a specific place for user data. As a result, instead of giving you the option to make the installation directory
the same as the solutions directory, the option reads: Use the
TDI User Product Directory.
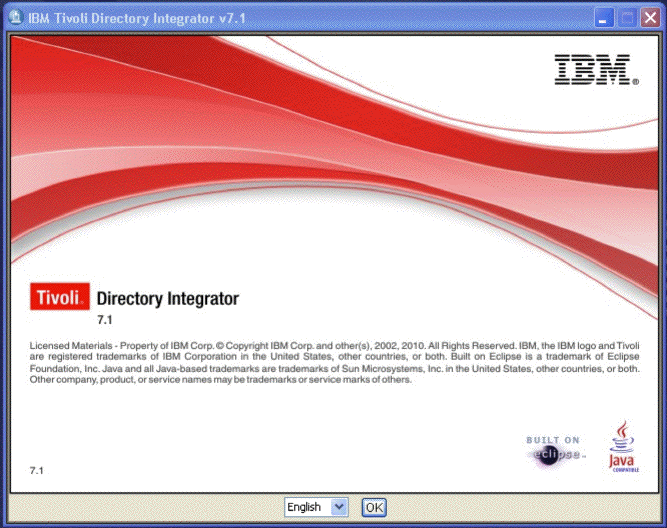
The splashscreen may also show a drop down list
of language choices if the underlying system supports more than one.
(The default is English.)
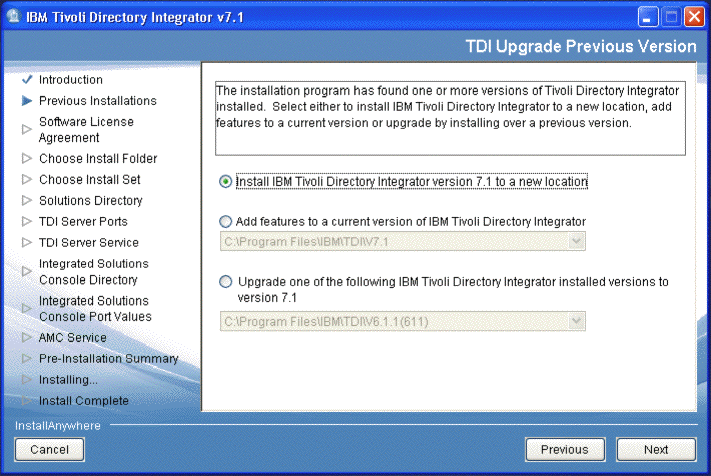
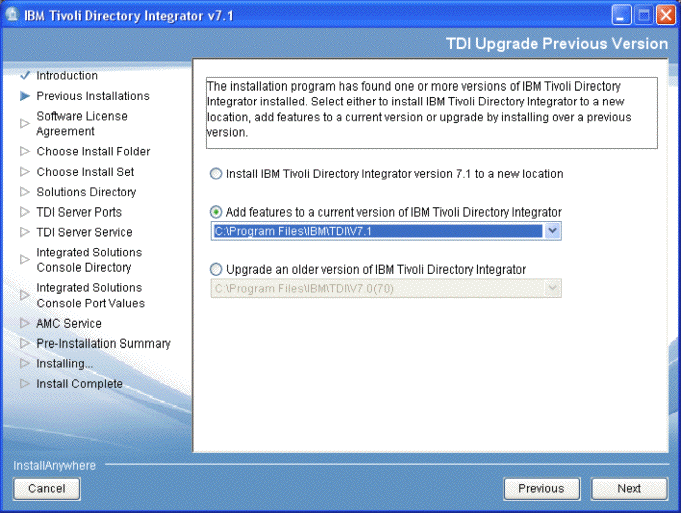
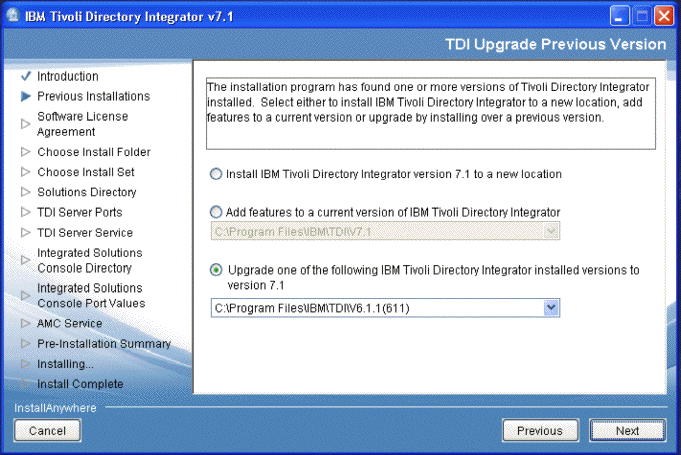
If a previous version is detected, you are presented with a
number of upgrade options.
Notes:
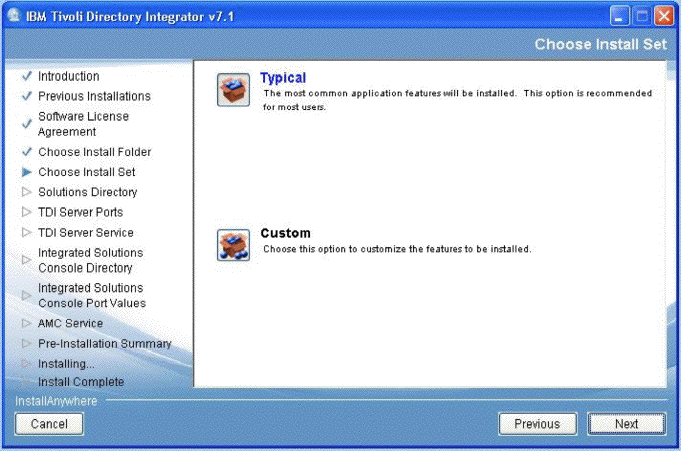
If we select Typical, the feature selection panel is
skipped. Also, we will automatically get the bundled embedded Web
platform/ISC package. The ISC Directory panel will be skipped.
If any feature is not supported on the platform it
will not be shown on the feature selection panel.
The
Configuration Editor feature is not available on zLinux, Linux PPC, Solaris Opteron, HP IA64 or i5/OS. The Configuration Editor Update
Site feature is not available on zLinux, Linux PPC, Solaris Opteron, or i5/OS. The Password Synchronization Plug-ins feature is not available
in the General Purpose edition nor on zLinux, Linux PPC, Solaris Opteron
, HP-UX IA64 or i5/OS.
The following list summarizes each feature:
On i5/OS
(console only), the Use Install Directory will
be replaced with Use the TDI User Product
Directory. The i5/OS platform has a specific location (/QIBM/UserData) for user data. The install
directory is not appropriate.
This panel will not
be shown in an upgrade from TDI 6.0, TDI 6.1, TDI 6.1.1, or TDI 7.0.
If
you are adding features, and the Server feature was already installed, this panel will not be shown.
We will be asked
for 4 various server ports numbers. There will be default values for
these ports. The installer will make sure that you enter a valid and
available port number (see Server Port Configuration).
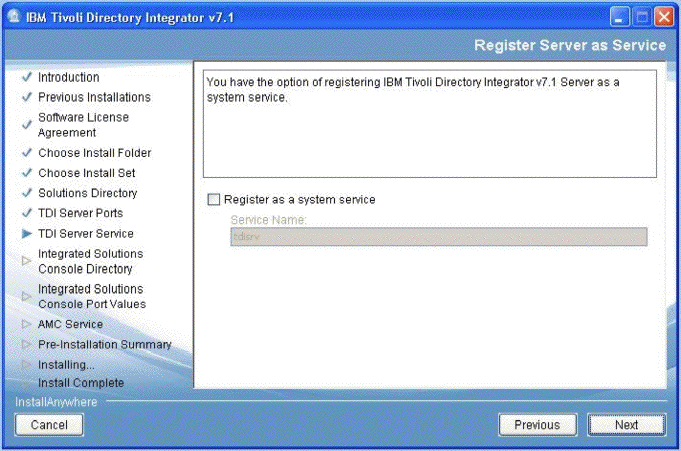
If the
checkbox is checked, then only SERVER will be registered as a service
for that OS.
The default is for the checkbox to be unchecked.
The two text boxes will be enabled only if the checkbox is checked.
The first text box is for service name and the second is for the port
number that the server as a system service will use to run on.
The
installer will do its best to provide a valid default value for Service
Name (see Registering Server as a Windows service or Unix Process
for details on this process). If the installer is unable to determine
a valid Service Name, the field will be blank. We will not be able
to move forward until you enter a valid service name.
If you did not choose
to install the embedded web platform feature, then that choice will
be grayed out.
Notes:
If you
are deploying AMC to a custom SE, the default values displayed for
the HTTP and HTTPS ports are found as follows:
Look in the TDI_Selected_ISC/conf/overrides/*.properties files
for the first occurrence of the properties com.ibm.pvc.webcontainer.port and com.ibm.pvc.webcontainer.port.secure and
use the associated values. If either of these properties is not defined
in any of the .properties files in that directory, look in TDI_Selected_ISC/conf/config.properties for
them. If the HTTP port is not found, it will default to port 80, and if the HTTPS port is not found, it will default to port 443.
The help port will have the same value as the HTTP port.
If
you are deploying AMC to a custom AE, the default values displayed
for the HTTP and HTTPS ports are found as follows (except on i5/OS
where the defaults are taken):
Look for files named serverindex.xml
file in the following directory specification: TDI_Selected_ISC\profiles\AppSrv01\config\cells\*\nodes\*.
Inside those files, look for XML blocks similar to the following for
the HTTP port:
and similar to the following for the
HTTPS port:
The installer searches for a specialEnpoints
tag that has an endPointName of WC_adminhost or WC_adminhost_secure and
use the associated port values from the embedded endPoint tags. In
the event the HTTP port is not found by this method, it 9060 and in
the event the HTTPS port is not found, it will default to 9043. The
help port will be set to the HTTP port value.
The values shown
are the defaults for the embedded SE.
The panel will not allow
ports to be entered that are already in use. A warning message will
appear asking you to choose another port value.
The default is for the checkbox to be unchecked.
This
panel is only shown if the embedded web platform and AMC features
were selected and if we have administrative privileges.
The installer will do its best to provide a valid default
value for Service Name (see Registering AMC as a Windows service or
Unix process for details on this process). If the installer is unable
to determine a valid Service Name, the field will be blank. We cannot
move forward until you enter a valid service name.
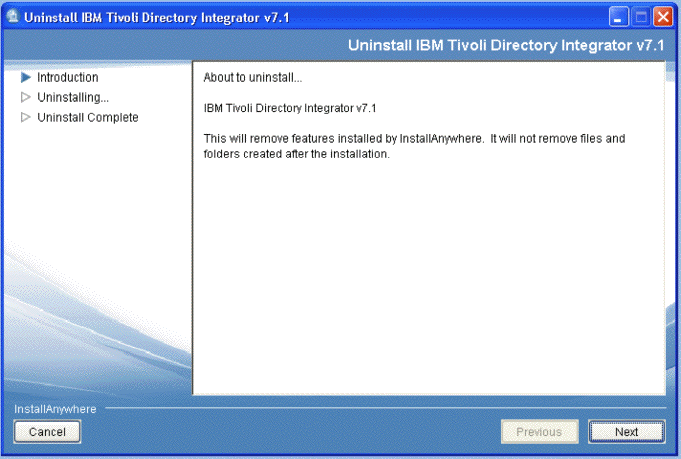
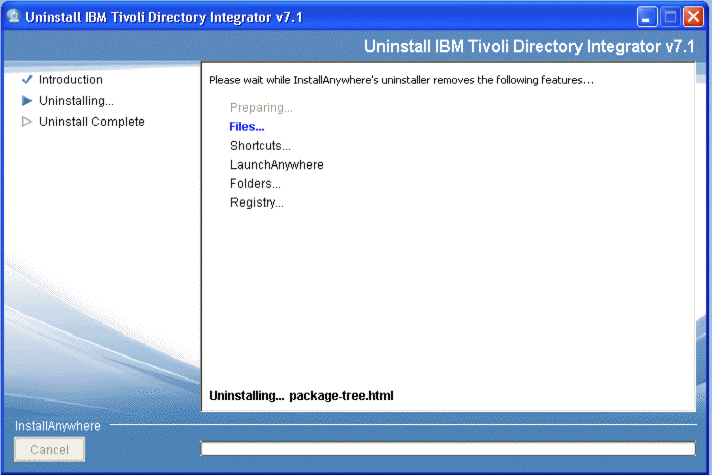
If Uninstall Specific Features is
chosen, the following panel is also displayed:
The Add Feature flow is similar to the new install flow. Only the
unique panels will be shown here.
You are not able to choose the Add
Feature button if there is no TDI 7.1 instance available.
You
are not able to choose the Upgrade button
if there are no previous versions of TDI available.
The TDI
7.1 drop down is enabled if the Add Features button
is chosen.
At this point we can add any additional features us choose.
You
are not allowed to remove features.
From this point the panel
flow matches the new install flow. Panels related to already-installed
features will, however, be skipped.
If we select Configuration
Editor, Server will also automatically be selected. Also if both features
are selected and you deselect Server, then Configuration Editor will
also be deselected.
The Migration flow is similar to the new install flow. Only the
unique panels will be shown here.
You are not able to choose the Add Feature button if there
is no TDI 7.1 instance available.
You are not able to choose
the Upgrade button if there are no previous versions of TDI available.
The
previous TDI version drop down is enabled if the Upgrade button is
chosen.
If us choose to install
the Server feature, the TDI Solutions Directory panel will be skipped;
the value will be obtained from the TDI 6.0 install.
If you
choose to install AMC, we will see the normal panels.
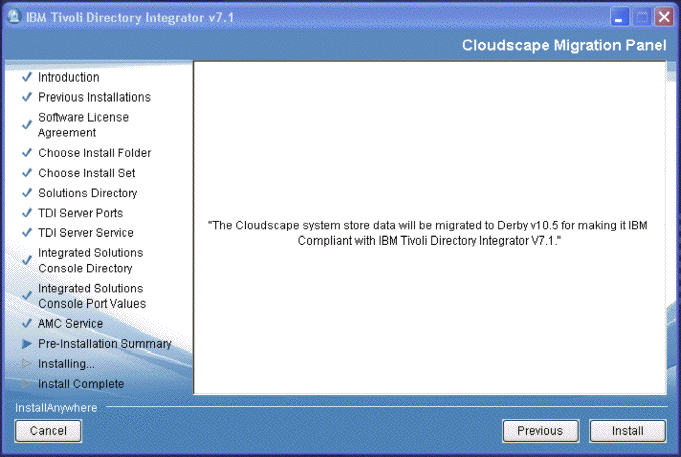
If the
installer detects that the TDI 6.0 instance used Cloudscape, we will
see this panel:
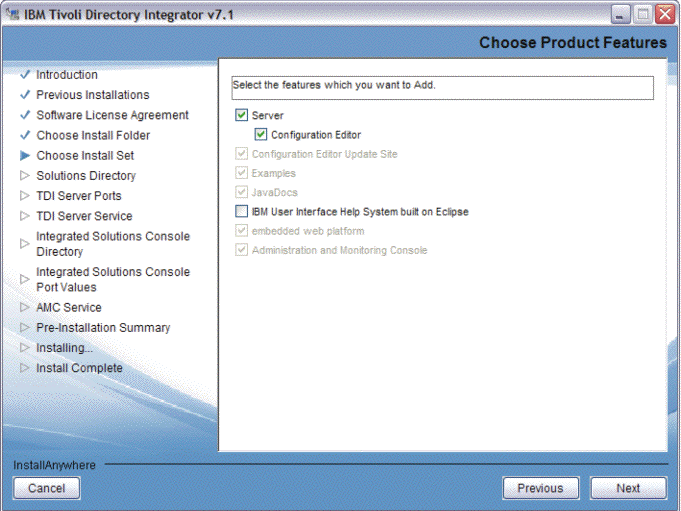
It will show those features (selected) that were already
installed in the previous version, and allow you to add new ones.
You are not allowed to disable features that were previously installed.
If
the Server was previously installed, the TDI Solutions Directory panel
will be skipped. The installer will use the value from the previous
installation.
If AMC was previously installed, we will still
see the Choose ISC panel, in a TDI 6.x.x migration.
The rest
of the panel flow is the same as a new install. In a TDI 7.0 migration, there is one new feature: Register server
as system service, this panel is only shown after the feature
selection panel.
If we select Configuration Editor, Server
will also automatically be selected. Also if both features are selected
and you deselect Server, then Configuration Editor will also be deselected.
The following command line options are supported by the TDI 7.1 installer:
The directory TDI_install_dir/examples/install contains
a number of example response files for various installation and de-installation
scenarios.
The optional country code is a two-character (commonly
uppercase) code defined by the ISO-3166 standard.
Locale options
are only respected if the installer includes localizations for the
locale you specify.
On Windows, -help only
works from the console launcher. Make sure to set the LaunchAnywhere
to Console on the Windows tab of the Project > Platforms subtask. (For an installed
LaunchAnywhere to provide this information, we need to make sure
it is explicitly set to Console Launcher on the action.)
The following command line option is unique to the TDI installation
Wizard:
The path
should be absolute to a java executable file, which generally resides
under the java bin directory; for example
Only spaces are
allowed between arguments.
In a silent install, if this skip option is chosen and
the install directory is same as an earlier installation of TDI V7.1, it will cause the installer to stop.
The Installation and Uninstallation Launcher
commands will not work on i5/OS. TDI does
not use IA-generated launchers on i5/OS, but instead, uses
shell scripts. Since launchers are not used, the launcher commands
are not applicable. The run-time command-line options will work.
During installation, the installer may use a substantial amount
of temporary file space in order to stage files. If your system is
constrained in this regard, errors during installation might occur.
UNIX/Linux systems typically use /tmp or /var/tmp as
temporary files storage, whereas on Windows, the temporary file storage
area is found in the location pointed to by the environment variable
TEMP.
InstallAnywhere installers can be instructed to redirect their
temporary file usage by setting the environment variable IATEMPDIR
before starting the installer. For example, on UNIX:
Then, start your console mode installers from the session in which
we have set the IATEMPDIR variable.
To perform a silent installation first generate a response
file. To generate this file, perform a non-silent installation
with the -r option specified, for example:
The response file is created in the directory that you specify
during installation.
The directory TDI_install_dir/examples/install contains
a number of example response files for various installation and uninstallation
scenarios.
Once the response file is created, you
can install silently using the following command:
The examples in this document use the Windows
platform installation executable file. See Launching the appropriate installer for
a list of executable file names for each supported platform.
If the CE Update site was installed, you now have to manually deploy
into Eclipse. See the section entitled Installing or Updating using the Eclipse Update Manager for
more information.
If any of the password synchronization plugins were installed, see the IBM TDI V7.1 Password Synchronization Plug-ins Guide for information on how to deploy the
plugin code.
On Windows, a shortcut to the launchAMC.html file
is created in the start menu under Program Files.
If
we have done a custom ISC SE/AE deployment then at a minimum you
will need to ensure that AM is started after we start the ISC SE/AE
that AMC was installed into.
The documentation system used by TDI is the IBM Eclipse Help System.
After we have done a default installation, this means that IBM TDI 7.1 documentation
is made available to you online, on the Web in the form of an Infocenter
hosted by IBM. You may, however, choose to deploy the documentation
locally. For more information, see Installing local Help files.
If you are new to TDI, we recommend that you read and step through
the IBM TDI V7.1 Getting Started in order to get used to the concepts
used.
If we have used earlier versions of TDI, then chapter 3 of the IBM TDI V7.1 Users Guide will be very beneficial to you in order to understand
the new IDE framework and layout. It will also explain how we can
import and open your existing configurations; and how the Server still
uses the Config model at runtime.
If we have used an earlier version of TDI, then we will most
likely need to migrate certain aspects of the previous deployment.
More information on what to do in this case can be found under Migrating.
Attention: Support for running the Configuration Editor (the GUI for
developing solutions in IBM TDI 7.1) has changed. The Configuration
Editor (CE) is not supported on the following platforms:
Launching the appropriate installer
The menu on the left of the Launchpad allows us to navigate
the Launchpad windows. Click a menu item to view information about
it. The following menu items are available:
Launchpad.bat
Launchpad.sh
Using the platform-specific TDI installer
Before you install
See Using the Remote Configuration Editor for information on how
to develop solutions without a local Configuration Editor.
Installing IBM TDI on i5/OS
Java virtual machine version
The install was unable to detect the IBM J9 VM (32-bit). The IBM J9 VM is required for this product.
Please install this JVM then try again.
PTF versions
The installer was unable to detect the i5/OS product/PTFs required by the embedded Web platform feature.
You may choose to continue the install without the embedded Web platform feature or you may exit now and
refer to the install log for a list of the missing requirements.
Installation
export QIBM_CCSID=819
before un-tarring
the TDI installer TAR image.Installing using the graphical installer
Install Panel flow



The install was unable to detect the IBM J9 VM (32-bit).
The IBM J9 VM is required for this product.  Please install this JVM then try again.
We will need to cancel the install at this point. This panel is
not shown if the JRE check passes.




The installer was unable to detect the i5/OS product/PTFs required by the embedded web platform feature.
You may choose to continue the install without the embedded web platform feature or you may exit now
and refer to the install log for a list of missing requirements.
You
can choose to go back and deselect the embedded web platform feature
through the custom feature panel and continue, or to exit the installer
and get the appropriate products installed.



<specialEndpoints xmi:id="NamedEndPoint_1200476459036" endPointName="WC_adminhost">   <endPoint xmi:id="EndPoint_1200476459036" host="*" port="9060"/>
</specialEndpoints>
<specialEndpoints xmi:id="NamedEndPoint_1200476459039" endPointName="WC_adminhost_secure">   <endPoint xmi:id="EndPoint_1200476459039" host="*" port="9043"/>
</specialEndpoints>


Uninstall Panel flow



Add Feature Panel flow

Migration Panel flow
Installing using the command line
install_tdiv71_win_x86.exe -i silent

install_tdiv71_win_x86.exe -i console
install_tdiv71_win_x86.exe -f installer.properties
This
path can be absolute or relative. (Relative paths are relative to
the location of the installer.)
install_tdiv71_win_x86.exe -r myinstaller.properties
install_tdiv71_win_x86.exe -Dmyvar=myvalue
install_tdiv71_win_x86.exe -l en

install_tdiv71_win_x86.exe -l pt_BR
The required language code
is a two-character (commonly lowercase) code defined by the ISO-639
standard. InstallAnywhere accepts both old (iw, ji, and in) and new (he, yi, and id)
language codes.
install_tdiv71_win_x86.exe LAX_VM "Java_DIR/jre/bin/java.exe"
TDI_install_dir\_uninst\uninstaller.exe -D$TDI_BACKUP$="true"
This
instructs the uninstaller to run the TDI_install_dir/bin/tdiBackup.bat(.sh) script, which in turn will cause a directory TDI_install_dir/backup_tdi to be created.
A backup of a number of files particular to our installation will
be stored into this directory, including your global.properties files, global certificates and the like.
Temporary file space usage during installation
export IATEMPDIR=/opt/IBM/TDI/temp
Performing a silent install
install_tdiv71_win_x86.exe -r Response File Name
install_tdiv71_win_x86.exe -i silent -f Response File Name
Post-installation steps
CE Update Site
Plugins
Administration and Monitoring Console (AMC)
General information
Bundled embedded web platform deployment
Customer or deferred deployment
Documentation
Migration
If you wish to develop solutions for these platforms, we should
use the Remote Configuration Editor functionality, meaning that you
run the CE on a supported platform, while in contact with a TDI Server
on one of the aforementioned platforms. See Using the Remote Configuration Editor for details.