Install packages
Overview
You can run Installation Manager in silent mode. If you are installing using UNC paths, you must install silently.
You can install updates at the same time that you install the base package.
Install a package
- Close the product to be updated or extended before installing the package.
- Start Installation Manager
- Configure product repository in Installation Manager. Methods include...
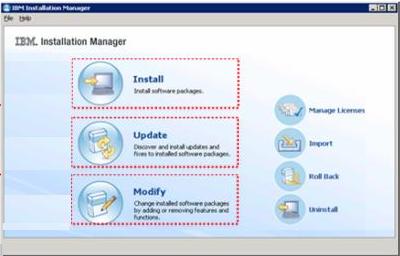
- In Installation Manager, click Install.
Installation Manager searches the defined repositories for available packages. If no available packages are found, verify that you have the correct repository listed,
- If a new version of Installation Manager is found, you might be prompted to confirm the installation. Click Yes to proceed. Installation Manager automatically installs the new version, restarts, and resumes.
- The Install page of Installation Manager lists all the packages that were found in the repositories that Installation Manager searched. Only the most recent version of the package is shown. To show all versions of a package that Installation Manager finds, select...
-
Show all versions
Click a package version to show the package description in the Details pane.
If you are running Installation Manager in group mode, you can only install packages enabled for installing in group mode.
- To search for fixes, updates, and extensions to the available packages, click...
-
Check for Other Versions, Fixes, and Extensions
Installation Manager searches for updates in the default update repositories for the packages.
For Installation Manager to search the default repository for the installed packages, on the Repositories preference page, set...
-
Search service repositories during installation and updates
This preference is selected by default .
If not checked, the Update wizard does not check the service repositories for package updates. Typically, Internet access is required.
To filter fixes, click the Filter icon
 .
.
If updates for a package are found, the updates are shown on the Install Packages page. Only the latest version of each package is shown.
- Select the packages and updates to the packages to install.
Updates that have a dependency relationship are automatically selected and cleared together. Click Next.
- On the Licenses page, read the license agreements for the selected packages. After accepting the license agreement, click Next to continue.
- On the Location page, enter the path for the shared resources directory in the Shared Resources Directory field.
The shared resources directory contains resources that can be shared by multiple package groups. Click Next. You can specify the shared resources directory only the first time that you install a package. Select the drive with enough available space to ensure adequate space for the shared resources of future packages. You cannot change the location of the shared resources directory unless you uninstall all packages.
- On the Location page, either choose a package group to install the packages into or create a package group.
A package group is a directory that contains resources that packages share with other packages in the same group. The first time that you install a package, you must create a package group. Click Next.
- On the next Location page, select the translations to install for packages in the package group.
The corresponding language translations for the graphical user interface and documentation are installed. Choices apply to all packages that are installed in this package group. Click Next to continue.
- On the Features page, select the package features to install.
- Optional: To see the dependency relationships between features, select Show Dependencies.
- Optional: Click a feature to view its brief description under Details.
- Select or clear features in the packages.
Installation Manager automatically enforces dependencies with other features and shows updated download size and disk space requirements for the installation. To restore the default features that are selected for the packages, click Restore default.
- When you are finished selecting features, click Next.
- On the Help System page, select a method for accessing help content.
- Select Access help from the web if you want to access help content on the web. This method has the smallest installation footprint and the most up-to-date information.
- Select Download help and access the content locally if you want to work disconnected from the Internet with periodic updates.
- Select Access help from a server on your intranet if you must work behind a firewall with administrative updates.
- On the Summary page, review your choices before installing the packages.
- Click Install. When the installation process completes, you receive a confirmation message.
See also
- Install packages from Passport Advantage
- Install multiple packages into multiple locations
- Extending an existing Eclipse IDE
- Package groups and the shared resources directory
- Unsupported characters for the installation path