Record an HTTP test
Overview
The test creation wizard starts when you record a test. This wizard...
- records a session with a Web application
- generates a test from the recording
- opens the test in the test editor
You can record a test from Internet Explorer (the default on Windows) or from another browser.
Record a test
- Click...
-
File | New | Test from Recording
- In the Create New Test from Recording window, select...
- Create Test from New Recording
- RPT HTTP Recording

......
- In the list of projects, click the one in which to store this test and related files. The
 icon identifies projects that are suitable for containing tests. Tests stored in other projects will not run.
In the Test file name field, type a name for the test, and click Next.

The default name is testproj. The standard Navigator and the Java Package Explorer use this name, with extensions. You will also see this name in the Test Navigator.
- In the Enter Client Digital Certificate window you can enable the use of digital certificates.

To enable downloading for certificates, for FireFox profile, check "Use an alternate Firefox profile", then in drop-down, set "Use a temporary Firefox profile".
- Click Finish. A progress window opens while browser starts.
- In the address box for browser, type the address of the Web-based application to test and activate the link.
If you enter the address of a secure Web site (one that starts with https:), browser might display a security alert. Depending on the security certificate for the site, you might be required to accept a security risk to proceed with the recording.
- Perform the user tasks to test.
While you are recording...
- Wait for each page to load completely. This waiting will not affect performance results, because you can remove extra "waiting time" (think time) when you play back the test.
- Do not change browser preferences.
- After finishing performing the user tasks, stop recording by closing the browser or click on the right side of the Recorder Control view bar.

- Be patient. Watch the Kbytes Recorded count in the Recorder Control panel. The Test Generation progress panel will appear after incrementing has completed.
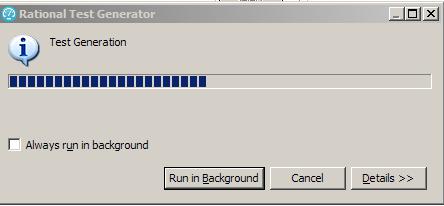
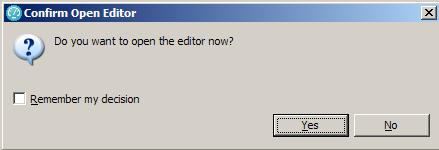
- On completion, the Recorder Control view displays the message Test generation completed, and you are asked to edit now...
If you get error: "response length nnn exceed 2048K", increase the content size that RPT will save.
- The test opens for you to inspect or edit.

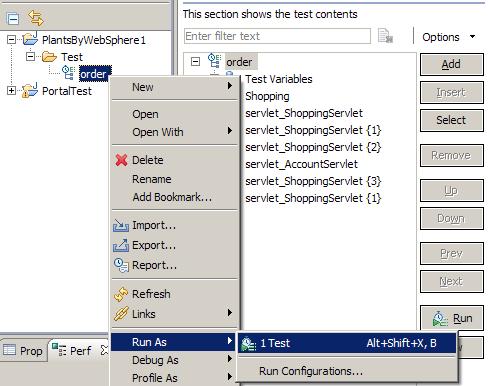
- Go ahead and verify new Test is working by right-clicking test name, and selecting...
Run As | Test
Typical web application tests incude "browse" and "order" tests.
Next
Create a datapool associated with a test
Related
- Record a successful test
- Configure Internet Explorer for recording from a secure Web site
- Annotate a test during recording
- Split a test during recording
- Record with IP addresses
- Record with Internet Protocol v6
- Return a browser to its initial state if recording is interrupted
- Change HTTP recording preferences
- Change HTTP test generation preferences