SIP test editor overview
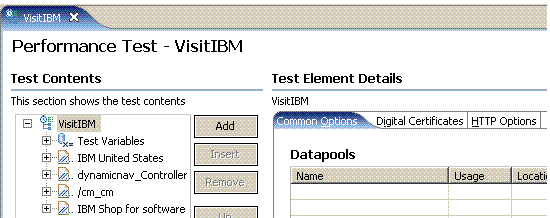
After creating a test project, you edit an empty SIP test to create and edit requests, responses, and other SIP protocol elements required for a SIP test.The following figure shows an empty SIP test. There are two main areas in the test editor window: the Test Contents area and the Test Element Details area.

Test Contents
The Test Contents area displays the contents of the SIP test elements in a nested hierarchy. Because this test has just been created, it has only one element.After you add elements to a test, the test contents are displayed in a nested hierarchy. Click + to expand a test element. Click - to collapse a test element. If you right-click on a test element, a drop-down menu opens, which contains actions that can be performed on the element. The buttons to the right of the Test Contents area also manipulate test elements within the hierarchy:
- Add: adds a child test element.
- Insert: adds a sibling test element above the selected element.
- Remove: deletes the selected test element and all elements nested beneath the selected element.
- Up: moves the selected element and all nested elements up the hierarchy.
- Down: moves the selected element and all nested elements down the hierarchy.
- Prev: moves to the previous test element of the same type (for example, from a Send request to the previous Send request)
- Next: moves to the next test element of the same type (for example, from a Send request to the next Send request
- Run: runs the test or schedule displayed in the workspace.
When you modify a test, the modified elements appear in italic type. The italic type changes to regular type after you save the test.
Test Element Details
The Test Element Details area displays specific information about the selected element; in this case, a test:
- The Common Options tab lists details about
each datapool that the test uses.
To learn more about datapools, see Provide tests with variable data (datapools).
- The SIP Options tab controls the registration
options for the test.
To learn more about registration options, see Configure background registration.
- The SIP Contexts Registry tab displays
the SIP contexts contained in the test.
To learn more about SIP contexts, see Add SIP contexts.
Managing the test editor
A portion of the test editor can occasionally be obscured. To see the obscured area, move the cursor over one of the blue lines until it changes to
 , and drag up or down while holding the left mouse
button.
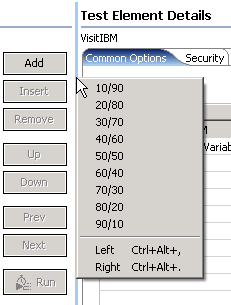
To resize the Test Editor window, do one of the following:
- Click Ctrl+Alt+> or Ctrl+Alt+< to enlarge or reduce the window.
- Hover at the left side of the Test Element Details area.
When you see a vertical blue line, right click the line and select
a size ratio from the menu.

The new size remains the next time you open the window. Double click the blue line to return to a 50/50 ratio.
Related
Related tasks