Portal Express, Version 6.0
Operating systems: i5/OS, Linux, Windows
Install a new version on an existing version of WebSphere Application Server
Before you begin, review...
- Planning for deployment
- Supported hardware and software for WebSphere Portal Express Version 6.0
- Preparing your operating system
- Choosing an installation source
When installing on Linux, if you install WebSphere Portal Express into a directory that does not have write permissions, the installation is not affected and proceeds normally. This is because the installation is performed with the root user, which always has full permissions over files.
- Ensure that the installed WebSphere Application Server is at the supported level.
- Ensure that the installed WebSphere Application Server has the following required features installed.
Product Features WebSphere Application Server Base - Application Server
- Administration
- Scripted Administration
- Administrative Console
- Ant and Deployment Tools
- Deploy Tool
- Ant Utilities
IBM WebSphere Application Server Network Deployment - Application Server
- Administration
- Scripted Administration
- Administrative Console
- Ant and Deployment Tools
- Deploy Tool
- Ant Utilities
If the existing WebSphere Application Server is at the supported level for WebSphere Portal Express and you then add a new feature to WebSphere Application Server, reinstall any previous fix packs and interim fixes to ensure that the new feature is updated to the proper level.
- If you are installing on a machine with a firewall enabled, disable the firewall before beginning the installation. If you do not disable the firewall and the installation program detects it, a warning message displays during the installation.
- If you are installing to a node that is already under deployment manager control, ensure that the deployment manager and the node agent are running.
- Choose one of the following options to start the installation program through the launchpad:
The launchpad has links that you can use to review system requirements and learn more about the product before you begin installation.
- Use the Quick Start Setup disc
If you have the Setup disc, perform the steps that are appropriate for your operating system:
- Linux:
Insert the Setup disc, and then run the ./setup.sh command from the root directory of the CD.
When installing with CD-ROM discs, ensure that you do not have an open shell in the CD directory. This can interfere with the installation when the installation program requires you to change discs.
- Windows:
Insert the Setup disc into the CD-ROM drive. The installation program automatically starts when you insert the Setup disc. If the autostart function is disabled, run the following command from the root directory of the CD:
setup.exe
- Linux:
- Access the downloaded product code
If you downloaded the product code, perform the steps that are appropriate for your operating system:
- Linux:
Run the following command from the root directory of the Quick Start Setup image that you downloaded and extracted to your server's hard drive:
./setup.sh
- Windows:
Run the setup.exe command from the root directory of the Quick Start Setup image that you downloaded and extracted to your server's hard drive.
- Linux:
If you prefer to bypass the launchpad (for example, if you are installing in a console-only environment), you can start installation directly as follows: Run the appropriate command from the PortalExpress directory on the Quick Start Setup CD (if you are using the disc) or image (if you are using downloaded product code):
- Linux:
./install.sh
- Windows:
install.bat
- i5/OS:
- Use the Quick Start Setup disc
- When you are ready to begin installation, click Install and then click the option to launch the installation wizard for your platform.
- Select the language for the installation and click OK.
- When the welcome panel displays, click Next to continue.
- Select the option to accept the terms of the license agreement. Click Next. The installation program checks the machine for operating system and software prerequisites.
- Select Custom, and click Next.
- If you have one or more existing WebSphere Application Server instance installed, select the instance that you want to use from the list.
If the installation program does not detect a WebSphere Application Server instance, but you know that it is present on the machine, exit the install and pass the location using the command line; for example:
./install.sh -W was.undetectedWas="/my/WAS/location/"
If you are installing to a node that is already under deployment manager control, ensure that Install on a managed node is checked.
Click Next and the custom location will be validated.
- Enter the user ID and password for the WebSphere Portal Express and WebSphere Application Server administrator.
Click Next.
- Ensure that the administrator user ID and password that you type conforms to the recommendations that are specified in Special characters in user IDs and passwords and to any restrictions that are specific to your operating system.
- The password that you specify here will also be used by the DB2 administrator user ID that the installation program creates.
- Do not use blanks in either the user ID or the password, and ensure that the password is at least five characters in length. This user ID is used to access WebSphere Portal Express and WebSphere Application Server with administrator authority after installation.
- This user ID is only used to log in to WebSphere Portal Express and WebSphere Application Server and is not related to any user IDs that are used to access the operating system.
- Managed Node only: If you choose to install on a managed node, have a profile created.
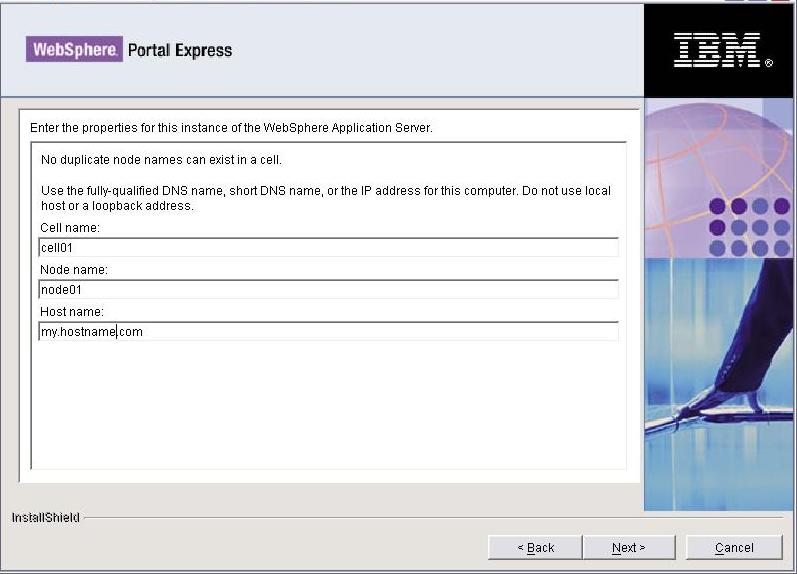
- Non-managed node only: Specify the following WebSphere Application Server information, and click Next:
- Enter the cell name.
- The node within the WebSphere Application Server cell where you want the WebSphere Portal Express
application server to be installed.
This value must be unique among other node names in the same cell. Typically, this value is the same as the host name for the computer.
- The fully qualified host name or IP address of the computer that is running WebSphere Application Server.
- Specify the directory where you want to install WebSphere Portal Express.
The directory that you specify must NOT exist; it will be created during the installation.
If you are installing on Windows, do not include periods (.) or special characters in the installation path, and avoid using a long path name. Click Next.
The installation program automatically installs the DB2 program files under the directory that you specify. In addition, it creates a database for WebSphere Portal Express data and stores this database in a directory that matches the DB2 administrator user name. By default, the installation program uses a preconfigured DB2 administrator user name (wpdb2ins), so it stores the database in a directory with that name (wpdb2ins). However, if a different DB2 administrator user name is required, the installation program creates the database in a directory that matches that name. To reduce the amount of time needed to install on Windows, the directory that contains the database is always located on the C: drive, no matter where you install WebSphere Portal Express.
- Enter the user ID and password for the WebSphere Portal Express and WebSphere Application Server administrator.
Click Next.
- Ensure that the administrator user ID and password that you type conforms to the recommendations that are specified in Special characters in user IDs and passwords and to any restrictions that are specific to your operating system.
- The password that you specify here will also be used by the DB2 administrator user ID that the installation program creates.
- Do not use blanks in either the user ID or the password, and ensure that the password is at least five characters in length. This user ID is used to access WebSphere Portal Express and WebSphere Application Server with administrator authority after installation.
- This user ID is only used to log in to WebSphere Portal Express and WebSphere Application Server and is not related to any user IDs that are used to access the operating system.
- If the default DB2 administrator ID (wpdb2ins) already exists on the system because of a prior installation, the installation program prompts you to specify a different administrator ID and password. To continue, click Next, enter the new DB2 administrator ID and password, and then click Next.
Ensure that the user ID and password conform to your organization's policies, including minimum password length and complexity. Failure to conform can result in a failed installation.
- Verify the components to be installed and click Next.
When you install for the first time on the current machine, the installation program sets the DB2 administrator ID to a preconfigured name (wpdb2ins). The DB2 administrator ID uses the same password that you specified earlier for the WebSphere Portal Express and WebSphere Application Server administrator ID.
The installation program begins installing the selected components. Throughout the installation and configuration process, the installation program displays progress indicators for the different components.
- When the installation is finished, the installation program displays a confirmation panel listing the components that have been installed. Write down the following information before clicking Finish:
- The port number that is used to access WebSphere Portal Express is displayed on the confirmation panel. Write down the port number for use in verifying the WebSphere Portal Express URL. This value is also stored in the WpsHostPort property in...
portal_server_root/config/wpconfig.properties
- If you want to use the WebSphere Portal Express First Steps, ensure that Launch First Steps is selected. From First Steps you can access WebSphere Portal Express or read the documentation.
- To enable LDAP security, transfer data to a different database, or run the Member Fixer tool, select Launch advanced configuration wizard.
- The port number that is used to access WebSphere Portal Express is displayed on the confirmation panel. Write down the port number for use in verifying the WebSphere Portal Express URL. This value is also stored in the WpsHostPort property in...
- Click Finish.
- To verify that WebSphere Portal Express is running, open the following URL in a browser:
http://example.com:port_number/wps/portal
...where example.com is the fully qualified host name of the machine that is running WebSphere Portal Express and port_number is the port number that is displayed on the confirmation panel. For example
http://www.ibm.com:10038/wps/portal
At this point you are running with security enabled.
- If the WebSphere Application Server where you installed WebSphere Portal Express is part of a cell managed by WebSphere Application Server Network Deployment, you can create a cluster of WebSphere Portal Express application servers. Refer to Clustering and WebSphere Portal Express for more information.
- By default WebSphere Portal Express uses the internal HTTP transport within WebSphere Application Server to handle requests, but if you have an external Web server, such as IBM HTTP Server, you can configure WebSphere Portal Express to use the Web server. Refer to Setting up a Web server with WebSphere Portal Express for instructions.
Next steps
At this point, you can login and start using WebSphere Portal Express or you can continue to extend your WebSphere Portal Express environment.
- To learn how to login, refer to Logging in to the portal and to explore WebSphere Portal Express, refer to Take a test drive of the site.
- To transfer WebSphere Portal Express data to another supported database, refer to Configuring databases.
- To configure WebSphere Portal Express to connect to a user registry, such as LDAP or another database, refer to Configuring security.
- To integrate with Lotus Domino and add collaboration function, such as Lotus Sametime instant messaging, refer to Lotus Domino Integration.