Configure a web server and an application server on separate machines (remote)
WebSphere Application Server provides a web server plug-in that we can configure to communicate with a particular brand of web server.
(Dist) When multiple profiles exist, we can select the profile that the Web Server Plug-ins Configuration Tool configures.
If the WAS product family supports a particular brand of web server, such as IBM HTTP Server or Microsoft Internet Information Services (IIS), our WAS product provides a binary plug-in for the web server.
If the WAS product family does not provide a binary plug-in for a particular brand of web server, then the web server is not supported. The purpose of the binary plug-in is to provide the communication protocol between the web server and the application server.
(Dist) Suppose that we create a new profile and we also want to use a web server. We must...
- Install a new web server for the new profile
- Install the Web Server Plug-ins
- Use the Web Server Plug-ins Configuration Tool to configure both the web server and the application server
If the web server is not already installed, we can still install the Web Server Plug-ins for future use.
(Dist) Installing the Web Server Plug-ins installs the plug-in module. The Web Server Plug-ins Configuration Tool (PCT) configures the web server for communicating with the application server and creates a web server configuration definition in the application server, if possible. Some topologies, such as the web server on one system and the application server on another system, prevent the Web Server Plug-ins Configuration Tool from creating the web server definition in the application server configuration directly on the remote system. In such a case, the tool creates a script that we can copy to the application server system. Run the script to create the web server configuration definition within the application server configuration.
The PCT tool is supported only on AIX, Linux, and Windows. As an alternative to using the Web Server Plug-ins Configuration Tool, we can use the pct command-line tool with a response file to configure a web server.
This procedure configures the application server profile that is the default profile on the machine. A one-to-one relationship exists between a web server and the application server.
This article describes how to create the following topology:
|
|

If we are planning to add the application server node into a dmgr cell but have not done so yet, start the deployment manager and federate the node before configuring the plug-in. We cannot add an application server with a web server definition into the deployment manager cell.
The following topology is considered a remote topology because the web server is on a separate machine. The diagram shows a typical remote topology for a distributed environment:
|
|

(Dist) This article describes the installation of a web server on one machine and the application server on a separate machine. In this situation, the Web Server Plug-ins Configuration Tool on one machine cannot create the web server definition in the application server configuration on the other machine.
(Dist) In such a case, the Web Server Plug-ins Configuration Tool creates a script on the web server machine that we can copy to the application server machine. Run the script on the application server machine to create the web server configuration definition within the application server configuration.
Perform the following procedure to install the plug-in and configure both the web server and the application server.
Tasks
- Install Installation Manager on Machine A and Machine B.
- Use Installation Manager to install WAS Network Deployment on Machine A.
- Create a standalone application server on Machine A.
- Optional: Create a new host alias for the default virtual host.
If we configured the web server to use a port other than port 80, then add a new host alias for that port for the default host. For example, when running as nonroot, IBM HTTP Server is configured with a default port value of 8080.
- Use Installation Manager to install the following on Machine B.
- Web Server Plug-ins for WAS
- WebSphere Customization Toolbox
- Use Installation Manager to install the IBM HTTP Server on Machine B, or install another supported web server on Machine B.
- Open the WebSphere Customization Toolbox, and launch the Web Server Plug-ins Configuration Tool on the machine with the web server.
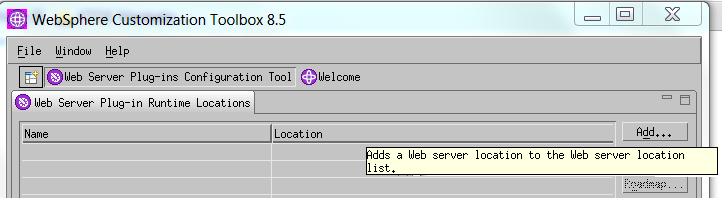
- Select a web server plug-in runtime location.
If the location of a previously installed web server to use is not in the list, perform the following actions to add the location to your working set:
- Click Add.
- Enter a name for the web server plug-in location.
- Perform one of the following actions:
- Enter the location.
- Click Browse, find the location, and click OK.

- Click Create.
- Select the type of web server that we are configuring, and click Next.
- Select the architecture of our installed target web server (64 bit or 32 bit) and click Next if we are asked.
- Click Browse to select the configuration file or files for our web
server, verify that the web server port is correct> Next when we are finished.
Select the file and not just the directory of the file. Some web servers have two configuration files and require you to browse for each file.
The following list shows configuration files for supported web servers:
- Apache Web Server
- apache_root/config/httpd.conf
- Domino Web Server
- names.nsf and Notes.jar
The wizard prompts for the notes.jar file. The actual name is Notes.jar.
The Web Server Plug-ins Configuration Tool verifies that the files exist but the tool does not validate either file.
- IBM HTTP Server
- (Dist) IHS_root/conf/httpd.conf
- (iSeries) IHS_profile_root/conf/httpd.conf
- Microsoft Internet Information Services (IIS)
- The Web Server Plug-ins Configuration Tool can determine the correct files to edit.
- Oracle iPlanet Web Server
- obj.conf and magnus.conf
- If we are configuring an IBM HTTP web server plug-in,
perform the following actions.
- Optionally, set up the administration server configuration to administer the web server.
When using the Web Server Plug-ins Configuration Tool to configure the IBM HTTP Server Administration server, the WebSphere Customization Toolbox must be run as a "local" account with administrator/root privileges.
- Select...
-
Setup IBM HTTP Server Administration Server
- Specify a port number on which the IBM HTTP administration server will communicate.
- Optionally, select...
-
Create a user ID for IBM Server Administration Server authentication
...and enter a user ID and password to authenticate to the IBM HTTP Server administrative server from the administrative console.
- Select...
- Click Next.
- (AIX) (Linux) Specify the system user ID and group to have write permission to IBM HTTP Server, the IBM HTTP Server administrative server, and the web server plug-in configuration files.
If necessary, select
- Create a new unique system user ID and group using the credentials
(AIX) Restriction: The configuration might fail if we specify a new user ID or group name that exceeds the platform limit, which is commonly 8 characters and is sometimes configurable.
- (Windows) Optionally, set up the IBM HTTP Server Administration Server to run as a Window service.
- Select...
-
Run IBM HTTP Server Administration Server as a Windows Service
- Perform one of the following actions:
- Select...
-
Log on as a local system account
- Select...
-
Log on as a specified user account
...and enter the user ID and password for that account.
The user ID requires the following advanced user rights:
- Act as part of the operating system
- Log on as a service
- Select...
- Choose whether your startup type will be automatic or manual.
- Select...
- Click Next.
- Optionally, set up the administration server configuration to administer the web server.
- Specify a unique name for the web server definition, and click Next.
- Select the configuration scenario.
- Choose the remote scenario.
- Identify the host name or IP address of Machine A, which is the application server machine.
- Click Next.
- Select the profile to configure with the current web server plug-in, and click Next.
This panel does not display if we selected the remote scenario in the previous step.
- Examine the summary panel, and click Configure to begin configuring.
The panel notifies you that we have manual steps to perform to complete the installation and configuration.
The Web Server Plug-ins Configuration Tool creates the script...
-
plugins_root/bin/configureweb_server
...on Machine B (the machine with the web server).
The Web Server Plug-ins Configuration Tool also creates...
-
plugins_root/config/web_server/plugin-cfg.xml
The web server reads the plugin-cfg.xml file to determine the applications that the application server on Machine A can serve to the web server on Machine B. Whenever the configuration changes, the application server regenerates the file. When regeneration occurs, propagate, or copy the actual plugin-cfg.xml file from the application server machine to the web server machine. We can automatically propagate the file to the IBM HTTP Server product.
- Verify the success of the installation on the summary panel, and click Finish.
If a problem occurs and the installation is unsuccessful, examine the logs in the plugins_root/logs directory. Correct any problems and re-configure.
- Copy the configureweb_server script from Machine B (the machine with the web server) to the app_server_root /bin directory on Machine A (the application server machine).
web_server is the nickname of the web server specified. web_server is not a vendor name, such as IIS or Apache.
(Dist) On an operating system such as AIX or Linux, the file is configureweb_server.sh. On a Windows system, the file is configureweb_server.bat. For example, on a Linux system with an IBM HTTP Server named web_server_1 in the default location, copy plugins_root/bin/configureweb_server_1.sh from Machine B (the machine with the web server) to app_server_root/bin on Machine A (the application server machine).
(iSeries) For example, on an IBM i system with an IBM HTTP Server named web_server_1 in the default location, copy plugins_root/bin/configureweb_server_1 from Machine B (the machine with the web server) to app_server_root/bin on Machine A (the application server machine).
(Dist) If one platform is a system such as AIX or Linux and the other is a Windows platform, copy the script from the crossPlatformScripts directory. For example:
-
plugins_root/bin/configureweb_server.sh
- Compensate for file encoding differences to prevent script failure.
The content of the configureweb_server.bat script or the configureweb_server.sh script can be corrupt if the default file encoding of the two machines differs. This scenario is possible when one machine is set up for a double-byte character set (DBCS) locale and the other machine is not.
(iSeries) The content of the configureweb_server script can be corrupt if the default file encoding of the two machines differs. This scenario is possible when one machine is set up for a double-byte character set (DBCS) locale and the other machine is not.
Determine the file encoding and use one of the following procedures to circumvent the failure. To determine the default file encoding, run the appropriate command.
(Dist)- Run the locale charmap command on a system such as AIX or Linux.
- Run the CHCP command on a Windows machine.
Use the result of the command on each machine as the value for the web_server_machine_encoding variable and the application_server_machine_encoding variable in one of the following procedures.
Procedures for compensating for encoding differences
- Web server running on a system such as AIX or Linux
Suppose that the web server is running on a Linux machine and the application server is running on a Windows machine. Before you FTP the web server definition configuration script to the Windows machine in binary mode, on the system to encode the file:
iconv -f web_server_machine_encoding \
      -t application_server_machine_encoding \
      configureweb_server.bat
Important: The name of the web server (nick name) is used in the name of the script file. The name cannot contain characters from a double-byte character set (DBCS) if we intend to set up IBM HTTP Server for automatic propagation.
- Web server running on a Windows system
Suppose that the web server is running on a Windows machine and the application server is running on a machine with a system such as AIX or Linux. We must first download the iconv utility from a third party because the command is not included by default on Windows systems. Before you FTP the web server definition configuration script in binary mode to a system such as AIX or Linux, on the machine to encode the file:
iconv -f web_server_machine_encoding \
      -t application_server_machine_encoding \
      configureweb_server.sh
For example, if the target machine is z/OS, we might use this command to convert the file from ASCII to EBCDIC, handling the end-of-line characters correctly:
iconv -f ISO8859-1 \
      -t IBM-1047 configureweb_server.sh > new_script_name.sh
Omit the continuation characters (\) if we enter the command on one line.
If the conversion mapping is not supported by the iconv command on the system, copy the contents of the web server configuration script to a clip board and paste it onto the machine where the application server is running.
If we copy over a .sh file onto a UNIX-based operating system after remote configuration on a Windows operating system, we must perform chmod 755.
- Start the application server on Machine A.
Use the startServer command, for example:
-
profile_root/bin/startServer.sh server1
- Start the IBM HTTP Server administration server.
The administration server must be started so that the configureweb_server.bat/.sh script can automatically propagate the plugin-cfg.xml file to the web server.
If we do not start the administration server, the script can configure the web server, but the plug-in is not propagated, and PLGC0063E, PLGC0049E, and PLGC0053E errors occur.
- Open a command window and change to the profile directory where the web server should be assigned. Run the script that you copied to Machine A (the application server machine). We need the following parameters:
- Profile Name
- (Optional) Admin user ID
- (Optional) Admin user password
For example, we could enter the following:
- configurewebserver1.sh AppSrv01 my_user_ID my_Password
The web server will be configured via wsadmin.
The contents of the configurewebserver1.sh script will be similar to this:
wsadmin.bat -profileName AppSrv01 -user my_user_ID -password my_Password -f "%WAS_HOME%\bin\configureWebserverDefinition.jacl" webserver1 IHS - From the administrative console of the deployment manager, click...
System administration > Save Changes to Master Repository > Synchronize changes with Nodes > Save.
- Domino Web Server only: Set the WAS_PLUGIN_CONFIG_FILE environment variable.
On platforms such as AIX or Linux, sourcing a script to the parent shell allows child processes to inherit the exported variables. On Windows systems, run the script as we would run any other command. Sourcing is automatic on Windows systems.
- Open a command window.
- Change directories to the plug-ins installation root directory.
- Issue the appropriate command for the plugins_root/bin/setupPluginCfg.sh script:
- (AIX) (HPUX) (Solaris) . plugins_root/bin/setupPluginCfg.sh
(Notice the space between the period and the installation root directory.)
- (Linux) source plugins_root/bin/setupPluginCfg.sh
- (AIX) (HPUX) (Solaris) . plugins_root/bin/setupPluginCfg.sh
The script is also in the lotus_root/notesdata directory on operating systems such as AIX or Linux.
Issue the appropriate command for the script before starting the Domino Web Server.
- Regenerate the plugin-cfg.xml file on Machine A (the application server machine) using the administrative console. Click...
-
Servers > Server Types > Web servers > web server > Generate Plug-in
During the installation of the plug-ins, the default plugin-cfg.xml file is installed on Machine B (the machine with the web server) in the directory...
-
plugins_root/config/web_server
The web server plug-in configuration service regenerates the plugin-cfg.xml file automatically. To use the current plugin-cfg.xml file from the application server, propagate the plugin-cfg.xml file as described in the next step.
This step shows you how to regenerate the plugin-cfg.xml file. WAS products are configured to automatically regenerate the file each time a significant event occurs. Such events include installing applications on the application server and the web server, for example. Creating a new virtual host is another such event.
- Propagate the plugin-cfg.xml file from the application server to the web server using the administrative console. Click...
-
Servers > Web server > web server > Propagate Plug-in
Web servers other than IBM HTTP Server require manual propagation.
The web server plug-in configuration service propagates the plugin-cfg.xml file automatically for IBM HTTP Server only. For all other web servers, propagate the plug-in configuration file by manually copying the plugin-cfg.xml file from...
-
profile_root/config/cells/cell/nodes/node/servers/web_server
...on Machine A (the application server machine) to...
-
plugins_root/config/web_server
...on Machine B (the machine with the web server).
- Start the Snoop servlet to verify the ability of the web server to retrieve an application from the application server.
Test the environment by starting the application server, the web server, and using the Snoop servlet with an IP address.
- Start the application server. In a Network Deployment environment, the Snoop servlet is available in the cell only if you included the DefaultApplication when adding the application server to the cell. The -includeapps option for the addNode command migrates the DefaultApplication to the cell. If the application is not present, skip this step.
Change directories to the profile_root/bin directory and run the startServer command:
- (UNIX) ./startServer.sh server1
- (Windows) startServer server1
- (iSeries) startServer server1
- Start the IBM HTTP Server or the web server that we are using.
(iSeries) Use either the 2001 page or use the STRTCPSVR SERVER(*HTTP) HTTPSVR(instance_name ) command to start the IBM HTTP Server.
(Dist) Use a command window to change the directory to the IBM HTTP Server installed image, or to the installed image of our web server. Issue the appropriate command to start the web server, such as these commands for IBM HTTP Server:
(Dist) To start the IBM HTTP Server from the command line:
(Dist) Access the apache and apachectl commands in the IBMHttpServer/bin directory.
- (UNIX) ./apachectl start
- (Windows) apache
- Point your browser to http://localhost:9080/snoop to test the internal HTTP transport provided by the application server.
Point your browser to http://Host_name_of_Web_server_machine/snoop to test the web server plug-in.
The HTTP Transport port is 9080 by default and must be unique for every profile. The port is associated with a virtual host named default_host, which is configured to host the installed DefaultApplication. The Snoop servlet is part of the DefaultApplication. Change the port to match your actual HTTP Transport port.
- Verify that Snoop is running.
Either Web address should display the Snoop Servlet - Request/Client Information page.
- Remote IBM HTTP Server only:
(Dist) Verify that the automatic propagation function can work on a remote IBM HTTP Server using the following steps. This procedure is not necessary for local web servers.
- Create a user=adminUser, password=adminPassword in the IHS_root /conf/admin.passwd file. For example: c:\ws\ihs90\bin\htpasswd -cb c:\ws\ihs90\conf\admin.passwd adminUser adminPassword
- Start the administrative console of the deployment manager or the application server to enter the User ID and password information created for the administrative user of IBM HTTP Server. Go to...
-
Servers > Web server > web_server_definition > Remote Web server administration
Set the following values: admin Port=8008, User Id=adminUser, Password=adminPassword.
- Set the correct read/write permissions for the httpd.conf file and the plugin-cfg.xml file. See the IHS_root /logs/admin_ERROR. LOG file for more information.
Automatic propagation of the plug-in configuration file requires the IBM HTTP administrative server to be up and running. If we are managing an IBM HTTP Server using the WAS administrative console, the following error might display:
- "Could not connect to IHS Administration server error"
Perform the following procedure to correct the error:
- Verify that the IBM HTTP Server Administration server is running.
- Verify that the web server host name and the port defined in the WAS administrative console matches the IBM HTTP Server administration host name and port.
- Verify that the fire wall is not preventing you from accessing the IBM HTTP Server administration server from the WAS administrative console.
- Verify that the user ID and password specified in the WAS administrative console under remote managed, is created in the admin.passwd file, using the htpasswd command.
- If we are trying to connect securely, verify that you export the IBM HTTP Server administration server keydb personal certificate into the WAS key database as a signer certificate. This key database is specified by the com.ibm.ssl.trustStore directive in the sas.client.props file in the profile where the administrative console is running. This consideration is primarily for self-signed certificates.
- If we still have problems, check the IBM HTTP Server admin_ERROR. LOG file and the WAS logs (trace.log file) to determine the cause of the problem.
- Start the application server. In a Network Deployment environment, the Snoop servlet is available in the cell only if you included the DefaultApplication when adding the application server to the cell. The -includeapps option for the addNode command migrates the DefaultApplication to the cell. If the application is not present, skip this step.
This procedure results in the installation of the Web Server Plug-ins for WAS on a web server machine. The Web Server Plug-ins Configuration Tool also configures the web server to support an application server on a separate machine.
The installation of the Web Server Plug-ins results in the creation of the Plugins directory and several subdirectories. The following directories are among those created on a Linux system, for example:
- plugins_root/bin/32bits or plugins_root/bin/64bits contain the binary plug-ins for all supported web servers
- plugins_root/logs contains log files
- plugins_root/properties contains version information
What to do next
- Select a web server topology diagram and roadmap
- Web server configuration
- Plug-ins configuration
- Editing web server configuration files
Related