Create profiles through the graphical user interface
Overview
This topic describes how to create runtime environments for WAS. Each runtime environment is created within a profile. A profile is the set of files that define the runtime environment. The Profile Management tool creates the profile for each runtime environment.
Before using the Profile Management tool, install the core product files.
The Profile Management tool is the graphical interface to the manageprofiles command.
You must provide enough system temporary space to create a profile.
You cannot use the Profile Management tool to create profiles on...
- 64-bit platforms
- The Linux for zSeries platform
The installation procedure for the ND product does not create a runtime environment by default because multiple possibilities exist. After installing the core product files for the ND product, use the Profile Management tool to create any combination of the following profiles to have an operational runtime environment:
- Create a cell profile.
With a cell profile, you can create a deployment manager profile and a profile for a federated appserver node in a single pass through the Profile Management tool. The recommendation is that you use the cell profile creation option to create the deployment manager profile and the federated appserver node profile, unless you have a specific reason to create them separately.
- A deployment manager profile.
With a deployment manager profile you can create the administrative node for a multinode, multi-machine group of Application Server nodes that you create later. This logical group of Application Server processes is known as a cell.
- An appserver profile.
When you create the appserver profile, a default server1 process is created. If you select Typical profile creation, the process has the default application and its own console. If you choose the Advanced profile creation option, you can choose what applications to deploy. You can federate the server1 node into the deployment manager cell with the addNode command or from the console of the deployment manager. The server1 process must be running to begin the federation from the deployment manager.
If you include all of the applications from the appserver, the act of federation installs the applications on the deployment manager where they can be redeployed.
Optionally, you can create stand-alone application servers by creating an appserver profile and not federating the node. If you remove a federated appserver node from a deployment manager, the appserver returns to its original configuration, which is a stand-alone appserver.
- A custom profile.
A custom profile is an empty node that you can customize through the deployment manager to include appservers, clusters, or other Java processes, such as a messaging server. Create a custom profile on a distributed machine and add the node into the deployment manager cell to get started customizing the node.
Each use of the Profile Management tool creates one profile for the deployment manager profile, the appserver profile, or the custom profile. For the cell profile, the Profile Management tool creates two profiles.
Procedure
- Install the product to create the core product files.
- Start the Profile Management tool to create a new runtime environment. Several ways exist to start the wizard:
- At the end of installation, select the check box to launch the Profile Management tool.
- Issue the command directly from a command line.
cd app_server_root/bin/ProfileManagement
pmt.sh - Select the Profile Management tool from the First steps console:
cd profile_root/firststeps
./firststeps.sh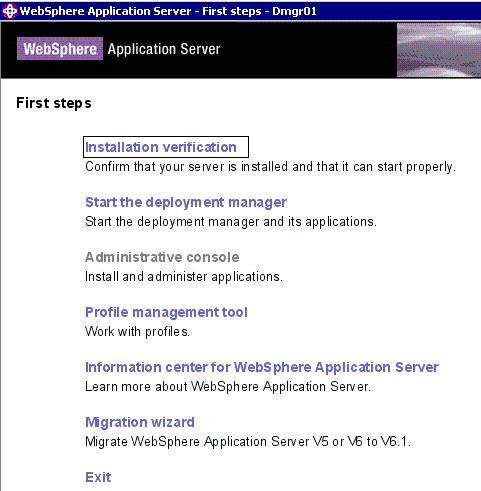
On Windows, use the Start menu to access the Profile Management tool. For example...
All Programs | IBM WebSphere | your product | Profile Management tool
- On Linux, use OS menus that you use to start programs in order to start the Profile Management tool. For example, click...
IBM WebSphere | your product Profile Management tool
- At the end of installation, select the check box to launch the Profile Management tool.
- Create a profile.
You can create profiles in any order. However, to create a functioning cell in the shortest possible time, use the cell profile template.
A custom profile requires a greater amount of customization. When you create a custom profile, federate the custom profile into the deployment manager cell on the Federation panel in the Profile Management tool or through the addNode command. In contrast to an appserver profile, a custom profile does not have a default appserver on its node. The server1 appserver does not exist by default on the custom node and no default applications exist on the custom node. Use the console of the deployment manager to customize the empty node for production or other uses. You can create appservers or clusters on the node, for example. Create any of the following profiles:
- Create a cell profile.
When you create a cell profile, the Profile Management tool creates a deployment manager profile and a federated Application Server node profile. After initial creation of a cell profile you can federate:
- Additional Application Server node profiles into this deployment manager profile.
- Custom profiles into this deployment manager profile.
- Additional Application Server node profiles into this deployment manager profile.
- Create a deployment manager.
Create a deployment manager to establish a cell. Although you can create an appserver profile and use it as a stand-alone appserver, have a deployment manager to use a custom profile. Wait to create a custom profile until after you create a deployment manager.
- Create an appserver profile
Federate the appserver into the deployment manager cell to create a federated server1 appserver. A stand-alone Application Server can include applications, depending on what you select during profile creation. As you federate the Application Server, you can include the applications so that the applications are installed on the deployment manager. Two methods exist for federating appservers into a deployment manager cell:
- Start the deployment manager and the appserver and use the administrative console of the deployment manager to federate the node. Click...
System administration | Nodes | Add node | Managed node | Next
...and identify the host name and the SOAP port of the machine where you created the appserver.
- Start the deployment manager. Go to...
app_server_root/profiles/profile/bin
...of the appserver and issue the addNode command.
- Start the deployment manager and the appserver and use the administrative console of the deployment manager to federate the node. Click...
- Create a custom profile
The first part of the process is to install the Network Deployment product to create the core product files. Then you can use the Profile Management tool to create a managed profile.
The next part of the process is to federate the managed profile into the deployment manager cell. This part of the process changes the custom profile into a managed node.
After federation, a custom profile has a node agent process, but does not have an appserver process. Contrast this situation to an appserver profile that has a server1 process, but does not have a node agent process until you federate the node.
Adding the node to the cell starts the node agent process. If the process stops for some reason, such as a machine restart, start the node agent process. The node agent process must be running so that the console of the deployment manager can create server processes on the managed node. Two methods exist for federating a custom node into a deployment manager cell:
- Federate the custom node during custom profile creation, either with the wizard or as the wizard runs in silent mode.
The deployment manager must be running and accessible at the host address you supply. The deployment manager must also use the default JMX connector type, which is SOAP. If any of these conditions are not met, do not federate the custom profile as you create it, but federate it later with the addNode command. Otherwise, you create a faulty profile that move or delete from the profiles repository directory before creating another profile.
- Use the addNode command to federate the custom node after you create
the custom profile.
- Start the deployment manager.
- Go to...
app_server_root/profiles/profile/bin
...of the custom profile and issue the addNode command.
The addNode command starts the nodeagent process.
- If the nodeagent is stopped for some reason, execute...
app_server_root/profiles/profile/bin/startNode.sh
On Windows platforms, the command is startNode.bat.
The console of the deployment manager shows the status of each federated nodeagent process.
- Start the deployment manager.
After federation, go to the console of the deployment manager to customize the empty node.
- Federate the custom node during custom profile creation, either with the wizard or as the wizard runs in silent mode.
- Create a cell profile.
What to do next
See the description of the manageprofiles command to learn more about the command-line alternative method of creating a profile, and to see examples of using the command.
See Planning the installation for examples of configurations that you can create by creating profiles.
Create a deployment manager profile
Create a cell profile
Create a custom profile
Create an appserver profile
Related tasks
manageprofiles commandInstal silently
Task overview: Installing