Install WebSphere Portal with WebSphere Application Server security enabled
Before you begin
- You should review Preparing your operating system before installing WebSphere Portal.
- You should review Choosing an installation source before starting the installation.
- You should review Plan for WebSphere Portal before continuing.
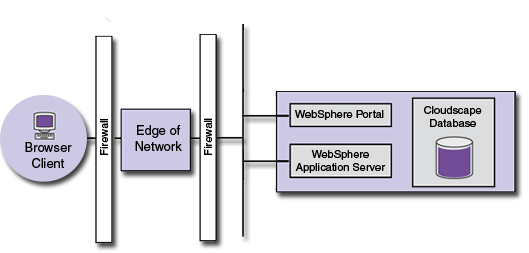
Figure 1. WebSphere Portal with default components installed
Install WebSphere Portal
Although WebSphere Portal can be installed while WebSphere Application Server security is enabled, there is some required configuration for WebSphere Portal that cannot be automatically performed when security is active. The instructions in this section describe how to install WebSphere Application Server and how to manually perform the necessary configuration. Note that if it is possible to temporarily disable security, you can install WebSphere Portal without having to perform this manual configuration, as described in the section Install WebSphere Portal with security temporarily disabled.
Java 2 security note: If you are running WebSphere Application Server with Java 2 security, disable it before installing and running WebSphere Portal.
To install WebSphere Portal while WebSphere Application Server security is enabled, follow these instructions.
Ensure that the installed WebSphere Application Server is at the supported level before continuing. Refer to Supported hardware and software for more information.
Linux installation note: If you install WebSphere Portal into a directory that does not have write permissions, the installation is not affected and proceeds normally. This is because the installation is performed with the root user, which always has full permissions over files.
- If you are installing on a machine with a firewall enabled, it is recommended that you disable the firewall before beginning installation. If you do not disable the firewall and the installation program detects it, a warning message displays during the installation.
- Choose one of the following options to start the installation program:
- Use the Setup disc
If you have the Setup disc, perform the steps that are appropriate for your operating system:
-
UNIX:
Insert the Setup disc, and then run the following command from the root directory of the CD:
./install.sh
When installing with CD-ROM discs, ensure that you do not have an open shell in the CD directory. This can interfere with the installation when the installation program requires you to change discs.
- Windows: Insert the Setup disc into the CD-ROM drive. The
installation program automatically starts when you insert the Setup disc. If the
autostart function is disabled, run the following command from the root directory
of the CD:
install.bat
-
UNIX:
Insert the Setup disc, and then run the following command from the root directory of the CD:
- Access the downloaded product code
If you downloaded the product code, perform the steps that are appropriate for your operating system:
-
UNIX:
Run the following command from the root directory of the CD:
./install.sh
- Windows: Run the install.bat command from the <install_root> directory.
-
UNIX:
Run the following command from the root directory of the CD:
- Use the Setup disc
- Select the language for the installation and click OK. The
welcome panel is displayed.
Although the screens here show a Windows 2000 installation, the screens that are displayed for other operating systems have a similar appearance. Be sure to conform to the conventions of your platform when specifying directory locations, file names, and so on.
- If you want to view the WebSphere Portal Information Center, you can click Launch Information Center, and the Information Center will be opened in a browser. Otherwise, click Next to continue.
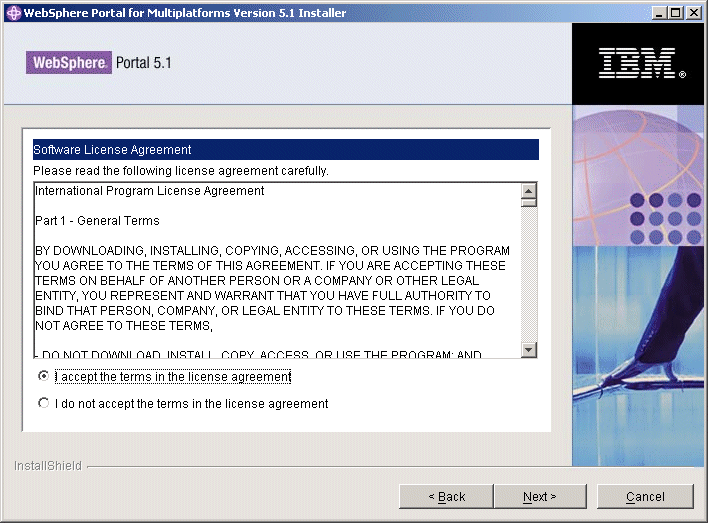
- Select I accept the terms in the license agreement. Click
Next.
The installation program checks the machine for operating system and software prerequisites.
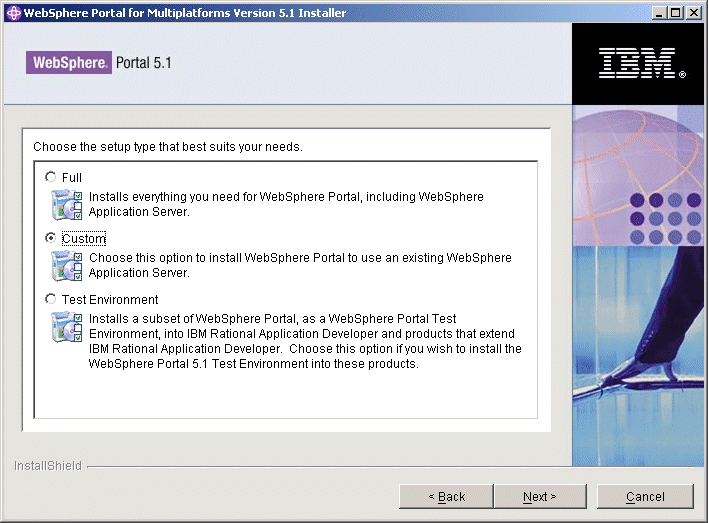
- Select Custom, and click Next.
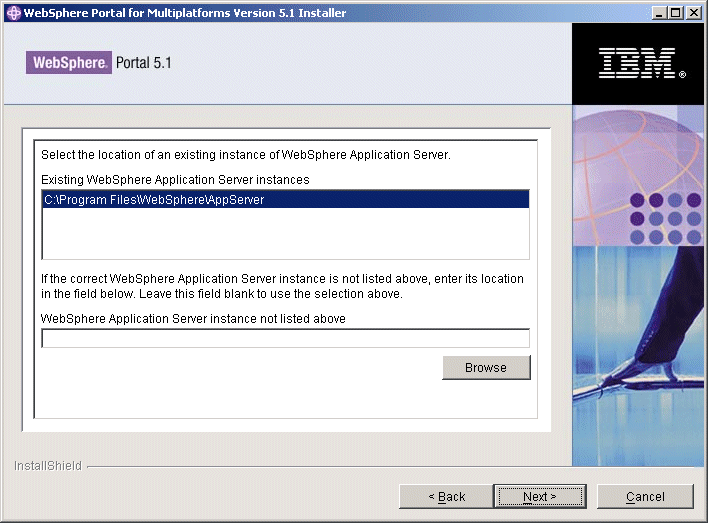
- If you have one or more existing instances of WebSphere Application Server already installed,
select the instance that you want to use from the list. If the installation program
does not detect an instance of WebSphere Application Server but you know that it is present
on the machine, you can enter the directory path to the WebSphere Application Server. Click
Next.
- If you are installing on an existing instance of WebSphere Application Server that is managed by a deployment
manager, indicate whether this node is the primary node or a secondary node in the deployment
manager cell. Select Primary node or Secondary node, and
click Next.
This panel is not displayed if you are installing on a stand-alone WebSphere Application Server.
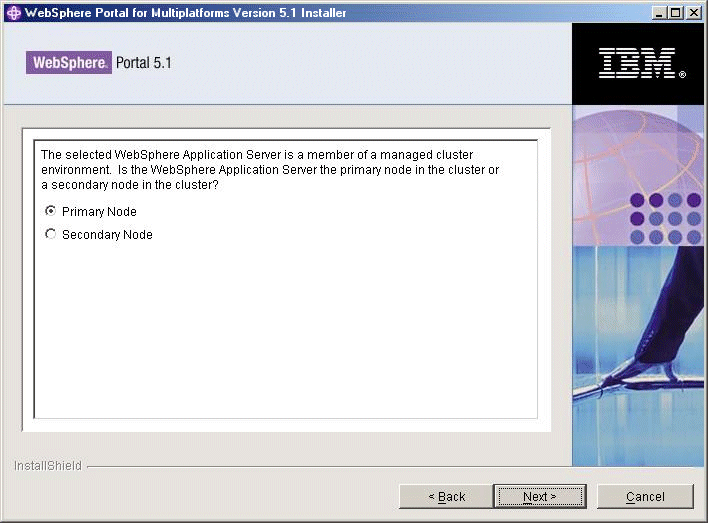
- The installation program will detect that WebSphere Application Server security is enabled and give you the option of continuing installation without performing WebSphere Portal configuration. Click Next.
- Specify the directory where you want to install WebSphere Portal. If the
directory that you specify does not exist, it will be created. If you are installing
on Windows, do not include periods (.) in the installation path. Click Next.
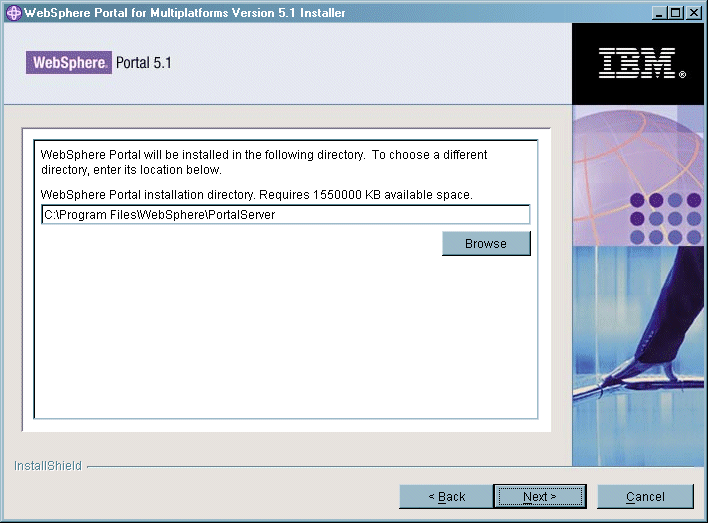
- Verify the components to be installed and click Next. The
installation program begins installing the selected components. Throughout the
installation and configuration process, the installation program displays progress
indicators for the different components.
A full installation including WebSphere Application Server can take some time to complete. Use the progress indicators and the process monitoring facilities of your platform to monitor the overall progress of the installation.
- When the installation is finished, the installation program displays a confirmation
panel listing the components that have been installed. Note the following information
before clicking Finish:
- The port number used to access WebSphere Portal is stored in the WpsHostPort property in the <wp_root>/config/wpconfig.properties file.
- Click Finish.
- Modify the WebSphere Application Server and WebSphere Portal administrator properties by doing the following
steps:
- Locate the <wp_root>/config/wpconfig.properties file and create a backup copy before changing any values.
- Use a text editor to open the <wp_root>/config/wpconfig.properties
file and enter the values that are appropriate for your environment.
Note the following information:
- Do not change any settings other than those specified in these steps. For instructions on working with these files, see Configuration properties reference for a complete properties reference, including default values.
- Use / instead of \ for all platforms.
- Some values, shown here in italics, might need to be modified to your specific environment.
Password considerations:
For security reasons, not store passwords in the wpconfig.properties file. You can specify the password on the command line using the following syntax:
-
WPSconfig.{sh|bat} task_name
-D password_property_key=password_valueAs with other properties, each password property must have the
-D prefix and be set equal to (=) a value. If you have multiple properties in a single command, use a space character between each-Dproperty=value setting.Section of properties file: WebSphere Application Server properties
Property Value WasUserid Description: The user ID for WebSphere Application Server security authentication.
Value: user_id
WasPassword Description: The password for WebSphere Application Server security authentication.
Value: was_password
Section of properties file: WebSphere Portal configuration properties
Property Value PortalAdminId Description: The user ID you want to use for the WebSphere Portal administrator.
Value: uid=portal_admin_id,o=default organization
PortalAdminIdShort Description: The short form of the user ID for the WebSphere Portal administrator, as defined in the PortalAdminId property.
Value: portal_admin_id
PortalAdminPwd Description: The password to use for the WebSphere Portal administrator.
Value: portal_password
PortalAdminGroupId Description: The group ID for the group to which the WebSphere Portal administrator belongs.
Value: cn=portal_admin_group_id,o=default organization
- Save the file.
- Perform manual configuration of WebSphere Portal by entering the following
command:
-
UNIX:
./WPSconfig.sh basic-config
-DWasPassword=password -DPortalAdminPwd=password - Windows: WPSconfig.bat basic-config
-DWasPassword=password -DPortalAdminPwd=password
Check the output for any error messages before proceeding with the next task. If any of the configuration tasks fail, verify the values in the wpconfig.properties file.
At this point the WebSphere Portal installation is incomplete. Before using WebSphere Portal, complete the configuration by following the instructions below to install Personalization support and to complete your security configuration, where portlet deployment is described.
-
UNIX:
./WPSconfig.sh basic-config
- Configure WebSphere Portal to use WebSphere Application Server security, depending
on the method you are using:
- Configure WebSphere Portal for LDAP without realm support. This topic explains how to configure WebSphere Portal to use an LDAP user registry for security, without affecting the security settings that are defined in WebSphere Application Server.
- Configure WebSphere Portal for LDAP with realm support. This topic explains how to configure WebSphere Portal to use an LDAP user registry for security, without affecting the security settings that are defined in WebSphere Application Server.
- Configure a database user registry. This topic explains how to configure WebSphere Portal to use a database for security, without affecting the security settings that are defined in WebSphere Application Server.
- Custom user registry. This topic explains how to configure WebSphere Portal to use a custom user registry for security, without affecting the security settings that are defined in WebSphere Application Server. You cannot use a custom user registry with the Cloudscape database.
These topics also provide the necessary instructions to complete the WebSphere Portal installation.
- Configure the Personalization support according to the following instructions. These instructions describe manual configuration for Personalization.
- If you installed WebSphere Portal on the primary node in a managed cell, ensure that you have deployed portlets by running the portlets
configuration task. This task should have been run as part of your security configuration, as described in the previous step.
Note that the portlets task should only be run after you have run the configuration task that sets up security,
such as the secure-portal-ldap task that is used for LDAP support.
It is not necessary to deploy portlets if you installed on a secondary node.
-
If the WebSphere Application Server where you installed WebSphere Portal is part of a cell managed by WebSphere Application Server Network Deployment, you can create a cluster of WebSphere Portal application servers. Refer to Clustering and WebSphere Portal for more information.
-
By default WebSphere Portal uses the internal HTTP transport within WebSphere Application Server to handle requests, but if you have an external Web server, such as IBM HTTP Server, you can configure WebSphere Portal to use the Web server. Refer to Configure your Web server for instructions.
Next steps
At this point, you can choose to explore the function that is provided with WebSphere Portal, or you can extend the WebSphere Portal environment by adding additional components for more advanced function:
- To explore WebSphere Portal, refer to First steps for information on WebSphere Portal that is installed and other important tasks, such as administering WebSphere Portal.
- To add a database with greater capability, such as DB2, refer to Database.
- To add a LDAP directory, refer to LDAP.
- To add collaboration function, such as Lotus Instant Messaging and Web Conferencing instant messaging, refer to Collaborative Services.
These are only a few of the options that are available to you. For a description of the range of components that WebSphere Portal can use to create a more rich environment, refer to Installation scenarios.
See also
WebSphere is a trademark of the IBM Corporation in the United States, other countries, or both.
IBM is a trademark of the IBM Corporation in the United States, other countries, or both.