Infrastructure - Business Process Management
- Start and stop
- Process Servers
- Server capability
- Process Admin Console
- Set behavior
- Add functions using services
- Remove functions
- Access WSRR registry
- View status
- Terminate JavaScript infinite loops
- ECM
- Event subscriptions
- Case Manager
- IBM WebSphere ILOG JRules
- 99Local.xml and 100Custom.xml
- Set properties
- Restrict Inspector actions
- Outbound web service timeout
- Server to server authentication
- Change state offline to online
- Process Server environment type
- Access ECM server using SSL
- Access ECM server using single sign-on
- Max characters in tracked performance data
- Proxy settings
- Process Server caches and databases
- Exposed process values (EPVs)
- Java debugging
Start and stop
Start deployment manager...
-
DMGR_PROFILE/bin/startManager.sh
Start nodes...
-
NODE_PROFILE/bin/startNode.sh
Start deployment environment...
-
Servers | Deployment Environments | environment | Start

Start using properties file...
BPM_home/bin/BPMConfig -start my_environment.properties
Start using options file...
BPM_home/bin/BPMConfig -start \
                       -profile DmgrProfile \
                       -de De1 -username DmgrAdmin \
                       -password mypassword
Stop employment environment using properties file...
BPM_home/bin/BPMConfig -stop my_environment.properties
Stop using options...
BPM_home/bin/BPMConfig -stop \
                       -profile DmgrProfile \
                       -de De1 \
                       -username DmgrAdmin \
                       -password mypassword
Username and password used can be either...
- cell administrator
- deployment environment administrator
Start and stop a cluster
Before starting...
- Ensure the node agents are running.
- Verify required app resources are available.
- Start all prerequisite subsystems.
Before stopping
- Verify there is no work in progress; PMI counters can indicate whether queued work is complete.
- Prevent new work from starting by disabling HTTP and IIOP traffic on the cluster members and quiescing the service integration buses.
If you use Remote Messaging, or Remote Messaging and Remote Support, there can be multiple clusters that depend on one another. If such a case exists, start or stop the infrastructure and the clusters as follows to avoid potential problems:
Infrastructure startup sequence:
- Database, LDAP, and web servers
- Deployment manager (if needed)
- Node agents
Cluster startup sequence:
- Messaging infrastructure cluster
- Support cluster (CEI)
- Application deployment cluster
Cluster shutdown sequence:
- Application deployment cluster
- Support cluster (CEI)
- Messaging infrastructure cluster
Start and stop servers
Start stand-alone servers...-
startServer.sh
To verify the server started successfully, review...
- installation_root/profiles/profile_name/logs/server/startServer.log
for the message...
-
Server server open for e-business; process id is nnnn.
Stop stand-alone servers
-
stopServer.sh
Start managed servers...
- Start dmgr and node agents.
- Run...
- startServer.sh servername
To have recovery functions finish before new work is started, restart the server in recovery mode...
- startServer.sh -recovery
To start via dmgr console...
-
Servers | Server Types | WebSphere application servers | server | Start
Stop managed servers
Stop the server before modifying certain configurations for the server or the modules deployed on it. Note that you can stop a single server in a cluster.
Verify there is no work in progress; PMI counters can indicate whether queued work is complete. Prevent new work from starting by disabling HTTP and IIOP traffic, and quiescing the service integration bus.
To stop a managed server.
- From the administrative console on the deployment manager, click...
-
Servers | Server Types | WebSphere application servers
- Select the server from the Application servers collection page, and then click Stop.
Process Servers
The Process Center server runs Business Process Definitions (BPDs) as you build them in Process Designer. These BPDs are installed to Process Servers.
Use the Process Admin Console to manage process centers, and process center servers.
The process center server and process server configuration files:
- PROFILE_HOME/config/cells/cell/nodes/node/servers/server/process-center/config/100Custom.xml
PROFILE_HOME/config/cells/cell/nodes/node/servers/server/process-server/config/100Custom.xml
The registration process checks to see whether the capability on the new server matches the capability of the Process Center server. If it matches, registration succeeds. If the capabilities are out of sync, the new server is not registered.
To import or test a snapshot on the Process Center server, or deploy it on a production process server, the target server must support all of the functionality in the process application. For example, you cannot import a process application with Service Component Architecture (SCA) modules unless the Process Center server supports BPM Advanced.
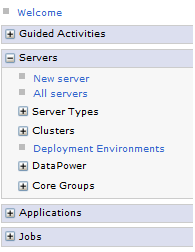
Process Admin Console
To access the Process Admin Console:
-
http://[host_name]:[port]/ProcessAdmin
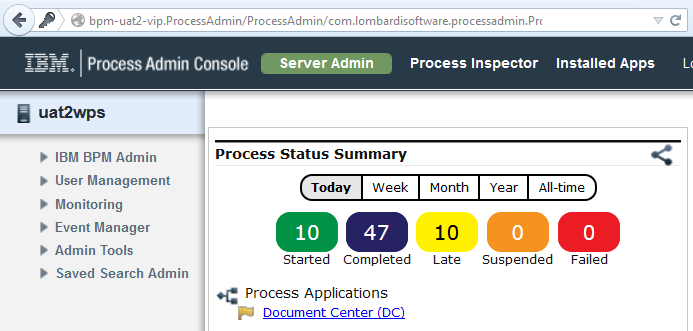
The Process Server instance name is displayed in the upper left. To manage applications, click the Installed Apps option. The User Management section in the User Management window displays only users that exist in the file registry part of VMM.
Set service permissions
In the BPM Process Designer...
-
Service_name | Overview tab | Exposed As drop-down | Administration Service | Expose To | Select button | participant_groups
Use the Designer to set a participant group's members.
Remove pages from the Process Admin Console
- If the BPM Process Admin Console is open in a browser window or tab, close the window or tab.
- Edit...
- install_root/BPM/Lombardi/process-server/config/console.xml
- Locate the item corresponding to the page to remove.
For example, to have only DB admins perform cleanup of data generated by Process Server in the task table, remove the Task Cleanup functionality from the Process Admin Console. In this case, find the following item:
-
<item name="Task Cleanup" link="cs_cleanup.lsw" codeType="JSP"><constraint type="role" value="tw_admins"/></item>
- Comment out the item so the corresponding page is not displayed in the Process Admin Console. Use the following syntax for comments:
- <!-- -->
Save the console.xml file.
- Verify the page is no longer available by logging in to the Process Admin Console.
Access WSRR registry
If a WebSphere Service Registry and Repository (WSRR) registry is running on a remote WAS with security enabled, configure Process Server to enable users in Process Designer to view available WSRR services.
Extract a signer certificate
WAS uses certificates in keystores to establish trust for an SSL connection. To enable Process Designer user access, extract the appropriate signer certificate from the remote WebSphere Application server, save the extracted certificate as a Distinguished Encoding Rules (DER) file, then install to the local trust store.
- Log in to the administrative console for the remote application server, and go to...
- Security | SSL certificate and key management | Key stores and certificates | NodeDefaultTrustStore | Signer certificates
- Enable the root option, and then click Extract.
- Set path and file to save the certificate.
- Set the Data type field to the value...
- Binary DER data
- Click OK.
See also: Retrieve a signer certificate
- Stop the Process Server.
- Transfer the DER file to the Process Server host.
- On the Process Server host system, run...
-
cd BPM_home/AppServer/java/bin
./ikeyman - Click...
-
Key Database File | Open
- Set the value of Key database type to JKS.
- Set the value of Location to...
- BPM_HOME/AppServer/java/jre/lib/security
- Set the value of File Name to cacerts.
- Click OK.
- Provide a password. The default password is changeit.
- Click...
- Signer Certificates | Add
- Set the location of the DER file, and then click OK.
- Enter a label for the certificate, and then click OK.
- Start Process Server.
View status
To view the status of instances running on a process server use the Process Status summary page, which displays status information...
- Started
- Completed
- Late
- Executing
- Failed states
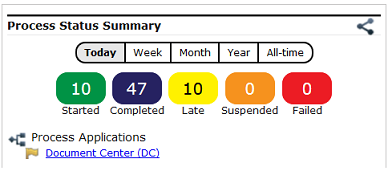
Click a time frame buttons to display status information for a specific period.
| Option | Status for... |
|---|---|
| Today | Last 24 hours. Default |
| Week | Last seven days. |
| Month | Last 30 days. |
| Year | Last 365 days. |
| All-time | That have ever existed |
Click a status boxe to get more detailed info:
- Started
- Completed
- Late
- Executing
- Failed
The Process Inspector opens and displaying a list of process instances in the time frame.

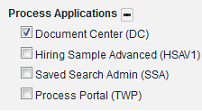
Click the name of a process application to display process instances originating from the selected process application.
Click an item to get detail info...
To embed the Process Status summary in another location, click the Embed icon in the summary to open the Embed window, then copy the HTML code from the window and paste it into the web page where you want the Process Status summary to appear.

Terminate infinite loops in JavaScript activities
With infinite loops, Process Center and Process Server threads are lost until the server is restarted. With loop detection, the JavaScript runtime notifies the BPM engine when the instruction counter reaches a set limit. After threshold is reached, if loop-detection-duration exceeds 20 seconds, we assume an endless loop.
To configure infinite loop detect, set loop-detection-exception property to true in 100Custom.xml...
<common merge="mergeChildren">
  <javascript-engine>
    <loop-detection-duration>60</loop-detection-duration>
    <loop-detection-exception>true</loop-detection-exception>
  </javascript-engine>
</common>
Before using, install interim fix JR48395.
Change ECM server settings
- Log in to the Process Admin Console and select Installed Apps

- Go to...
-
Snapshot | Servers tab | server
...and set...
- Click Test Connection to check the settings.
- Click Apply or Cancel.
Enable event subscriptions
To enable an ECM subscription, from the Process Admin Console...
-
Installed Apps | Event Subscriptions tab | event subscription type | ECM server | Enabled check box
The state is cleared when the process application is activated.
If you receive a message that implies the server is not connected, click...
-
Servers tab | Test Connection
The state of the event subscription is reflected in the database, and applied at run time.
Change Case Manager server settings
Configure connection information for Case Manager servers in Process Designer. Edit settings in the Process Admin Console.
Log in to the Process Admin Console and select Installed Apps.
Click a snapshot and select the Servers tab. You will see entries on the Servers page only if the process application snapshot has servers specified.
Select a server from the list and set..
| Hostname | Hostname or IP address of the Case Manager server. |
| Port | Port number of the Case Manager server. |
| Secure | HTTPS |
| Target Object Store | Target object store name for the Case Manager server. Used to store runtime case solutions. |
| Connection User ID | User ID to connect to the Case Manager server. |
| Password | Password of the user ID used to connect to the Case Manager server. |
Change IBM WebSphere ILOG JRules server settings
Configure connection information for ILOG servers in Process Designer. Edit settings for installed snapshots in the Process Admin Console.
Log in to the Process Admin Console and select...
-
Installed Apps | snapshot | Servers tab | server
...then set...
| Hostname | Hostname or IP address of the ILOG JRules server. |
| Port | Port number of the ILOG JRules server. |
| Secure | HTTPS |
| Connection User ID | User ID to connect to the ILOG JRules server. |
| Password | Password of the user ID used to connect to the ILOG JRules server. |
99Local.xml and 100Custom.xml
Some Process Server configuration settings are saved in 99Local.xml. The 100Custom.xml file is used to modify one or more of those default settings. Other XML files include 98Database.xml and 50AppServer.xml. BPM default configuration file names start with a number less than 100. Do not make changes to default configuration files. Create custom configuration files using a number equal to or greater than 100, for example, 100Custom.xml.
Use updateBPMconfig to merge all changes into 100Custom.xml from all the various of custom files, such as 101Custom.xml, 102Custom.xml, etc...
| Merge attribute | Description |
|---|---|
| append | Append the new tag |
| mergeChildren | Merge new tag with the first of the existing tags (default behavior) |
| replace | Replace old tag with new tag. Settings in foo.xml overwrite those in bar.xml. |
Match updated elements between 100Custom.xml and the original configuration...
| Merge attribute | Description |
|---|---|
| id | Matches the element with the id attribute |
| name | Matches the element with the name attribute |
| elementName | Matches the element with the element name |
Config file locations
- Stand-alone server
- PROFILE_ROOT/config/cells/cell/nodes/node/servers/server/process-server/config/system/99Local.xml
PROFILE_ROOT/config/cells/cell/nodes/node/servers/server/process-server/config/100Custom.xmlNetwork Deployment Process Server cluster:
- PROFILE_ROOT/config/cells/cell/clusters/cluster/process-server/config/system/99Local.xml
Process Server cluster member:
-
PROFILE_ROOT/config/cells/cell/nodes/node/servers/server/process-server/config/system/99Local.xml
- Network Deployment Process Server cluster:
-
PROFILE_ROOT/config/cells/cell/clusters/cluster/process-server/config/100Custom.xml
Each Process Server cluster member at:
- PROFILE_ROOT/config/cells/cell/nodes/node/servers/server/process-server/config/100Custom.xml
At run time, only the settings from these cluster member files are read.
- Network deployment single server
-
PROFILE_ROOT/config/cells/cell/nodes/node/servers/server/process-server/config/system/99Local.xml
PROFILE_ROOT/config/cells/cell/nodes/node/servers/server/process-server/config/100Custom.xml
WAS ND changes
For ND environments, files on the cluster level are templates for files created when new cluster members are added. If you make changes to the file at the cluster member level...
-
PROFILE_ROOT/config/cells/cell/nodes/node/servers/server/process-server/config/100Custom.xml
...make the changes at the cluster level as well...
-
PROFILE_ROOT/config/cells/cell/clusters/cluster/process-server/config/100Custom.xml
At run time, only the settings from cluster member files are read. If you make changes after deployment, make them in the cluster member version of the file for each server in order to have the changes take effect at run time. Always make changes to any of these configuration files on the Dmgr server.
After making the changes, select Full Resynchronize to replicate the settings.
Back up configuration files
When backing up config files, save copies above .../config, or change the file extension from .xml to something else. Files in .../config ending in .xml are loaded when you start BPM. Files starting with letters are loaded before ones starting with numbers. Loading copies of backup configuration files that have a .xml extension can cause unexpected behavior.
For example, the following files are loaded in the order shown...
-
../config/system/Copy of 99Local.xml
../config/system/00Static.xml
../config/system/50AppServer.xml
../config/system/60Database.xml
../config/system/80EventManager.xml
../config/system/98Database.xml
../config/system/99Local.xml
../config/100Custom.xml
Use a standard extension for the copies such as .bak.
Change properties in 100Custom.xml
Although this topic references 100Custom.xml, the information applies to any custom configuration file you create (110Custom.xml).
- Stop the server for Process Server or Process Center.
- Open the original configuration file.
Process Server...
-
PROFILE_HOME/config/cells/cell/nodes/node/servers/server/process-server/config/system/99Local.xml
Process Center....
-
PROFILE_HOME/config/cells/cell/nodes/node/servers/server/process-center/config/system/99Local.xml
- Copy the relevant sections.
For example...
<properties>
  <common merge="mergeChildren">
   <environment-name>My Environment</environment-name>
  </common>
</properties>
..and paste into either...
-
PROFILE_ROOT/config/cells/cell/clusters/cluster/process-server/config/100Custom.xml
PROFILE_ROOT/config/cells/cell/clusters/cluster/process-center/config/100Custom.xml - Update environment-name:
<properties>
  <common merge="mergeChildren">
   <environment-name merge="replace">My New Environment</environment-name>
  </common>
</properties>
Default boolean values are false. For some configuration properties, such as...
-
<automatic-schema-management>
...if the property is commented out, value defaults to true.
- Save changes.
- Restart Process Server or Process Center server.
Restrict Inspector actions
Use the Process Designer Inspector to inspect processes on connected process servers. Inspector actions can be restricted, for example, to allow only users in the tw_admins group to use the Inspector on production servers. These restrictions do not apply to process applications in IBM Process Center.
- Add an <inspector> element in the <authoring-environment> section of 100Custom.xml.
- Add one or more <target-server> elements.
- For particular type of server, add a type attribute to the <target-server> element....
- development
- test
- staging
- production
- To apply the restrictions to a specific server, add a name attribute to the <target-server> element.
- Optional: Add one <default-action-policy> element to a<target-server> element.
- Add <action> elements to <default-action-policy>.
The <action> element describes a particular Inspector action, and the roles that are allowed to perform that action.
- Add a type attribute to the <action> element:
ACTION_VIEW_INSTANCE Specified roles can view process instances. ACTION_RUN_PROCESS Specified roles can run processes. ACTION_MANAGE_INSTANCE Specified roles can manage process instances by suspending, resuming, stopping, or deleting instances. ACTION_RUN_TASK Specified roles can run or debug tasks. ACTION_CHANGE_VARIABLE Specified roles can change variables. - Add one or more <role> elements to the <action> element.
lt;role> specifies the group to which the user must be a part. Role must correspond to a Process Center group.
Example:
<inspector>
   <target-server type="production">
      <default-action-policy>
         <action type="ACTION_VIEW_INSTANCE">
            <role>tw_admins</role>
         </action>
         <action type="ACTION_RUN_PROCESS">
            <role>tw_admins</role>
         </action>
         <action type="ACTION_MANAGE_INSTANCE">
            <role>tw_admins</role>
         </action>
         <action type="ACTION_RUN_TASK">
            <role>tw_admins</role>
         </action>
         <action type="ACTION_CHANGE_VARIABLE">
            <role>tw_admins</role>
         </action>
      </default-action-policy>
   </target-server>
</inspector>
If an <action> type is not specified or is empty, there are no restrictions for the user on that action.
<inspector>
   <target-server type="staging">
      <default-action-policy>

         <action type="ACTION_VIEW_INSTANCE">
              <!-- No Restrictions -->
         </action>

         <action type="ACTION_RUN_PROCESS">
            <role>tw_admins</role>
            <role>staging_admins</role>
         </action>

      </default-action-policy>
   </target-server>
</inspector>
Outbound web service timeout
The timeout property specifies the amount of time to wait for a web service response when invoking an outbound request. Default is -1, which causes the property to be ignored, and the web service engine's default value of 300 seconds is used. If the system does not respond in the required time, an exception is generated and the request fails.
To change, paste this stanza into 100Custom.xml...
-
<--
Timeout in seconds to wait when invoking WebService using SOAPConnector
Use -1 to disable
-->
<timeout>-1</timeout>
...make changes, then restart.
Server to server authentication
To update Process Center to Process Server authentication alias settings, go to...
-
Security | Global Security | Java Authentication and Authorization Service | J2C authentication data
...and set values for...
- DeAdminAlias
- ProcessCenterUserAlias
Change state offline to online
To change the state of an offline Process Server to online, update heartBeatInterval to a number >0. For example, set to 60 seconds...
-
ps = AdminConfig.getid("/Cell:/MyCell:appcluster/MyCluster:/BPMProcessServer:/")
AdminConfig.modify(ps, [['heartBeatInterval', '60']])
print AdminConfig.show(ps)
AdminConfig.save()
exit
Restart the deployment manager after completing updates, then restart the Process Server cluster.
Modify the Process Server environment type
The environment type indicates how BPM is used (Development, Test, Staging, Production). Process authors can set environment-specific variables for each process application and then define values for each type of environment in which a process runs. For example, load testing might be done on a test server, while a staging environment type might be used as a temporary location to host changes before putting those changes into a production environment. You might specify Staging as the Environment type if the server you are configuring is accessed and used to review content and new functionality.
Valid values are as follows:
- Development
- Use Development if the server you are configuring is to be used as a development environment.
- Test
- Use Test if the server is to be used as a testing environment.
- Staging
- Use Staging if the server is to serve as a staging platform to be used as a preproduction server.
- Production
- Use Production if the server is to serve in a production capacity.
To change the environment type for a Process Server.
- Stop the Process Server environment.
- Use the updateBPMConfig admin task to update the bootstrap URL, the environment type, and the environment name. Invoke the wsadmin scripting client, and then run the updateBPMConfig admin task as shown below:
To update the bootstrap URL, use the following examples:
- For a stand-alone server environment, run:
AdminTask.updateBPMConfig( [ '-nodeName',  Node_Name, '-serverName',  Server_Name, '-bootstrapURL', 'corbaname:iiop:host_name:port' ] )
AdminConfig.save()
- For a clustered environment, run on the deployment manager. In addition, if you have a three-cluster environment, you run the command twice: once with the application cluster name, and once with the support cluster name.
AdminTask.updateBPMConfig( [ '-clusterName', Cluster_Name, '-bootstrapURL', 'corbaname:iiop:host_name:port' ] )
AdminConfig.save()
To update the environment type and the environment name, use the following examples:
- For a stand-alone server deployment environment, run:
AdminTask.updateBPMConfig( [ '-nodeName', Node_Name, '-serverName', Server_Name, '-environmentName', Environment_Name, '-environmentType', Environment_Type ] )
AdminConfig.save()
- For a clustered deployment environment, run:
AdminTask.updateBPMConfig( [ '-clusterName', Cluster_Name, '-environmentName', Environment_Name, '-environmentType', Environment_Type ] )
AdminConfig.save()
where Cluster_Name is the application cluster name, not the support or messaging cluster name.
The updateBPMconfig admin task will update your 99Local.xml file.
- For a stand-alone server environment, run:
- Start the Process Server. Verify the changes are synchronized to the nodes and picked up by the cluster members.
Access an ECM server using SSL
- Log in to the Integrated Solutions Console of the server running your IBM Process Center, and select...
-
Security | SSL certificate and key management | Key stores and certificates | NodeDefaultTrustStore | Signer certificates | Retrieve from port
- In the Host field, enter the hostname, in the Port field enter the secure port number, and in the Alias field enter an alias name for the ECM server to connect to.
- Click Retrieve signer information.
Click Ok if the retrieval is successful.
Save your work and log out of the Integrated Solutions Console. Restart your server if necessary.
- When you add this secure server in the Process Apps Settings page, use the host name and port used in the Integrated Solutions Console. Select the Secure check box.
Access an ECM server using single sign-on
If the same people use BPM and ECM, you might be able to use single sign-on to allow them access both systems with a single log on ID.
See Understanding elements of application security and WS-Security specification.
- Where you set up the ECM server configuration, there is a check box labeled...
- Always use connection information specified here
...which is selected by default. To use single sign on, clear this check box. When that check box is not selected, the BPM system uses individual user IDs for authentication and projects the identity to the ECM server.
- When a Content Integration step-type is called from a Human Service or Coach, the outbound JAX-WS call is done using the current user, rather than the user specified in the configuration settings for the ECM server.
Configure proxy settings
If you use a proxy server for internet connections, you can configure BPM so that it uses the appropriate server and protocol for internet connections, such as when connecting to Blueworks Live.
Configure proxy settings requires updating 100Custom.xml. Before you begin, make sure this file exists in the...
-
PROFILE_HOME/config/cells/cell/nodes/node/servers/server/process-server/config
If not, create the file. See The 99Local.xml and 100Custom.xml configuration files.
The connection section of 99Local.xml contains the proxy settings for BPM. To make changes to the configuration, copy content from 99Local.xml to 100Custom.xml. When you use this method to control configuration, all customized settings are maintained in a single file; this can result in faster component upgrades.
To edit the proxy settings:
- Open 99Local.xml and 100Custom.xml with a text editor. These files are located in the root directory of the server profile.
- PROFILE_HOME/config/cells/cell/nodes/node/servers/server/process-server/config/system/99Local.xml
- PROFILE_HOME/config/cells/cell/nodes/node/servers/server/process-server/config/100Custom.xml
- Copy the connection section of 99Local.xml and paste the connection section in 100Custom.xml.
<server merge="mergeChildren">

<connection merge="mergeChildren">

<proxy-settings>
 <host>localhost</host>
 <port>80</port>
 <user-name>admin</user-name>
 <password>password</password>
 <password-encrypted>false</password-encrypted>
 <excluded-hosts></excluded-hosts>
 </proxy-settings>

<!--
 <proxy-settings protocol="http">
  <host></host>
  <port></port>
  <user-name></user-name>
  <password></password>
  <password-encrypted></password-encrypted>
  <excluded-hosts></excluded-hosts>
  </proxy-settings>
  <proxy-settings protocol="https">
  <host></host>
  <port></port>
  <user-name></user-name>
  <password></password>
  <password-encrypted></password-encrypted>
  <excluded-hosts></excluded-hosts>
 </proxy-settings>
 -->

</connection>
</server>
- Close 99Local.xml.
- In 100Custom.xml, uncomment the section or sections to edit.
- Edit 100Custom.xml for the environment. Consider the scope for the changes to the proxy settings before editing the file:
- To have proxy settings applied for all known protocols, use the <proxy-settings> section.
- To establish settings for specific protocols, use the <proxy-settings protocol="http"> and <proxy-settings protocol="https"> sections.
If using the <proxy-settings> section, any protocol-specific settings established in other sections are ignored.
Set Required or Optional Description host Required IP address or host name of the proxy server. port Required Port number used by the proxy server for client connections. user-name Optional User name used by the proxy server for client connections. password Optional Password used by the proxy server for client connections. password-encrypted Optional Encryption status for the password. The value is true if the password is encrypted; otherwise, the value is false. excluded-hosts Optional IP addresses or host names of any hosts for which proxy settings should not be applied. localhost , 127.0.0.1 , and 0:0:0:0:0:0:0:1 are excluded by default. Use a comma-separated string of IP addresses to exclude additional hosts. Save and close the file.
Use encrypted passwords in proxy settings
To use an encrypted password in the proxy settings, update 100Custom.xml to include the password and its encryption status.
To enable encrypted passwords in proxy settings.
- Log in with administrator privileges.
- Encrypt the password.
- Follow the steps in "Configuring proxy settings" link at the bottom of this topic to copy the connection section from 99Local.xml to 100Custom.xml.
<server> <connection> <proxy-settings> <host></host> <port></port> <user-name></user-name> <password></password> <password-encrypted></password-encrypted> <excluded-hosts></excluded-hosts> </proxy-settings> <proxy-settings protocol="http"> <host></host> <port></port> <user-name></user-name> <password></password> <password-encrypted></password-encrypted> <excluded-hosts></excluded-hosts> </proxy-settings> <proxy-settings protocol="https"> <host></host> <port></port> <user-name></user-name> <password></password> <password-encrypted></password-encrypted> <excluded-hosts></excluded-hosts> </proxy-settings> </connection> </server> - In 100Custom.xml, edit the proxy settings in the connection section to include the encrypted password and to set the <password-encrypted> element to true.
  <password>nzDPAfVxQvhEorXxD8Ua3A==:Z3jT8wjK60QShbkXsysnzg==</password>
     <password-encrypted>true</password-encrypted>
Save 100Custom.xml.
Encode credentials in URLs
You can control whether the credentials passed in an BPM URL that implements redirect-login.jsp are encoded. For example, you can encode credentials in a URL used to start a service directly from Process Designer.
Verify the following components are stopped before completing this task:
- IBM Process Center Server
- Process Server
To control encoding, use the <encode-redirect-url-credentials> property in 00Static.xml, which you can find in the following directory:
-
PROFILE_HOME/config/cells/cell/nodes/node/servers/server/process-server/config\system
To make changes to the configuration, copy content from 00Static.xml to 100Custom.xml is located in...
-
PROFILE_HOME/config/cells/cell/nodes/node/servers/server/process-server/config/100Custom.xml
Make all required modifications to 100Custom.xml. Do not edit 00Static.xml.
- Open 00Static.xml in a text editor.
- In 00Static.xml, copy each property you want to change.
- Open 100Custom.xml in a text editor.
- Paste the following properties from 00Static.xml into 100Custom.xml.
<authoring-environment merge="mergeChildren">
 <encode-redirect-url-credentials merge="replace">true</encode-redirect-url-credentials>
</authoring-environment>
- Modify the value of the <encode-redirect-url-credentials> property. By default, this property is set to true so that credentials passed in an BPM URL are encoded. If you change the setting to false, the URL is composed with credentials in plain text.
Save changes.
- Start IBM Process Center Server and Process Server.
Manage Process Server caches and databases
The Process Server caches and databases normally run efficiently and without issues. However, in some cases particular problems come up that require you to use the utilities covered in this section.
Reset Process Server caches
The caches for BPM refresh automatically and so resetting these caches should only be required when an issue exists that a reset might rectify.
To control the frequency of cache refresh, use the cache-refresh-interval setting in...
- install_root/BPM/Lombardi/process-server/config/system/00Static.xml
You can use the Manage Caches page in the Process Administrative console to view all caches and their status, as well as reset each cache. In addition to the name of the cache and a brief description, the Manage Caches page displays the following information for each cache on Process Server:
| Abbreviation | Meaning | Explanation |
|---|---|---|
| CA | Cache access | Shows the number of times the cache was refreshed and accessed. |
| UCA | Unrefreshed cache access | Shows the number of times the cache was accessed but not refreshed. |
| UCP | Unrefreshed cache percentage | Shows the percentage of uncached access versus cached access for this cache. |
| Last A. | Last accessed | Shows the most recent access. |
| Status | Status | Shows whether the cache is on or off. |
| Actions | Actions | Allows you to show or reset the cache. |
To use the Manage Caches page:
- In the Server Admin area of the Process Admin console, click the indicator next to BPM Admin to list the available administrative options.
- Click the Manage Caches option.
- In the Actions column, click one of the following options:
- Show: View a cache in a separate browser window.
- Reset: Reset a cache.
- Click Refresh to ensure that you are viewing the most recent data available.
Delete tasks from the Process database
To reduce the amount of space BPM uses, administrators can use the Task Cleanup utility in the Process Administrative console to delete tasks from the BPM task database.
The Cleanup Task utility enables administrators to remove:
- Tasks users have deleted from their task list
- Tasks residing in the user SENT or CLOSED folders
- Attachments for deleted or orphaned tasks
To use the Task Cleanup utility:
- In the Server Admin area of the Process Administrative console, click the indicator next to BPM Admin to list the available administrative options.
- Click the Task Cleanup option.
- Select the option that you want.
Option Description Clean up attachments that are associated with deleted tasks or that have been orphaned. Removes only attachments and not tasks. Clean up tasks and attachments where every user in the history tree has deleted the task from their task list. Removes tasks and attachments. Clean up tasks and attachments where every user in the history tree has deleted the task from their task list or the task resides in the user SENT folder. Removes tasks and attachments. Clean up tasks and attachments where every user in the history tree has deleted the task from their task list or the task resides in either user SENT or CLOSED folders. Removes tasks and attachments. - Under Current Counts, note how many tasks and attachments currently exist in the database per the option you choose.
- Click the Cleanup button.
- Under After Cleanup Counts, you can see how many tasks and attachments were deleted.
Remove process instances from the Process Server database
To prevent disk-space issues and long waits in Process Portal, remove completed BPD instances that you no longer need, along with their runtime data, from the Process Server database. Use the BPMProcessInstancesCleanup command to periodically clean the process instances based on filter criteria.
Run the query during an off period or maintenance window. When thousands of instances and data are purged, this process might cause a strain on the LSW_TASK and LSW_BPD_INSTANCE tables, which are core product tables. Running a cleanup job outside of normal business hours is a good practice.
To create archive data rather than delete it, copy the data into a custom-built table outside of the product schema.
Completed BPD instances are not deleted from the system automatically. After a process instance is completed, the instance is typically no longer needed, so it can be removed from the Process Server database. Use the BPMProcessInstancesCleanup periodically to delete old process instances.
The stored procedure described in previous versions of BPM is still available for offline cleanup, but the wsadmin command is recommended because it provides broader capabilities, such as filtered cleanup and multi-instance delete. See "Using the LSW_BPD_INSTANCE_DELETE stored procedure."
When an instance completes, and all of its associated tasks are closed, future work is not possible with the instance. You cannot restart it, assign it to someone, or edit old work. When a user logs in to Process Portal, various tables are queried to gather data on the active tasks for that user. The operation involves full table scans, so that even if only 35% of the data is relevant, it is going to take a while to pull the tasks needed for the user. If the other 65% is deleted, there is less data to scan.
If you do not delete old completed instances, your team experiences slow performance on Process Portal, and a potentially unusable state. Ignoring increases in database size cause an increase in backup time and disk space.
Deleted processes and their tasks can no longer be opened in the Process Portal inbox. When you run the cleanup command, you can specify that only completed processes older than a specified age will be deleted. Store any data that you really need in the performance database or another system of record for auditing or metrics.
How often you delete old instances depends on the following factors:
- How many instances are closed in a specified time period (for example, a week or month)
- How large the data is in each task (including execution context and document attachments)
- How many tasks there are in a process instance
The most common reasons for runtime data growth are documents and execution context. If you have many documents and you must reference them later, consider a document management solution. Execution context is all the data carried from activity to activity. If the solution has many variables with large amounts of data, this scenario quickly uses database space. In this case, reviewing your solution is a good idea to reduce the amount of processor usage in the application.
You can use the BPMProcessInstancesCleanup command to safely clean up data created by runaway processes. The command ensures that even instances with a lot of associated data are deleted in a consistent fashion.
The cleanup functions provided in the Admin Console remove task data only, not all of the BPD instance data. The BPMProcessInstancesCleanup command deletes both the instance and task data that is associated with the BPD. Therefore, it is a much more thorough way to clean out BPD instances. You might want your system administrator to set up a scheduled job that invokes the BPMProcessInstancesCleanup command periodically with the correct filter settings for the environment.
If you are using stand-alone services, consider using the Process Admin Console after you run the BPMProcessInstancesCleanup command, because data associated with a stand-alone service is not removed by the BPMProcessInstancesCleanup command.
Use the LSW_BPD_INSTANCE_DELETE stored procedure to remove all runtime data in the Process Server database that is associated with a completed BPD instance.
Run the query during an off period or maintenance window. When thousands of instances and data are purged, this process might cause a strain on the LSW_TASK and LSW_BPD_INSTANCE tables, which are core product tables. Running a cleanup job outside of normal business hours is a good practice.
To create archive data rather than deleting it, copy the data into a custom-built table outside of the product schema.
Completed BPD instances are not deleted from the system automatically. After a process instance is completed, the instance is typically no longer needed, so it can be removed from the Process Server database. Use the LSW_BPD_INSTANCE_DELETE stored procedure to delete old instances.
When an instance completes, and all of its associated tasks are closed, future work is not possible with the instance. You cannot restart it, assign it to someone, or edit old work. When a user logs in to Process Portal, various tables are queried to gather data on the active tasks for that user. The operation involves full table scans, so that even if only 35% of the data is relevant, it is going to take a while to pull the tasks needed for the user. If the other 65% is deleted, there is less data to scan.
If you do not delete old completed instances, your team experiences slow performance on Process Portal, and a potentially unusable state. Ignoring increases in database size cause an increase in backup time and disk space.
Delete old instances affects only the search for history items from the Process Portal inbox. When you run the delete queries, you can specify that only completed tasks older than 30 days will be deleted. Store any data that you really need in the performance database or another system of record for auditing or metrics.
How often you delete old instances depends on the following factors:
- How many instances are closed in a specified time period (for example, a week or month)
- How large the data is in each task (including execution context and document attachments)
- How many tasks there are in a process instance
The two most common reasons for runtime data growth are documents and execution context. If you have many documents and you must reference them later, consider a document management solution. Execution context is all the data carried from activity to activity. If the solution has many variables with large amounts of data, this scenario quickly uses database space. In this case, reviewing your solution is a good idea to reduce the amount of processor usage in the application.
You can use the stored procedure to safely clean up data created by runaway processes. This approach is acceptable for scenarios with event-based undercover agents associated with tasks. The undercover agent makes up to five attempts, after which it stops, and nothing is required from the Process Portal user.
The cleanup utility provided in the Admin Console removes task data only, not all of the BPD instance data. The LSW_BPD_INSTANCE_DELETE stored procedure deletes both the instance and task data that is associated with the BPD. Therefore, it is a much more thorough way to clean out BPD instances. If you are using stand-alone services, consider running the cleanup utility after you run the LSW_BPD_INSTANCE_DELETE stored procedure. You might want the database administrator to construct a recurring job that queries for, then deletes, the instances that you must delete.
The LSW_BPD_INSTANCE_DELETE stored procedure removes all runtime data that is associated with the instance in the following database tables:
- Dynamic groups that are created for the instance from:
- LSW_USR_GRP_MEM_XREF
- LSW_USR_GRP_XREF
- Tasks that are associated with the instance from:
- LSW_TASK_ADDR
- LSW_TASK_EXECUTION_CONTEXT
- LSW_TASK_NARR
- LSW_TASK_FILE
- LSW_TASK_IPF_DATA
- LSW_TASK_EXTACT_DATA
- LSW_TASK
- BPD instance data from:
- LSW_BPD_INSTANCE_DOC_PROPS
- LSW_BPD_INSTANCE_DOCUMENTS
- LSW_BPD_INSTANCE_VARIABLES
- LSW_BPD_INSTANCE_DATA
- LSW_BPD_NOTIFICATION
- LSW_RUNTIME_ERROR
- LSW_BPD_INSTANCE
- LSW_INST_MSG_INCL
- LSW_INST_MSG_EXCL
- Query the LSW_BPD_INSTANCE table for all closed instances that fall within a date range to remove.
- Input the resulting instances into the stored procedure. You can get the date from the LAST_MODIFIED_DATETIME column in the LSW_BPD_INSTANCE table. The closed instances have an EXECUTION_STATUS value of 2, which means the instance completed.
Example
For example, the following query shows your distribution of tasks by BPD execution status:
select inst.EXECUTION_STATUS, count(*) as total from LSW_BPD_INSTANCE inst, LSW_TASK task where task.BPD_INSTANCE_ID = inst.BPD_INSTANCE_ID
group by inst.EXECUTION_STATUS
The following query shows you the same data, but just for BPD instances:
- select inst.EXECUTION_STATUS, count(*) as total from LSW_BPD_INSTANCE inst group by inst.EXECUTION_STATUS
Manage exposed process values (EPVs)
Exposed process values (EPVs) are variables that certain users can change when processes are running on the Process Center server or a Process Server in your test, production, or other runtime environment.
The Process Admin Console restrictions must allow managing the EPVs. See Restrict access to the Process Admin Console.
To view and manage a specific EPV, the EPV must be exposed to you.
To understand how EPVs can be changed, consider the following example: Suppose a process author is creating an Expense Reimbursement process and wants the process to be flexible so that it can work in any major organization. To support this flexibility, the process author creates EPVs to enable some end users to adjust specific variable values as constants, thereby affecting the flow of the process, task assignments, and so on. The process author can, for example, enable supervisors in the organization to change the allowed amounts for daily expenditures, or the dollar amount that coincides with the various levels of approvers.
The users who can manage EPVs is determined during process design in Process Designer. When a process author creates an EPV, the exposure setting is used to select the users who can alter the EPV. If you are included in the exposure setting, you can manage EPVs.
To manage EPVs, follow these steps:
- In the Server Admin area of the Process Admin Console, click the indicator next to Admin Tools to list the available options.
- Click the Manage EPVs option.
- Use the drop-down menu, select the process application snapshot that contains the EPV to modify. Each process application snapshot listed also includes the track name.
Current working versions of process applications are listed as Tip, enabling you to test EPVs on the Process Center Server without creating a snapshot.
- Use the drop-down menu, select the EPV to edit. The Process Admin Console displays the variable values in the EPV that you can modify.
- Complete the following steps for each variable to modify:
- Click the row of the variable to change, and then click New.
- In the Exposed Process Value window, enter a new value, set the date and time at which you want the new value to take effect, and click OK.
You can enter multiple values for the same variable, each taking effect at a different time. The Process Admin Console displays all modifications for each variable in a separate table.
- Click a row in the table and then use the Edit and Delete buttons to change or remove your modifications. A value that has taken effect in the past and is no longer the current value is listed for your reference. You cannot edit or delete this previous value.
Enable servers for Java debugging
Use the Java debugging mode to trace and debug a running server.
The server must be running.
To enable the Java debugging mode for a server.
- From the administrative console of the deployment manager, click...
-
Servers | Server Types | WebSphere application servers | application_server | Server infrastructure | Java and Process Management | Process Definition | | Java Virtual Machine.
- On the Java virtual machine page, click Debug mode to enable the standard Java debugger.
- If required, set Debug Mode arguments.
- Click OK.
Save the changes.
- Stop and restart the server.