Configure Web Content Manager
- Install the authoring portlet
- Configuration options
- Enable workflows
- Enable profiling
- Version control options
- Inheritance options
- Hierarchical item locking options
- Define valid mime types for the image element
- Active content filtering
- Set the default child placement position
- Set the size of the breadcrumb library dropdown
- Expired items
- Configure authoring portlet search
- Import large files and images
- Increasing time-outs
- Configure remote server access for links
- Set up support for federated documents
- Configure a web content staging environment
- Configure a web content delivery environment
- Set up site analysis for the web content viewer
- Caching options
- Pre-rendering options
- Disable the site toolbar on a delivery server
- Reserved authoring portlet
- Additional configuration options
- Control access to hosts specified in a URL
- Web content substitution variables
- Enable connect tags
- Remove authoring configuration task
- Enable email
- Configure managed pages
- Transfer content associations to the Portal Site library
- Syndication properties
- Enable search for web content
- Indexing web content
- Configure WCM search options
- Configure Search Center to search for web content
- Crawl web content with search seedlists
- Use the search seedlist 1.0 format
- Enable support for search seedlist 1.0
- Use the custom metadata field search support
- Seedlist 1.0 REST service API
- Use the search seedlist 0.9
- Manage tagging and rating for web content
- Use tagging and rating scopes with web content
- Synchronize scopes for web content
- Synchronize scopes when items change
- Synchronize scopes after syndication
- Scheduling scope synchronization
- Synchronize scopes manually
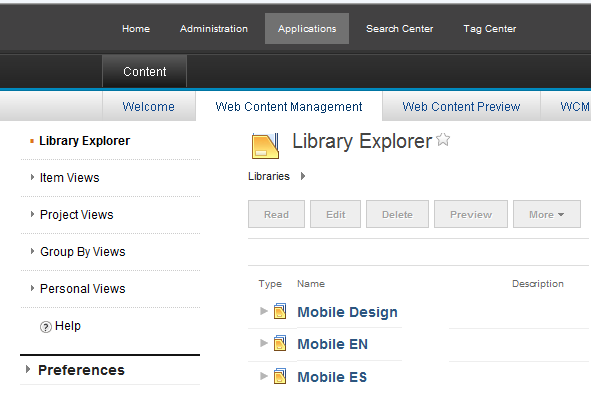
Configure Web Content Manager
Install the authoring portlet
Pages that include the Web Content Manager (WCM) authoring portlet and the local rendering portlet are created when we first install WebSphere Portal. If we have previously uninstalled the authoring or local rendering portlets, to re-install te authoring portlet...-
cd WP_PROFILE/ConfigEngine
./ConfigEngine.sh configure-wcm-authoring -DPortalAdminPwd=foo -DWasUserid=username -DWasPassword=foo
The authoring portlet configuration task will automatically create WCM pages and install the authoring portlet and local rendering portlets. To view, log out of the portal, log back in, and select Web Content from the product banner to access the authoring portlet. If the authoring portlet does not display after installing in a cluster, we might need to activate the portlet.
Locales
In general, the language display by the authoring portlet is determined by the locale of the user. However, some elements of the authoring portlet, such as date selection fields, display the locale of the WebSphere Portal server. For sites with content in different languages, use a separate WCM authoring application for each language on different WebSphere Portal Servers. These can then be combined into one site using a staging server.
If a user changes their locale, to view the new locale, close open WCM dialogs and start a new session.
Authoring portlet configuration options
To add additional authoring portlet configuration parameters:
- Open the portal administration view and go to...
-
Administration | Portlet Management | Portlets
- Search for the Web Content Authoring portlet.
- Open the configuration view.
We can add any of the following optional configuration parameters:
>
| Parameter | Details |
|---|---|
| htmlfield.rows | Number of rows to display in an HTML field used in an element design or presentation template. If not specified, the default setting of 15 rows is used. |
| htmlfield.columns | Width of an HTML field used in an element design or presentation template. The width is defined as the number of characters to display per row. If not specified, the default setting of 85 characters is used. |
| htmlfield.embedded.rows | Number of rows to display in an HTML field used in an element design or presentation template, but not an HTML component. If not specified, the number of rows defined using htmlfield.rows is used. |
| htmlfield.embedded.columns | Width of an HTML field used in an element design or presentation template, but not an HTML component. The width is defined as the number of characters to display per row. If not specified, the number of characters defined using htmlfield.columns is used. |
| htmlfield.htmlcomponent.rows | Number of rows to display in the HTML field used in an HTML component. If not specified, the number of rows defined using htmlfield.rows is used. |
| htmlfield.htmlcomponent.columns | Width of the HTML field used in an HTML component. The width is defined as the number of characters to display per row. If not specified, the number of characters defined using htmlfield.columns is used. |
| htmlfield.presentation.rows | Number of rows to display in the HTML field used in a presentation template. If not specified, the number of rows defined using htmlfield.rows is used. |
| htmlfield.presentation.columns | Width of the HTML field used in a presentation template. The width is defined as the number of characters to display per row. If not specified, the number of characters defined using htmlfield.columns is used. |
| EDIT_LIVE_CUSTOM_LICENCE | Enter a custom license key to use in place of the OEM license for Ephox EditLive using this format:
|
All users will need to logoff and login before any configuration changes will appear in the authoring portlet.
Enable workflows
By default, the WCM application will workflow content items only. To enable workflows for different items, open the WCM WCMConfigService service, create any of the following item types...
| Content items | control.Content |
| Presentation templates | control.Style |
| Authoring templates | control.Template |
| Taxonomy items | control.Taxonomy |
| Categories | control.Category |
| Site area items | control.SiteArea |
| Library components | control.Cmpnt |
...and specify a value of...
-
com.aptrix.pluto.workflow.WorkflowControl
| Property name | control.Template |
| Value | com.aptrix.pluto.workflow.WorkflowControl |
To disable workflow for an item type, set the property to "false". For example, to disable workflow for authoring templates...
| Property name | control.Template |
| Value | false |
If workflows are enabled for the following items, a workflow view will not be available in the item views navigator.
- Site areas.
- Taxonomies and categories.
- Workflows, workflow stages, or workflow actions.
Individual items can still be moved through workflow stages by accessing them through the normal item views and approving them.
Only content items can be moved through a workflow using the web content API. If we enable workflows for other item types, we will not be able to approve or reject these items using the API.
Enable profiling
We use profiling methods to group contents for a taxonomy.
By default, the WCM application will profile content items only. We can update the WCM WCMConfigService service to enable profiling for different items. To enable profiling, create a new property for the item type to which to apply profiling, and specify a value of com.aptrix.pluto.taxonomy.ProfileControl for the property. We can enable profiling for the following item types:
- Content items (control.Content)
- Presentation templates (control.Style)
- Authoring templates (control.Template)
- Taxonomy items (control.Taxonomy)
- Categories (control.Category)
- Site area items (control.SiteArea)
- Library components (control.Cmpnt)
| Property name | control.Cmpnt |
| Value | com.aptrix.pluto.taxonomy.ProfileControl |
To disable profiling for an item type, set the property to "false". For example, to disable profiling on components...
| Property name | control.Cmpnt |
| Value | false |
Version control options
By default version control is enabled with the following properties:
- versioningStrategy.AuthoringTemplate
- versioningStrategy.Component
- versioningStrategy.Content
- versioningStrategy.PresentationTemplate
- versioningStrategy.Taxonomy
- versioningStrategy.Workflow
- versioningStrategy.Default
To specify version control settings:
- The Save Version button is available in the read mode of non-workflowed items and in workflowed items in the published state.
- The Save and Version button is available in the edit mode of non-workflowed items and in workflowed items in the published state.
| always | A version is saved every time a non-workflowed item is saved, or every time a workflowed item is published. |
| manual | Versions will only be saved when a user with at least editor access chooses to save a version. This setting causes the following changes in the interface:
|
| never | Disable version control for an item type. |
If a version control strategy is not defined for an item type, then the version control strategy specified in by the versioningStrategy.Default property is used.
Inheritance options
Inheritance is automatically propagated down to each item. We can disable automatic inheritance:
| Property name | default.inherit.permissions.enabled |
| Value | false |
When this setting is specified, it is applied only to new items. The inheritance on existing items will remain unchanged.
Hierarchical item locking options
When a content item is being edited, it is locked. Locking of site areas, taxonomies and categories not enabled by default. To enable locking for hierarchical item types, change the following parameters to "true":
| Property name | Value |
|---|---|
| wcm.authoringui.lock.taxonomies | true |
| wcm.authoringui.lock.categories | true |
| wcm.authoringui.lock.siteareas | true |
| wcm.authoringui.lock.projects | true |
If a site area is locked, we cannot create any new site areas or content items within that site area until it is unlocked. This applies only to direct children of the locked parent. Items that are descendants of the children of a locked parent are not affected.
Define valid mime types for the image element
We define the mime types of files allowed to be uploaded into the image element using...
-
imageresourcecmpnt.allowedmimetypes
For example:
| Property name | imageresourcecmpnt.allowedmimetypes |
| Value | image/gif,image/jpeg |
This will prevent users uploading non-image files into the image element.
Active content filtering
Active content filtering provides the ability to strip specified HTML fragments from HTML entered in elements. This includes rich text and HTML elements. Active content filtering is configured using property...
-
active.content.filtering.enable
By default, active content filtering is enabled. If enabled, this will prevent a user from introducing malicious code into a website such as cross site scripting. For example, if a user entered this code into an HTML element:
-
Welcome
<a href="javascript:window.alert("boo!")">my link</a>
<script language="javascript">window.alert("boo 2!")</script>
Click the link for a surprise.
It would be changed to this when saved:
-
Welcome
<a href="<"- active content removed -->">my link</a>
<"- active content removed -->
Click the link for a surprise.
Set the default child placement position
To specify the default placement of new content items set parameter...
-
wcm.authoringui.childPlacementDefault
| Property value | Description |
|---|---|
| start | Place a new content item as the first content item within a site area. |
| end | Place a new content item as the last content item within a site area. |
- If this parameter is not set, the default child position will be "end".
- The default placement position specified in an authoring template will override this setting for content items created with that authoring template.
Set the size of the breadcrumb library dropdown
To specify the number of libraries to be shown in the authoring interface breadcrumb, set the parameter...
-
wcm.authoringui.breadcrumbLibrariesMaximum
-
wcm.authoringui.breadcrumbLibrariesMaximum=16
If this parameter is not set, only the first 10 libraries are displayed. The value of this parameter must be an integer between 5 and 50. IBM recommends that its value should be between 10 and 20. If more than this number of libraries exist, the remaining libraries are accessible using the Select from all libraries option.
Expired items
By default, expired items are displayed alongside published and draft items.
Set wcm.authoringui.showexpireditems in WCM WCMConfigService service using the WAS console:
- If true, expired items are displayed alongside published and draft items.
- If false, only published and draft items are displayed.
- If not specified, this setting defaults to true.
Configure authoring portlet search
We manage authoring portlet search options in the WCM WCMConfigService service using the WAS console.
- wcm.authoringui.advancedsearch.searchonselection
- If true, when you click Advanced Search, an advanced search will automatically be executed based on any text currently entered in the basic search. If nothing has been entered in the basic search, advanced search is not automatically executed. If false, advanced search will not automatically be executed if there is existing text in the basic search field. Default is false.
- wcm.authoringui.simplesearch.addstar
- If true, a wildcard character is added to the end of text entered in the basic search. For example, searching for Span will automatically search for Span* and will display search results that have a title, description or keywords that begin with the word Span such as Spanish. If false, only exact matches to the text entered in the basic search field will be searched for. Default is false
- wcm.authoringui.advancedsearch.addstar
- If true, a wildcard character is added to the end of text entered in the advanced search. For example, searching for Span will automatically search for Span* and will display search results that have a title, description or keywords that begin with the word Span such as Spanish. If false, only exact matches to the text entered in the advanced search field will be searched for. Default is false
Import large files and images
Because importing large files into IBM WCM can have a negative impact on performance, we can adjust several settings to ensure better performance when importing files.Before updating the settings for large file handling, review the following considerations:
For UNIX operating systems, to remove any limit on file size, use the command: ulimit -f.
When importing files, a temporary directory is used to store the files during the upload process. If the size of the uploaded files exceeds the available disk space for the temporary directory, the import operation fails. When uploading large files, ensure that there is sufficient disk space to accommodate the import. The location of the temporary directory is specified by the jcr.binaryValueFileDir property in the file...
-
WP_PROFILE/PortalServer/jcr/lib/com/ibm/icm/icm.properties
- Log in to the WAS console and go to...
-
Resources | Resource Environment | Resource Environment Providers | WCM WCMConfigService | Custom properties
If we are using this web content server as part of a cluster, use the WAS console for the deployment manager when manipulating configuration properties.
- For the resource.maxUploadSize property, specify a value in megabytes corresponding to the size of the largest file allowed to be imported. For example, to not allow files larger than 34 MB to be imported, update the resource.maxUploadSize property to have a value of 34. Although IBM recommends that this value not exceed 100 MB, we cannot upload files larger than 512 MB.
- For the property resourceserver.maxCacheObjectSize, specify a value of 300 KB or less.
- Add the transaction.sync.remove property, and specify a value of true.
-
Servers | Server Types | WebSphere application servers | portal_server | Server infrastructure | Administration | Custom Properties
- Add the property...
-
protocol_http_large_data_inbound_buffer
...and for the value specify the maximum file size in bytes. This value should correspond to the set for the property...
-
resource.maxUploadSize
...in the WCM WCMConfigService service. Note that property uses bytes. So if you specified a value of 34 MB for the resource.maxUploadSize property, specify a value of 35651584 bytes for the property.
- Click...
-
Resources | JDBC | Data sources | datasource_name | Custom properties
- Specify the fullyMaterializeLobData property with a value of false.
- Increase the maximum number of database collections allowed for the application server by increasing the value of the Maximum connections field to a value greater than the default 50 connections.
-
Resource | JDBC | Data sources | datasource_name | Connection pool properties
- If we are working with files larger than 100 MB, increase the web containers transaction timeout setting from default setting of 120 seconds...
-
Servers | Server Types | WebSphere application servers | portal_server | Container Services | Transaction service | Total transaction lifetime timeout
- Increase the maximum number of threads allowed in the thread pool used by the web container.
-
Servers | Server Types | WebSphere application servers | portal_server | Thread pools | WebContainer
Set the value of the Maximum Size field to 100 threads.
- If we are using IBM HTTP Server v7, increase the connection timeout value for connections to the application.
-
Servers | Server Types | web servers | web_server | plug-in properties | Custom properties | New
In the name field, enter ServerIOTimeout. In the value field, enter the timeout value in seconds. The default value is 60 seconds. However, when working with large files, this default value is typically insufficient and can cause a false server error response to be sent, which in turn causes the portal to reissue the request. Specify a timeout value that is long enough to allow a failing request to receive a response, or enter -1 for an unlimited timeout value.
- Click Save to save the configuration changes.
- Restart the portal for the settings to take effect.
If the portal's policy cache manager indicates that a number of web container threads are hung, set the cacheinstance.com.ibm.wps.policy.services.PolicyCacheManager.lifetime property in the WP CacheManagerService service to a value of -1. This setting reduces the database connections and load times and helps prevent threads from hanging.
Increasing time-outs
If users are experiencing timeout errors when saving items, we can increase the total transaction lifetime timeout setting of the WebSphere Portal server.The total transaction lifetime timeout setting is changed using the WAS console.
- Servers | Server Types | WebSphere application servers | portal_server | Container Services | Transaction Service
The total transaction lifetime timeout setting should be changed to the same amount on all the servers in the web content system.
Alternatives to increasing server time-outs
Increasing the total transaction lifetime timeout setting may not always be the best solution to server time-outs as increasing this setting too much may cause a drop in performance. Timeout errors generated when saving items occur when the current transaction finishes before the item has been saved. If the item we are saving contains large amounts of data, it may be better to redesign the item rather than change the total transaction lifetime timeout setting:
| Option | Details |
|---|---|
| Authoring Templates | If a large number of elements have been added to an authoring template, you may experience a timeout error when saving. Instead of using a single authoring template, create multiple authoring templates containing only those elements required for a specific task. |
| Presentation templates and components | We may receive timeout errors when saving presentation templates or components containing large amounts of HTML or rich text in their designs. We should instead create multiple HTML or rich text components and then reference these in the presentation templates or component designs. |
| Site areas and content items | We may receive timeout errors when saving site areas and content items containing elements that use large amounts of HTML. We should instead create multiple HTML or rich text components and then reference these in element designs. If a large number of elements have been added to a site area or content item, you may also experience a timeout error when saving. In this case, we should reduce the number of elements stored in the site area or content item. |
| Downloadable files | Another alternative to creating web content containing large amounts of HTML or rich text is to provide information on the website in the form of downloadable files. These can be stored as file resource elements. |
Configure remote server access for links
Before adding links to files stored in remote content management systems into web content elements, configure the server with information about the remote system and the settings used to handle communication with the system.In WP ConfigService, specify a list of allowed domains that the portal can access via the AJAX proxy component. We can use the global AJAX proxy configuration to customize the outgoing HTTP traffic, such as applying specific HTTP timeout values, or configuring an outbound HTTP proxy server. We do this by mapping the URL patterns for the ECM server to the federated_documents_policy dynamic policy using the WP ConfigService configuration service.
Log in to the WAS console, go to...
-
Resources | Resource Environment | Resource Environment Providers | WP ConfigService | Additional Properties | Custom Properties | New
...and set...
-
wp.proxy.config.urlreplacement.federated_documents_policy.suffix = http://URL/pattern/of/the/ECM/server/*
- wp.proxy.config.urlreplacement.federated_documents_policy.1=http://ecm.myhost.com:10038/*
The value of the property key suffix, in this case, ".1", can be any value as long as it is unique within the set of keys mapping to the federated_documents_policy. Create additional properties as needed for any other ECM servers to access through the server.
Save the changes, and restart the portal server.
If a user tries to access a server (for example, www.myhost.com) that has not been added to the list of allowed domains, the following message is displayed:
- Access to remote server www.myhost.com has not been granted. Please contact the system administrator.
Quickr
IBM Content Manager Services for Lotus Quickr provides the capability to link to documents stored in IBM Content Manager. These links are generated according to the base service URL configured in IBM Content Manager Services for Lotus Quickr, as specified by the urlBaseService property in the file...
-
cmpathservice.properties
If SSL is enabled for the portal, verify urlBaseService reflects the https protocol, and not the http protocol.
Set up support for federated documents
Before we can access metadata from federated documents, configure access to the remote servers containing the documents, and specify information about the feeds or service documents used to retrieve the documents. We can also tune the cache settings used with the federated documents feature.
Before using the federated documents feature:
- Enable single sign-on (SSO) in IBM WebSphere Application Server between the portal server and the content management system.
- Use a content management system that supports HTTP basic authentication, and enable a credential vault slot that stores the credentials to authenticate with the remote server.
If we are setting up single sign-on between IBM Lotus Quickr and our portal server, export the SSO key from the Lotus Quickr server and import it into the portal server, rather than the other way around.
- Configure access to remote systems for federated documents
- Configure the federated documents feature
- Cache tuning for federated documents
Configure access to remote systems for federated documents
To retrieve metadata information for documents on remote content management systems, configure the federated documents feature with information about the remote system and the settings used to handle communication with the system.Because the federated documents feature uses the AJAX proxy component to access the remote content management system, we can use the global AJAX proxy configuration to customize the outgoing HTTP traffic, such as applying specific HTTP timeout values or configuring an outbound HTTP proxy server. We must list the individual content management servers to be accessed through the federated documents feature as allowed request targets in the AJAX proxy configuration, and enable LTPA cookie forwarding for those requests. To do this, map the URL patterns for the content management server to the federated_documents_policy dynamic policy using the WP ConfigService configuration service.
- Log in to the WAS console and go to...
-
Resources | Resource Environment | Resource Environment Providers | WP ConfigService | Additional Properties | Custom Properties | New
- Enter the property name...
-
wp.proxy.config.urlreplacement.federated_documents_policy.suffix
...and set the string value to the URL pattern of the content management server. For example, to enable the federated documents feature to access information from the content management server ecm.myhost.com on port 10038 over HTTP...
- wp.proxy.config.urlreplacement.federated_documents_policy.1=http://ecm.myhost.com:10038/*
The value of the property key suffix can be any value as long as it is unique within the set of keys mapping to the federated_documents_policy dynamic policy.
- Create additional properties as needed for any other content management servers to access through the federated documents feature.
- Optional: The federated documents feature can also consume arbitrary ATOM feeds. To enable this, we can map the URL prefix of the ATOM feed to the default_policy dynamic policy.
- Click New, and enter the property name...
-
wp.proxy.config.urlreplacement.default_policy.suffix
Set the string value to the URL pattern of the server providing the ATOM feed. For example, to enable the federated documents feature to access ATOM feeds from the server www.myhost.com...
- wp.proxy.config.urlreplacement.default_policy.1=http://www.myhost.com/*
The value of the property key suffix can be any value as long as it is unique within the set of keys mapping to the default_policy dynamic policy.
To prevent security token forwarding to untrusted servers, be sure that you do not use the federated_documents_policy dynamic policy for those servers.
- Create additional properties as needed for any other ATOM feed servers to access through the federated documents feature.
- Click New, and enter the property name...
- Save the changes, and restart the portal server.
Configure the federated documents feature
Configure the federated documents feature to specify information about the source servers for the documents available to users.
When the portal retrieves documents from a remote server, authentication might be required to access the documents on the remote server. We can use several types of authentication:
- Single sign-on (SSO) between the portal and the remote server
- User name and password information in the user interface. Only HTTP basic authentication is supported for CMIS servers.
- Credential vault slots that handle HTTP authentication
In addition to enabling or disabling credential vault slots for authentication, we can identify the servers providing documents. For each server, we can define characteristics such as the type of document that the server returns and the title used to identify the server.
- Log in to the WAS console and go to...
-
Resources | Resource Environment | Resource Environment Providers | WP FederatedDocumentsService | Additional Properties | Custom Properties
- Specify whether credential vaults slots are used for authentication with remote servers.
Because we can access federated documents through either the personalization editor or the rich text editor provided with WCM, we can configure credential vault slots for each method independently.
- To access federated documents through the personalization editor, click...
-
wp.federated.documents.pzn.vaultselection.enabled
To enable credential vaults slots, set the value to true, or, to disable credential vault slots, set the value to false. By default, the value is true.
- To access federated documents through the rich text editor in WCM, click...
-
wp.federated.documents.wcm.vaultselection.enabled
To enable credential vaults slots, set the value to true, or, to disable credential vault slots, set the value to false. By default, the value is true.
If we enable credential vault slots, users can select a credential vault slot in the user interface. We can also specify a default credential slot to be used with a given remote server...
-
wp.federated.documents.suffix.vault.slot
- To access federated documents through the personalization editor, click...
- To specify whether users can enter their own servers when accessing remote content, or can use only predefined servers, set...
-
wp.federated.documents.custom.server.enabled=true
To prevent users from entering custom servers, set the value to false. When set to false, the user interface does not display the entry field for custom servers. By default, the value is true.
- Specify whether documents from servers supporting Document Services remote interfaces can be retrieved by the portal. Examples of products that support Document Services remote interfaces include IBM Lotus Quickr, IBM Content Manager, and IBM FileNet Content Manager. To enable access to Document Services feeds, set:
-
wp.federated.documents.document.services.enabled=true
To disable access, set the value to false. If false, users can still access servers supporting CMIS or Atom feeds, but connections to Document Services servers are not supported. Default is true.
- For each remote server containing documents to access from the portal, configure the server URL, feed type, and additional optional properties.
The value of the suffix portion of the property key is used to group related properties for each server. Use the same suffix value for properties related to the same server. The suffix can be any value as long as it is unique across the property keys. For each property, click New and enter the name and value:
- Optional: Configure the amount of data returned for the summary metadata attribute of the document. Go to...
-
Resources | Resource Environment | Resource Environment Providers | WCM WCMConfigService | Additional Properties | Custom Properties | wcm.pzn.ecm.max.field.length
...and enter the number of characters to be returned. If no value is specified, the default value is 128 characters.
- Optional: Configure whether property changes are automatically loaded.
By default, the Federated Documents service automatically reloads properties at a specified interval, without requiring us to restart the portal. We can change the automatic reloading behavior or modify the reloading interval. Go to:
-
Resources | Resource Environment | Resource Environment Providers | WP FederatedDocumentsService | Additional Properties | Custom Properties
...and set...
-
wp.federated.documents.document.service.reload.disabled=true/false
A value of true disables automatic reloading of properties. The default, false enables automatic reloading.
Click wp.federated.documents.document.service.reload.interval, and specify the interval in seconds for reloading properties. The default value is 3 seconds.
Save the changes. The Federated Documents service automatically reloads any updated properties. If we have disabled automatic reloading, restart the portal server.
- If we enable credential vault slots, grant access to credential vault slots for all authenticated users.
- Log in to the portal as an administrator and click...
-
Administration | Access | Resource Permissions
- From the list of resource types, navigate to Virtual Resources.
- For the ADMIN_SLOTS resource, click the Assign Access icon.
- Edit the User role, and add the All Authenticated Portal Users group to the role.
- Log in to the portal as an administrator and click...
Cache tuning for federated documents
The federated documents feature uses the document list cache, the document data cache, and the feed type cache to manage information about the list of documents, the document data, and the types of feeds a server provides.
- The document list cache contains the list of document identifiers contained in the rule selection result of a specific user and a specific selection rule. The cache is activated by default with a default cache entry lifetime of 10 minutes.
- The document data cache contains the metadata of a specific document. The cache is activated by default with a default cache entry lifetime of 10 minutes.
- The feed type cache contains the type of feed for a given feed URL. The feed type can be Document Services, CMIS, or ATOM. The cache is activated by default with a default cache entry lifetime of 24 hours.
To tune these caches we can configure the Cache Manager Service (WP CacheManagerService) in the WAS console. using the following properties:
- Document list cache: cacheinstance.com.ibm.pzn.wcm.ecm.DocumentListCache
- Document data cache: cacheinstance.com.ibm.pzn.wcm.ecm.DocumentMetaDataCache
- Feed type cache: cacheinstance.com.ibm.pzn.wcm.ecm.FeedTypeServerCache
Updates occurring on the remote content management system might not immediately be reflected on the portal side if there is a corresponding entry found in the cache. The individual cache life time values determine the maximum time lag for corresponding updates.
- The time lag for new documents becoming visible and deleted documents being removed depends on the lifetime value for the configured document list cache.
- The time lag for updates in the metadata describing a document (for example, changes to the document title) depends on the configured lifetime value for the document list cache.
The user-specific document list cache is explicitly invalidated each time the user logs in, so that the most current list of available document identifiers is available upon login.
Configure a web content staging environment
Configure the staging environment to emulate the web content delivery environment and allow for testing before deployment. We manage staging environment options in the WCM WCMConfigService service using the WAS console.
- If the staging server is to be used purely as a holding server where changes to the site are accumulated prior to syndicating these changes to a delivery environment, then you may only need to review the syndication settings of the staging server. In most cases ensure that automatic syndication is disabled.
- If we are using the staging environment for user acceptance testing prior to syndicating to a delivery environment we will need to ensure that all other settings configured on the staging server match those set on the delivery server.
Configure a web content delivery environment
To track usage data for the web content viewer, we can configure the portal for site analysis logging for the web content viewer.- XML configuration interface parameters for the web content viewer
- Caching options
- Pre-rendering options
- Disable the site toolbar on a delivery server
Set up site analysis for the web content viewer
Enable the web content viewer logger
To take advantage of the site analysis logging available for the web content viewer, configure the WP SiteAnalyzerLogService service and activate the SiteAnalyzerJSRPortletLogger service. Before activating the SiteAnalyzerJSRPortletLogger logger, ensure that site analysis has been enabled for the portal in general, as described in Logging and analyzing server side site data.
- Log on to the WAS console and click...
-
Resources | Resource Environment | Resource Environment Providers | SiteAnalyzerLogService
- Activate the SiteAnalyzerJSRPortletLogger logger through the WP SiteAnalyzerLogService by defining the parameter...
-
SiteAnalyzerJSRPortletLogger.isLogging=true
- Save the changes, and restart the portal.
Site analysis example for the web content viewer
The site analysis log uses the NCSA Combined log format, which is a combination of NCSA Common log format and three additional fields: the referrer field, the user_agent field, and the cookie field. This example describes typical site analysis logging information for the web content viewer.
The IBM WebSphere Portal site analysis log is:
- WP_PROFILE/logs/WebSphere_Portal/sa_date_time.log
where date_time is the date and time the file was created. The current (active) log file is named sa.log.
The WP SiteAnalyzerService might be configured to use different filenames.
The following example displays a sample entry in the site analysis log as it is written by the web content viewer if the SiteAnalyzerJSRPortletLogger is enabled.
- 9.37.3.88 - jdoe [22/Nov/2008:22:11:27 +0100] "GET /Portlet/5_8000CB1A00U6B02NVSPH1G20G1/Web_Content_Viewer_(JSR_286)/Web%20Content%2fSite01%2fSiteArea01%2fContent01?PortletPID=5_8000CB1A00U6B02NVSPH1G20G1&PortletMode=view&PortletState=normal&RequestType=render&PUBLIC_CONTEXT=%2fWeb%20Content%2fSite01%2fSiteArea01%2fContent01 HTTP/1.1" 200 -1 "http://myserver.company.com/Page/6_8000CB1A00UR402F0JC25U1O25/MyPage" "Mozilla/5.0 (Windows; U; Windows NT 5.1; en-US; rv:1.8.1.18) Gecko/20081029 Firefox/2.0.0.18" "JSESSIONID=0000JwIm04xm7btVLwzCj9Qo-uj:-1"
...where...
- The identifier Portlet.
- The ID of the web content viewer instance that is requested.
- The administrative name of the web content viewer (Note: This name is always the same unless the portlet has been cloned.).
- The context path of the rendered WCM item encoded in UTF-8.
- A query string containing the following parameters:
- PortletPID
- The ID of the web content viewer instance that is requested.
- PortletMode
- The mode in which the portlet is rendered. Note that the web content viewer writes log entries only in its view mode.
- PortletState
- The portlet window state.
- RequestType
- The request type (note that the web content viewer writes log entries only for render requests).
This is followed by a list of all request parameters available to the web content viewer instance as UTF-8 encoded key-value-pairs.
| Field in the Example | Log Field Name | Explanation |
|---|---|---|
| 9.37.3.88 | host | The IP address of the HTTP client that sent the request. Important: If there is a reverse proxy server between the client and the portal, the IP address logged is that of the reverse proxy server rather than the HTTP client. To log the IP address of the HTTP client, remove the reverse proxy server from the environment. |
| - | rcf931 | The identifier used to identify the client making the request. If the client identifier is not known, the field is set to the hyphen character (-). |
| jdoe | username | The user ID for the client. If the user ID is not known, the field is set to the hyphen character (-). |
| [22/Nov/2008:22:11:27 +0100] | date:time timezone | The date and time of the HTTP request. |
| "GET /Portlet/[...] HTTP/1.1" | request | The HTTP method, the URI of the requested resource, and the version of HTTP used by the client. The URI is composed of the following elements:
|
| 200 | statuscode | The HTTP status code for the request. |
| -1 | bytes | The number of bytes of data transferred from the client as part of the request. A value of -1 indicates that the number of bytes is unknown. |
| "http://myserver.company.com/Page/6_8000CB1A00UR402F0JC25U1O25/MyPage" | referrer | The referrer in case of portlet site analysis log entries identifies the portal page on which the web content viewer instance is rendered. |
| "Mozilla/5.0 [...]" | user_agent | The type of web browser used by the client. |
| "JSESSIONID=0000JwIm04xm7btVLwzCj9Qo-uj:-1" | cookies | The name and value of a cookie sent to the client browser as part of the request. If multiple cookies were sent, the list is delimited by the semicolon character. |
XML configuration interface parameters for the web content viewer
As with other portlets in the portal, we can use the XML configuration interface (xmlaccess command) to deploy and configure the web content viewer. To simplify the configuration of the portlet with xmlaccess.sh, the portlet parameters we can specify accept path values in addition to the standard IDs. By default web content viewer is configured with unique IDs. This has the advantage that the configuration does not break if an item is renamed of moved. However, when configuring a portlet with xmlaccess.sh, it can be difficult to determine the unique ID of an item. When configuring the Web content viewer, we can reference web content items by their path, as well as by their IDs, using the following parameters:
- AUTHORINGTEMPLATE_OVERRIDE
- Authoring templates of the profile section. The parameter can contain multiple values, separated by commas. The list can contain both ID and path values.
- CATEGORY_OVERRIDE
- Categories of the profile section. To list multiple categories, separate the categories by commas. We can use both ID values and path values.
- SITEAREA_OVERRIDE
- Site areas of the profile section. To list multiple site areas, separate the site areas by commas. We can use both ID values and path values.
- WCM_BROADCASTS_TO
- Link broadcasting setting for the web content viewer.
Values include:
WCM_LINKING_DYNAMIC Information about the web content item displayed in the web content viewer is used to dynamically determine to which page the context is broadcast. WCM_LINKING_SELF The context of the current Web content viewer is broadcast to other web content viewers on the same portal page. WCM_LINKING_OTHER The context of the current Web content viewer is broadcast to other web content viewers on another portal page, as specified by the WCM_PORTAL_PAGE_ID parameter. WCM_LINKING_NONE The context of the current Web content viewer is not broadcast to other web content viewers. - WCM_COMPONENT_IDR
- Specifies a library component and is only used if content type Component is selected.
- WCM_CONTENT_COMPONENT
- Name of the element to be displayed, when the WCM_CONTENT_TYPE parameter has the value CONTENT_COMPONENT.
- WCM_CONTENT_CONTEXT_IDR
- Content render context. It can be a content item or site area, as specified by the WCM_CONTENT_CONTEXT_TYPE parameter.
- WCM_CONTENT_CONTEXT_TYPE
- Type of the configured content context. Values include:
CONTENT Indicates that the content context is a content item. PARENT Indicates that the content context is a site area. - WCM_CONTENT_TYPE
- Specifies the item to be displayed. Values include:
CONTENT The item to be displayed is a content item. COMPONENT The item to be displayed is a component. CONTENT_COMPONENT The item to be displayed is an element. - WCM_DESIGN_IDR
- Specifies an alternate presentation template.
- WCM_LISTENS_TO
- How the web content viewer is configured to receive links broadcast from other web content viewers. Values include:
WCM_LINKING_OTHER Information is received from any web content viewer broadcasting links. WCM_LINKING_SELF Information is received only from this web content viewer. WCM_LINKING_NONE No information from other web content viewers is received. - WCM_PAGE_TITLE
- Used with the WCM_PAGE_TITLE_TYPE parameter, this parameter specifies the page title for the web content viewer. Values include:
- The user-defined title for the page, if the WCM_PAGE_TITLE_TYPE parameter has a value of WCM_PAGE_TITLE_TYPE_GENERAL.
- The name of the resource bundle containing the title for the page, if the WCM_PAGE_TITLE_TYPE parameter has a value of WCM_PAGE_TITLE_TYPE_RESBUN.
- WCM_PAGE_TITLE_TYPE
- How the page title is displayed for the web content viewer. Value include:
WCM_PAGE_TITLE_TYPE_DEFAULT The default title defined in the portal's administration interface is used. WCM_PAGE_TITLE_TYPE_GENERAL A user-defined title is used, as specified by WCM_PAGE_TITLE parameter. WCM_PAGE_TITLE_TYPE_RESBUN The title is defined in a resource bundle, as specified by WCM_PAGE_TITLE parameter. WCM_PAGE_TITLE_TYPE_DYN The title is defined by the value of the Display title field for the content item that is displayed in the web content viewer. - WCM_PORTAL_PAGE_ID
- Unique name or object ID of the page which is the target for link broadcasts, when the WCM_BROADCASTS_TO parameter is set to WCM_LINKING_OTHER.
- WCM_PORTLET_TITLE
- Used with the WCM_PORTLET_TITLE_TYPE parameter, this parameter specifies the portlet title for the web content viewer. Values include:
- The user-defined title for the portlet, if the WCM_PORTLET_TITLE_TYPE parameter has a value of...
-
WCM_PORTLET_TITLE_TYPE_GENERAL.
- The name of the resource bundle containing the title for the portlet, if the WCM_PORTLET_TITLE_TYPE parameter has a value of...
-
WCM_PORTLET_TITLE_TYPE_RESBUN
- The user-defined title for the portlet, if the WCM_PORTLET_TITLE_TYPE parameter has a value of...
- WCM_PORTLET_TITLE_TYPE
- How the portlet title is displayed for the web content viewer. Value include:
WCM_PORTLET_TITLE_TYPE_DEFAULT The default title defined in the portal's administration interface is used. WCM_PORTLET_TITLE_TYPE_GENERAL A user-defined title is used, as specified by WCM_PORTLET_TITLE parameter. WCM_PORTLET_TITLE_TYPE_RESBUN The title is defined in a resource bundle, as specified by WCM_PORTLET_TITLE parameter. WCM_PORTLET_TITLE_TYPE_DYN The title is defined by the value of the Display title field for the content item that is displayed in the web content viewer.
When specifying a content path, begin with the forward slash character (/) followed by the library name, as indicated in the following examples of valid content paths:
- /mylib/myfolder/mysitearea/mycontent
...or...
- /mylib/mypresentationtemplate
If we configure an item by its path rather than by its ID, the portlet configuration can become invalid if the item is renamed or moved. If an item has been configured by its path, the web content viewer displays a small path icon after the item when we are in the Edit Shared Settings or Configure mode. When configuring an item by its path, we cannot build the path from the Display title fields of the items in the path. Use the Name fields of the items when specifying the path.
Caching options
WCM generated Web pages, and content from external data sources, can be cached by the WCM application. If utilized correctly, WCM caching can dramatically increase the performance of a site.Basic web content caching
The first time a web page is rendered by the WCM application, it is stored in a cache. Users then access this page from the cache until it expires. Only then is the web page rendered afresh. The main benefit of this scenario is improved performance. Basic caching should only be used on static content that does not require "real-time" access.
Advanced web content caching
There are two major differences between basic caching and advanced caching:
- Advanced caching can cache pages based on different user profiles.
- Cache parameters in connect tags and URL requests can be used to override the server's default advanced web content caching settings allowing us to set custom cache settings for individual web pages or components.
| Advanced caching type | Details |
|---|---|
| Site caching | Same as the basic web content cache except that cache parameters in connect tags and URL requests can be used to override the server's default advanced web content caching settings. |
| Session caching | A copy of each Web page a user visits is stored in the session cache. The User accesses the cached version of a web page until they start a new session, or until the cached web page is expired from the cache. |
| User caching | A copy of each Web page a user visits is stored in the user cache. The user accesses the cached version of a web page until the cached web page is expired from the cache. |
| Secured caching | Used on sites where the item security features are used to grant different users access to different Web pages and components based on the groups they belong to. |
| Personalized caching | Cache web pages of users who have the same "personalization profile". Users who have selected the same personalization categories and keywords, and who belong to the same group, share a single cache. |
See also:
Default web content caching versus custom caching
Cache parameters in connect tags and URL requests can be used to override the server's default advanced web content caching settings allowing us to set custom cache settings for individual web pages or components. In most cases, basic, site and session caching would only be used as the server's default web content cache. User, secured and personalized caching would mostly be used when using custom caching in connect tags and URL requests. If basic caching is used as the default web content cache, custom caching cannot be used.
Cache comparisons
| Function | Basic caching | Advanced caching |
|---|---|---|
| Memory usage per item: | Medium | High |
| Performance improvement: | Very High | High |
| Custom caching available: | No | Yes |
| Connect tag processing: | No | Yes |
| Web Content Viewer Portlet: | No | Yes |
Caching Personalization components:
Web content caching can sometimes be used with Personalization components but will depend on the conditions set in the personalization rule, or the resources used to determine the rule results. Cache testing will be required to determine if the content returned by the personalization component can be cached using web content caching.
Caching versus pre-rendering
Content displayed in rendering portlets and through IBM WCM can be cached. An alternative to caching is the use of the pre-rendering feature. View the differences between each strategy. A pre-rendered site can be viewed in two ways:
- Use a web server
- View a pre-rendered site through a web server is similar to using basic caching because the displayed content is static and custom caching cannot be used.
- Use WCM
- View a pre-rendered site through WCM is similar to using advanced caching because content can be dynamic and custom caching can be used.
Basic caching versus a pre-rendered site delivered with a web server
At first glance, the pre-rendering feature and basic caching do the same thing. There are however, some major differences that will determine which feature is the best for you. The main difference between the two features is that the pre-rendering feature takes a snapshot of the entire site each time it is run. Basic caching only caches on a page-by-page basis. If performance is your main issue, then pre-rendering might be the answer. If not, then basic caching might be a better option.
| Function | Basic caching | Pre-rendered site delivered with a web server |
|---|---|---|
| Performance: | Very fast | Extremely fast |
| Connect tag processing: | Yes | No |
| Custom caching: | Yes | No |
| Memory requirements: | Low to Medium | Memory requirements depends on the web server being used. |
| Disk requirements: | Low to Medium | Potentially very high as the entire site must be able to fit on disk. |
| Unexpected broken links: | Yes. As some pages may be cached at different times, there is a small chance that not all the links on a cached page will be currently valid. | No. The site is pre-rendered in a single batch, greatly reducing the chances of inconsistencies in the site. |
Advanced caching versus a pre-rendered site delivered using WCM
These options are very similar. We may have to test both strategies before deciding which is best for the site.
| Function | Advanced caching | Pre-rendered site delivered through WCM |
|---|---|---|
| Performance: | Fast when cached, but slower if the requested page has expired from the cache. (As tag processing has a cost, this depends on how many connect tags a page contains.) | Fast, but as tag processing has a cost, this depends on how many connect tags a page contains. |
| Connect tag processing: | Yes | No |
| Custom caching: | Yes | No |
| Memory requirements: | Medium to high. | Medium to high. |
| Disk requirements: | Medium to high. | Medium to high. |
| Unexpected broken links: | Yes. As some pages may be cached at different times, there is a small chance that not all the links on a cached page will be currently valid. | No. The site is pre-rendered in a single batch, greatly reducing the chances of inconsistencies in the site. |
Expiring strategies
Like caching strategies, a server's default expiring strategies can be set in the WCM WCMConfigService service using the WAS console. Custom expiring parameters can also be set in connect tags and URL requests to override a server's default expiring strategies. If basic caching is used as the default web content cache, custom expiring cannot be used. In most cases the expiry schedule is based around how often the source content is updated. So, if the source content is updated hourly, then each cache would be expired hourly. If the source content is updated daily, then each cache would be expired daily. Beyond these examples, a different expiry schedule would be used. If the web pages were only updated weekly, or monthly, we would still schedule the caches to expire daily. Otherwise, when the source content was updated, it could take up to a week for it to appear on the site.Caching expiries versus workflow expiries
The expires parameter in a workflow is not related to the Expires parameter in IBM WCM caching. A page set to expire at midnight as part of a workflow will only do so if it has not already been saved in a cache. The page will remain in the cache until expired by the WCM application regardless of the Expires setting in a workflow.
Web content cache configuration
We can tailor the caching behavior of the web content environment by changing configuration settings such as the default cache type and expire settings. We define and manage web content cache options in the WCM WCMConfigService service using the WAS console.Set the default web content cache type
The default web content caching environment for the web content server is specified by the following properties:
- connect.businesslogic.defaultcache
- connect.moduleconfig.ajpe.contentcache.defaultcontentcache
| Parameter | defaultcache value | defaultcontentcache value |
|---|---|---|
| No caching: | false | None |
| Basic cache: | true | Not specified |
| Site caching: | false | Site |
| Session caching: | false | Session |
| User caching: | false | User |
| Secured caching: | false | Secured |
| Personalized caching: | false | Personalized |
Additional default web content cache parameters
Web content cache configuration settings set in WCM WCMConfigService.
| Cache Type | Properties |
|---|---|
| Basic cache: | connect.businesslogic.defaultcacheexpires
connect.businesslogic.defaultcache |
| Advanced cache: All | connect.moduleconfig.ajpe.contentcache.defaultcontentcache
connect.moduleconfig.ajpe.contentcache.contentcacheexpires |
| Advanced cache: Session cache only | connect.sessioncacheconfig.memcachesize |
| Cache Property | Details |
|---|---|
| contentcacheexpires | Default expiry for all advanced caches. It can be either a relative period or an absolute date and time. |
| defaultcache | If true, basic caching is enabled. If false or missing, advanced caching is enabled. |
| defaultcacheexpires | Default expiry for the basic cache. It can be either a relative period or an absolute date and time. |
| defaultcontentcache | If the advanced cache is enabled, the default advanced cache is set here. |
| resourceserver.browserCacheMaxAge | Define the maximum time an item will be stored in a web browser cache. |
| resourceserver.maxCacheObjectSize | Define the maximum size of objects that can be cached in kilobytes. By default this is set to 300. |
Cache expire time formats
When setting the cache expire settings listed in Table 3, we can specify either a relative time, or absolute time:
- REL {integer-value}{units}
- ABS {date-format-string}
{units} =
- d|D for days
- m|M for months
- s|S for seconds
- h|H for hours
{date-format-string} =
- Mon, 06 Nov 2000 09:00:00 GMT
- Monday, 06-Nov-00 09:00:00 GMT
- Mon Nov 6 09:00:00 2000
- 6 Nov 2000 9:00 AM
The last two formats assume GMT.
Examples:
- contentcacheexpires="REL 300S"
- contentcacheexpires="ABS Mon, 06 Nov 2000 09:00:00 GMT"
Data cache configuration
Data caching is used to cache data retrieved by the IBM WCM application from external sources using connect tags or by requests made through URLs. We manage data cache options in the WCM WCMConfigService service using the WAS console. Specify the following properties for data cache options:
- connect.connector.httpconnector.defaultcache
- Used when no cache is specified in a request for data. Possible values are true or false. If true, the data will be stored in the site cache.
- connect.connector.httpconnector.defaultcacheexpires
- The expiry date/time for items added to a cache (site or session) if the expiry date/time is not specified in the request.
- connect.connector.sqlconnector.defaultcache
- Determines whether to cache data by default or not. Possible values are true or false.
Pre-rendering options
We can enable pre-rendering so that content can be viewed either through a IBM WCM application or as a standalone site that is accessed through a web server. We manage pre-rendering options in the WCM WCMConfigService service using the WAS console.Start pre-rendering automatically
Although we can manually pre-render a website through the URL interface, we can also configure pre-rendering to run automatically when the server starts.
- Click...
-
Resources | Resource Environment | Resource Environment Providers | WCM WCMConfigService | Additional Properties | Custom Properties
- Edit the connect.businesslogic.module property, and append cacher to the value. For example:
- web, mail,default, ajpe,federatedproxy, ajpecatselect,memberfixer, workflowenablement, itemdispatcher, plutouploadfile,plutodownloadfile, synd,subs, syndication, refreshallitems, unlocklibrary,custom, data,clearversions, clearhistory, reseteventlog, cacher
- Save the changes and restart the server.
Enable pre-rendering for sites viewed using WCM
This option is used when we are accessing the pre-rendered site through WCM. This will increase performance as static content is accessed from the pre-rendered site, but dynamic content will still be rendered through WCM. To enable users to access the pre-rendered site through a WCM application, specify the connect.businesslogic.module.default.class property in the WCM WCMConfigService service using the WAS console.
- Property name: connect.businesslogic.module.default.class
- Value: com.aptrix.cacher.CacherModule
We cannot use the local rendering portlet (Web Content Viewer) when pre-rendering is set as the default module.
Enable pre-rendering for standalone sites
This option is used when we are using WCM to generate a pre-rendered site, but are not using WCM to view the pre-rendered site. You will need to use a web server to view the pre-rendered site.
Specify the connect.businesslogic.module.cacher.class property in the WCM WCMConfigService service using the WAS console.
- Property name: connect.businesslogic.module.cacher.class
- Value: com.aptrix.cacher.CacherModule
Specify the following properties to configure caching. Default values are listed, although we can tailor these values as needed. Unless we explicitly set a value for a property, the default value is used.
- connect.moduleconfig.cacher.destdir
- Value: ${USER_INSTALL_ROOT}/PortalServer/ilwcacher
Base directory under which each site cache will be created. There will be one subdirectory created for each site. If the prerenderer is run with the connect.moduleconfig.cacher.overwritecache property set to true, any files in the connect.moduleconfig.cacher.destdir path that were not written in the last run of the prerenderer will be deleted. For this reason, ensure that the connect.moduleconfig.cacher.destdir path is only used for storing rendered content and that it does not contain any other data that cannot be recreated.
- connect.moduleconfig.cacher.tempdir
- Value: ${USER_INSTALL_ROOT}/PortalServer/ilwcacher/temp
The temporary directory required to build the site cache prior to moving the data over to the base directory is specified by the property connect.moduleconfig.cacher.destdir property.
- connect.moduleconfig.cacher.delay
- Value: 1
Set the time, in seconds, between requesting a page while caching.
- connect.moduleconfig.cacher.busydelay
- Value: 5
Set the time, in seconds, of the busy delay setting. Use if executing within the busy start to busy end period. Otherwise the delay setting is used.
- connect.moduleconfig.cacher.busystart/connect.moduleconfig.cacher.busyend
- Value: 9:00 am/5:00 pm
These settings determine the times between which the busy delay setting will be used. Enter an absolute time as shown.
- connect.moduleconfig.cacher.overwritecache
-
- true
- The prerenderer will overwrite files in the destdir cache directory (then delete unneeded files). This results in a progressive change in site content as seen by the user. Default value.
- false
- The first time a site is pre-rendered, the cached site files will be added to the destination directory. As changes are made to the site through the authoring portlet, the new version of the site will gradually be cached in the temporary directory and the old site will remain in the destination directory. After the cacher has finished caching the site completely, the contents of the temporary directory are moved to the destination directory which will then contain both old and new versions of the cached site. A value of false should not be used if a web server is used to display the pre-rendered data because some web servers lock the data directories.
- connect.moduleconfig.cacher.rendereruser
- Value: Anonymous.
This determines the user to be used to render the WCM content. Either type Anonymous or Administrator or a specific user or group name. The site is pre-rendered based on this user's security rights. If the user specified here does not have access to a particular component it will not be pre-rendered.
- connect.moduleconfig.cacher.task.cacherurl
- Value: http://${WCM_HOST}:${WCM_PORT}/${WCM_CONTEXT_ROOT}/connect/
The full URL to be used as the replacement for the connect servlet in pre-rendered pages. The URL should end with the string specified in connect.moduleconfig.cacher.task.servletpath property if it is not blank. The context of cacherurl is used when generating a URL with pre-rendering. This property is not used when a page belongs to a site that has not already been pre-rendered at a site level by the scheduled task or through a SRV=cacheSite request.
- connect.moduleconfig.cacher.task.servletpath
- Value: /connect
The path of the substituted connect servlet defined in the connect.moduleconfig.cacher.task.cacherurl property. This property can remain blank if the cacherurl context should be used unchanged.
- connect.moduleconfig.cacher.defaultcontentname
- Value: index.html
This sets the name of the default or home file used when accessing the pre-rendered site. This normally would be index.html.
- connect.moduleconfig.cacher.task.siteareas
- Value: LibraryA/SiteAreaA,LibraryB/SiteAreaB,SiteAreaC
The site areas within a WCM environment to cache are entered here, separated by commas. This property provides the option of specifying the library in addition to the site area. If the library is specified, the pre-renderer looks for the site area in that library. If no library is specified, the default library is used, as specified in the defaultLibrary property.
If any of the site area names contain commas, create separate parameters for each site area using this format:
-
connect.moduleconfig.cacher.task.siteareas.N
N represents a different integer for each parameter. For example, to pre-render a site area named "SiteArea,Red" and a site named "Site,Yellow", we would need to create the following parameters:
-
connect.moduleconfig.cacher.task.siteareas.1=MyLib/SiteArea,Red
connect.moduleconfig.cacher.task.siteareas.2=Site,Yellow - connect.moduleconfig.cacher.task.interval.recurrence
- connect.moduleconfig.cacher.task.interval.startdelay
- The CacherModule can be set to run after a recurring number of
minutes.
- recurrence:
- Value: 10.
The recurring period in minutes for a recurring task.
- startdelay:
- Value: 1
The delay in minutes prior to starting the first recurring task.
If we do not configure pre-rendering to start automatically when the server starts, pre-rendering at intervals does not work until you manually trigger the cacher module.
- connect.moduleconfig.cacher.task.scheduled.times
- Value: 3:00 am
Alternately, the CacherModule can be set to run at certain times. Enter a series of absolute times, separated by commas.
When specifying time values, conform to the format H:MM am|pm, including the use of the colon (:) character and the space. Incorrectly specified values prevent pre-rendering from functioning properly.
If we do not configure pre-rendering to start automatically when the server starts, pre-rendering at scheduled times does not work until you manually trigger the cacher module.
Pre-rendering resources
- connect.moduleconfig.cacher.useTieredResourceFolders
- Value: false
All resources, such as images and file resources, are stored under the following folder:
- CACHER_DIR\LIBRARY\SITEAREA\resources
By default, each individual resource is saved under its own folder. For example, a resource with the ID of "7961d78049717f29bc57fee5670e9d7b" will be stored under this folder:
- CACHER_DIR\LIBRARY\SITEAREA\resources\7961d78049717f29bc57fee5670e9d7b
We can change this behavior so that resources are stored under a tiered set of sub-folders based on the first two characters of the resource ID by changing the value of connect.moduleconfig.cacher.useTieredResourceFolders to true. For example, a resource with the ID of "7961d78049717f29bc57fee5670e9d7b" will be stored under this folder:
- CACHER_DIR\LIBRARY\SITEAREA\resources\7\9\
All other resources that whose IDs begin with "79" will also be stored under this folder. This is done to reduce the number of sub-folders under the "resources" folders.
Disable the site toolbar on a delivery server
The site toolbar provides access to editing features for managed pages, including adding and editing pages and web content. Although essential for an authoring server, IBM recommends disabling the site toolbar on a delivery server. We can disable the toolbar for an entire portal or for specific virtual portals.The site toolbar function is not typically needed on a delivery server, and disabling the site toolbar can improve performance on the delivery server.
- Log in to the WAS console as an administrator and click...
-
Resources | Resource Environment | Resource Environment Providers | WP VirtualPortalConfigService
- Update the appropriate configuration properties, depending on whether to affect the entire portal or a specific virtual portal.
- To affect the entire portal, click Custom properties and set...
-
global.toolbar.enabled = false
This setting disables the site toolbar for all virtual portals.
- To affect a specific virtual portal, click: Custom properties
- To disable the site toolbar for the default virtual portal, set...
-
default.toolbar.enabled = false
- For each virtual portal other than the default where to disable the site toolbar...
- context.virtual_portal_context.property.toolbar.enabled
- Set the value to false. Replace virtual_portal_context with the context of the target virtual portal (for example, context.vp1.property.toolbar.
- hostname.virtual_portal_hostname.property.toolbar.enabled
- Set the value to false. Replace virtual_portal_hostname with the host name of the target virtual portal (for example, hostname.vp.myhost.com.property.toolbar.enabled.
If defined, the global.toolbar.enabled property acts as a fallback setting for virtual portals that have no values defined.
For more information about prefixes, placeholders, and the order in which properties are evaluated, see Virtual Portal Configuration Service
- To affect the entire portal, click Custom properties and set...
Reserved authoring portlet
When working with the web content viewer or Web content pages, some scenarios involve web content authoring tasks accomplished with authoring tools components. Such authoring tasks are performed through a special instance of the authoring portlet that is reserved specifically for these tasks and is installed on page hidden from the page navigation available to typical users.The following tasks use the reserved authoring portlet:
- Select a web content folder when creating or editing the properties of a web content page.
- Configure the web content viewer, such as selecting the content item to display.
- Performing inline editing using authoring tools components rendered in the web content viewer.
Typically authoring tasks are performed in a separate window that opens from the current page, but we can configure the behavior of authoring tools components to redirect users to the hidden page containing the reserved authoring portlet.
Ensuring the availability of the reserved authoring portlet
If either the authoring portlet instance or the hidden portal page are not available or if the user lacks the permission to access either of them, the authoring tasks requiring the reserved authoring portlet will fail, causing web content pages and the web content viewer to be unusable. For this reason, be careful when administering the reserved authoring portlet and the hidden portal page.
The following conditions are essential for the proper function of the reserved authoring portlet:
- Users performing any of the previous authoring tasks must have the User role on the hidden portal page.
- Users performing any of the previous authoring tasks must have the User role on the reserved authoring portlet.
- The reserved authoring portlet must be the only portlet located on the hidden portal page.
- The unique name of the hidden portal page must be com.ibm.wps.hiddenpage.wcm.Authoring_Portlet.
- The unique name of the portlet window of the authoring portlet instance on the hidden portal page must be com.ibm.wps.hiddenpage.wcm.control.Authoring_Portlet.
Availability problems related to the reserved authoring portlet or the hidden portal page are usually identified by the following symptoms:
- The SystemOut.log file for the portal server contains error messages referencing the authoring portlet or hidden page. For example:
- EJPDB0124E: The specified string [com.ibm.wps.hiddenpage.wcm.Authoring_Portlet] can neither be deserialized as an object ID nor resolved as a unique name.
- EJPDB0124E: The specified string [com.ibm.wps.hiddenpage.wcm.control.Authoring_Portlet] can neither be deserialized as an object ID nor resolved as a unique name.
- When a separate window is launched from the current page to perform the authoring task, the new window displays the following message:
Error 400: EJPPH0006E: The resolution of a URI failed. Refer to the stack trace for more detailed information.
- When a separate window is launched from the current page to perform the authoring task, the new window is empty.
- When the user is redirected to another portal page to perform the authoring task, the user is redirected to the default portal page instead of the page containing the reserved portlet.
- When the user is redirected to another portal page to perform the authoring task, the user is redirected to an empty page.
If any of these problems occur, verify that the conditions for proper operation of the reserved authoring portlet and hidden portlet page are fully implemented.
If the reserved authoring portlet or the hidden portlet page are removed inadvertently, we can deploy them again using the action-install-wcm-hidden-authoring configuration task.
Configure the reserved authoring portlet
The reserved authoring portlet is essential to the proper operation of web content pages and the web content viewer, so it is important that the configuration of the reserved authoring portlet reflect similar settings for performing authoring tasks as the configuration of other instances of the IBM WCM authoring portlet.
- Log in to the portal as an administrator and go to...
- Administration | Portal User Interface | Manage Pages
- Search for the page with the unique name of com.ibm.wps.hiddenpage.wcm.Authoring_Portlet.
- Click the Edit Page Layout icon (small pencil) for the page.
- Select Edit shared settings from the portlet menu, and specify any settings for the reserved authoring portlet.
The available settings and the process for updating them is the same for the reserved authoring portlet as it is for any other instance of the authoring portlet. Changes made to the reserved authoring portlet with the Edit shared settings mode affect only the reserved authoring portlet and no other instances of the authoring portlet. To ensure a consistent authoring experience, we can make the same changes to other authoring portlet instances using the Edit shared settings mode for each instance. Alternatively, we could make the same changes to every instance of the authoring portlet using the Configure mode from a single instance. Changes made in the Configure mode also affect the reserved authoring portlet.
- Save the changes.
Additional configuration options
These configuration options are available to address installation requirements for additional deployment scenarios.
- Control access to hosts specified in a URL
- Web content substitution variables
- Enable connect tags
- Remove authoring configuration task
- Enable email server.
Controlling access to hosts specified in a URL
By default, we can specify any host name in a URL used to retrieve content. However, we can restrict access to a specified list of host names by modifying the configuration of the WCM WCMConfigService service.
- Log in to the WAS console and go to...
-
Resources | Resource Environment | Resource Environment Providers | WCM WCMConfigService | Custom properties
If we are using this web content server as part of a cluster, use the WAS console for the deployment manager when manipulating configuration properties.
- Update the configuration to block access from unknown hosts. Specify the following property:
-
connect.connector.httpconnector.denyunknownhosts = true
- For each host name for which to grant access, add a new property.
-
connect.connector.httpconnector.hosts.host = true or false
host name of server for which to permit access. For example:
-
connect.connector.httpconnector.hosts.www.myhost.com
- Optional: Specify a default cache expiration value for the host name you added by adding a new property. Use the following format for new properties:
-
connect.connector.httpconnector.hosts.host.defaultcacheexpires = expiration_time
For example:
-
connect.connector.httpconnector.hosts.www.myhost.com.defaultcacheexpires = REL 9000s
- Optional: Specify a default cache setting for the host name you added by adding a new property. Use the following format for new properties:
-
connect.connector.httpconnector.hosts.host.defaultcache = true or false
For example:
-
connect.connector.httpconnector.hosts.www.myhost.com.defaultcacheexpires
Web content substitution variables
IBM WCM uses several substitution variables defined in the configuration for IBM WebSphere Application Server. To modify these variables, use the WAS console for the application server. If we are working with a managed cell or cluster, use the WAS console for the deployment manager when making changes.| Variable | Description | Example |
|---|---|---|
| WCM_CONTEXT_ROOT | The context root for the enterprise application for WCM. | wps/wcm |
| WCM_HOST | The fully qualified host name of the machine running the portal. | www.myhost.com |
| WCM_ILWWCM_HOME | Directory where the WCM application is installed | PORTAL_HOME/wcm |
| WCM_PORT | The port number used to access the portal. | 10038 |
| WCM_SCHEMA | The database schema name of the JCR domain configured for use with IBM WebSphere Portal. | jcr |
| WCM_SEARCHSEED_CONTEXT_ROOT | The context root for the Search Seed portlet. | wps/wcmsearchseed |
| WCM_WEB_APP_HOME | The directory path where the ilwwcm.war file is located. | PROFILE_ROOT/wp_profile/installedApps/node/wcm.ear/ilwwcm.war |
| WCM_WPS_CONTEXT_ROOT | The context root or base URI for the portal. All URLs beginning with this path will be reserved for the portal. | wps
http://hostname.myhost.com:10038/wps/portal |
| WCM_WPS_DEFAULT_HOME | The default portal page. The page for users who are not logged in. | portal
http://hostname.myhost.com:10038/wps/portal |
| WCM_WPS_PERSONALIZED_HOME | The portal page for users who have already logged in to the portal. This page cannot be accessed by anonymous users. | : myportal
http://hostname.myhost.com:10038/wps/myportal |
Enable connect tags
Enable connect tags to reference web content components and apply customized caching to the components.
- Log in to the WAS console and go to...
-
Resources | Resource Environment | Resource Environment Providers | WCM WCMConfigService | Custom properties
If we are using this web content server as part of a cluster, use the WAS console for the deployment manager when manipulating configuration properties.
- Specify connect.businesslogic properties to process connect tags from any host or from specific hosts.
- Process connect tags from any host
- Add the following property:
- Property name: connect.businesslogic.processunknownhosts
- Value: true
- Property name: connect.businesslogic.processunknownhosts
- Process connect tags from specific hosts
- Add the following property:
- Property name: connect.businesslogic.processunknownhosts
- Value: false
For each host for which to enable processing, add a new property:
- Property name: connect.businesslogic.hosts.hostname
- Value: true
- Property name: connect.businesslogic.processunknownhosts
- Restart the server or cluster.
Remove authoring configuration task
The remove authoring configuration task will uninstall the authoring portlet and related portal pages.Running the configuration task:
To remove the Authoring portlet:
- Stop the server.
- Open a command prompt.
- Run the remove-wcm-authoring task
-
cd WP_PROFILE/ConfigEngine
ConfigEngine.bat remove-wcm-authoring -DWasPassword=foo
Enable email
To use the email workflow action configure WCM to use the SMTP server.
- Log in to the WAS console and go to...
-
Resources | Resource Environment | Resource Environment Providers | WCM WCMConfigService | Custom properties
Cluster note: If we are using this web content server as part of a cluster, use the WAS console for the deployment manager when manipulating configuration properties.
- Specify connect.connector.mailconnect properties to use the SMTP server. Add the following properties:
- Default SMTP server
-
- Property name: connect.connector.mailconnector.defaultsmtpserver
- Value: mail.yourmailserver.com
- Default email address for "from" field
-
- Property name: connect.connector.mailconnector.defaultfromaddress
- Value: admin@yourmailserver.com
- Property name: connect.connector.mailconnector.defaultfromaddress
- Default email address for "reply-to" field
-
- Property name: connect.connector.mailconnector.defaultreplytoaddress
- Value: admin@yourmailserver.com
- If we use a secured SMTP server, we will also need to specify a user name and password to access the SMTP server: Add
the following properties:
- Default user name
-
- Property name: connect.connector.mailconnector.defaultusername
- Value: username
- Default password
-
- Property name: connect.connector.mailconnector.defaultpassword
- Value: password
- Save the changes.
- Restart the portal for the new settings to take effect.
Configure managed pages
When performing a new installation of IBM WebSphere Portal 8.0, managed pages are enabled by default. However, we can also manually disable and enable the feature as needed.Migration note: If you migrate from a previous version, managed pages are disabled by default, but we can enable the feature after migration.
Enable managed pages
By default, support for managed pages is enabled for the default virtual portal. However, we can also manually enable this support if managed pages are disabled.Do not attempt to enable managed pages on a server where managed pages are already enabled. If you previously disabled managed pages and want to re-enable the feature, ensure that the Portal Site library is empty first. If you fail to remove page artifacts from the previous configuration, the resulting portal might not work properly. When support for managed pages is enabled for a virtual portal, all pages in the virtual portal are copied into the Portal Site library in IBM WCM. However, the following pages are not treated as managed pages and are not copied:
- Administration pages, as identified by the label ibm.portal.Administration and its children
- Private pages
Each virtual portal has its own Portal Site library.
To take advantage of the features available to managed pages in the user interface, the pages must use the Portal 8.0 theme.
- Start the portal server.
- To enable support for managed pages, run the enable-managed-pages task
-
cd WP_PROFILE/ConfigEngine.
ConfigEngine.bat enable-managed-pages -DPortalAdminPwd=foo -DWasPassword=fooAfter running the enable-managed-pages task for the first time, the property managed.pages is created in the WP ConfigService configuration service. The value of the property is set to true.
- Restart the portal server.
- To populate web content libraries with information about virtual portals in the system, run the create-virtual-portal-site-nodes task.
-
cd WP_PROFILE/ConfigEngine
ConfigEngine.bat create-virtual-portal-site-nodes -DPortalAdminPwd=foo -DWasPassword=fooFor each virtual portal, this task creates a library and a site area called lost-found for resources that cannot be properly located. If the library or site area exist, the task exits. By default, the task runs on all virtual portals in the system.
- To populate web content libraries with information about the portal pages in the system, run the create-page-nodes task.
-
cd WP_PROFILE/ConfigEngine
ConfigEngine.bat create-page-nodes -DPortalAdminPwd=foo -DWasPassword=fooBy default, this task is performed on all pages in all virtual portals. To limit this task to a specific virtual portal, identify the virtual portal by adding one of the following parameters to the command line. Each parameter requires the prefix -D on the command line.
VirtualPortalHost Specify the host name of the virtual portal. For example, vp.myhost.com. If the host name of the virtual portal is the same as the host name of the default virtual portal, also specify the VirtualPortalContext property. We can specify the VirtualPortalHost property by itself only if the host name is unique. VirtualPortalContext Specify the virtual portal context that identifies the virtual portal. For example, vp1. We can customize the task with the following optional parameters on the command line. Each parameter requires the prefix -D on the command line.
RunParallel Indicate whether we want the task to run with multiple threads. A value of false indicates a single thread and is the default setting. A value of true indicates multiple threads, as specified by the work manager wpsJcrSyncWorkManager in the WAS console. Each thread requires a database connection. For optimal performance, ensure that the database connection pool supports at least as many connections as there are threads in the pool. Excluded Specify a list of unique names of page nodes to exclude from the creation process. Excluding a page also excludes its child pages. By default, the portal administration pages (ibm.portal.Administration) are excluded. - Optional: If we used web content pages before enabling managed pages, we can transfer the content associated with those pages to the Portal Site library. For details on performing this transfer, see Transfer content associations to the Portal Site library.
This task can also be used when portal pages and managed pages artifacts in WCM are not synchronized. In this case, the task attempts to resynchronize the portal artifacts and web content artifacts, giving precedence to the portal artifacts.
Performance note: Depending on the amount of information in the system, the create-page-nodes task can take a long time to run. Because of the database load of the task, it is not recommended run the task frequently. The initial run of the task requires the most time, while subsequent runs typically require less time.
Disable managed pages
Disable support for managed pages by running the disable-managed-pages configuration task. Disabling managed pages has the following effects:
- By default, each virtual portal has its own specific workspace where content is stored. When you disable managed pages, only a single workspace for the default virtual portal is available. The workspaces of other virtual portals are still there, but we can no longer access them. Any system associations between pages in those virtual portals and their respective Portal Site libraries no longer work.
To preserve content in the other virtual portals, import or syndicate the libraries into the default virtual portal before disabling managed pages.
- We can still access the Portal Site library for the default virtual portal, but the library is no longer automatically synchronized with the page structure.
- Pages are no longer managed in IBM WCM, with the following implications:
- No page drafts can be created.
- No new versions of pages can be created.
- Pages are no longer syndicated.
- Access control changes performed in the portal interface are no longer applied to the portal page site area.
- If you delete a page from the portal interface, the corresponding portal page site area is not deleted.
- If we create a page with either the Basic or Articles page template, the page has no web content association. This missing association can cause errors if you attempt to add content from the Web Content category of the Content tab in the site toolbar. To use the sample web content items when managed pages are disabled, create a web content association on the page before attempting to add content.
- Run the disable-managed-pages task...
-
cd WP_PROFILE/ConfigEngine
ConfigEngine.bat disable-managed-pages -DPortalAdminPwd=foo -DWasPassword=fooAfter running the disable-managed-pages task for the first time, the property managed.pages is created in the WP ConfigService configuration service. The value of the property is set to false.
- Restart the portal server.
Transfer content associations to the Portal Site library
When we enable manage pages, any web content pages that we have are converted to managed pages and added to the Portal Site library. However, the content associated with the web content pages remains in the original libraries. We can transfer this associated content to the Portal Site library with the internalize-content-mappings task.
Administration pages are not intended to be managed pages and so are not included when you enable managed pages.
When transfering the content association for a page to the Portal Site library, several things happen:
- The content referenced by the default content association for the page is copied to the portal page site area for the page. Only the default content association is affected; other content associations for the page are ignored.
Nested pages are not copied. Nested site areas are not copied in the following cases:
- The nested site area is referenced by the default association of another page.
- The nested site area has the same name as an existing site area for the same page.
- Template mappings and content elements that exist in the associated site area are copied over into the portal page.
If the template mapping or element already exists for the page, the copy is not performed.
- The default content setting for the portal page is modified to reference the copied content.
- The configuration of any web content viewers on the page is updated to reference the content that is stored in the portal page site area. However, viewer configurations that use content paths are not affected.
To transfer content associations, run the internalize-content-mappings task
-
cd WP_PROFILE/ConfigEngine.
ConfigEngine.bat internalize-content-mappings -DPortalPage=target_page -DIncludeDescendants=true_or_false -DSynchronous=true_or_false -DPortalAdminPwd=foo -DWasPassword=foo
The following properties must be specified either on the command line or in the wkplc.properties file.
- PortalPage
- The object ID or the unique page name of the page to transfer content. If the target page is contained in a virtual portal, identify the virtual portal by specifying either...
- VirtualPortalContext
- VirtualPortalHost
- IncludeDescendants
- Specify true to transfer content for the target page and any child pages. To transfer content only for the target page, specify false. If not specified, the default value is true.
- Synchronous
- Specify true to perform the transfer synchronously. To perform the transfer asynchronously, specify false. If not specified, the default value is true.
- Verbose
- Specify true to output additional information to the log. To generate basic log information, specify false. If not specified, the default value is false.
- VirtualPortalContext
- Specify the virtual portal context that identifies the virtual portal. For example, vp1.
- VirtualPortalHost
- Specify the host name of the virtual portal. For example, vp.myhost.com. If the host name of the virtual portal is the same as the host name of the default virtual portal, also specify the VirtualPortalContext property. We can specify the VirtualPortalHost property by itself only if the host name is unique.
- PortalAdminPwd
- The administrator password for WebSphere Portal.
- WasPassword
- The administrator password for WebSphere Application Server.
Example commands:
ConfigEngine.bat internalize-content-mappings -DPortalPage=example.page -DIncludeDescendants=true -DSynchronous=true -DPortalAdminPwd=foo -DWasPassword=foo
Syndication properties
We can tailor the syndication behavior of the web content environment by changing configuration settings such as the syndication interval and automatic syndication.We manage syndication options in the WCM WCMConfigService service using the WAS console.
Change the syndication interval
Although the frequency of syndication is set by default during installation, we can change the syndication interval to better suit the needs of our environment. For example, we might shorten the interval in an active authoring environment where users must collaborate heavily and rely on timely replication. Similarly we might lengthen the interval to avoid excessive replication of data that does not change often. The syndication interval applies to all syndication operations and cannot be specified separately for different syndicator-subscriber pairs.
To change the syndication interval, modify the deployment.itemChangedTaskDelay property. By default, the syndication interval is set to 30 seconds. Specify the number of seconds to use as the syndication interval, with a minimum of 0 seconds and a maximum of 65536 seconds. A value of 0 will prevent syndication from occurring. If set the value to so short an interval that syndication cannot complete before the interval expires, syndication begins again when the previous syndication completes.
Disable automatic syndication
In some cases we might choose to rely only on manual syndication to have complete control over when syndication occurs. To do this, disable automatic syndication. When automatic syndication is disabled, the syndication interval setting is ignored. This property should be set to the same value on both the syndicator and the subscriber.
To disable automatic syndication, specify the following property:
- Property name: connect.moduleconfig.syndication.inittasks
- Value: false
Configure a subscriber-only server
A syndicator server uses several processes to gather and queue content for syndication. These processes can sometimes impact server performance when run. However, a subscriber-only server does not require these processes, so we can improve performance on the subscriber-only server by disabling the processes.
To do this, ensure that deployment.subscriberOnly property is set to true.
Enable secure syndication using SSL
To enable and use SSL for syndication, the following properties must be changed in the WCM WCMConfigService to use the "https" protocol and the appropriate port.
- deployment.itemDispatcherUrl
- deployment.syndicatorUrl
- deployment.subscriberUrl
Enable search for web content
Indexing web content
To search for web content, the content must first be indexed by the WebSphere Portal search engine. Once the content has been indexed, we can run searches using the search center or using a search component. If you search for documents in the WebSphere Portal search center, be aware that we see search results for published documents only. Unpublished pending changes in a project are not included in the results.Create a content source for a site area
The WebSphere Portal search engine defines content sources that index the web content. All the child site areas and content items of the selected site area will be included in the index. Related content sources are grouped together in a search collection.
- Go to...
-
Administration | Search Administration | Manage Search
- Select or create a new collection.
A default search collection named WebContentCollection is provided by default.
- Click New Content Source.
- Select WCM site as the content source type.
- Enter a name in the Content Source Name field.
- In the field...
-
Collect documents linked from this URL
...set...
- For a stand-alone server:
-
- http://hostname:port/wps/seedlist/myserver?SeedlistId=library/sitearea1/childsitearea2&Source=com.ibm.workplace.wcm.plugins.seedlist.retriever.WCMRetrieverFactory&Action=GetDocuments
Replace hostname, port, library and site area with values appropriate for the site. If the library name or site area names contain spaces, we will need to replace the spaces with a "+" symbol. For example, the path library one/site area one would be instead be defined as library+one/site+area+one
- For a cluster:
- In this case us to use the host and port of the HTTP server:
- http://httpserver:port/wps/seedlist/myserver?SeedlistId=library/sitearea1/childsitearea2&Source=com.ibm.workplace.wcm.plugins.seedlist.retriever.WCMRetrieverFactory&Action=GetDocuments
Replace httpserver, port, library and site area with values appropriate for the site. If the library name or site area names contain spaces, we will need to replace the spaces with a "+" symbol. For example, the path library one/site area one would be instead be defined as library+one/site+area+one
- For a virtual portal configured to use the URL Context as its access point:
-
- http://httpserver:port/wps/seedlist/myserver/virtualPortalContext?SeedlistId=library/sitearea1/childsitearea2&Source=com.ibm.workplace.wcm.plugins.seedlist.retriever.WCMRetrieverFactory&Action=GetDocuments
Replace httpserver, port, virtualPortalContext, library and site area with values appropriate for the site. If the library name or site area names contain spaces, we will need to replace the spaces with a "+" symbol. For example, the path library one/site area one would be instead be defined as library+one/site+area+one
- For a virtual portal configured to use a different hostname as its access point:
-
- http://vhost:port/wps/seedlist/myserver/?SeedlistId=library/sitearea1/childsitearea2&Source=com.ibm.workplace.wcm.plugins.seedlist.retriever.WCMRetrieverFactory&Action=GetDocuments
Replace vhost, port, library and site area with values appropriate for the site. If the library name or site area names contain spaces, we will need to replace the spaces with a "+" symbol. For example, the path library one/site area one would be instead be defined as library+one/site+area+one
The seedlist ID can be any of the following:
- library
- library/site area
- library/site area/sub-site area/...
- the JCRID of a site area
- If the content to be indexed is secured, go to the Security tab and enter the user name and password of the user that will be used to access the secured site. We must then click Create on the search tab itself.
- If the site uses remote actions, we will need to filter these out of the search index. Go to the Filter tab:
- Type a name in the Rule Name field
- Select Apply rule while Collecting documents
- Select the rule type of Exclude
- Select the rule basis of URL text
- Type *&wcmAuthoringAction=* in the URL text field
- Click Create in the Filter tab
- Click Create.
If we have multiple parent site areas and want the searches to run across all site areas, we can create a content source for each of them in the same collection. If we don't want the searches to run across all parent site areas, create a separate collection for each parent site area or group of related parent site areas.
Search web content in a virtual portal
Search services and search collections are separate for individual virtual portals and are not shared between individual virtual portals. We set up an individual search service and separate search collections for each virtual portal. These collections can be used to crawl and search the same set of documents. If we are using a website that is shared across virtual portals, then to search that website in a virtual portal environment :
- Create a new search collection for the virtual portal. We can create a new content source by copying the URL from the original search collection.
- Create a new search component, or copy an existing search component, and configure it to use the new virtual portal search collection created in step 1.
- Create a new search form, using an HTML component, configured to use the search component created in step 2.
- Create a new content item to display the HTML component created in step 3.
Perform these steps for each virtual portal in the system.
Configure WCM search options
We can edit the following search options to manage how the search service works with WCM search forms
- Edit the SearchService.properties file.
WP_PROFILE/PortalServer/shared/app/config/wcmservices/SearchService.properties
- Specify values for the search parameters.
- elementName is the name of element we would
like to search for Metadata. Any valid element with that name in a searchable site area or content item will be crawled.
- key is the "key" specified in an element tag used as part of a search element design. In the previous example, the key of "meta" has been used. To render the content of the metaText element in a search element design, we would use the following tag:
-
<Element context="autoFill" type="content" key="meta"/>
- Only text elements and short text elements can be searched.
- Only site areas that have been configured to be searchable will be crawled.
Parameter Details SearchService.DateFormatString Set the date format when entering dates in search forms and for displaying search results. Enter a supported Java date format string. If not set, then the default format is MMM dd yyyy HH:mm:ss z. SearchService.RecrawlInterval The "recrawl interval" in hours. SearchService.BrokenLinksExpirationAge Default "Broken links expiration age" in days. SearchService.MetaFields Specify additional elements to crawl when searching for Metadata. The format for this parameter value is: elementName,key1 To specify more than one Metadata field maps, use the following format: -
elementName1,key1;elementName2,key2;elementName3,key3
For example, to crawl for Metadata in a text element named metaText:
SearchService.MetaFields=metaText,meta
SearchService.SearchSeed.ExcludeFileAttachments=false Set this to "true" to prevent file resource component attachments from being included in the search results. If set to false, the files stored in file resource elements in content items can also be searched. Files stored in file resource elements in a site area can also be searched so long as a default content item has been selected.
- elementName is the name of element we would
like to search for Metadata. Any valid element with that name in a searchable site area or content item will be crawled.
- Save the SearchService.properties file.
- Restart the portal for the new settings to take effect.
Previous topic: Indexing web content
Configure Search Center to search for web content
We can use the Search Center to search for web content by adding a web content search collection to the Search Center.
- Go to Administration > Search Administration > Manage Search >Search Scopes.
- Click New Scope.
- Click Select Locations and select the web content search collection.
- Complete the search scope and click OK.
Previous topic: Configure WCM search options
Crawl web content with search seedlists
Portal Search supports the use of seedlists to make crawling websites and their metadata more efficient and to provide content owners fine-grained control over how content and metadata are crawled. We can configure the portal to use seedlist support when crawling content generated with IBM WCM. By default Portal Search is configured to use seedlist format 1.0 when indexing content for search collections. When used with web content, seedlist format 1.0 makes it possible to use the web content page type to render content found in the search results on the corresponding web content page. We can also include custom metadata fields from a web content item that will appear in the search seedlist but not in the HTML source.Search seedlist 1.0 can make access control information available in a way that makes pre-filtering of contents possible. Pre-filtering provides the fastest filtering approach because it takes place in the search index level. An additional advantage of pre-filtering is that remote secured content sources can be searched from the portal. The filtering mode is defined as part of the search service configuration parameters. Support for generic seedlist 1.0 crawling is only available with IBM OmniFind Enterprise Edition Version 9.1 and later.
Previous topic: Configure Search Center to search for web content
Use the search seedlist 1.0 format
Portal Search supports the IBM WCM search seedlist 1.0 format by default.Search seedlist 1.0 provides several features:
- Use the web content page type to render content found in the search results on the corresponding web content page.
- Include custom metadata fields from a web content item that appear in the search seedlist but not in the HTML source.
- Search within a specific library or site area, across all web content libraries, or across a list of libraries.
- Perform incremental crawling of libraries for faster seedlist processing. For new items, only items added, changed, or deleted since the previous crawl are retrieved.
Older search collections created using seedlist format 0.9 cannot be reused or migrated to the new format.
Search seedlist 1.0 can make access control information available in a way that makes pre-filtering of contents possible. Pre-filtering provides the fastest filtering approach because it takes place in the search index level. With pre-filtering remote secured content sources can be searched from the portal. The filtering mode is defined as part of the search service configuration parameters.
- Enable support for search seedlist 1.0
- Use the custom metadata field search support
- Seedlist 1.0 REST service API
Enable support for search seedlist 1.0
To use Portal Search to crawl the web content and leverage features like web content pages enable seedlist 1.0 support for the Portal Search crawler.
- Log in to the portal as an administrator, and go to Administration.
- Create a new search collection.
- Click...
-
Manage Search | Search Collections
- Create a new search collection for the web content.
Be sure that the new search collection uses the portal search service edited in the previous steps.
- Click...
- Add the following custom properties to the WP ConfigService resource environment using the WAS console:
- wcm.config.seedlist.version=1.0
- wcm.config.seedlist.servletpath=/seedlist
- wcm.config.seedlist.metakeys=<metakey1>,<metakey2> (optional)
Use the custom metadata field search support
With the search seedlist 1.0 support, custom metadata fields specified on content items are added to the search seedlist as metadata information, without requiring the metadata to appear in the HTML source for the content items.
- Log in to the WAS console and go to....
-
Resources | Resource Environment | Resource Environment Providers | WP ConfigService | Additional Properties | Custom Properties | New
...and set...
-
wcm.config.seedlist.metakeys=<metakey1, metakey2, metakey3)
Add the names of the text element from the content that should be included in the search results to the wcm.config.seedlist.metakeys property. To add more than one text element, separate them with commas. The name of the text element on the content item that should be included in the search seedlist must match the name configured for this configuration key. For example, edit the WP ConfigService resource environment provider and add...
-
wcm.config.seedlist.metakeys=language,region
We can add a IBM WCM text component as an element with the name language to a content item or authoring template. In the content item we can enter the value german into the text component for the language. After saving the content item, the search crawler will add the value german into a metadata field called language within the search seedlist. Then we can filter the search results based on the metadata information.
- Click OK, and save the changes to the master configuration.
- Restart the portal.
Seedlist 1.0 REST service API
The WCM API for retrieving application content through a seedlist is based on the REST architecture style. To obtain seedlist content, third party crawlers or administrator applications need to construct and send only HTTP requests to the application servlet. All REST API requests are synchronous calls. The order of the parameters in the requests does not matter. The parameter names are case-sensitive and must be entered in the format described here. An HTTP error response (for example, status code 404) is generated in the following situations:
- An unknown or unsupported parameter is submitted as part of the request.
- WCM cannot resolve the site area path or ID.
- WCM cannot find any items.
- The search seedlist enterprise application (Seedlist_Servlet) is not running.
The request is a standard HTTP GET command. The URL is formed by combining the seedlist servlet host name, port number, and path, followed by a collection of input parameters separated by ampersand (&) characters. The input parameters are entered as name-value pairs. For example:
- http://host:port/wps/seedlist/myserver?SeedlistId=library&Source=com.ibm.workplace.wcm.plugins.seedlist.retriever.WCMRetrieverFactory&Action=action&Range=entries
- library
- One or more web content libraries, separated by commas. If no value is specified, all libraries are used.
- action
- The action to perform on the request. The following actions are available:
- GetDocuments
- Retrieves a list of content items with their associated information.
- entries
- For each seedlist page returned, this value specifies the number of entries in the list of content items. If no value is specified, 100 items are returned.
Examples
In these examples, replace the following variables with values that are appropriate for the environment:
- host
- vphost
- http_server
- port
- library
- site_area
- site_area_id
For the SeedlistId parameter, we can specify the value in the following formats:
- No value
- A specific library (for example, library1)
- A specific site area (for example, site_area1)
- A list of libraries, separated by commas (for example, library1,library2,library3)
- The JCRID of a site area
- Retrieve a maximum of 100 items from a stand-alone server using the path to the site area
- http://host:port/wps/seedlist/myserver?SeedlistId=library/site_area&Source=com.ibm.workplace.wcm.plugins.seedlist.retriever.WCMRetrieverFactory&Action=GetDocuments
- Retrieve a maximum of 200 items from a stand-alone server using the ID of the site area
- http://host:port/wps/seedlist/myserver?SeedlistId=site_area_id&Source=com.ibm.workplace.wcm.plugins.seedlist.retriever.WCMRetrieverFactory&Action=GetDocuments&Range=200
- Retrieve a maximum of 100 items from a specific library
- http://host:port/wps/seedlist/myserver?SeedlistId=library&Source=com.ibm.workplace.wcm.plugins.seedlist.retriever.WCMRetrieverFactory&Action=GetDocuments
- Retrieve a maximum of 100 items from all libraries
- To use all libraries, leave SeedlistId value empty.
http://host:port/wps/seedlist/myserver?SeedlistId=&Source=com.ibm.workplace.wcm.plugins.seedlist.retriever.WCMRetrieverFactory&Action=GetDocuments
- Retrieve a maximum of 100 items from a specified list of libraries
- http://host:port/wps/seedlist/myserver?SeedlistId=library1,library2&Source=com.ibm.workplace.wcm.plugins.seedlist.retriever.WCMRetrieverFactory&Action=GetDocuments
- Retrieve a maximum of 100 items from a cluster
-
When referencing a cluster, specify the request with the host name and port number of the HTTP server.
http://http_server:port/wps/seedlist/myserver?SeedlistId=library/site_area&Source=com.ibm.workplace.wcm.plugins.seedlist.retriever.WCMRetrieverFactory&Action=GetDocuments
- Retrieve a maximum of 100 items from a virtual portal configured to use the URL context as the access point
- http://http_server:port/wps/seedlist/myserver/virtual_portal_context?SeedlistId=library/site_area&Source=com.ibm.workplace.wcm.plugins.seedlist.retriever.WCMRetrieverFactory&Action=GetDocuments
- Retrieve a maximum of 100 items from a virtual portal configured to use a different host name as the access point
- http://vphost:port/wps/seedlist/myserver?SeedlistId=library/site_area&Source=com.ibm.workplace.wcm.plugins.seedlist.retriever.WCMRetrieverFactory&Action=GetDocuments
We can access the REST API for the WCM search seedlist 1.0 with a secured connection (HTTPS) or with an unsecured connection (HTTP). Depending on the method, use the correct port. However, if you access this REST API with an unsecured connection, we are automatically redirected to a secured connection.
- An empty value causes all libraries to be used.
- A specific library (for example, library1)
- A specific site area (for example, site_area1)
- A list of libraries, separated by commas (for example, library1,library2,library3)
- The JCRID of a site area
- GetDocuments retrieve all underlying documents.
- GetNumberOfDocuments returns the number of all underlying documents, typically for debug purposes. This value must be the same as the number of all documents returned from an appropriate GetDocuments request.
| Parameter | Default | Description |
|---|---|---|
| SeedlistID | No default; must be specified. | Identifies the seedlist. This parameter can be specified in the following ways:
|
| Start | 0 | Defines the start number for currently returned section. |
| Range | 100 | Number of returned entries for current section. |
| Date | No default. If not specified, all applicable results are returned. | Entries (documents) that were updated after this date are retrieved. The date format (compliant to standard ISO 8601) is the following : dateTtimezone, where date is yyyy-MM-dd, time is HH:mm:ss, and zone is ±hhmm. This format includes time zone information, which is critical if the client and server are in different time zones. > Proper HTML URL encoding must be performed (for example, represent the plus symbol + as %2B). |
| Action | GetDocuments | Defines requested action to execute.
|
| Format | ATOM | Defines the output format : ATOM / HTML/ XML. |
| Timestamp | No default. | Indicates the content provider timestamp from a previous crawling session. The timestamp represents for the content provider some snapshot of the content and allows the crawler to get only the content changes on the next crawling. This parameter is used for incremental crawling. |
Use the search seedlist 0.9
Although Portal Search is configured to support the search seedlist 1.0 format by default, we can reconfigure the portal to use the standard seedlist 0.9 format when searching for web content with the Search Center. For example, we might choose to use seedlist format 0.9 because to make use of older search collections or because you retrieve the seedlist 0.9 contents using the seedlist URL, which uses a different syntax from the URL used with the search seedlist 1.0 format.With IBM WebSphere Portal v7, search seedlist format 0.9 is deprecated. Although we can still use seedlist format 0.9, IBM recommends that you transition to seedlist format 1.0 to ensure future compatibility. To use the seedlist format 0.9, you essentially disable the default support for the seedlist format 1.0.
- Log in to the portal as an administrator nad click Administration in the tool bar.
- Disable search seedlist 1.0 support for IBM WCM.
- Log in to the WAS console (http://hostname.myhost.com:10027/ibm/console) and click...
-
Resources | Resource Environment > Resource Environment | Providers | WP ConfigService | Additional Properties | Custom Properties
- Remove the property named wcm.config.seedlist.version.
- Remove the property named wcm.config.seedlist.servletpath.
- If it exists, remove the property named wcm.config.seedlist.metakeys .
- Click OK, and save the changes to the master configuration.
- Restart the portal.
- Log in to the WAS console (http://hostname.myhost.com:10027/ibm/console) and click...
Manage tagging and rating for web content
When using tagging and rating with web content, the web content viewer provides additional scope options for the filtering of tagging and rating results. Because changes in the web content system can affect the accuracy of the tagging and rating information used by the portal, it is important to keep the scope information up to date by synchronizing the scopes on a regular basis.
Use tagging and rating scopes with web content
Scoping is typically used to filter the tag cloud or ratings overview according to hierarchical metadata attached to the resources being tagged. When applying tagging and rating to web content, we can scope these display components according to authoring template, category, or content item parent. We can configure the advanced settings of the web content viewer to limit results to show only tags or ratings associated with one or more of the following scopes:
- The parent of the content item being displayed (for example, a site area).
- The authoring template used to generate the content item or site area being displayed.
- The categories used to profile the content item being displayed. In this way, we can manage scopes from within the web content system simply by defining taxonomies for the content items.
Synchronize scopes for web content
When users are tagging or rating web content, the web content viewer provides the tagging or rating information to the portal, where it is stored. If information in the web content system changes, this can cause the tagging and rating information stored in the portal to be out of sync. This can happen, for example, if content items are moved or category information changes. To ensure the tagging and rating information is current, synchronize the scopes used for web content. We can set up automatic synchronization according to different conditions or perform a manual synchronization as needed.
- Synchronize scopes when items change
- Synchronize scopes after syndication
- Scheduling scope synchronization
- Synchronize scopes manually
Synchronize scopes when items change
To automatically perform scope synchronization whenever an item changes in the web content system, specify the tagging.syndication.enableItemModificationSynchronization property in the WCM configuration service. This type of synchronization only works for individual item changes. For example, this type of synchronization is not automatically performed when an entire site area or folder is moved. To synchronize scopes after such a change, we can perform synchronization manually.
- Log in to the WAS console, and go to...
-
Resources | Resource Environment | Resource Environment | Providers WCM WCMConfigService | Additional Properties | Custom Properties
- Add the tagging.syndication.enableItemModificationSynchronization property.
- Click New, and enter the property name tagging.syndication.enableItemModificationSynchronization.
- Set the string value to true.
- Click OK, and save the changes to the master configuration.
- Restart the portal.
Synchronize scopes after syndication
To automatically perform scope synchronization whenever syndication occurs, specify the tagging.syndication.enableTagSynchronization property in the WCM configuration service.
- Log in to the WAS console and go to...
-
Resources | Resource Environment | Resource Environment Providers | WCM WCMConfigService | Additional Properties | Custom Properties
- Add the tagging.syndication.enableTagSynchronization property.
- Click New, and enter the property name tagging.syndication.enableTagSynchronization.
- Set the string value to true.
- Click OK, and save the changes to the master configuration.
- Restart the portal.
Scheduling scope synchronization
We can schedule scope synchronization to be performed at specific times by defining the schedule with the XML configuration interface.
- Verify whether any scheduled synchronizations have already been defined for the portal.
- Create an export file we can use with the xmlaccess command. Here is an example of a request we can use to query the current configuration:
<?xml version="1.0" encoding="UTF-8"?>
<request type="export" xmlns:xsi="http://www.w3.org/2001/XMLSchema-instance" xsi:noNamespaceSchemaLocation="PortalConfig_8.0.0.xsd" >
  <portal action="locate">
    <task action="export" name="com.ibm.portal.cp.SynchronizationTask"/>
  </portal>
</request>
- Run the xmlaccess command, specifying the export file. The resulting output file contains any scheduled synchronization times that are defined in the portal.
- Create an export file we can use with the xmlaccess command. Here is an example of a request we can use to query the current configuration:
- Set the synchronization schedule.
- To set a time for a scheduled synchronization, create an XML request document. For example, to schedule a synchronization
to occur at 15:36 hours every day, we would use a request like this:
<?xml version="1.0" encoding="UTF-8"?>
<request type="update" xmlns:xsi="http://www.w3.org/2001/XMLSchema-instance" xsi:noNamespaceSchemaLocation="PortalConfig_8.0.0.xsd">
  <portal action="locate">
    <task action="create" name="com.ibm.portal.cp.SynchronizationTask">
      <startTime>15:36</startTime>
    </task>
  </portal>
</request>
For each scheduled synchronization, create a separate task element, and specify the time with a startTime element.
- Run the xmlaccess command, specifying the file containing the scheduling request. Scope information for the web content system will then be synchronized automatically according to the schedule we defined.
- To set a time for a scheduled synchronization, create an XML request document. For example, to schedule a synchronization
to occur at 15:36 hours every day, we would use a request like this:
- Optional: To set a minimum time before subsequent synchronizations are performed, specify the tagging.syndication.minimumTagSynchronizationTimeInterval property in the WCM configuration service.
- Log in to the WAS console, and go to...
-
Resources | Resource Environment | Resource Environment Providers | WP ConfigService | Additional Properties | Custom Properties | New
- Enter the property name tagging.syndication.minimumTagSynchronizationTimeInterval.
- Set the string value to the number of seconds between synchronizations.
- Click OK, and save the changes to the master configuration.
- Restart the portal.
- Log in to the WAS console, and go to...
Synchronize scopes manually
If we have not enabled automatic synchronization of the scopes used for web content or to perform synchronization outside of a scheduled synchronization period, we can manually start the synchronization process.
To manually perform synchronization, run the cp-sync configuration task or submit an XML request to the portal using the XML configuration interface.
- To perform synchronization with a configuration task, run the following task
-
cd WP_PROFILE/ConfigEngine
ConfigEngine.bat cp-sync -DWasPassword=foo -DPortalAdminPwd=foo - Create an XML request file and submit it using the xmlaccess command.
Here is an example of a request we can use to start synchronization:
<?xml version="1.0" encoding="UTF-8"?>
<request type="update" xmlns:xsi="http://www.w3.org/2001/XMLSchema-instance" xsi:noNamespaceSchemaLocation="PortalConfig_7.0.0.xsd">
  <portal action="locate">
    <task action="create" name="com.ibm.portal.cp.SynchronizationTask"/>
  </portal>
</request>