Creating Web services using the Web Service wizard
The Web Service wizard assists you in creating a new Web service, configuring it for deployment, and deploying the Web service to a server. To create a Web service from a JavaBean, do these steps:

| In the Java EE perspective, expand RAD75WebServiceWeb2 Ć Java Resources: src Ć itso.rad75.bank.model.simple.
|
|
| Right-click SimpleBankBean.java and select Web Services Ć Create Web service. The Web Service wizard starts (Figure | 8-6).
|
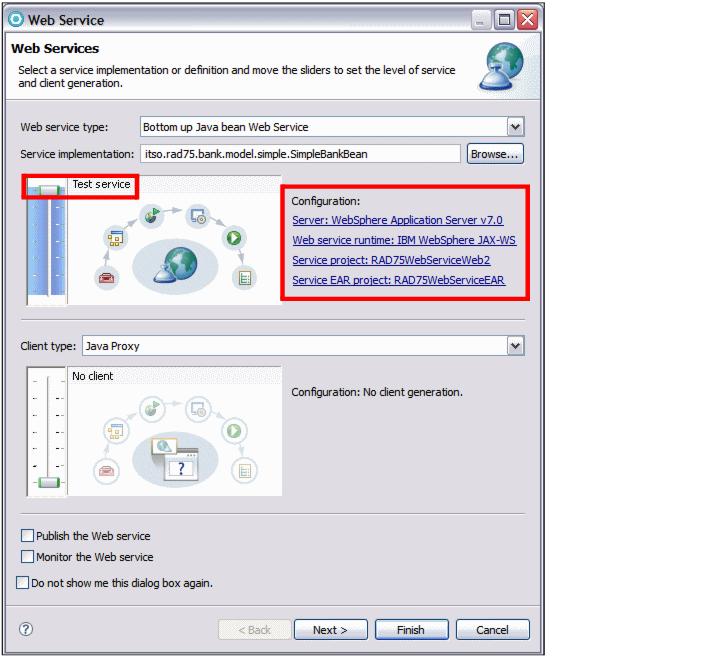
Figure 18-6 Web Service wizard: Web Services page
|
| Select the Web Services options in the Web Services page:
|

 Select Bottom up Java bean Web Service as your Web service type. This should be selected by default.
|
|
Move the slider for the service to the Test position (top). This provides options for testing the service in subsequent pages of the wizard.
|
|
Behind the scenes:
The slider allows you to select the stages of Web services development. It allows more granular division of Web services development:
|
| Develop: Develops the WSDL definition and implementation of the Web service. This includes such tasks as creating the modules which will contain the generated code, WSDL files, deployment descriptors, and Java files when appropriate.
|
|
| Assemble: Ensures that the project which will host the Web service or client will get associated to an EAR when required by the target application server.
|
|
| Deploy: Creates the deployment code for the service.
|
|
| Install: Installs and configures the Web module and EARs on the target server. If any changes to the endpoints of the WSDL file are required, they are made in this stage.
|
|
| Start: Starts the Web service after the service has been installed on the server.
|
|
| Test: Provides various options for testing the service, such as using the Web Service Explorer or sample JSPs.
|
|
|
Ensure that the following server-side configurations are selected:
|
 Server: WebSphere Application Server v7.0
|
|
Web service runtime: IBM WebSphere JAX-WS
|
|
Service project: RAD75WebServiceWeb2
|
|
Service EAR project: RAD75WebServiceEAR
|
|
If you click the hyperlink Server: WebSphere Application Server v7.0, the Service Deployment Configuration dialog is displayed (Figure | 8-7).
|
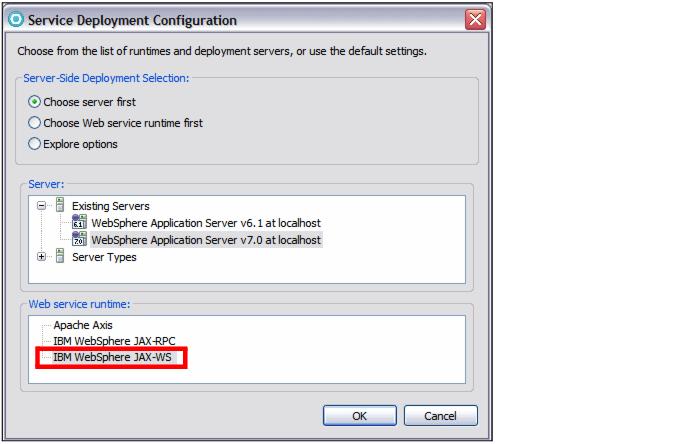
Figure 18-7 Web Service wizard: Service Deployment Configuration
|
This page allows you to select the server and runtime. We leave this page as default and click Cancel to exit this page.
|
|
Clear Publish the Web service (we do not publish to a UDDI registry) and clear Monitor the Web service (we will do that later).
|
|
Click Next in the Web Services page.
|
|
| In the WebSphere JAX-WS Bottom Up Web Service Configuration dialog (Figure | 8-8):
|
|
Leave the Delegate class name as default (SimpleBankBeanDelegate).
|
The delegate class is a wrapper that contains all the methods from the Java bean as well as the JAX-WS annotation the runtime recognizes as a Web service.
|
Leave the Java to WSDL mapping style as default.
|
The style defines encoding style for messages sent to and from the Web service. The recommended WSDL style is Document Wrapped.
|
Select Generate WSDL file into the project.
|
Because the annotations in the delegate class are used to tell the runtime that the bean is a Web service, a static WSDL file is no longer generated into your project automatically. The runtime can dynamically generate a WSDL file from the information in the bean. Select this to generate a static WSDL file for the Web service. This is a convenient option if you plan to create the client at a later time or publish the WSDL for other users.
|
Select Generate Web service deployment descriptor.
|
For JAX-WS Web services deployment information is generated dynamically by the runtime; static deployment descriptors are optional. Selecting this check box will generate the deployment descriptors.
|
Click Next.
|
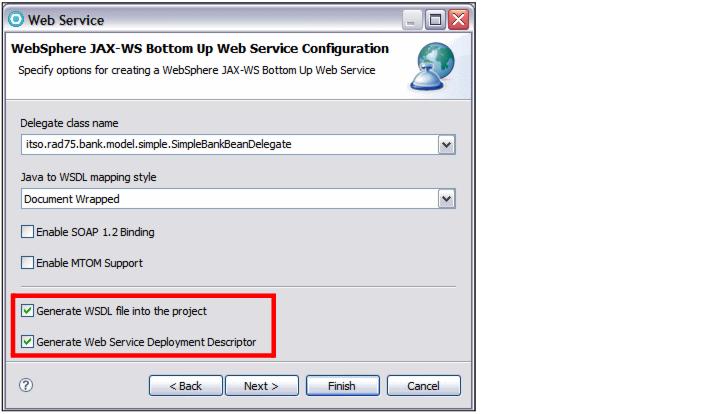
Figure 18-8 Web Service wizard: Service Endpoint Interface Selection
|
Select WSDL Target Namespace, and enter http://bank.rad75.itso/ as the WSDL Target Namespace.
|
|
Select Configure service name, and enter BankService as the WSDL Service Name.
|
|
Select Configure WSDL Port Name, and enter BankPort as the WSDL Port Name.
|
|
Click Next.
|
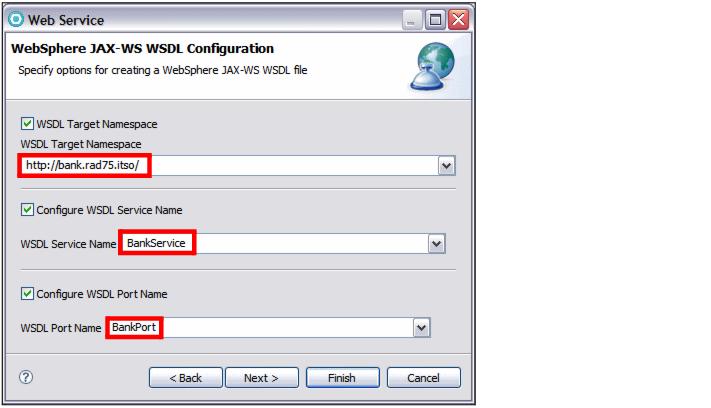
Figure 18-9 WebSphere JAX-WS WSDL Configuration page
|
| The Web service is generated and deployed to the server.
|
|
| The Test Web Services dialog (Figure | 8-10) shows because we moved the slider for the service to the Test position. Click Launch to launch the Web Services Explorer.
|
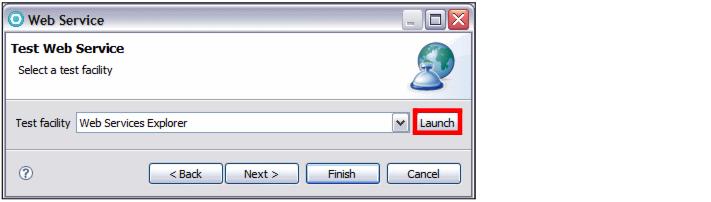
Figure 18-10 Web Service wizard: Test Web Service
|
| The Web Services Explorer opens in an external Web browser.
|
|
| The Web services are available at two endpoints: one is the HTTP endpoint and the other is the HTTPS endpoint. If your server is secured, the endpoint of the Web service listed in the Web service explorer should be:
|
https://localhost:944x/RAD75WebServiceWeb2/BeanService
To test the HTTPS protected Web service with the Web Services Explorer, configure the workbench JRE to work with a secured server. The signer certificate from the WebSphere Application Server must be imported into the Eclipse trust store. This involves s complicated SSL configuration. To make things easier, you can just send the SOAP request to the HTTP endpoint:
|
In the endpoints section, click Add and then enter the following endpoint:
|
http://localhost:908x/RAD75WebServiceWeb2/BankService
|
Click Go.
|
|
Select the getNumAccounts operation, then click Add.
|
|
Enter a value for the customer ID, such as 111-11-1111, and click Go.
|
|
The result 2 is displayed in the status pane.
|
|
Optionally try other operations.
|
|
| Close the Web Services Explorer.
|
|
| Click Finish to exit the Web Service wizard.
|
You have successfully created Web services from a Java bean.