Publish a project
Publishing a project consists in pushing a local project onto the collaboration server in order to make it available for the other test team members.

The publishing action is driven through a wizard. The wizard lists the steps to publish all the changes brought to a local project:
- Selecting the elements among the ones which can be published
- Entering a comment for the publication
- Completing the publication
- Warning: Two members may well bring changes on the same section in the design tree. This may generate conflicts. Although NeoLoad can handle such conflicts in most situations, it is strongly advised to read Test in collaborative mode.
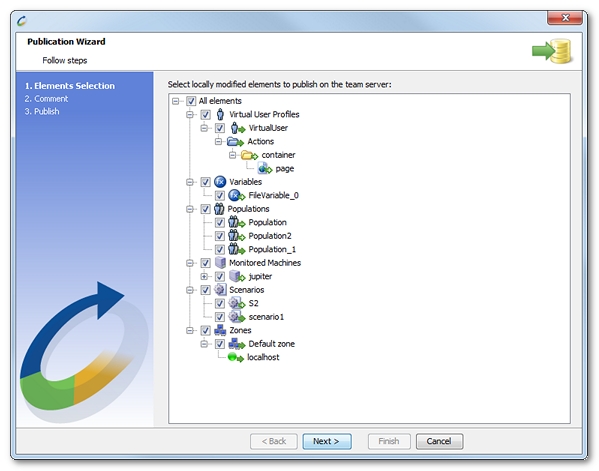
To open the project publication wizard, the Share > Publish Project command must be chosen or the Publish project elements on Collaboration Server button in the toolbar must be clicked. The Elements Selection screen is displayed.

The elements to publish are listed in the form of a design tree, making it possible to publish a selection of them:
- Servers to publish all servers
- <host> to publish only the <host> server
- Virtual User Profiles to publish all Virtual Users
- <virtual_user> to publish only the <virtual_user> Virtual User. In order to be legible and although the publishing process manages the content of Virtual Users down to the requests level, the wizard develops Virtual Users down to pages level only.
- Shared Containers to publish all Containers
- <shared_container> to publish only the <shared_container> Container
- Variables to publish all Variables
- <variable> to publish only the <variable> Variable
- Project Settings to publish all project Preferences
- <setting> to publish only the <setting> preference
- Populations to publish all Populations
- <population> to publish only the <population> Population with its Virtual User Profiles breakdown and its parameters (browser profile, WAN emulation, etc.)
- Monitoring Agents to publish all monitoring agents
- localhost to publish only the monitoring agent for the localhost
- <machine> to publish only the monitoring agent for the <host> machine
- Monitored Machines to publish all machines
- <machine> to publish only the <machine> machine and its monitors
- <monitor> to publish only the <monitor> monitor for the <machine> machine, with its associated monitors
- <machine> to publish only the <machine> machine and its monitors
- Scenarios to publish all scenarios
- <scenario> to publish only the <scenario> scenario with its duration and load policies
- Load Generators to publish all Load Generators
- Default zone to publish all the Load Generators for the default zone
- <machine> to publish only the Load Generator available on the <machine> machine, with the proxy settings
- localhost to publish only the Load Generator available on the local host machine
- <zone> to publish all the Load Generators for the <zone> zone
- <machine> to publish only the Load Generator available on the <machine> machine in this <zone> zone, with the proxy settings
- Default zone to publish all the Load Generators for the default zone
- Tip: By default, the All elements entry is selected. The option includes the whole project for the publication process. This ensures that the project on the collaboration server remains consistent. However, some elements can be unselected before publishing the project to prevent inconsistencies within the project configuration (e.g. a request without a server to query).
Every element which can be published carries an icon bringing information about the kind of changes, and the way of the collaborative transaction. The publishing direction is always from the local machine toward the server. It is represented with a right-oriented green arrow.
|
Icon |
Meaning |
|---|---|
|
|
Green arrow with a + (plus) sign: The vu_1 Virtual User is going to be pushed onto the server. |
|
|
Green arrow: The container Container is going to be modified on the server. |
|
|
Green arrow with a – (minus) sign: The delay delay is going to be deleted on the server. |
NeoLoad publishes only the elements selected in the tree view. Depending on the type of the selected elements, NeoLoad may also select the associated elements. For example, when elements are renamed, NeoLoad automatically selects the deletion and the addition of the elements.
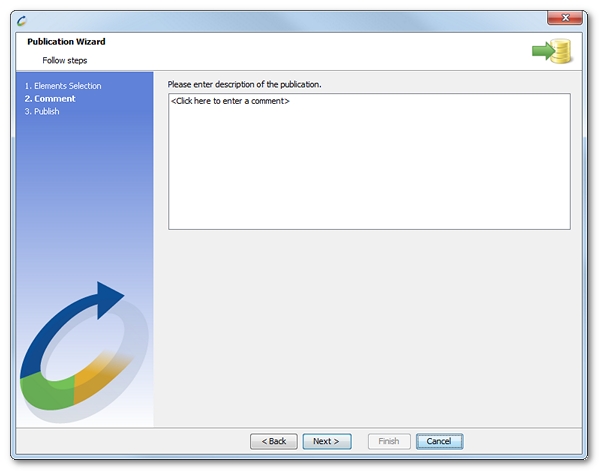
In the publication wizard, a click on Next displays the Comment dialog.

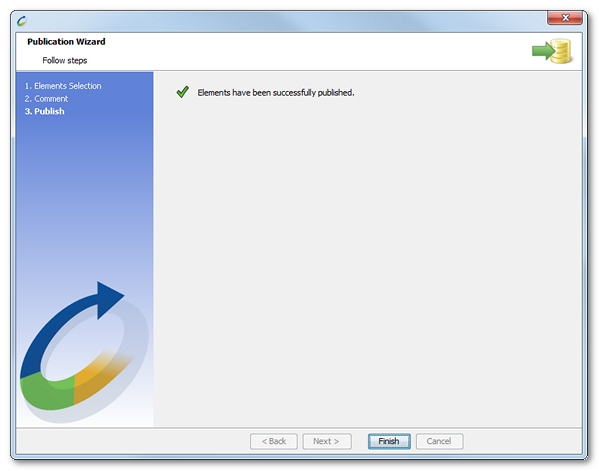
A description of the publication can be entered. The comment will be available to the other team members who update their local project with the elements published. A click on Next displays the Publish dialog. All selected elements are pushed onto the collaboration server.

A click on Finish closes the publication process.
- Warning: Like other collaborative actions, publishing a project causes the complete deletion of the Cancel/Recover actions list.
When, on publishing a project, a subset of selected element has been modified and published by another team member, NeoLoad determines that the elements to publish are out of date and need be updated before they are published. Publication is only available after the project is updated and the potential conflicts are solved. See Update a project.
- To publish a project
- Click Share > Publish Project.
- In the Publication Wizard first screen, select the elements you want to load onto the collaboration server.
- Click Next.
- In the Comment screen, you can enter a description for the other team members.
- Click Next to launch the publication process.
- Click Finish to close the Publication Wizard.