Tutorial: Customizing Web 2.0 and Web services to support personalization > < Previous | Next >
Customizing the store
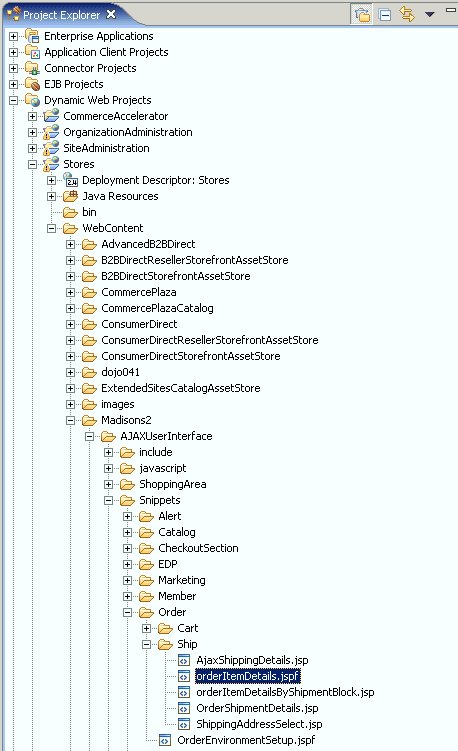
This section explains how to customize the store. Add engraving fields into your order item jsp- In your Project Explorer navigate to Dynamic Web Projects/Stores/WebContent/Madisons2/AJAXUserInterface/Snippets/Order/Ship Note: If the Madisons2 folder does not appear, right-click
WebContent and refresh the folder.

- Open the orderItemDetails.jspf file. Click the source code, click
the Source tab and find these two lines of code
<c:forEach var="discounts" items="${orderItem.orderItemAmount.adjustment}" varStatus="status"> - Directly above the for loop tag that you searched for, is a <tr>
tag. Input the below code, directly above the <tr> tag
<c:choose> <c:when test="${!empty orderItem.engravingText}"> <%-- This is an engravable item --%> <c:forEach var="i" begin="0" end="${fn:length(orderItem.engravingText)-1}"> <tr> <td class="right"> <b><fmt:message key="ENGRAVING_TITLE" bundle="${storeText}"/></b> </td> <td class="left"> <input type="text" name="engravingTextField" id="engravingTextField<c:out value="${status.count}"/>" size="25" class="input" value="<c:out value="${orderItem.engravingText[i].value}"/>"> </td> <td> <select size="1" name="engravingSizeBox" id="engravingSizeBox<c:out value="${status.count}"/>" style="border: 1px solid #7F9DB9; font-size: 9pt; font-face: Verdana; width: 90px"> <c:choose> <c:when test="${empty orderItem.engravingText[i].size}"> <option selected value=''><fmt:message key="SIZE_PROMPT" bundle="${storeText}"/></option> </c:when> <c:otherwise> <option selected value="${orderItem.engravingText[i].size}">${orderItem.engravingText[i].size}</option> </c:otherwise> </c:choose> <option value='<fmt:message key="SIZE_OPTION1" bundle="${storeText}"/>'><fmt:message key="SIZE_OPTION1" bundle="${storeText}"/></option> <option value='<fmt:message key="SIZE_OPTION2" bundle="${storeText}"/>'><fmt:message key="SIZE_OPTION2" bundle="${storeText}"/></option> <option value='<fmt:message key="SIZE_OPTION3" bundle="${storeText}"/>'><fmt:message key="SIZE_OPTION3" bundle="${storeText}"/></option> <option value=''></option> </td> <td> <select size="1" name="engravingFontBox" id="engravingFontBox<c:out value="${status.count}"/>" style="border: 1px solid #7F9DB9; font-size: 9pt; font-face: Verdana; width: 90px"> <c:choose> <c:when test="${empty orderItem.engravingText[i].font}"> <option selected value=''><fmt:message key="FONT_PROMPT" bundle="${storeText}"/></option> </c:when> <c:otherwise> <option selected value="${orderItem.engravingText[i].font}">${orderItem.engravingText[i].font}</option> </c:otherwise> </c:choose> <option value='<fmt:message key="FONT_OPTION1" bundle="${storeText}"/>'><fmt:message key="FONT_OPTION1" bundle="${storeText}"/></option> <option value='<fmt:message key="FONT_OPTION2" bundle="${storeText}"/>'><fmt:message key="FONT_OPTION2" bundle="${storeText}"/></option> <option value='<fmt:message key="FONT_OPTION3" bundle="${storeText}"/>'><fmt:message key="FONT_OPTION3" bundle="${storeText}"/></option> <option value=''></option> </td> <td> <input type="button" class="button" value="Save" onclick="shipmentPageJS.updateCartEngraving( document.getElementById('engravingTextField<c:out value="${status.count}"/>').value, document.getElementById('engravingSizeBox<c:out value="${status.count}"/>').value, document.getElementById('engravingFontBox<c:out value="${status.count}"/>').value, '<c:out value='${itemId}'/>');"/> </td> </tr> </c:forEach> </c:when> </c:choose> - OrderItemDetails.jspf file is only a fragment, the save will not take effect until after you have saved the jsp files it is associated with. Open up both the AjaxShippingDetails.jsp and orderItemDetailsByShippingBlock.jsp. Make a non-programmatic change to both files, like a carriage return or space and then save and close the files.
Customizing the java script logic to send engraving parameters to Client API
- In your Project Explorer navigate to Dynamic Web Projects/Stores/WebContent/Madisons2/AJAXUserInterface/javascript

- Open the shipmentPage.js file. At the bottom of the file find the second last bracket, this bracket represents the end of the block for the last function. Add a comma after this bracket, like this },
- Copy the new function below into the file after your comma but before
the last bracket. The last bracket represents the end of the shipmentPageJS
block and your new function must exist inside. Save and close shipmentPage.js
updateCartEngraving:function(engravingTextBox,engravingSizeBox,engravingFontBox,
orderItemId){
// summary : This function updates the Order to include engraving
information
// description : This function updates the Order with new engraving
specified by user for
// particular order item. Text, font and size are sent to the
Client API
// engravingTextBox: DOM Node
// DOM node representing the engravingText testbox.
// engravingSizeBox: DOM Node
// DOM node representing the engravingSize testbox.
// engravingFontBox: DOM Node
// DOM node representing the engravingFont testbox.
// orderItemId : Number
// OrderItemId for the Item being updated.
// assumptions : None.
// dojo API : None.

var engravingText = engravingTextBox;
var engravingSize = engravingSizeBox;
var engravingFont = engravingFontBox;

var params = [];
params.orderId = ".";
params["storeId"] = this.storeId;
params["catalogId"] = this.catalogId;
params["langId"] = this.langId;
this.updateParamObject(params,"orderItemId",orderItemId,false,-1);
this.updateParamObject(params,"engravingText",engravingText,false,-1);
this.updateParamObject(params,"engravingSize",engravingSize,false,-1);
this.updateParamObject(params,"engravingFont",engravingFont,false,-1);
wc.service.invoke("AjaxUpdateOrderItem",params);
cursor_wait();
}
Add your text to the properties file
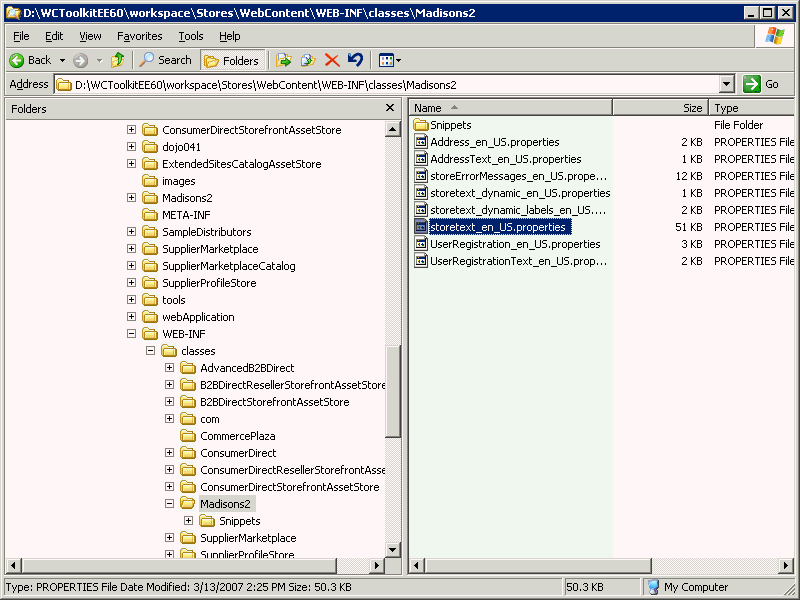
- Use explorer, navigate to your WCToolkit\workspace\Stores\WebContent\WEB-INF\classes\Madisons2
directory

- Open storetext_en_US.properties file with a text editor
- Paste the below text into the bottom of the file
#Engravings for Checkout Page
ENGRAVING_TITLE=Engraving Text:
SIZE_PROMPT=Select Size
FONT_PROMPT=Select Font
SIZE_OPTION1=Small
SIZE_OPTION2=Medium
SIZE_OPTION3=Large
FONT_OPTION1=Arial
FONT_OPTION2=Tunga
FONT_OPTION3=Courier
- Navigate to WCToolkit\WCToolkitEE60\workspace\Stores\JavaSource\Madisons2 and open the storetext_en_US.properties file in this directory.
- Paste the same text into the bottom of this file as well.
- Save and close both of the files.