Create communities
Overview
Communities can be public or restricted. Public communities are visible to everyone in the organization and, depending on the level of access specified, can be available to everyone. Public communities can also have moderated access that requires ownership approval before we can join. Restricted communities are available only to those people who are added to the community as members. Restricted communities are not visible to people who do not have community membership. Restricted communities can have external access. That is, community owners can invite people from outside the organization (external users) to join this community.
Communities that have external access cannot work with the CCM Library and Linked Library widgets. If the Connections implementation is configured to work with CCM, the Library and Linked Library widgets do not appear in the Application palette of communities with external access.
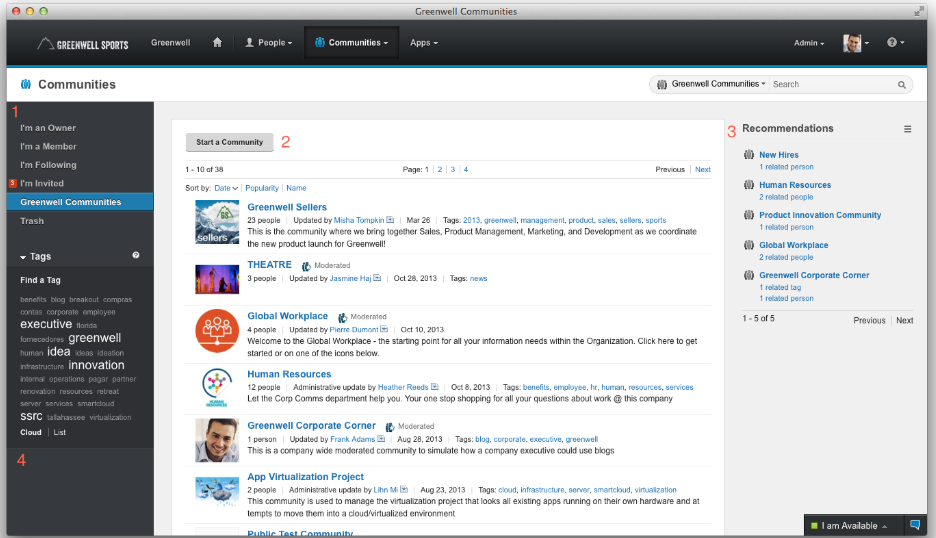
- View Communities that I'm a Member, I'm an Owner, or that I'm Following. Or view all Communities or all those of which we are interested in becoming a member by using this menu.
- Start a Community quickly by providing a name, description, and tag(s).
- Recommendations to other Communities of possible interest are listed in this section. All recommendations are based on the data collected from your social network and social data.
- Browse the Community content by tags, filtering on frequently used tags as needed.
Start a community
- From any view in the Communities tab, click Start a Community.
- If we are not already logged in, we are prompted for a user name and password. Provide the requested information, and then click Log In.
- Required: In the Name field, type a name for the community. Choose a name that identifies the purpose of the community.
We cannot have multiple public or moderated communities with the same name, however we can have multiple restricted communities with the same name. This naming system allows a public and a restricted community with the same name, or a moderated and a restricted community with the same name.
- Required: Specify the level of access you want for the community :
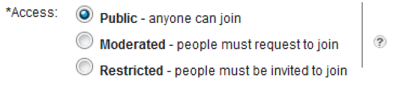
Option Description Public Community is public with anyone within the organization able to join. Moderated Community is public but for users within the organization to request membership. Restricted Community to be restricted. Available only to those people who are added to the community as members or invited to join by a community owner. - If we are creating a restricted community and to allow community owners to invite external users to join the community, select the External access check box.
Only certain people with specific privileges can see and select the External access check box.
If we create a restricted community and you do not select the External access check box, the restricted community is created as an internal community and no external users can be added to it.
We cannot invite external users to join public or moderated communities.
- Type a description of the purpose of the community in the Description field. Be as specific as possible. Identify the community's goals.
- Enter one or more tags in the Tags field. Tags are keywords defined to provide users with more ways to identify what a community is all about. Tags must be a single word or multiple words that are connected with underscores or hyphens. For example, a community that deals with accessibility issues might have the tags accessibility and low-vision. Tags give users more than one way to find a community of interest. The tags defined here display with the community in the Public Communities view.
- Click Access Advanced Features and enter the names of the people to add as community members.
We can search for names from the organization's directory. Type-ahead
predicts the name that we are typing by comparing it to names in the directory the administrator specified. If it proposes the name you want, click to add it.
Hover the mouse over a person's name to see if they are an external user
 .
To not add community members now, we can add them at a later stage, for more information, see How do I add community members?
.
To not add community members now, we can add them at a later stage, for more information, see How do I add community members?
To add community owners, click the Down arrow next to Members and select Owners, then repeat the process that is described in this step for adding community members.
- To generate a web address for your community, enter a one-word, unique term that identifies the community in the Web Address field. You and other community members can use this web address to access the community. These terms are case-sensitive, so community members must use the correct case when they access the community with the URL.
To not create a community web address, leave this field blank.
Because web addresses must be kept unique, other users might learn that a particular web address is in use even if it is for a restricted community. Avoid web addresses that are sensitive or confidential in nature.
Be sure to bookmark the full web address that displays when we complete the Web Address field to save the direct URL to the community.
- Certain keywords with a technical meaning, such as html or Atom, are reserved and cannot be used in community web addresses. If we enter a reserved keyword, an error message is displayed, and we are prompted to enter a different keyword.
- If the web address contains a non-alphanumeric character, such as an ampersand (&), we must escape the character by using a forward slash ( / ) before the character.
- If we do not see the option to create a web address for your community in the user interface, the administrator disabled this option.
- Certain keywords with a technical meaning, such as html or Atom, are reserved and cannot be used in community web addresses. If we enter a reserved keyword, an error message is displayed, and we are prompted to enter a different keyword.
- Click Upload a Community Image to browse for an image to associate with the community on the overview page. The image must be 155 x 155 pixels in size, and it can be in .jpeg, .gif, or .png format.
There are no file size restrictions. However, because the image is resized to 15 KB to fit the allocated space in the user interface, the server takes more time to process larger files.
Image resizing does not support all image formats. If we encounter problems with uploading an image, converting the image to a different format often works.
- To apply a different theme to the community, click Change Community Theme and select a theme.
- If moderation is available and editable at the site, we can select from the following options:
- Owners must approve all content (widgets) where widgets might be one or more of the following widgets: Blog, Files, or Forums. When this option is enabled, community owners can review unpublished content that is submitted for approval and decide whether to publish it to the community or reject it.
- Viewers can flag inappropriate content (widgets) where widgets might be one or more of the following widgets: Blog, Files, or Forums. When this option is enabled, community owners can review content that is flagged as inappropriate by other users. Community owners can then decide whether to keep the content or remove it from the community.
- Owners must approve all content (widgets) where widgets might be one or more of the following widgets: Blog, Files, or Forums. When this option is enabled, community owners can review unpublished content that is submitted for approval and decide whether to publish it to the community or reject it.
- Click Save.
Related concepts:
Customize the community
How do I add community members?
Manage the communities
Moderating community content