Null Behavior: Dealing with missing Attributes/values
To deal with missing values we can either use the built-in Null Behavior feature of Attribute Maps, or we can detect and handle this yourself.
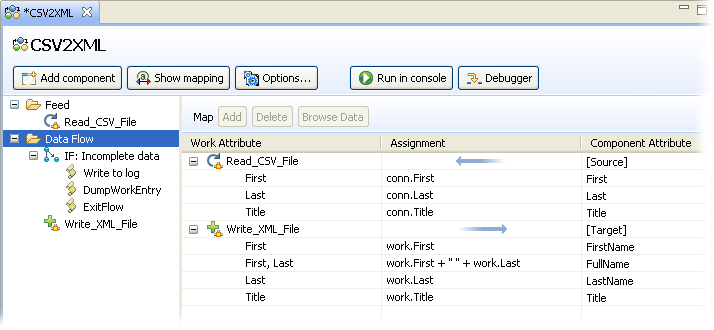
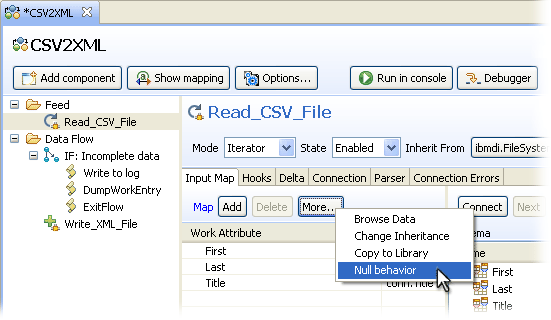
Let's start by configuring Null Behavior. Do this by right-clicking on the 'Read_CSV_File' Connector in the Attribute Maps panel (not in the AssemblyLine components tree-view) and selecting Null Behavior from the context menu1.
Null Behavior button for AL-level configuration
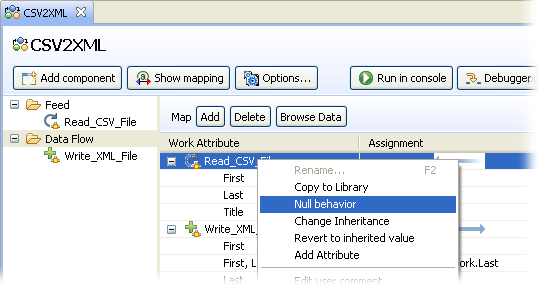
This brings up the Null Behavior dialog where we can configure both how null is defined - which can vary depending on the type of source you are reading from - as well as how this situation should be handled. By default, null means that an Attribute is missing, and the default handling is to remove this Attribute from the mapping operation. The end result of this is that no Attribute with the specified name will be found in the receiving Entry.
Once in the Null Behavior dialog, use the radio buttons on the right to define null as an empty string value, and then those on the left to specify a default value of "* missing *" to be returned in this case.
Null Behavior configuration dialog

Re-run your AssemblyLine and refresh the browser window displaying the contents of Output.xml. The entry for 'Roger' should now have the special null value ("* missing *") for 'Title' and 'LastName'.
Result in the XML output of Null Behavior settings
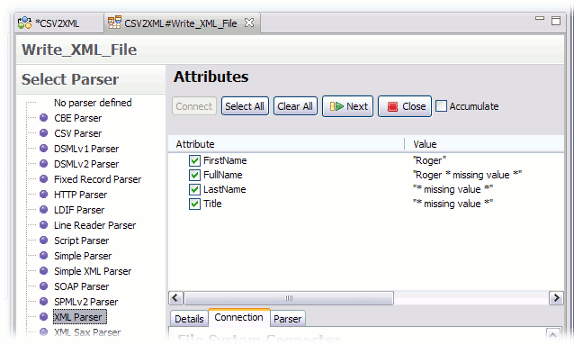
This is somewhat better - at least it's a conscious choice. However, sometimes an entry is just too incomplete to continue processing. In our scenario we need at least values for 'FirstName' and 'LastName' in order to compute 'FullName', so we will now add filtering logic to our AssemblyLine to ensure that all entries fulfill this requirement.
Start by clicking the Insert Component button again and then choosing Control/Flow Components from the radio buttons at the left. Then select 'IF' in the list, name it 'Incomplete data'2 and press Finish.
Selecting the IF branch component
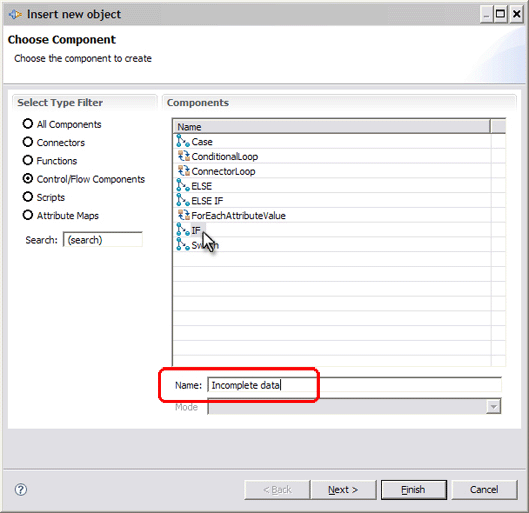
Now drag this IF branch above the output Connector. The IF branch editor area lets you add your conditions.
Editing conditions for the IF branch
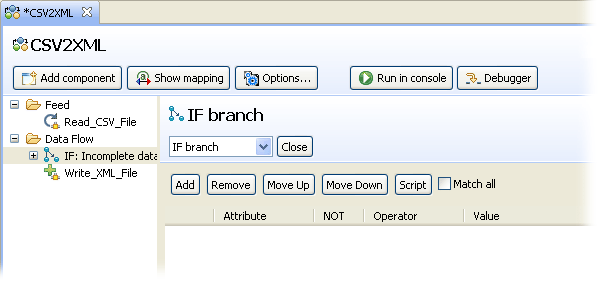
Here we have the option of adding simple conditions or writing a snippet of Script - or both. Note the Match All checkbox that decides whether your Conditions (simple and scripted) are evaluated with an implied OR between them when this is unchecked, or with AND when it is selected.
Add a simple condition by pressing the Add button. Then pick the 'First' Attribute from the leftmost drop-down and then the 'has value(s)' operator. Negate this condition by toggling the not column value. Nothing needs to be specified in the right-most field when using the 'has value(s)' operator. Now add a similar has no values condition for the Attribute named 'Last' as well. Finally, make sure the Match All checkbox is unchecked – which implies Match Any - so that the lack of values for either Attribute will trigger this branch.
Adding simple Conditions to the IF branch
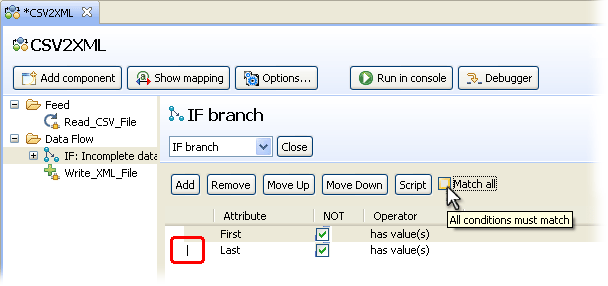
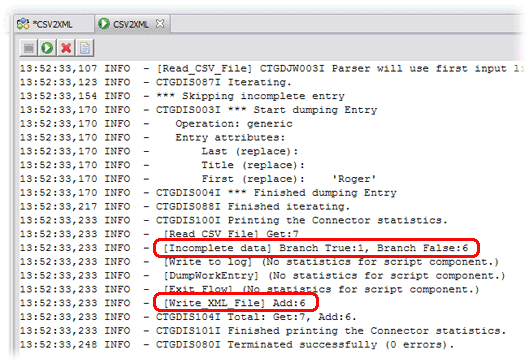
An IF Branch diverts the execution flow of the AssemblyLine whenever the specified Conditions evaluate to true. In your case, processing will continue to those components placed under the branch if either the 'First' or 'Last' Attributes do not have values assigned to them - or even if either does not exist in the Work Entry. In other words, the 'has value(s)' operator also includes the check for 'exists'.
Now expand the IF branch and double-click on the placeholder displayed under it to insert a component here. In the Choose Component dialog, click on the radio button for Scripts, select the one called 'Script' and press Finish. Rename this Script component (also called an 'SC') to 'Write to log' and then enter the following snippet of JavaScript in it3:
