Example: IBM WebSphere Portal Configuration
- Transfer databases to SQL Server
- Change JCR database auto growth settings
- Open firewall ports
- Install dmgr node
- Add the primary node to the cell
- Configure Active Directory
- Create the secondary node
- Register portal as a Windows service
- Configure session replication
- Increase historical logs
- Configure IIS with Portal
- Create the remote search node
- Deploy the search application
- Configure remote search service
- Set up certificate expiration monitoring
- Post VIP Configuration
- Mobile Configuration
- Portal server performance tuning tool
- What to do next
Appendix
- Restart WebSphere Portal
- Export WCM libraries
- Import WCM libraries
- EJPJO0032E: Unable to create Webscanner
- Install Fiddler
Transfer Databases to SQL Server
- Verify connectivity to SQL Server Management Studio.
-
Windows Start | Run | ssms.exe

- Verify SQL Server passwords are non-expiring
- Open the command prompt as administrator...
- Setup Microsoft SQL Server 2012 XA support
- Copy driver files...
Copy...
-
C:\IBM\drivers\auth\x64\sqljdbc_auth.dll
...to...
-
C:\IBM\drivers\
Copy sqljdbc41.jar to...
-
C:\IBM\drivers\
- Copy...
-
C:\IBM\drivers\xa\x64\sqljdbc_xa.dll
...to database server...
-
C:\Program Files\Microsoft SQL Server\MSSQL11.MYCO\MSSQL\Binn
- Copy driver files...
- Enable MS DTC for XA transactions...
- Select Control Panel > Administrative Tools > Component Services.
- Select Component Services > Computers > My Computer > Distributed Transaction Coordinator.
- Right-click Local DTC and then select Properties.
- Click the Security tab on the Local DTC Properties dialog box.
- Select the Enable XA Transactions check box, and click OK. This will restart the MS DTC service.
- Click OK again to close the Properties dialog box, and then close Component Services.
- Restart SQL Server to ensure that it syncs up with the MS DTC changes.
- Start the Microsoft SQL Server Management Studio and connect to the local database engine as the system administrator, sa.
- Select File -> Open -> File and select xa_install.sql from the subdirectory of the downloaded and extracted JDBC driver.
- Execute the script by selecting Query -> Execute.
- Edit...
-
C:\IBM\WebSphere\wp_profile\ConfigEngine\properties\wkplc_dbtype.properties
...and set...
-
sqlserver2005.DbLibrary=C:/IBM/drivers/sqljdbc41.jar
- Set database properties in...
-
C:\IBM\WebSphere\wp_profile\ConfigEngine\properties\wkplc_dbdomain.properties
Example database values:
- Create database
-
C:\IBM\WebSphere\wp_profile\ConfigEngine\ConfigEngine.bat create-database -DWasPassword=myco123
- Setup database
-
C:\IBM\WebSphere\wp_profile\ConfigEngine\ConfigEngine.bat setup-database -DWasPassword=myco123
- Validate configuration properties
-
C:\IBM\WebSphere\wp_profile\ConfigEngine\ConfigEngine.bat validate-database -DWasPassword=myco123
- Verify that the task completed successfully
- Stop the Portal JVM
-
C:\IBM\WebSphere\wp_profile\bin\stopServer.bat WebSphere_Portal -username wpsadmin -password myco123
- Transfer the Portal databases...
-
C:\IBM\WebSphere\wp_profile\ConfigEngine\ConfigEngine.bat database-transfer -DWasPassword=myco123
- Verify that the task completed successfully
- Start portal
Try deleting wp_profile/tranlog if portal does not restart.
- Login and test the portal (http://localhost:10039/itsc/portal)
- Increase number of transaction logs to 200, and double default size of transaction logs.
If you ever need to switch the SQL Server drivers, from the console, set class path to new drivers for each JDBC provider...
Change JCR database auto growth settings
- Login to Microsoft SQL Server Management studio with SA or administration account
- Right click on MYCOJ/MYDBJ database of interest and select properties from context menu:
- In properties dialog select Files Page:
- Select [...] button next to the DB_LOG row in the autogrowth column
- Set File Growth to 50 MB and Maximum File size to 600MB, then click OK
Open firewall ports
- Open firewall ports between all WAS VMs
- Open ports 389 and 636 between Portal virtual machines and Active Directory virtual machines.
- Verify each host that will be part of the environment is network reachable. For example...
-
telnet host port
- Switch LDAP server to Enterprise mode.
- Open firewall for required ports.
- Configure firewall to allow outgoing internet connection to stage-tms.govdelivery.com
- Add FW rule to allow traffic from web server to portal servers over ports 10029 and 10039.
- Add FW rule to allow traffic from desktop to web server. For example...
-
https://mycoportalsupport.myco.gov:8443/itsc/portal/
- For access to RPE, on firewall, create a link under Web Applications...
Then create a new policy, for example, RPE_PPD_Cluster, to allow SSL VPN traffic. For example...
Install dmgr node
- Install the binaries for WebSphere Application Server
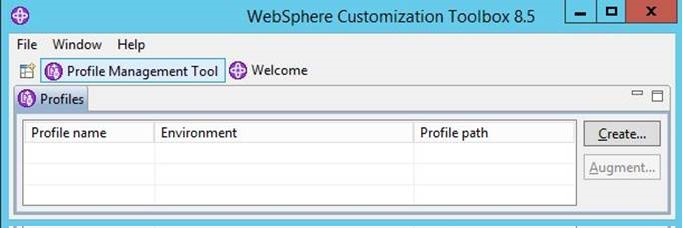
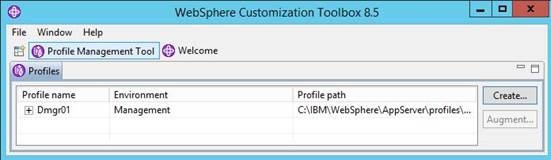
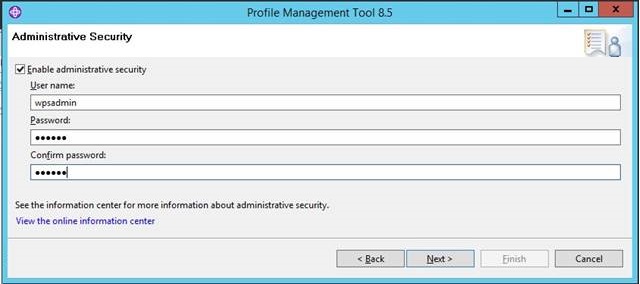
- Launch the Profile Management Tool
-
C:\IBM\WebSphere\AppServer\bin\ProfileManagement\pmt.bat
- Click "Create" to create the Dmgr profile
- Select "Management" as your profile type and click "Next"

- Select "dmgr" and click "Next"

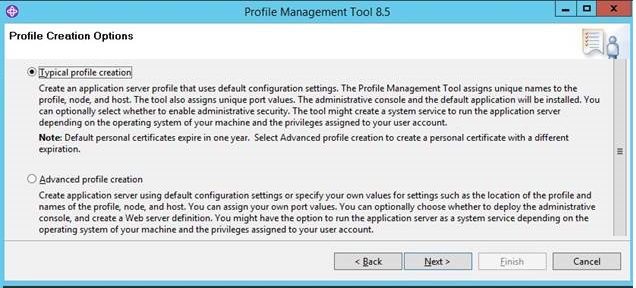
- Select "Typical profile creation" and click "Next"

- Enter the WAS Admin user id and password and click "Next"

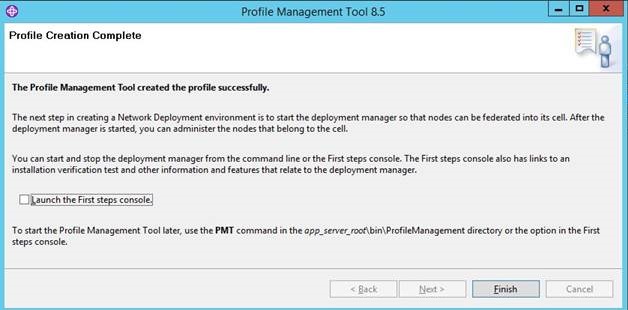
- Review the Summary page and click "Create"

- Deselect "Launch the First Steps console" and click "Finish"
- Copy...
-
C:\IBM\WebSphere\PortalServer\filesForDmgr.zip
...from Portal node 1 to dmgr, and extract to...
-
C:\IBM\WebSphere\AppServer
- Augment the Dmgr
-
cd C:\IBM\WebSphere\AppServer\bin\
manageprofiles.bat -augment -templatePath C:\IBM\WebSphere\AppServer\profileTemplates\management.portal.augment -profileName Dmgr01 - Start the Dmgr from Windows Services
- C:\IBM\WebSphere\AppServer\bin\startManager.bat
- Login to the Dmgr Console and navigate to...
-
Global security | Web and SIP security | Trust association | Interceptors | com.ibm.portal.auth.tai.HTTPBasicAuthTAI
- Edit the urlBlackList and urlWhiteList parameters with the new context path:
- urlBlackList:/itsc/myportal*
- urlWhiteList:/itsc/mycontenthandler*
- Copy db drivers to the same location on the Dmgr node as on primary node
Add the primary node to the cell
- Edit the icm.properties file and set...
-
jcr.textsearch.enabled=false
- Restart the Portal JVM
- Login to the portal and delete the existing search collections
- Restart the Portal JVM and verify that the search collections have been deleted
- Create the profile templates for building additional node
-
ConfigEngine.bat enable-profiles -DWasPassword=myco123
ConfigEngine.bat package-profiles -DWasPassword=myco123 - Add the node the Dmgr Cell
-
addNode.bat <dmgrHostName> 8879 -includeapps -username wpsadmin -password password
- Edit the wkplc.properties files to use the new Dmgr values:
-
WasSoapPort=8879
WasRemoteHostName=<dmgrHostName>
WasUserid=cn=wpsadmin,dc=
WasPassword=myco123
PortalAdminId=cn=wpsadmin,dc=defaultWIMRealm
PortalAdminPwd=myco123
ClusterName=PortalCluster
PrimaryNode=true - Run the Portal post federation ConfigEngine task
-
ConfigEngine.bat cluster-node-config-post-federation -DWasPassword=myco123
- Run the Portal ConfigEngine task to create the new Portal Cluster
- ConfigEngine.bat cluster-node-config-cluster-setup -DWasPassword=myco123
Configure Active Directory
- Install Active Directory
- Configure AD licensing.
For production Active Directory requires user CALs for internal users such as agents, employees, and contractors, as well as External Connector licenses for public users, such as business users. Named users working on any windows server must have a CAL license, including employees, contractors, agents, and sub-contractors. If these users are already connecting to other windows servers directly or indirectly in their current environment, IT may have already assigned windows user or device CAL licenses assigned to each of them.
- Create user portaladmin in Active Directory. For example...
Create portal bind account with write permission. For example...
-
CN=Service-PortalBind,CN=Users,DC=me,DC=myco
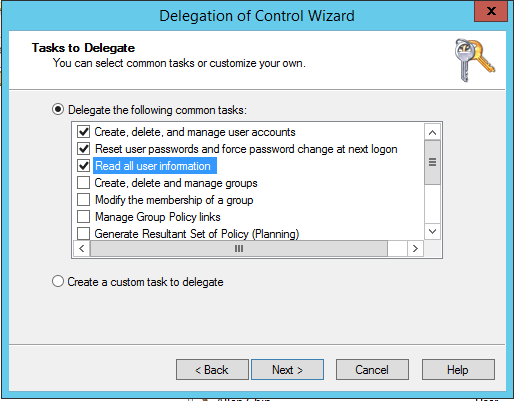
- Grant permissions for bind account
The DN used as the BIND account for connecting portal to Active Directory LDAP must have write privileges under the branches where users expected to update their profiles are located. The bind user does the actual updates/changes so it needs to have to permissions to create the csr and add them to the CSRs group.
For csradmin, add same permissions, and modify membership of the group to include your csradmin user.
- For federated system, log in to the Dmgr for the portal and stop all JVMs
- Optional. Force distinguished name logins.
-
cd /opt/IBM/WebSphere/profiles/profilename/ConfigEngine
ConfigEngine wp-modify-realm-enable-dn-login -DWasPassword=myco123After enabling DN logins, to log on to WAS Console or Portal administration, instead of using short name, such as portaladmin, we would use long name, such as...
-
CN=wpsadmin,CN=Users,DC=me,DC=myco
uid=wpsadmin,o=defaultWIMFileBasedRealmThis is generally not a problem with MYCO AD setup. In general, only portaladmin is defined in AD, not wpsadmin.
We disable DN logins later in the procedure after LDAP setup is complete.
- Edit wkplc.properties on the primary node and set LDAP properties. For example...
-
federated.ldap.id=PortalLdap
federated.ldap.host=ME-DC.ME.MYCO
federated.ldap.port=636
federated.ldap.sslEnabled=true
federated.ldap.sslConfiguration=NodeDefaultSSLSettings
federated.ldap.certificateMapMode=EXACT_DN
federated.ldap.bindDN=CN=Service-PortalBind,CN=Users,DC=me,DC=myco
federated.ldap.bindPassword=mypassword
federated.ldap.ldapServerType=AD
federated.ldap.baseDN=DC=me,DC=myco
federated.ldap.attributes.mapping.entityTypes=PersonAccount
federated.ldap.et.group.objectClasses=group
federated.ldap.et.personaccount.objectClasses=user
federated.ldap.gm.groupMemberName=member
federated.ldap.gm.objectClass=group
federated.ldap.gm.dummyMember=
federated.ldap.gc.updateGroupMembership=
personAccountRdnProperties=cnOther examples...
You can use BeyondCompare to compare your wkplc.properties file, with an existing, working, wkplc.properties file as template.
- Configure an SSL Certificate for Microsoft Active Directory
- Validate LDAP settings and retrieve Active Directory LDAP signer certificate
-
ConfigEngine.bat validate-federated-ldap -DWasPassword=myco123
This command should ask you about downloading certificate from Active Directory LDAP, and adding to portal truststore. Say yes.
After completion of validate-federated-ldap, log on to the WAS console and verify the signer certificate for the LDAP is in place...
-
Security | SSL certificate and key management | SSL configurations | CellDefaultSSLSettings | Key stores and certificates | CellDefaultTrustStore | Signer certificates | Retrieve from port
If certificate is not there, manually download...
- Set LDAP host name, SSL port (default 636), and alias of your choice
- Click "Retrieve signer information".
This should pull the certificate directly from the LDAP server.
- Save the changes to the master configuration.
You should now see your LDAP signer certificate stored in the trust store for the default SSL configuration...
- Restart dmgr
- On primary node, perform syncNode...
-
syncNode.bat dmgr.myco.com 9879 -user wasadmin -password myco123
- Restart WebSphere_Portal and node agent
- Configure portal with LDAP...
-
ConfigEngine.bat wp-create-ldap -DWasPassword=myco123
If, after creating, to later change a property in wkplc.properties, set, then run...
-
ConfigEngine.bat wp-update-federated-ldap -DWasPassword=myco123
From the console, you should be able to see the portaladmin user in the list of available users. If not found, use BeyondCompare to compare a working wimconfig.xml file with your wimconfig.xml file.
-
C:\IBM\WebSphere\wp_profile\config\cells\MYDBCell\wim\config\wimconfig.xml
- Synchronize all nodes and restart node agents and dmgr
- Change the WAS Admin user
- ConfigEngine.bat wp-change-was-admin-user -DWasUser=uid=wpsadmin,o=defaultWIMFileBasedRealm -DWasPassword=myco123 -DnewAdminId=CN=portaladmin,CN=Users,DC=me,DC=myco-DnewAdminPw=1234@myco
- Synchronize all nodes and restart node agents and dmgr
- Change the Portal Admin user and group
-
ConfigEngine.bat wp-change-portal-admin-user -DWasPassword=myco123 -DnewAdminId=CN=portaladmin,CN=Users,DC=me,DC=myco -DnewAdminPw=1234@myco -DnewAdminGroupId=CN=wpsadmins,OU=Roles,DC=me,DC=myco -Dskip.ldap.validation=true
- Synchronize all nodes and restart node agents and dmgr
- For a cluster, edit wkplc.properties to use the new user id, password and group and then run...
-
ConfigEngine.bat update-jcr-admin
- Disable distinguished name logins...
-
ConfigEngine.bat wp-modify-realm-disable-dn-login -DWasPassword=myco123
- Start all JVMs
- From WAS console validate you see...
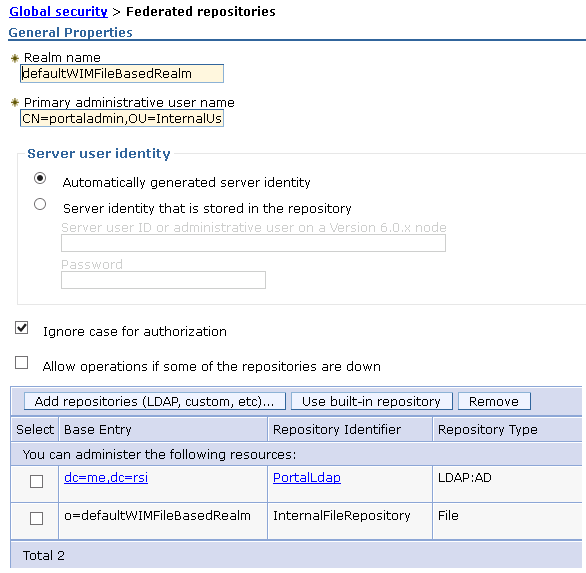
- To remove LDAP, revert back to the file repository by turning security off and removing the LDAP entry.
Create the secondary node
See also Additional portal nodes
- Use installation manager to install portal binaries
- Copy the profileTemplates.zip file from the secondary node to C:\IBM\WebSphere\AppServer
- Extract the contents of the zip file to directory...
-
C:\IBM\WebSphere\PortalServer\profileTemplates
- Install the templates:
-
cd C:\IBM\WebSphere\PortalServer\profileTemplates
installPortalTemplates.bat C:\IBM\WebSphere\AppServer - Launch the Profile Management Tool
- Click "Create"

- Select "Custom Portal Profile"

- Select "Advanced profile creation" and click "Next"

- Enter the profile name and path for the directory that we would like to create the portal profile in to and click "Next"

- Enter the node and host name, then click "Next"

- Select to "Federate this node later" and click "Next"
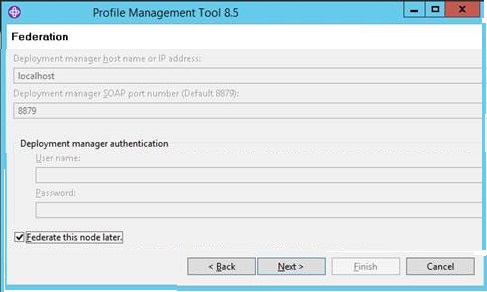
- Verify the information on the Summary page and click "Create"
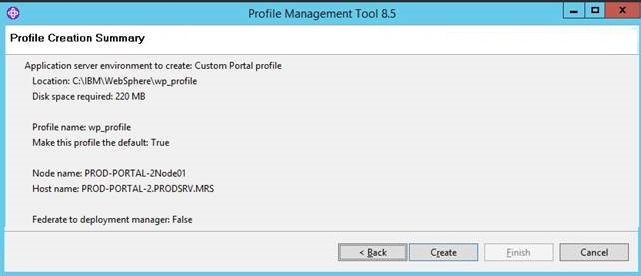
- Deselect the "Launch the first steps console" option and click "Finish"

- Edit the wkplc_dbdomain.properties and wkplc_dbtype.properties and add db info to match the primary node
Make sure that case is correct in all properties files.
- Copy db drivers to the same location on the secondary node as on primary node
- Validate the database properties
-
ConfigEngine.bat validate-database -DWasPassword=myco123
- Edit the icm.properties file and set...
-
jcr.textsearch.enabled=false
- Add the secondary node to the Dmgr Cell
-
addNode.bat <dmgrHostName> 8879 -username wpsadmin -password password
- Edit the wkplc.properties files to use the new Dmgr values:
-
WasSoapPort=8879
WasRemoteHostName=<dmgrHostName>
WasUserid=cn=wpsadmin,dc=
WasPassword=myco123
PortalAdminId=cn=wpsadmin,dc=defaultWIMRealm
PortalAdminPwd=myco123
ServerName=WebSphere_Portal_2
ClusterName=PortalCluster
PrimaryNode=false - Create the additional cluster node
-
ConfigEngine.bat cluster-node-config-cluster-setup-additional -DWasPassword=myco123
Register portal as a Windows service
For standalone configurations only. Should not be done for clustered implementations.
- cd C:\IBM\WebSphere\wp_profile\bin
- wasservicehelper.bat
- Enter "1" for "Add new or update existing WebSphere service (minimum parameters required)"
Configure session replication
For each cluster member, we enable memory-to-memory replication. Set replication mode to "Both client and server". Memory to memory replication failover ensures that, if a cluster member is shutdown down, incoming requests are routed to a cluster member that already has the session data in memory.


Increase historical logs
Middleware servers > WebSphere_Portal_02 > WebSphere_Portal_*
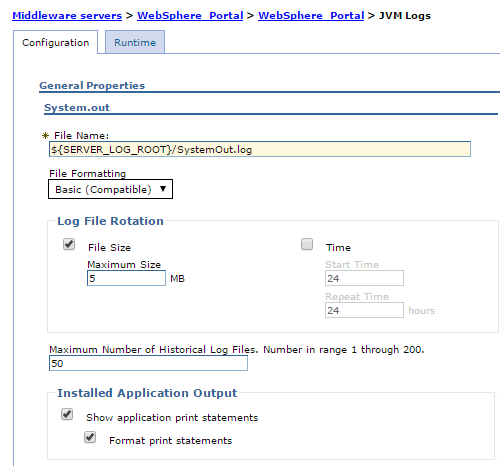
Configure IIS with Portal
For multiple web sites, see Configuring the WebSphere Application Server Web server plug-in for multiple Web sites.
Install WAS Plugin
- From the initial install files, copy...
-
C:\IBM\InstallationManager\eclipse\IBMIM.exe -record C:\install_files\responsefiles\iis_response.xml -skipInstall c:\skipinstall
C:\install_files\responsefiles\iis_response.xml
C:\install_files\custom\bin\install_iis_plugins.bat - Navigate to
-
C:\install_files\WAS SUPPL\WAS_V8.5.5_SUPPL_2_OF_3
Paste disk2 to...
-
C:\install_files\WAS SUPPL\WAS_V8.5.5_SUPPL_1_OF_3
- Navigate to
-
C:\install_files\WAS SUPPL\WAS_V8.5.5_SUPPL_3_OF_3
Paste disk3 to...
-
C:\install_files\WAS SUPPL\WAS_V8.5.5_SUPPL_1_OF_3
- Open cmd prompt as administrator and run the below command
-
C:\install_files\custom\bin\install_iis_plugins.bat
The above procedure will install IIS and Plugins
On portal host, generate plug-in files...
-
c:\IBM\WebSphere\wp_profile\bin\GenPluginCfg.bat
Copy...
-
C:\IBM\WebSphere\wp_profile\config\cells\plugin-cfg.xml
...to WebServer machine, and place it in directory...
-
c:\IBM\WebSphere\Plugins\config\dev_webserver
If necessary, create directory location.
If you get error:
-
ERROR: lib_security: loadSecurityLibrary: Failed to load gsk library from XAS
...to fix...
- Apply the latest Plugin fix pack.
- Install 64 bit Visual C++ Redistributable package.
Configure the IIS service
- Configure Microsoft Internet Information Services (IIS)
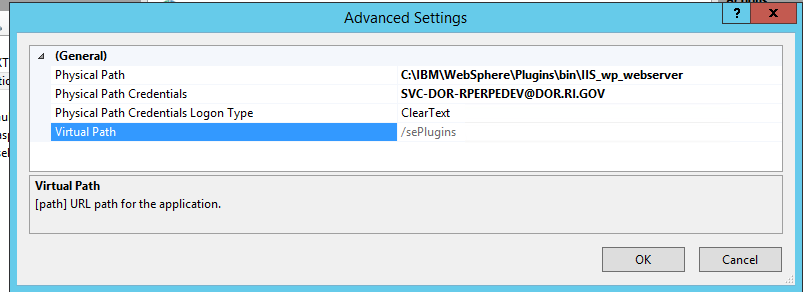
- Create the virtual directory as sePlugins (not wpPlugs) for the time being (we need research this).
- We need Management Tools to be installed...

- Check to make sure ISAPI filter and ISAPI & CGI restrictions configurations are in place
- Create the virtual directory as sePlugins (not wpPlugs) for the time being (we need research this).
- Create a remote IIS configuration on the portal server...
- From the IIS host, copy...
-
C:\IBM\WebSphere\Plugins\bin\configurewp_webserver.bat
...to the WebSphere Portal host...
-
C:\IBM\WebSphere\AppServer\bin\configurewp_webserver.bat
- Start the WebSphere_Portal process
- On the portal host, run...
-
setupCmdLine.bat
configurewp_webserver.bat
- From the IIS host, copy...
- Run regedit to start the windows registry
- Go to...
...and set...
-
UrlSegmentMaxLength = 0
AllowRestrictedChars = 1
Make sure to set type as DWORD.
Setting 0 makes URLs unlimited
Restart Internet Information Server (IIS)...
net stop WAS
net start W3SVC
net stop http
net start httpHere is a PowerShell script we can run to set values...
-
Set-ItemProperty -Path HKLM:\System\CurrentControlSet\Services\HTTP\Parameters -Name UrlSegmentMaxLength -Value 1500
Set-ItemProperty -Path HKLM:\System\CurrentControlSet\Services\HTTP\Parameters -Name AllowRestrictedChars -Value 0
Restart-Service W3SVC –ForceOpen a 'cmd" prompt as an administrative user and run...
-
net stop http
net start httpRepeat for each web server
If that does not work, trying...
-
net stop WAS
net start W3SVC
net stop http
net start http
net start W3SVC...or reboot the machine.
- Open WebSphere Customization Toolbox | WebServer Plugin Configuration Tool

- Click Add and fill in your information

- Create a WebServer Definition

- Copy configurewp_webserver.bat from the IIS host to the WebSphere Portal host
The location of this script on the IIS host is
-
C:\IBM\WebSphere\Plugins\bin\configurewp_webserver.bat
- The target location for this script on the WebSphere Portal host is
-
C:\IBM\WebSphere\AppServer\bin\configurewp_webserver.bat
- On the portal host, run configurewp_webserver.bat
- From the WAS console, generate new plugin-cfg.xml file, then copy the plug-in files to each web server Plugin config directory.
From..
-
C:\IBM\WebSphere\AppServer\profiles\Dmgr01\config\cells\PROD-DMGRCell01\nodes\WebServerNode01\servers\wp_webserver\plugin-cfg.xml
C:\IBM\WebSphere\AppServer\profiles\Dmgr01\config\cells\PROD-DMGRCell01\nodes\PROD-WEB2.PRODSRV.MRS-node\servers\wp_webserver2\plugin-cfg.xml...to..
-
C:\IBM\WebSphere\Plugins\config\<webserverName>
- plugin-cfg.xml
- Db file
- Stash file
- Restart IIS
- Login to the Dmgr Console and select Environment >WebSphere Variables
- Update the following variables
-
WCM_HOST=<fqdnVIP>
WCM_PORT = 80 - You should be able to hit the portal server via HTTP
- If IIS does not forward requests to portal, create an app pool for Portal
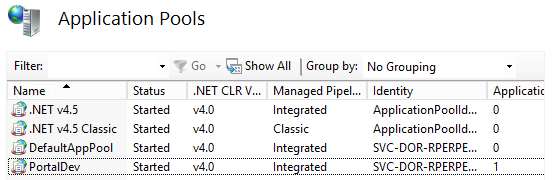
Then link via a service account.
Configure IIS to use SSL
- Open Internet Information Services (IIS) Manager.
-
Control Panel | System and Security | Administrative Tools
- Create self-signed certificate.
-
Features view of the machine | Server Certificates | Actions pane | Create Self-Signed Certificate
In the box...
-
Specify a friendly name for the certificate box
...and type a friendly name for the certificate. For example...
-
mycoportalsupport.myco.gov
...and then click OK.
- Go to...
-
Connections | server name | Sites | website

- Go to...
-
Actions menu | Edit Site | Bindings | Add
- In the Add Site Binding window, set...
Type In the drop-down list, select https. IP address In the drop-down list, select All unassigned. Port Enter 443, unless you are using a non-standard port for SSL traffic. SSL certificate In the drop-down list, select the recently imported SSL Certificate by its friendly name. - Click OK.
- Set IIS to ignore client certificate.

- Force use of SSL
- Install Microsoft URL Rewrite Module
- In IIS Manager, click on your website and select "URL Rewrite" from the Features View.
- Click "Add Rules(s)..." from the Action Pane on the Right.
- Setup the rule...

- Install Microsoft URL Rewrite Module
- Restart IIS: iisreset
See also: IIS 8.0 Centralized SSL Certificate Support: SSL Scalability and Manageability
Certificate signing requests
- Use IIS to create Certificate signing request (CSR) files for the 4 SSL certificates
mycoportal.myco.gov External only 201.162.163.219 mycoportalsupport.myco.gov External and Internal 201.162.163.220 mycoportalusb.myco.gov External Only 201.162.163.223 mycoportalusbtest.myco.gov External only 201.162.163.224 - Fill in the following information, then generate a file.
- Copy *.cer files to target web server(s)
- From IIS Manager, go to...
-
Connections | workstation name | Server Certificates | Actions | Complete Certificate Request
- Change the file type view setting at the lower right corner of the browser window to be able to see *.cer files
The friendly name is not linked to the certificate download from Entrust.net, it is used as an identifier after the certificate is installed. You should provide a unique Friendly Name so that we can easly identify what the certificate is used for.
Select a certificate store for the new certificate: leave the selection set to Personal
- From the left hand side of the IIS Manager, under Connections, Expand the Server Name
- Expand the Sites folder and select the site you wish to bind the certificate to
- From the right hand side under Actions, Select: Bindings...
- From the Site Bindings menu Select: Add
- From the Add Site Binding change the settings listed below:
Type HTTPS SSL Certificate Select the friendly name of the certificate you wish to bind to the site, we can verify that you have selected the corrrect certificate by clicking on View... Once you have configured the settings Select: OK
- Restart the web site
From the right hand side under Actions | Manage Website, Select: Restart
Common Name mycoportal.myco.gov Organization State of State Organizational Unit Office of Information Technology City Augusta State State Cryptographic service provider Microsoft RSA SChannel Cryptographic Provider Bit Length 2048
Prod...

PreProd...

See also:
Configure IHS with Portal
See: Example: httpd.conf
Create the remote search node
- Launch the Profile Management Tool on the Dmgr node and click "Create"
- Select "Application Server" as the profile type and click "Next"

- Select "Typical profile creation" and click "Next"
- Enter the WAS admin ID and password and click "Next"
- Verify the information on the summary page and click "Create"

- Deselect "Launch first steps" and click "Finish"

- Add the newly created node to the Dmgr Cell
-
addNode.bat <dmgrHostName> 8879 -username wpsadmin -password password
Deploy the search application
- Copy the WebScannerEjbEar.ear file from Portal Node1...
-
C:\IBM\WebSphere\PortalServer\search\prereq.webscanner\installableApps
...and install it to the Server1 JVM
- Copy the shared lib zip file from Portal Node1...
-
C:\IBM\WebSphere\PortalServer\search\wp.search.libs\installableApps
...and extract it to...
-
C:\IBM\WebSphere\AppServer\profiles\AppSrv01\installableApps
- Open a browser and log in to the Dmgr Console
- Navigate to...
-
Environment | Shared Libraries | Cell scope | New

- Create a library named "PSE" and set Classpath to library files...
-
C:\IBM\WebSphere\AppServer\profiles\AppSrv01\installableApps\extract\lib

- Navigate to...
-
Applications | Application Types | Enterprise Applications | PSEStandalone | Shared library references | PSEStandalone | Reference shared libraries
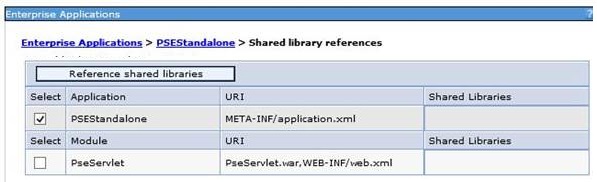
- Select the newly created PSE Shared Library, add it and click "OK"

- Verify that the library has been added and click "OK"

- Click on "Security role to user/group mapping", select the PSEStandalone and click "Map users/groups"
- Add the wpsadmin and click OK
- Save and synchronize your nodes
- Navigate to...
-
Global security | Java Authentication and Authorization Service | JAAS - J2C authentication data
...and set...
-
SearchAdminUser=portaladmin
- Navigate to...
-
Resources | Asynchronous beans | Work managers
- Change to the cell scope and click New
Name PSEWorkManager JNDI Name wps/searchIndexWM Minimum Number of Threads 20 Maximum number of Threads 60 Growable True (Growable check box is selected) Service Names Application Profiling Service, WorkArea, Security, Internationalization - Restart the server1 JVM

Configure remote search service
Log in to the portal as an administrator and navigate to...
-
Administration | Search Administration | Manage Search | Search Services | New Search Service
...and create the "Remote PSE service EJB" search service...

| RESOURCE_ENVIRONMENT_PROVIDER_NAME | SearchPropertiesService |
| facetedFields | |
| EJB_Example | ejb/com/ibm/hrl/portlets/WsPse/WebScannerLiteEJBHome |
| WORK_MANAGER_DEPLOY | wps/searchIndexWM |
| DefaultCollectionsDirectory | C:\IBM\RemoteSearchCollections |
| CONTENT_SOURCE_TYPE_FEATURE_NAME | ContentSourceType |
| EJB | ejb/com/ibm/hrl/portlets/WsPse/WebScannerLiteEJBHome |
| MAX_BUILD_BATCH_SIZE | 10000 |
| fieldTypes | |
| WORK_MANAGER | wps/searchIndexWM |
| WORK_MANAGER_NATIVE | force.hrl.work.manager.use.native.threads |
| IIOP_URL | iiop://prod-dmgr.prodsrv.myco:9810 |
| VALIDATE_COOKIE | 123 |
| WORK_MANAGER_NAME | wps/searchIndexWM |
| PortalCollectionSourceName | Portal Content Source |
| CONTENT_SOURCE_TYPE_FEATURE_VAL_PORTAL | Portal |
| PSE_TYPE | ejb |
| HTTP_MAX_BODY_SIZE_MB | 20 |
| MAX_BUILD_INTERVAL_TIME_SECONDS | 300 |
| startup | false |
| SetProperties | on |
| PortalCollectionName | Default Search Collection |
| IIOP_URL_Example | iiop://localhost:2811 |
| CLEAN_UP_TIME_OF_DAY_HOURS | 0 |
| mappedFields | |
| SOAP_URL_Example | http://localhost:10000/WebScannerSOAP/servlet/rpcrouter |
| OPEN_WCM_WINDOW | /itsc/myportal/wcmContent?WCM_GLOBAL_CONTEXT= |
| CONFIG_FOLDER_PATH | C:\IBM\CollectionsConfig |
| SecurityResolverId | com.ibm.lotus.search.plugins.provider.core.PortalSecurityResolverFactory |
| DEFAULT_acls_FIELDINFO | contentSearchable=false, fieldSearchable=true, returnable=true, sortable=false, supportsExactMatch=true, parametric=false, typeAhead=false |
| SOAP_URL | |
| CONTENT_SOURCE_TYPE_FEATURE_VAL_UPLOAD | Upload |
| CONTENT_SOURCE_TYPE_FEATURE_VAL_WEB | Web |
| OpenResultMode | new |
| SEARCH_SECURITY_MODE | SECURITY_MODE_PRE_POST_FILTER |
Required: Open firewall for traffic going from prod-portal-[1-2] to dmgr server1 for ports 9810, 9405 and 9201.
- For IIOP_URL, verify we can telnet to address from both portal nodes. For example...
-
telnet prod-dmgr.prodsrv.myco 9810
- You should also be able to telnet to server1 port for CSIV2_SSL_SERVERAUTH_LISTENER_ADDRESS...
-
telnet prod-dmgr.prodsrv.myco 9405
The Manage Search portlet now lists the new search service in the list of search services. A green check in the status column indicates that the new search service is working correctly.

Restart all Portal JVMs for the changes to take effect.
Certificate expiration monitoring
Set up certificate expiration monitoringPost VIP Configuration
Navigate to...-
Environment | WebSphere Variables
...and change all instances of the following variables:
-
WCM_HOST = VIP URL
WCM_PORT = 80 or 443 (whichever the VIP is configured for)
Synchronize and restart all Portal JVMs
Portal server performance tuning tool
Run the Portal server performance tuning tool.
Appendix
Restart WebSphere Portal
To restart standalone portal, for example in Cfg and Syst environments, remote desktop to target host, then from an Administrator command prompt...
-
cd c:\IBM\WebSphere\wp_profile\bin
stopServer.bat WebSphere_Portal
stopServer.bat WebSphere_Portal
To restart cluster, log on to WAS dmgr console for target environment, select the cluster, then select restart.
Export WCM libraries
Log on to NC-Portal1 (10.1.2.201)
Open a command prompt as an administrator...

..then run...
-
mkdir c:\temp\wcm
cd c:\IBM\WebSphere\wp_profile\ConfigEngine
ConfigEngine.bat export-wcm-data -DWasPassword=mypwd -DPortalAdminPwd=mypwd -Dexport.allLibraries=true -Dexport.singledirectory=true -Dexport.directory=c:\temp\wcm
Import WCM libraries
- Create a zip file for WCM export data and copy to target VM
- We copy a zip file rather than actual file so we don't lose bytes as it is copied over network.
- Log on to target VM
- Log on to SQL Server and increase the size of the transaction logs.
Alternatively, disable JCR text search
- Open a command prompt as an administrator...
- Import WCM libs
-
mkdir c:\temp\wcm
cd c:\IBM\WebSphere\wp_profile\ConfigEngine
ConfigEngine.bat import-wcm-data -DWasPassword=mypwd -DPortalAdminPwd=mypwd -Dimport.directory=c:\temp\wcm - If required, renable JCR text search
Appendix
EJPJO0032E: Unable to create Webscanner
This exception due to port not available. You need to open firewall between portal server and dmgr.
-
Reason: connect timed out Remote Host: 172.30.4.73 Remote Port: 9405
Here is complete message...
EJPJO0119E: Failed to initialize portal collections services.
com.ibm.hrl.portlets.WsPse.PortalWebScannerException: EJPJO0119E:  Failed to initialize portal collections services.

 Error EJPJO0032E: Unable to create Webscanner
com.ibm.hrl.portlets.WsPse.PortalWebScannerException: EJPJO0032E: Unable to create Webscanner

 Error EJPJO0038E: Cannot create EJB webscanner with iiop url iiop://prod-dmgr.prodsrv.myco:9810
com.ibm.hrl.portlets.WsPse.PortalWebScannerException: EJPJO0038E: Cannot create EJB webscanner with
iiop url iiop://prod-dmgr.prodsrv.myco:9810

 Error javax.naming.NamingException: Error getting WsnNameService properties
[Root exception is org.omg.CORBA.TRANSIENT: initial
and forwarded IOR inaccessible vmcid: IBM minor code: E07 completed: No]
javax.naming.NamingException: Error getting WsnNameService properties [Root exception is org.omg.CORBA.TRANSIENT:
initial and forwarded IOR
inaccessible  vmcid: IBM  minor code: E07  completed: No]

 Error org.omg.CORBA.TRANSIENT: initial and forwarded IOR inaccessible vmcid: IBM minor code: E07 completed: No
org.omg.CORBA.TRANSIENT: initial and forwarded IOR inaccessible  vmcid: IBM  minor code: E07  completed: No

Error org.omg.CORBA.COMM_FAILURE: CONNECT_FAILURE_ON_SSL_CLIENT_SOCKET - JSSL0130E: java.io.IOException:
Signals that an I/O exception of some sort has occurred.
Reason: connect timed out Remote Host: 172.30.4.73 Remote Port: 9405 vmcid: 0x49421000 minor code: 80 completed: No
org.omg.CORBA.COMM_FAILURE: CONNECT_FAILURE_ON_SSL_CLIENT_SOCKET - JSSL0130E: java.io.IOException: Signals that an I/O
exception of some sort has occurred.
Reason:  connect timed out Remote Host: 172.30.4.73  Remote Port: 9405  vmcid: 0x49421000  minor code: 80  completed: No
portalnxt
feedback.DbType=sqlserver2005
likeminds.DbType=sqlserver2005
release.DbType=sqlserver2005
community.DbType=sqlserver2005
customization.DbType=sqlserver2005
jcr.DbType=sqlserver2005
feedback.DbName=MYDBS_NXT
likeminds.DbName=MYDBS_NXT
release.DbName=MYDBS_NXT
community.DbName=MYDBS_NXT
customization.DbName=MYDBS_NXT
jcr.DbName=MYDBJ_NXT
feedback.DbUrl=jdbc:sqlserver://MEMYDB-DB.ME.MYCO:49962;SelectMethod=cursor;DatabaseName=MYDBS_NXT
likeminds.DbUrl=jdbc:sqlserver://MEMYDB-DB.ME.MYCO:49962;SelectMethod=cursor;DatabaseName=MYDBS_NXT
release.DbUrl=jdbc:sqlserver://MEMYDB-DB.ME.MYCO:49962;SelectMethod=cursor;DatabaseName=MYDBS_NXT
community.DbUrl=jdbc:sqlserver://MEMYDB-DB.ME.MYCO:49962;SelectMethod=cursor;DatabaseName=MYDBS_NXT
customization.DbUrl=jdbc:sqlserver://MEMYDB-DB.ME.MYCO:49962;SelectMethod=cursor;DatabaseName=MYDBS_NXT
jcr.DbUrl=jdbc:sqlserver://MEMYDB-DB.ME.MYCO:49962;SelectMethod=cursor;DatabaseName=MYDBJ_NXT
feedback.DbUser=ServiceMYDBShare
feedback.DBA.DbUser=sa
likeminds.DbUser=ServiceMYDBShare
likeminds.DBA.DbUser=sa
release.DbUser=ServiceMYDBShare
release.DBA.DbUser=sa
community.DbUser=ServiceMYDBShare
community.DBA.DbUser=sa
customization.DbUser=ServiceMYDBShare
customization.DBA.DbUser=sa
jcr.DbUser=Service-WCM
jcr.DBA.DbUser=sa
feedback.DbPassword=portal@123
feedback.DBA.DbPassword=foo69
likeminds.DbPassword=portal@123
likeminds.DBA.DbPassword=foo69
release.DbPassword=portal@123
release.DBA.DbPassword=foo69
community.DbPassword=portal@123
community.DBA.DbPassword=foo69
customization.DbPassword=portal@123
customization.DBA.DbPassword=foo69
jcr.DbPassword=portal@123
jcr.DBA.DbPassword=foo69
feedback.DbType=sqlserver2005
likeminds.DbType=sqlserver2005
release.DbType=sqlserver2005
community.DbType=sqlserver2005
customization.DbType=sqlserver2005
jcr.DbType=sqlserver2005
feedback.DbHome=C:\\Program Files\\Microsoft SQL Server\\MSSQL11.MYCO\\MSSQL
likeminds.DbHome=C:\\Program Files\\Microsoft SQL Server\\MSSQL11.MYCO\\MSSQL
release.DbHome=C:\\Program Files\\Microsoft SQL Server\\MSSQL11.MYCO\\MSSQL
community.DbHome=C:\\Program Files\\Microsoft SQL Server\\MSSQL11.MYCO\\MSSQL
customization.DbHome=C:\\Program Files\\Microsoft SQL Server\\MSSQL11.MYCO\\MSSQL
jcr.DbHome=C:\\Program Files\\Microsoft SQL Server\\MSSQL11.MYCO\\MSSQL
LDAP - MRS web portal
| Bind DN: | CN=Service-PortalBind,CN=Users,DC=me,DC=myco |
| Host: | dc.me.myco |
| Port: | 636 |
| Pw: | mypwd |
Uninstall portal
The following procedure will Uninstall WebSphere Portal v8.0
- Remove database tables...
-
cd C:\IBM\WebSphere\wp_profile\bin
stopServer.bat WebSphere_Portal -username portaladmin -password 1234@myco
cd C:\IBM\WebSphere\AppServer\bin
stopServer.bat server1 -profileName cw_profile -username portaladmin -password 1234@myco
cd C:\IBM\WebSphere\wp_profile\ConfigEngine
ConfigEngine.bat remove-schema -DWasPassword=1234@myco -Drelease.DbPassword=1234@myco -Dcustomization.DbPassword=1234@myco -Dcommunity.DbPassword=1234@myco -Djcr.DbPassword=1234@myco -Dfeedback.DbPassword=1234@myco -Dlikeminds.DbPassword=1234@mycoFailing on portalnxt. will skip this step and drop databases after uninstall is complete...
[sqlproc] Could not connect to database
[sqlproc] com.microsoft.sqlserver.jdbc.SQLServerException: Login failed for user 'ServiceMYDBShare'.Some tables may remain in the IBM Java Content Repository database. Removing the database will remove these tables.
- Stop appservers...
-
cd C:\IBM\WebSphere\wp_profile\bin
stopServer.bat WebSphere_Portal -username portaladmin -password 1234@myco
cd C:\IBM\WebSphere\AppServer\bin
stopServer.bat server1 -profileName cw_profile -username portaladmin -password 1234@myco - Uninstall WebSphere Portal using Installation Manager
Run...
-
cd C:\IBM\InstallationManager\eclipse
IBMIM...then select Uninstall
- Remove C:\IBM directory.
- Keep a copy of C:\MYCO dir
- Remove portal DBs.
- Remote desktop to the SQLServer host
- Run SQL Server Management Studio
-
Windows Start button | Run | ssms.exe
- Connect to the DB server, then right-click to drop DBs.
For example...
- MYCOJ_NXT
- MYCOS_NXT
- MYCOAppDB_NXT
- Reboot machine