Omnifind Search with WebSphere Portal - Part 2
Procedure for integration with clustered Portal
- Enable crawler setup for the Portal Pages and WCM content.
Use the WAS ND admin console to deploy ESPACServer.ear to the portal cluster.
- Enable crawler setup for the Portal Document Manager which is achieved through the WebSphere Information Integrator Content Edition connector.
Install WebSphere Information Integrator Content Edition (connectors only option) on the individual portal servers directly and deploy the services.war webapp on the portal cluster through the WAS ND admin console.
- Prepare the OmniFind server by executing the escvbr.vbs script on the OmniFind server.
The actual creation of the crawlers on the OmniFind server happens later from the admin console once the preparatory work has been completed. For the PDM crawler, you should setup the WebSphere Information Integrator Content Edition connector to connect to the RMIServerBridge on the portal servers through RMI.
- Deploy the customized search Portlet on the portal servers
- Modify the search bar on the portal to use the customized search portlet rather than the default search from Portal.
The files required to integrate enterprise search with WebSphere Portal are provided in the es.wp6.install.jar file. When you unpack this file, the following files are extracted:
- ESSearchPortlet.war
- ESPACServer.ear
- esapi.jar
- es.search.provider.jar
- es.security.jar
- Search application source type icons that are used in the search provider results page
- Script, batch, XML, and JACL files that are needed by the installation
Because the installation script available with the OmniFind software is defined for a non-clustered Portal Server (not deployed on WAS ND) the steps that are executed by the script need to be executed manually from the Deployment Manager.
Do the following on each Portal Server node:
- Copy the es.wp6.install.jar file from the enterprise search server to the WebSphere Portal server, and then use the Java JAR command (or the TAR command) to unpack the file.
- Optional: To support integration with WebSphere Portal Document Manager (PDM), do one of the following steps:
- Run the WebSphere Information Integrator Content Edition installation program, select the option to perform a connector-only installation, and install the PDM connector on the WebSphere Portal server.
- Create the WebSphere Information Integrator Content Edition directory structure on the WebSphere Portal server, and copy the following files from an existing WebSphere Information Integrator Content Edition installation to the WebSphere Portal server, where CE_ROOT specifies the root WebSphere Information Integrator Content Edition installation directory:
- CE_ROOT/lib/vbr.jar
- CE_ROOT/ejb/vbr_pdm.jar (make sure that you download the version from the WebSphere Information Integrator Content Edition support site. The one supplied with the OmniFind software download is old and has a few bugs)
- CE_ROOT/war/services.war
- E_ROOT/vbr_services.properties
In the figure below, the yellow artifacts show the added packages, applications, or libraries, and the red text indicates the actions taken or verification points
Architectural detail- portal side

Perform these steps from the admin console of the Deployment Manager of the Portal cluster:
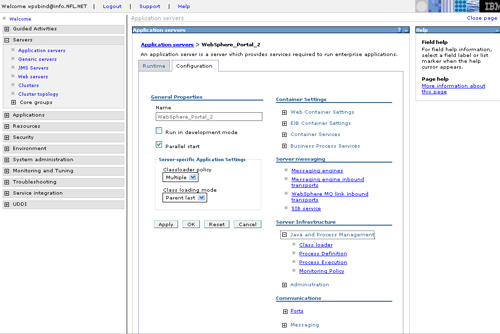
- Inside Enterprise Applications, select the option to install a new application. Deploy ESPACServer.ear with default options to the cluster with the two Portal nodes, by mapping the modules to the appropriate cluster. Follow the screenshots below.
- Inside Enterprise Applications, select the option to install a new application. Deploy ESPACServer.ear with default options to the cluster with the two Portal nodes, by mapping the modules to the appropriate cluster. Follow the screenshots below.
Ensure that the applications that have to be deployed (ESPACServer.ear) are deployed to the cluster and not to the individual portal servers.
Key architectural components and activities on the OmniFind Server

Portal and Workplace Web Content Management (WCM) crawler setup
- Login into the WAS ND admin console and deploy the ESPACServer.ear application onto the portal cluster.
- Browse to the location where the ESPACServer.ear is available. You should be able to find it by unjar-ing the es.wp6.install.jar file on the OmniFind server in the directory C:\WS\es\bin\es.wp6.install.jar

Preparing for the application installation - Accept all defaults until you reach the following screen:
Accept defaults until you get the option to map modules to servers. Map the ESPACServer.ear to the wpsCluster01 and select Next. Proceed to the end and click Finish. When given the option to synchronize to all nodes, accept it.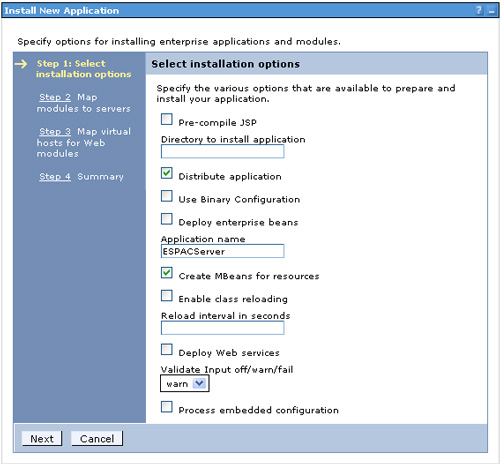
Installation options - On the OmniFind server, login to the Search admin console and begin the process to create a Portal crawler:

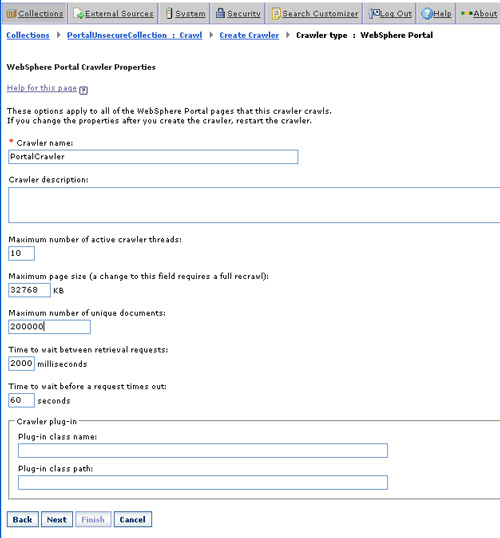
Installation options - Set the crawler properties:
Installation options - Get a URL to be searched from the portal server by following these steps:
- Ensure that WebSphere Portal Server is started, and then log in to WebSphere Portal as an administrator.
- Click Administration in the lower left corner.
- Click Manage Search from the navigation area on the left.
- On the Manage Search page, click Search Collections.
- On the Manage Search page, from the Search service options, click Default Portal Search Service.
- In the Search Collections table, click Portal Content collection.
- In the Content Sources table, click the Edit icon on the far right (the pencil icon) next to Portal Content Source.
- For Content source type, click Portal Site. The site URL is displayed in the Collect documents linked from this URL field.
- Copy the URL to the clipboard. For example, highlight the URL and then hold the Ctrl key while you press the Insert key.
- Return to the enterprise search administration console and paste the URL that you copied into the site URL field.

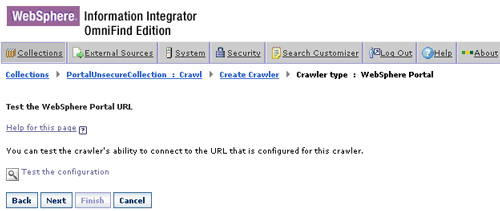
URL to be searched - Test the connection by clicking Test the configuration as Figure 63 shows:
URL to be searched - ClickNext,and then select Finish.
URL to be searched - Start the process to create a Web Content Management crawler.
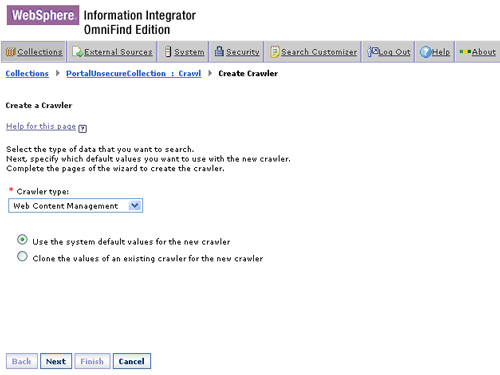
Creating the WCM crawler - Click Next.
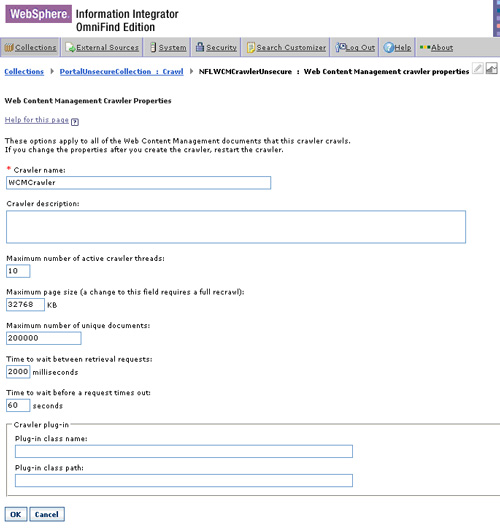
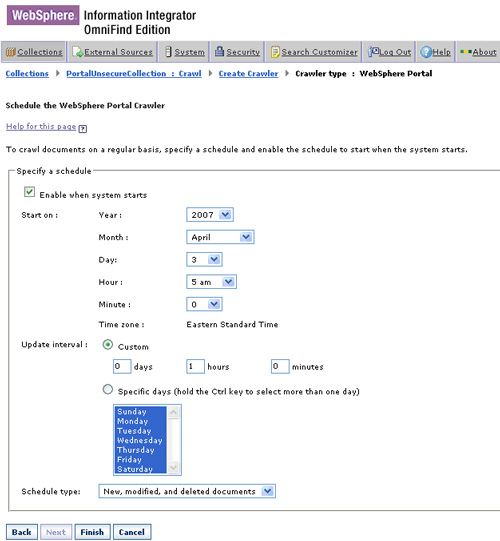
URL to be searched - Accept the defaults, or modify as required and click Next:

Configure the WCM crawler options - Enter the appropriate URL based on the site name and library without any spaces. Enter multiple URLs on different lines. To enter single sign-on authentication information, select Specify the SSO authentication type.
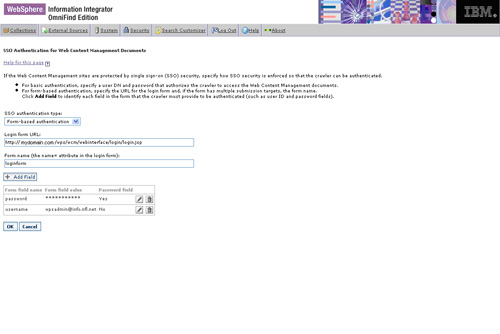
Specifying single sign-on authentication - You can test the crawler's ability to connect to the URLs, as Figure 69 shows:
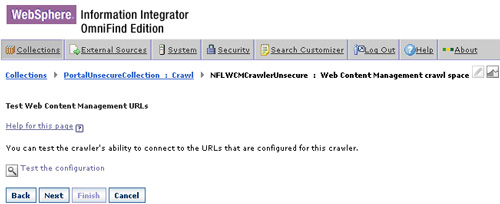
Testing the WCM URLs
Portal document Management Crawler setup
- Login into the WAS ND admin console and deploy the services.war application onto the portal cluster.:
Configuration screen - After selecting Process definition you should arrive at this screen:

Process definition screen - Select JVM settings. Your screen should look like this:
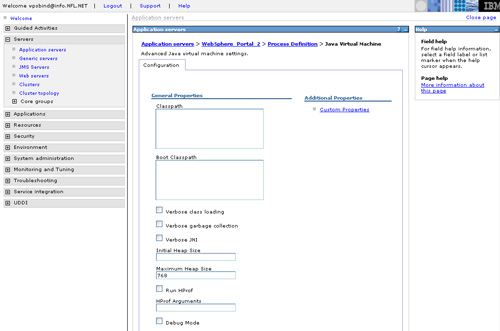
JVM settings - Define the variable vbr.home on both the portal servers. JVMs:

Defining vbr.home - Define the shared library on both the portal server nodes.
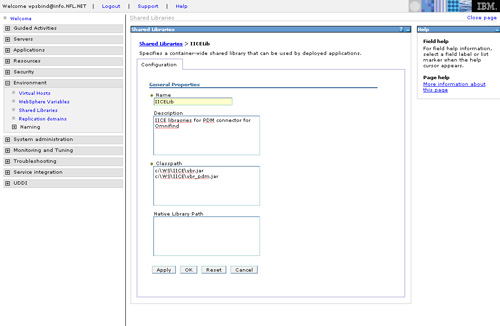
Define the shared library - Save the above configuration and synchronize all portal nodes. Then, restart all portal servers. Once they have restarted, on each portal server, start the admin console of WebSphere Information Integrator Content Edition in direct mode. You may have to make changes as appropriate to the path variables in the admin.bat file. From the admin console, create a new Portal Document Manager connector.
The steps below optional. They are only needed to verify that the portal server has been correctly configured to allow IICE connectors to connect to it.

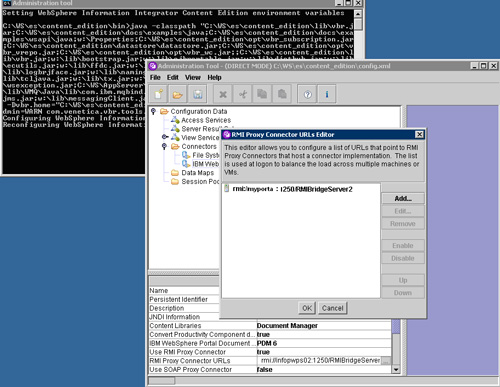
Creating a WebSphere Portal document connector - Change the default URL (or add a new one in case none exists) to read 'rmi://localhost:1250/RMIServerBridge2

Creating a WebSphere Portal document connector - Test the connector, as shown below:
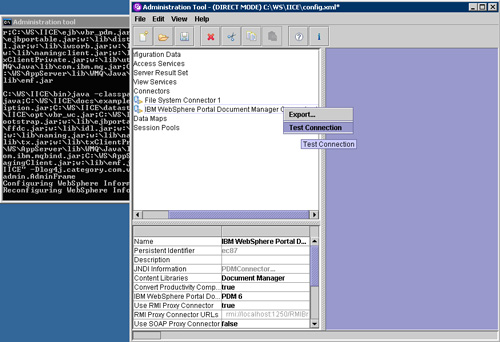
Select to test connector - You should then authenticate, as Figure 78 shows:
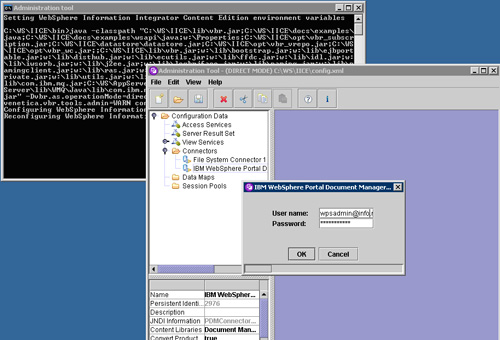
Authenticate - Then, you get a message that your connections succeeded:

Get results of test - On the OmniFind server, add a Portal Document Manager connector, as shown below:

Select the connector - Next, add the connector:
Add the connector - Test the connector by logging in as wpsadmin (or whatever user has appropriate access to the portal server).

Authenticate - You should then see a screen that gives you your test results:

Get test results - Login into the search admin console and create a new crawler of type Content Edition. Select the previously defined connector (for Portal Document Manager). For the libraries, select all. You may subsequently schedule the crawling activity.
Previous