|
10.2.4 Extended Sites: New Store
This is the Store Creation Wizard. To create a new store within the hub, follow these steps:
| 2.
| Select the Extended Sites Hub from the Store name list.
|
| 3.
| Select Extended Sites Ć New Store. The General page is displayed.
|
| 4.
| Complete the entries in the General page:
|
a.  Enter the Store unique identifier (required).
|
|
b.
Enter a Store display name. This is the name that the customers will see (required).
|
|
c.
Enter a description of the store (required).
|
|
d.
Enter a valid e-mail address for the recipient of store notifications (required).
|
|
e.
Select the default store currency (required).
|
|
f.
Select the Store organization (required). An organizational unit under the Store organization will be created for the store.
|
|
g.
If you would like to allow registered customers of other stores within the site to access this store, select its check box.
|
| 5.
| Click Next. The Store Type page is displayed.
|
| 6.
| Select the storefront asset store on which this functional store will be based from the Store type list box. The available store types are:
|
 B2BDirectStorefrontAssetStore
|
|
ConsumerDirectStorefrontAssetStore
|
| 7.
| Click Next. The Catalog page is displayed.
|
| 8.
| Select the catalog for the store from the Catalog list box. You can choose to start with an Empty catalog or use the shared catalog from the Extended Sites Catalog asset store.
|
| 9.
| Click Next. The Payments page is displayed.
|
| 10.
| Complete the entries in the Payments page.
|
|
a.
Select the check box next to each of the payment options that you would like to provide for customers of this store
|
 Cash On Delivery (COD)
|
|
Pay by phone (BillMe)
|
|
Credit card (processed offline)
|
If Credit card is checked, the Brand and Currency list boxes are displayed as depicted in Figure 10-4.
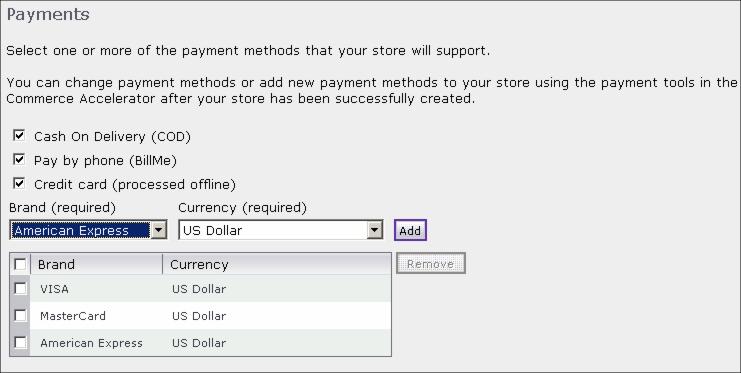
Figure 10-4 Payments page
|
b.
Select a combination of Brand and Currency and click Add. Repeat this for each combination that will be available for the store.
|
|
Note: Additional credit card brands may be added through the Payment Manager interface.
|
| 11.
| Click Next. The Summary page is displayed.
|
| 12.
| Review the contents of the Summary page. You can click Previous to return to any page within the Store Creation Wizard to change values.
|
| 13.
| Click Finish when you are ready to create the store. The Store Creation Confirmation page opens, displaying a progress bar while the store is being created.
|
|