|
8.1.1 Create stores with the ConsumerDirectStorefrontAssetStore
This section describes the steps required to create an Extended Site based on the Consumer Direct Storefront Asset Store:
| 2.
| Log on as the extendedsitesadmin.
|
| 3.
| Select Extended Sites Hub from the Store name list box.
|

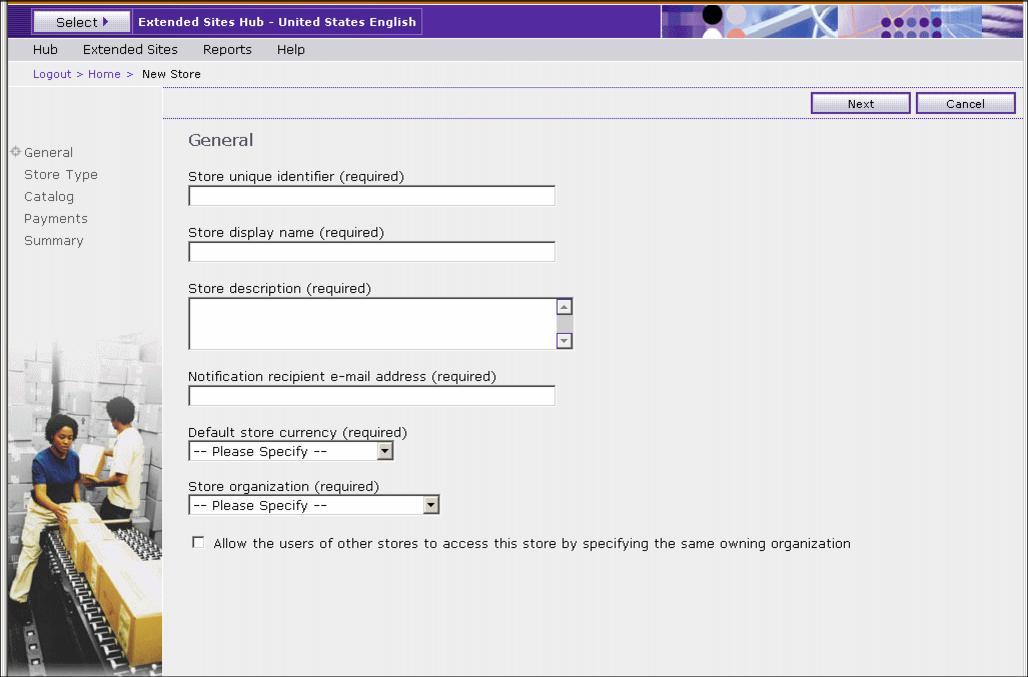
Figure 8-1 Store Creation Wizard - General page
| 6.
| Complete the fields on the page:
|

 Store unique name: B2C1
|

 Store display name: B2C1
|

 Store description
|

 Notification recipient e-mail address (must be a valid e-mail address)
|

 Default store currency: US Dollar
|

 Store organization: B2C Seller Organization
|

 Click Next.
|
| 7.
| Select ConsumerDirectStorefrontAssetStore from the Store type list box.
|
| 9.
| We use the shared catalog from the Catalog Asset Store that was created when we published the ExtendedSites.sar file. Select Extended Sites Catalog Asset Store from the Catalog list box.
|
| 10.
| Click Next to display the Payments page.
|
|
Ensure that WebSphere Commerce Payments is running.
|

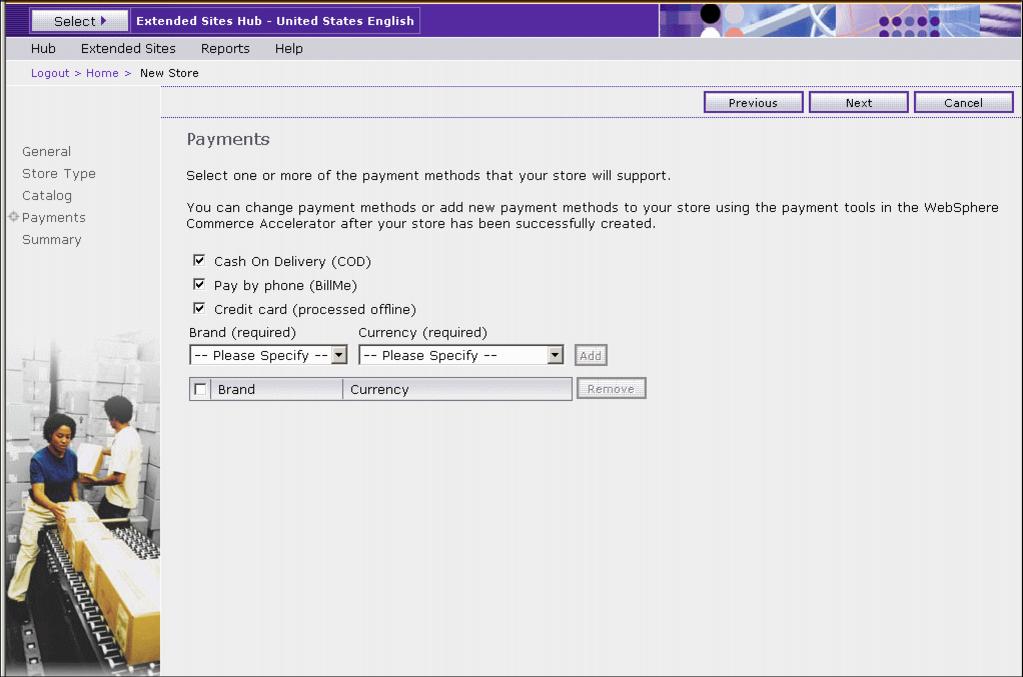
Figure 8-2 Store Creation Wizard - Payments page
| 11.
| Select payment options for the store. If Credit card is selected, the Brand and Currency list boxes are displayed. For each brand and currency combination required at the store, select the brand, select the currency, and click Add.
|
| 12.
| Click Next when complete. The Store creation summary page is displayed.
|
| 13.
| Click Finish after reviewing the contents of the page.
|
| 14.
| The Store Creation Confirmation page is displayed. When the process is complete, click Bookmark Store and Close.
|
|
Note: The store is created in a Closed state. We will leave it closed for now to perform some customizations prior to opening it for business.
|
To create the second store, repeat the previous process from Step 5. In Step 6, enter B2C2 for the store name. You will still enter the store organization as B2C Seller Organization. Complete the remaining steps exactly as done with B2C1.
|


 Store unique name: B2C1
