Tutorials > Payments > Develop a payment plug-in
| | Next >
Step 1: Creating the payment plug-in EJB project
In this step, we will create the payment plug-in EJB project, which will contain the payment plug-in session bean and the payment plug-in deployment descriptor file.
- Prerequisites
- Payment Service Provider Simulator
- Add the Payment Service Provider Simulator Web service client project as a utility JAR file to the WebSphere Commerce EAR file
Procedure
- Open WebSphere Commerce Developer.
- Open the Java EE perspective.
- Click File > New > EJB Project.
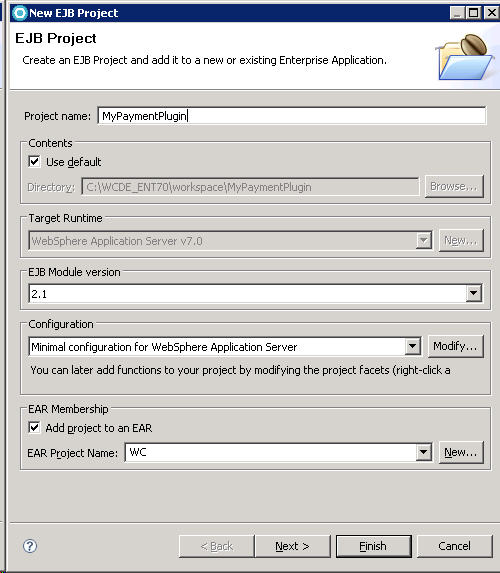
- In the Name field, type MyPaymentPlugin.
- In the EJB Module version list, select 2.1.
- Make sure that the Add module to an EAR project option is selected.
- In the EAR Project Name field, select WC;
then click Next.
- Clear the Create an EJB Client JAR Project to hold the client interfaces and classes option:

- Click Next.
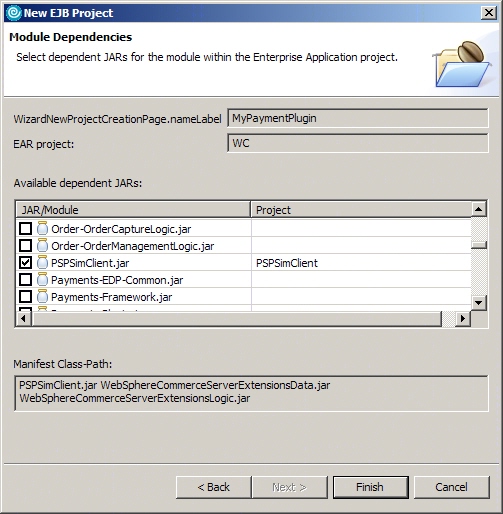
- In the Available dependent JARs list, select PSPSimClient.jar, WebSphereCommerceServerExtensionsData.jar and WebSphereCommerceServerExtensionsLogic.jar:

- Click Finish.
- In the Enterprise Explorer view, expand EJB Projects and confirm that the MyPaymentPlugin project has been created.
| | Next >