8.2 Installing the Cache Monitor
The DynaCache monitor is an installable Web application that displays simple cache statistics, cache entries, and cache policy information. We use Cache Monitor to verify the cachespec.xml configuration for the ConsumerDirect store in this tutorial.
| 1. | Use the WebSphere Application Server Administrative console to install CacheMonitor.ear |
|
a. |

Figure 8-3 Applications
|
b. |
|
c. |
|
d. |
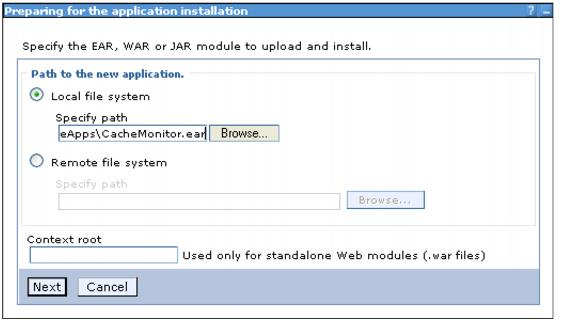
Figure 8-4 CacheMonitor.ear
|
e. |
|
f. |
|
g. |

Figure 8-5 Map modules to servers
|
h. |

Figure 8-6 Map virtual hosts for Web modules
|
i. |
|
j. |
|
k. |
| 2. | Regenerate the Web server plug-ins. |
|
a. |
|
b. |
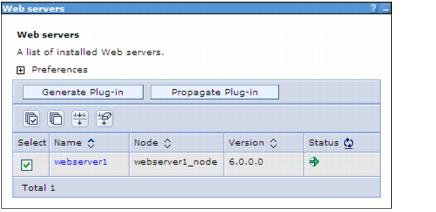
Figure 8-7 Web servers
| 3. | Restart the Web server and application server. |
|
a. |
|
b. |
|
c. |
|
d. |
| 4. | Verify that you can access the Cache Monitor by pointing your Web browser to: |
|
|
You should now be able to see the Cache Monitor screen in your browser as shown in Figure | -8.
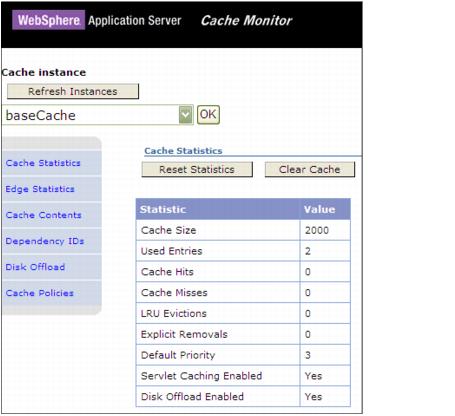
Figure 8-8 Cache Monitor
| 5. | Reading cache statistics |
Use the cache monitor's main screen to watch cache hits versus misses. By comparing these two values, determine how much DynaCache is helping your application, and whether there are any additional steps you can take to improve performance further and decrease the load on the Application Server.
Cache Monitor displays the cache statistics described in Table | -2.
Table 8-2
| Cache statistic | Description |
|---|---|
| Cache Size | The maximum number of entries that the cache can hold. |
| Used Entries | The number of cache entries used. |
| Cache Hits | The number of request responses that are served from the cache. |
| Cache Misses | The number of request responses that are cacheable but cannot be served from the cache. |
| LRU Evictions | The number of cache entries removed to make room for new cache entries. |
| Explicit Removals | The number of cache entries removed or invalidated from the cache based on cache policies or were deleted from the cache through the cache monitor. |
| Default priority | Specifies the default priority for all cache entries. Lower priority entries are moved from the cache before higher priority entries when the cache is full. You can specify the priority for individual cache entries in the cache policy. |
| Servlet Caching Enabled | If servlet caching is enabled, results from servlets and Java Server Pages (JSP) files are cached. |
| Disk Offload Enabled | Specifies if entries that are being removed from the cache are saved to disk. |
Cache statistics