Propagate IBM HTTP Server Plug-in configuration
If automatic generation and propagation of IBM HTTP Server Plug-in configuration and remote Web server management are activated (see above), the plug-in configuration is automatically updated on all Web servers. If automatic propagation is not activated for the Web server, the plug-in has to be manually propagated to the Web server by performing the following steps:
1. Navigate to Servers Æ Web servers (Figure 10-7).
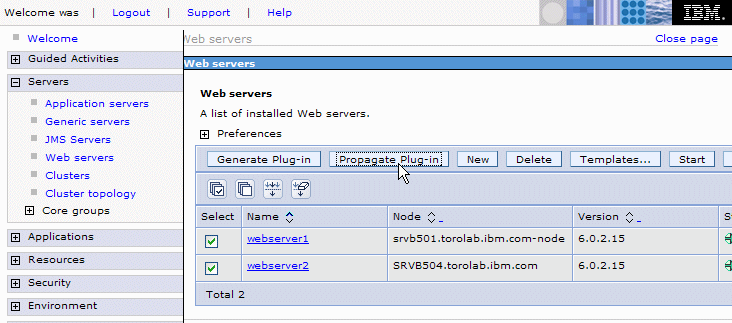
Figure 10-7 Web servers page
2. Under Select, check all webserver1 for which automatic propagation is not activated.
3. Click Generate Plug-in, then Propagate Plug-in.
This still requires that remote management is set up for the Web server and that the IBM HTTP Server administrative server is running on the Web server (see Figure 10-7).
If remote management is disabled, the plug-in configuration file can still be automatically generated, but it needs then to be copied manually to the Web server. The path to the generated configuration file on the Network Deployment Manager is displayed after clicking Generate Plug-in, as shown in Figure 10-8.

Figure 10-8 Plug-in generation message
From there, you need to copy the plugin-cfg.xml file to your Web server. On the Web server, update the WebSpherePluginConfig directive in the httpd.conf file to point to the copied file.
The Web server configuration is now complete.
| xxxx |