Cluster System Manager
Cluster System Manager (CSM) provides a distributed systems management solution for maintaining clusters of AIX and Linux nodes. CSM has a client server architecture. It utilizes the Resource Management and Control (RMC) part of RSCT to manage pSeries servers and LPARs. The functionality of CSM includes:

| 
|
| Installing and updating software on nodes |
|
|
|
| Distributed command execution |
|
|
|
| Hardware control |
|
|
|
| File synchronization across managed nodes |
|
|
|
| Monitoring resources in the cluster |
CSM uses NIM for software installation and update. It provides commands to set up the NIM environment and create machine and other resources. However, it does not prevent independent use of NIM. After CSM setup and cluster configuration, you can still manage the software installation and maintenance of machines that are not part of the CSM cluster.
We suggest that you create one VLAN for the CSM management server, managed devices, and hardware control points, and a separate VLAN for the CSM management server and cluster nodes.
Here is the recommended configuration for system management in CSM:
| Management VLAN |
Hardware control commands such as rpower and rconsole are run on the management server, and they communicate to nodes through the management VLAN. The management VLAN connects the management server to the cluster hardware through an Ethernet connection.
For optimal security, the management VLAN must be restricted to hardware control points, remote console servers, the management server, and root users. Routing between the management VLAN and cluster or public VLANs could compromise security on the management VLAN.
| Cluster VLAN |
The cluster VLAN connects nodes to each other and to the management server through an Ethernet connection. Installation and CSM administration tasks such as running the dsh command are done on the cluster VLAN. Host names and attribute values for nodes on the cluster VLAN are stored in the CSM database.
| Public VLAN |
The public VLAN connects the cluster nodes and management server to the site network. Applications are accessed and run on cluster nodes over the public VLAN. The public VLAN can be connected to nodes through a second Ethernet adapter in each node, or by routing to each node through the Ethernet switch.
Note that using a physically separate CSM management server is safer than using an LPAR management server that is part of a Central Electronics Complex (CEC) that can fail during a hardware or power failure.
For more detailed information about CSM, refer to IBM Redbooks publication Cluster Systems Management Cookbook for pSeries, SG24-6859.
Creating a CSM cluster
Use the following basic steps to create a CSM cluster:
| 1. |
|
| Set up the management server. |
| 2. |
|
| Set up one or more install servers (optional). |
| 3. |
|
| Define the nodes in the cluster. |
| 4. |
|
| Define non-node devices to the cluster (optional). |
| 5. |
|
| Install the nodes of the cluster (optional). |
| 6. |
|
| Add the nodes to the cluster. (You can add AIX, Linux, or both AIX and Linux nodes.) |
All tasks can be performed from the WebSM client. Figure 3-24 displays the Web-based System Manager Master Server Overview; all the Task items listed on the left side can be performed on the CSM Master.
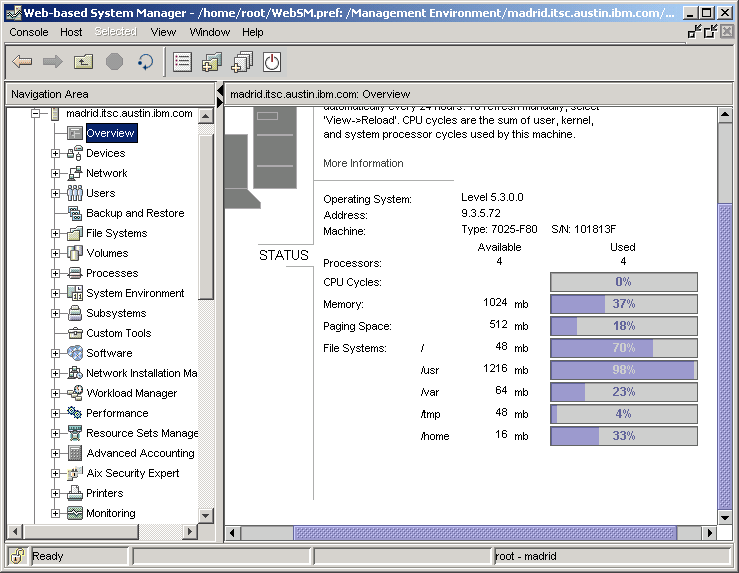
Figure 3-24 WebSM Master Server Overview - tasks listing
Add HMC managed partitions as nodes to a cluster
To add HMC controlled p5 partitions, then in addition to Step 3 in Creating a CSM cluster, define the nodes in the cluster as follows:
| 1. | To enable CSM remote console function for HMC-attached pSeries nodes, use the command systemid to store the user ID and password for remote hardware access and execution. You can verify that the CSM management server can access the HMC by executing the command rpower -a query. |
| 2. | Create a CSM node definition file called nodedef file and define the CSM node. |
The creation of the nodedef file enables you to define the HMC as the remote console configuration for this partition using ConsoleMethod=hmc. We created a file named /exports/systemfiles/br.node.csm with the following contents:
br:At this point, partition br_lparprod can be defined as node br into the CSM database by using the command definenode:
ConsoleMethod=hmc
ConsoleServerName=riogrande
HWControlNodeId=br_lparprod
HWControlPoint=riogrande
LParID=003
PowerMethod=hmc
InstallAdapterDuplex=auto
InstallAdapterSpeed=auto
definenode -f /exports/systemfiles/br.node.csm
To check the power control from the CSM Management Server, use the rpower command for the new created node. In our case, it showed that the power status was off, as expected:
#rpower -n pt query
pt.itsc.austin.ibm.com off
| 3. | Acquire Network Adapter information from the node. |
In our case, because we want to use NIM to install our partitions, we needed to know the Ethernet adapter information. You can obtain this information either manually by using the SMS Menu, or by executing the CSM command getadapters. You can use the command to collect the data for all nodes by using the -a option, or for single nodes only by using the -n option.
The following example shows the command used to collect the data for all nodes and write them into a file:
getadapters -a -z /exports/systemfiles/p550q_lpar_adapters
The node stanzas in this file can be adapted for your needs. In our case, the final content in the /exports/systemfiles/p550q_lpar_adapters file appeared as follows:
###CSM_ADAPTERS_STANZA_FILE###--do not remove this line
#---Stanza Summary----------------------
# Date: Tue Sep 19 17:12:11 CDT 2006
# Stanzas Added: 3
#---End Of Summary----------------------
de.itsc.austin.ibm.com:
MAC_address=922430002002
adapter_type=ent
cable_type=N/A
install_gateway=9.3.5.41
location=U9133.55A.10D1FAG-V2-C2-T1
machine_type=install
netaddr=9.3.5.187
interface_type=en
subnet_mask=255.255.255.0
adapter_duplex=auto
adapter_speed=auto
To view the entire file we used, refer to CSM adapter definition file: p550q_lpar_adapters.
| 4. | Update the CSM database and write the node definitions. |
Perform this task by using the command getadapters with the -w option, as shown:
getadapters -w -f /exports/systemfiles/p550q_lpar_adapters
The command lsnodes can be used to verify the entries in the CSM database. For example, to list the status of all nodes use the lsnode -p command:
# lsnode -p
br: 1 (alive)
brazos: 1 (alive)
de: 1 (alive)
| 5. | Update the NIM database with the CSM node information by using commands csm2nimnodes and csmsetupnim, as explained here: |
| csm2nimnodes |
This command creates or updates NIM machine definitions corresponding to CSM for AIX node definitions. The command can be run from an AIX or Linux management server. It uses CSM database information and command line input to run the appropriate NIM commands. The command creates NIM machine definitions corresponding to CSM cluster nodes; it does not provide all of the options available with standard NIM commands.
| csmsetupnim |
This command sets up CSM customization scripts to automatically install and configure CSM when AIX is installed on a node. This command must be run after the NIM client definitions have been created. The command assumes that the CSM node names match the NIM client names.
Provisionnode script for advanced installations
The sample script provisionnode provides an example of how to provision a node based on a predefined node "profile". The provisionnode sample script and its README can be found at /opt/csm/samples/install. You can customize the script for your own needs.
Script provisionnode runs on a CSM management server to automatically detect and add nodes into a cluster. For details, refer to CSM for AIX 5L and Linux V1.5 Planning and Installation Guide.
CSM node reachability, power status, and network interface status
You can check cluster status by using the command csmstat, as shown in Example 3-21. Notice that all CSM cluster nodes have the status on.
Example 3-21 Output of csmstat command for entire cluster

#csmstat
---------------------------------------------------------------------------------
Hostname           HWControlPoint     Status    PowerStatus    Network-Interfaces
---------------------------------------------------------------------------------
br.itsc.austin.i~  riogrande          on        on             en0-Online
brazos.itsc.aust~  riogrande          on        on             en0-Online
de.itsc.austin.i~  riogrande          on        on             en0-Online
guadalupe.itsc.a~  riogrande          on        on             en0-Online
pt.itsc.austin.i~  riogrande          on        on             en0-Online
trinity.itsc.aus~  riogrande          on        on             en0-Online
uk.itsc.austin.i~  riogrande          on        on             en0-Online
us.itsc.austin.i~  riogrande          on        on             en0-Online

The csmstat command gathers node reachability, power status and network interface status for one or more nodes and displays the output. The default ordering for output is by host name. If there are multiple hardware control points for node (for example, multiple Hardware Management Consoles), then the first hardware control point in the list is shown.
Copy and store vital CSM data using csmbackup
The csmbackup command copies vital CSM data from the management server and stores the data in the directory specified by the -d flag. The command backs up a CSM management server in case of a hardware problem, or if the management server is being changed to another machine. For example, the following command saves all current CSM data into the directory /backup/CSMServerbackup:
csmbackup -d /backup/CSMServerbackup
Distributed Shell (dsh) execution
The dsh command runs commands concurrently on remote targets, that is, on nodes, hardware devices, or both. Targets can be selected from multiple contexts. A context is a target database that contains node and device definitions, such as the CSM database. The dsh command issues a remote shell command for each target specified and returns the output from all targets, formatted so that command results from all nodes can be managed.
The dsh command is a powerful utility for managing and executing common tasks in one step from a central server on all, or selected, managed nodes. For an example illustrating the stop and start of WebSphere from the CSM Management Server, refer to Example 4-12.
You can also gather information about resources allocated to all partitions, and then generate a general report repository. As shown in Example 3-22, we ran the command lsattr -El mem0 on all nodes (br,de,pl,pt,uk,us) and wrote the dsh execution report into directory /tmp/Nodes on the CSM Management Server.
Example 3-22 dsh execution to generate report

#dsh -n br,de,pl,pt,uk,us --report /tmp/Nodes --report-name MemasofOct2006 "lsattr -El mem0"A report for this command has been generated and can be found on the Managing Machine at /tmp/Nodes/MemasofOct2006.0001.

The --report option enables report generation and specifies the path to the directory where reports are saved. All output from each host is saved to individual output and error files, and a report is generated. All output from each host is saved to individual output and error files. Summary HTML and XML report files are created, in addition to an XML results file, as shown in Figure 3-25.
Distributed Copy (dcp) execution
The dcp command concurrently copies files to or from remote target nodes, hardware devices, or both. Targets can be selected from multiple contexts. The dcp command is a CSM Distributed Shell Utility. The configuration and environmental settings for dsh impact the behavior of dcp.
In illustrated in Example 3-24, we used the dcp command to transfer the report that was generated by dsh in Example 3-22 onto a node that has an IBM HTTP server running.
First we determined where an HTTP server was up and running, as shown in Example 3-23.
Example 3-23 dsh execution to check for a running process

#dsh -n br,de,pl,pt,uk,us "ps -ef |grep HTTPServer |grep -v DSH_TARGET_ |grep -v greppt.itsc.austin.ibm.com: root 327778 1 0 Oct 05 - 0:02 /usr/IBM/HTTPServer/bin/httpd -d /usr/IBM/HTTPServer -k start

The IBM HTTP server was up and running, so we copied the files using the dcp recursive option -R onto node pt. To verify that the files are on the remote node pt, we generated a directory listing by using the dsh command with the ls command, as shown in Example 3-24.
Example 3-24 dcp command to copy files

#dcp -n pt -R /tmp/Nodes /usr/IBM/HTTPServer/htdocs/en_US/Nodes
#dsh -n pt "ls /usr/IBM/HTTPServer/htdocs/en_US/Nodes/*"
pt.itsc.austin.ibm.com: MemasofOct2006.0001
pt.itsc.austin.ibm.com: index.html
pt.itsc.austin.ibm.com: listOfReports.html

The result can be viewed in a Web browser, as shown in Figure 3-25.
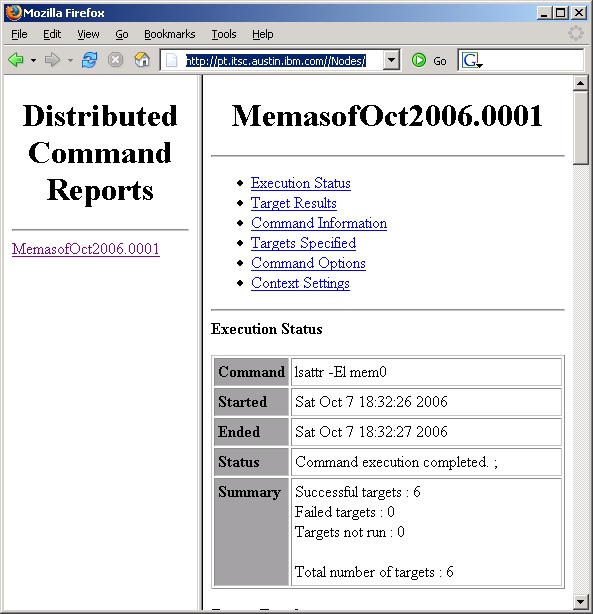
Figure 3-25 dsh execution report in Web browser
Using dsh and dcp to create WebSphere backups
You can also run WebSphere backups of the cell on a regular basis. WebSphere Application Server provides the command line tool backupConfig.sh for this purpose. This tool is located in the bin directories for both WebSphere Application Server and the Network Deployment run-time.
Example 3-25 shows the script backupConfig.sh being executed on node pt using the absolute pathname to the WebSphere bin directory. To prevent changes from being made while the backup is running, we did not use the option -nostop. As a result, we needed to restart the server after backupConfig.sh finished.
Example 3-25 dsh command to run backupConfig.sh

#dsh -n pt -s "/usr/IBM/WAS/AppServer/bin/backupConfig.sh"
pt.itsc.austin.ibm.com: ADMU0116I: Tool information is being logged in file
pt.itsc.austin.ibm.com:            /usr/IBM/WAS/AppServer/profiles/Dmgr/logs/backupConfig.log
pt.itsc.austin.ibm.com: ADMU0128I: Starting tool with the Dmgr profile
pt.itsc.austin.ibm.com: ADMU5001I: Backing up config directory
pt.itsc.austin.ibm.com:            /usr/IBM/WAS/AppServer/profiles/Dmgr/config to file
pt.itsc.austin.ibm.com:            /home/root/WebSphereConfig_2006-10-07.zip
pt.itsc.austin.ibm.com: ADMU0505I: Servers found in configuration:
pt.itsc.austin.ibm.com: ADMU0506I: Server name: dmgr
pt.itsc.austin.ibm.com: ADMU2010I: Stopping all server processes for node ITSOProdCellManager
pt.itsc.austin.ibm.com: ADMU0510I: Server dmgr is now STOPPED
pt.itsc.austin.ibm.com: ....................................................................
pt.itsc.austin.ibm.com: ADMU5002I: 456 files successfully backed up
#dsh -s -n pt "/exports/systemfiles/startup/rc.was"
pt.itsc.austin.ibm.com: ADMU0116I: Tool information is being logged in file
pt.itsc.austin.ibm.com:            /usr/IBM/WAS/AppServer/profiles/Dmgr/logs/dmgr/startServer.log
pt.itsc.austin.ibm.com: ADMU0128I: Starting tool with the Dmgr profile
pt.itsc.austin.ibm.com: ADMU3100I: Reading configuration for server: dmgr
pt.itsc.austin.ibm.com: ADMU3200I: Server launched. Waiting for initialization status.
pt.itsc.austin.ibm.com: ADMU3000I: Server dmgr open for e-business; process id is 389206

To keep a copy of the WebSphere backups, use the dcp command again to copy files into a backup directory on the CSM Management server. You must use the dcp command option -P to pull the files from the client node to the management node, as shown in Example 3-26.
Example 3-26 dcp command to pull WebSphere Application Server backupconfig File
#dcp -n pt -P /home/root/WebSphereConfig_2006-10-07.zip /backup/wasconfigbackups
#ls -ltr /backup/wasconfigbackups
-rw-r--r-- 1 root system 1944638 Oct 08 15:15 WebSphereConfig_2006-10-07.zip._pt.itsc.austin.ibm.com