Service request AssemblyLines
In this last exercise you will be building a web server AssemblyLine to provide a very simple user interface for launching your 'CSV2XML_LookupMode' AL; In other words, an HTTP service for initiating data transfers.
Start by creating a new AL and call it 'TINA_WebServer'1. Then insert a new component,
choosing the 'HTTP Server Connector' and pressing Finish to
end the wizard. Now open its Input Map tab.
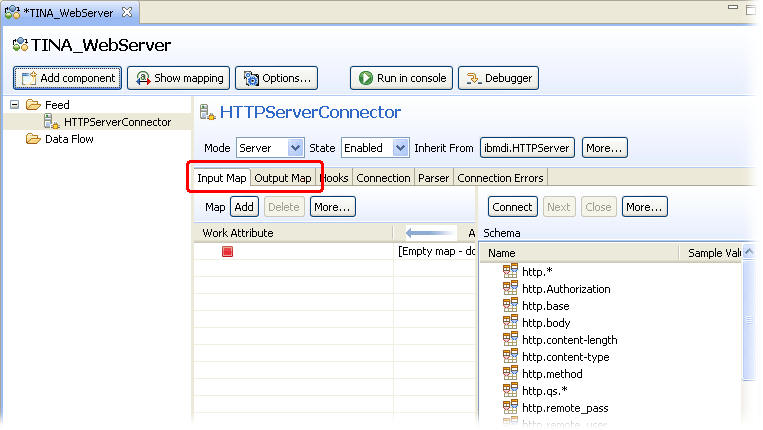
Server Connectors are complementary to Function components. Whereas FC's make service requests, a Server Connector provides and powers a service. As a result, the Input Map for a Server Connector is used to receive Attributes coming from the client making a request, while the Output Map provides a way to reply. We can also see in the right-hand part of the Attribute Map screen that the Input Schema is already in place. The same is true for the Output Schema. Server Connectors provide this information to help you do your mapping. Note however that some of these Schema Attributes contain wildcard characters, like 'http.qs.*'. This is design-time information telling you to expect any number of incoming Attributes whose names start with 'http.qs.'2.
Finally, the Mode drop-down for all Server Connectors offer both Server and Iterator modes. There is an additional mode (Response) not shown here, bringing the total to three. The Server Connector switches between these modes at various stages in its operation:
- A Server Connector first starts in Server mode, connecting to some resource like an IP port and waiting for incoming client connections;
- Once a connection is made, the Connector switches to Iterator mode to retrieve client data based on the Input Map and passing this to the Data Flow components;
- Finally, when the Data Flow components are finished executing, the Connector goes into Response mode, using the Output Map to form a reply back to the client.
You don't have to worry about this since it is handled automatically for you. However, if you do any Hook scripting then you will notice that there are three sets of Hooks: Server, Iterator and Response.
Continue with the tutorial exercise by adding an Input Map Attribute
item.
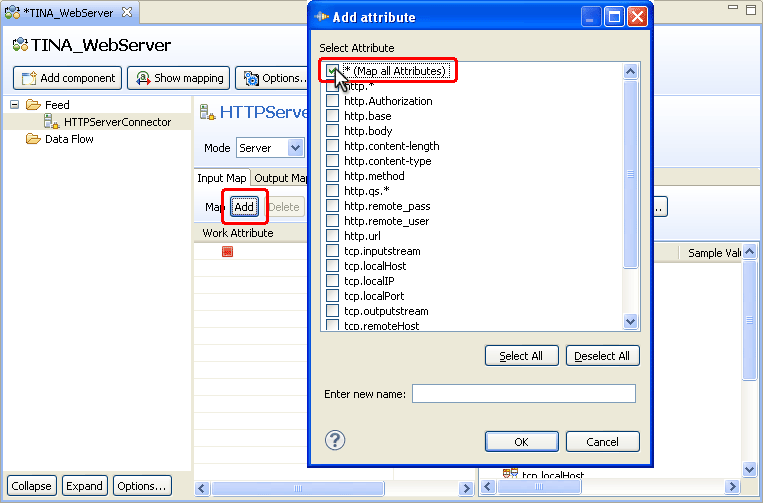
Simply select the topmost option in the dialog presented. Note that you could also have typed the asterisk character (*) in the Entry new name field instead. This is the special wildcard map rule that tells Security Directory Integrator to map in all Attributes read by the Connector.
Your Input Map will look like this:
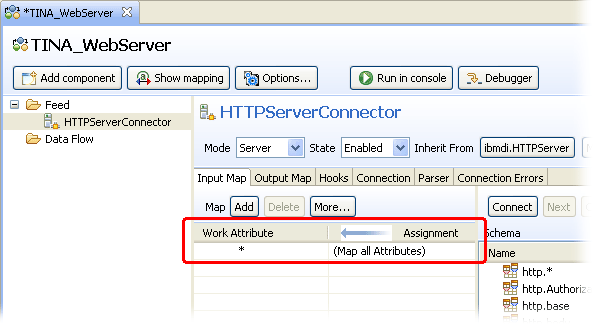
Add a wildcard map item to the Output map as well to ensure that any Attributes set up in the Work Entry for the response message will get mapped back to the client.
To test this component, put a 'Dump Work Entry' Script component in the Flow section and then Run the AssemblyLine. The log output should display the message that your HTTP Server Connector is listening for HTTP connections on port 803. That means your AL is waiting for clients to connect, which you do now by opening a browser and navigating to the following URL:
http://localhost:80
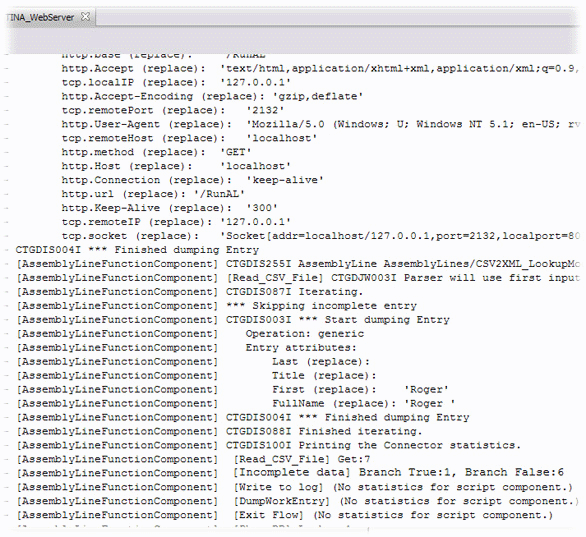
Now look at your log output. Here you will see a number of TCP
and HTTP header properties that were returned as Attributes.

The only Attribute you will be interested in for this exercise is 'http.base' which holds that part of the URL appearing after the host and socket. Specifically, you will be looking for it to contain the text 'RunAL'.
To check for this text, add an IF branch to the Data Flow section of your AL. Call it 'RunAL detected' and set the Condition to be: http.base contains 'RunAL'.
If this branch Condition evaluates to true then you
want to launch your 'CSV2XML_LookupMode' AL. To do this you will re-use
the AssemblyLine Function component from your 'Scheduler' AL by first
dragging it to Resources > Functions in the Navigator panel and then back into this AssemblyLine,
dropping it on top of the new IF branch.
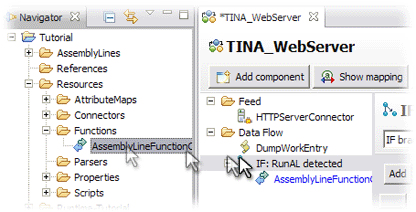
Now re-run the AssemblyLine and enter this text into the address field of your browser:
http://localhost/RunAL
You will now see the Work Entry dump in the log output, followed
by the statistics from the called AssemblyLine.
Your service is working, but the exercise does not end here. First you will make it a little prettier and a lot easier to use by having your web server AssemblyLine return some HTML pages. This would normally require a fair bit of scripting. Fortunately you have been given a few more tutorial files that make this a simple case of drag-and-drop.
Before you begin, disable the 'Dump Work Entry' Script to minimize
the log output. Then add an ELSE branch immediately after 'IF RunAL
detected'. Name it 'Return web page'. Now use a file browser to locate
the script file named "Return web page.script"
in the Tutorial directory and drag it into Resources > Scripts. From there we can pull
it into your AL, dropping it on top of the ELSE branch. Your AL should
now look like this:

Run the AssemblyLine again and when you dial up http://localhost you should see this
web page:
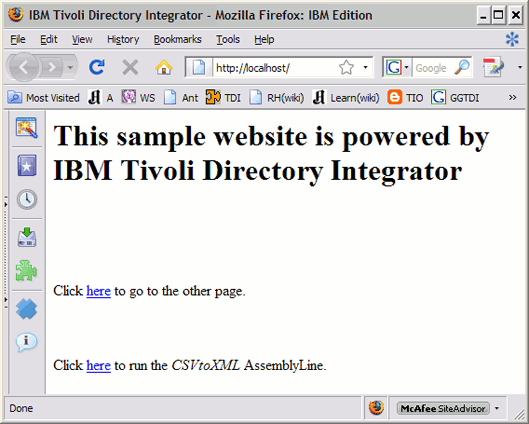
The topmost link will navigate to OtherPage.html, while the link at the bottom should send the required 'RunAL' text in the http.base in order to launch the AssemblyLine.
And that concludes the hands-on part of this guide.
Parent topic:
Event-driven integration1 TINA here stands for "TINA Is Not Apache" :-)2 This particular set of Attributes (http.qs.*) will carry any query string parameters passed into the HTTP call by the client.3 If for some reason this port is already in use, simply open the Configuration panel for the HTTP Server Connector and choose another port.