For up-to-date product documentation, see the IBM MobileFirst Foundation Developer Center.
Install MobileFirst Server in graphical mode
Use the graphical mode of IBM® Installation Manager and the Server Configuration Tool to install MobileFirst Server.
Before you begin
- Make sure that one of the following databases and a supported Java™ version are installed. You also need the corresponding JDBC driver for the database to be available
on your computer:
- Database Management System (DBMS) from the list of supported database:
- DB2®
- MySQL
- Oracle
Important:
You must have a database where you can create the tables that are needed by the product, and a database user who can create tables in that database.
In the tutorial, the steps to create the tables are for DB2. We can find the DB2 installer as a package of IBM MobileFirst™ Platform Foundation eAssembly on IBM Passport Advantage®.
- JDBC driver for our database.
- For DB2, use the DB2 JDBC driver type 4.
- For MySQL, use the Connector/J JDBC driver.
- For Oracle, use the Oracle thin JDBC driver.
- Java 7 or later.
- Database Management System (DBMS) from the list of supported database:
- Download the installer of IBM Installation Manager V1.8.4 or later from Installation Manager and Packaging Utility download links.
- You must also have the installation repository of the MobileFirst Server and
the installer of WebSphere® Application Server Liberty Core
V8.5.5.3 or later. Download these packages from the IBM MobileFirst Platform Foundation eAssembly
on Passport Advantage:
- MobileFirst Server installation repository
- IBM MobileFirst Platform Foundation V8.0 .zip file of Installation Manager Repository for IBM MobileFirst Platform Server
- WebSphere Application Server Liberty profile
- IBM WebSphere Application Server - Liberty Core V8.5.5.3 or later
We can run the installation in graphical mode if you are on one of the following operating systems:
- Windows x86 or x86-64
- Mac OS x86-64
- Linux x86 or Linux x86-64
On other operating systems, we can still run the installation with Installation Manager in graphical mode, but the Server Configuration Tool is not available. We need to use Ant tasks (as described in Install MobileFirst Server in command line mode) to deploy MobileFirst Server to Liberty profile.
Note: The instruction to install and set up the database is not part of this tutorial. If we want to run this tutorial without installing a stand-alone database, we can use the embedded Derby database. However, the restrictions for using this database are as follows:
- We can run Installation Manager in graphical mode, but to deploy the server, you need to skip to the command line section of this tutorial to install with Ant tasks.
- We cannot configure a server farm. Embedded Derby database does not support access from multiple servers. To configure a server farm, you need DB2, MySQL, or Oracle.
This tutorial goes through the following steps:
- Install IBM Installation Manager
- Install WebSphere Application Server Liberty Core
- Install MobileFirst Server
- Create a database
- Run the Server Configuration Tool
- Testing the installation
- Create a farm of two Liberty servers that run MobileFirst Server
- Testing the farm and see the changes in MobileFirst Operations Console
Parent topic: Tutorials about MobileFirst Server installation
Install IBM Installation Manager
You must install Installation Manager V1.8.4 or later. The older versions of Installation Manager are not able to install IBM MobileFirst Platform Foundation V8.0 because the postinstallation operations of the product require Java 7. The older versions of Installation Manager come with Java 6.
Procedure
- Extract the IBM Installation Manager archive that is downloaded. We can find the installer at Installation Manager and Packaging Utility download links.
- Install Installation Manager.
- Run install.exe to install Installation Manager as administrator. Root is needed on Linux or UNIX. On Windows, the administrator privilege is needed. In this mode, the information about the installed packages is placed in a shared location on the disk and any user that is allowed to run Installation Manager can update the applications.
- Run userinst.exe to install Installation Manager in user mode. No specific privilege is needed. However, in this mode, the information about the installed packages are placed in the user's home directory. Only that user can update the applications that are installed with Installation Manager.
Install WebSphere Application Server Liberty Core
The installer for WebSphere Application Server Liberty Core is provided as part of the package for IBM MobileFirst Platform Foundation. In this task, Liberty profile is installed and a server instance is created so that we can install MobileFirst Server on it.
Procedure
- Extract the compressed file for WebSphere Application Server Liberty Core that you downloaded.
- Launch Installation Manager.
- Add the repository in Installation Manager.
- Go to File > Preferences and click Add Repositories....
- Browse for the repository.config file of diskTag.inf file in the directory where the installer is extracted.
- Select the file and click OK.
- Click OK to close the Preferences panel.
- Click Install to install Liberty.
- Select IBM WebSphere Application Server Liberty Core and click Next.
- Accept the terms in the license agreements, and click Next.
- In the scope of this tutorial, do not need to install the
additional assets when asked. Click Install for
the installation process to start.
- If the installation is successful, the program displays a message indicating that installation is successful. The program might also display important postinstallation instructions.
- If the installation is not successful, click View Log File to troubleshoot the problem.
- Move the usr directory that contains the servers in a location that does not need specific privileges.
If you install Liberty with Installation Manager in administrator mode, the files are in a location where non-administrator or non-root users cannot modify the files. For the scope of this tutorial, move the usr directory that contains the servers in a place that does not need specific privileges. In this way, the installation operations can be done without specific privileges.
- Go to the installation directory of Liberty.
- Create a directory named etc. We need administrator or root privileges.
- In etc directory, create a server.env file
with the following content:
WLP_USER_DIR=<path to a directory where any user can write>
For example, on Windows:
WLP_USER_DIR=C:\LibertyServers\usr
- Create a Liberty server that will be used to install
the first node of MobileFirst Server at
the later part of the tutorial.
- Start a command line.
- Go to liberty_install_dir/bin,
and enter server create mfp1.
This command creates a Liberty server instance named mfp1. We can see its definition at liberty_install_dir/usr/servers/mfp1 or WLP_USER_DIR/servers/mfp1 (if you modify the directory as described in step 6).
Results
After the server is created, we can start this server with server start mfp1 from liberty_install_dir/bin/.
To stop the server, enter the command: server stop mfp1 from liberty_install_dir/bin/.
The default home page can be viewed at http://localhost:9080.
Note: For production, you need to make sure that the Liberty server is started as a service when the host computer starts. Making the Liberty server start as a service is not part of this tutorial.
Install MobileFirst Server
Before you begin
Make sure that Installation Manager V1.8.4 or later is installed. The installation of MobileFirst Server might not succeed with an older version of Installation Manager because the postinstallation operations require Java 7. The older versions of Installation Manager come with Java 6.
Run Installation Manager to install the binary files of MobileFirst Server on your disk before you create the databases and deploy MobileFirst Server to Liberty profile. During the installation of MobileFirst Server with Installation Manager, an option is proposed to you to install IBM MobileFirst Platform Application Center. Application Center is a different component of the product. For this tutorial, it is not required to be installed with MobileFirst Server. For more information about Application Center, see Install and configure the Application Center.
Procedure
- Launch Installation Manager.
- Add the repository of MobileFirst Server in
Installation Manager.
- Go to File > Preferences and click Add Repositories....
- Browse for the repository file in the directory where
the installer is extracted.
If you decompress the IBM MobileFirst Platform Foundation V8.0 .zip file for MobileFirst Server in mfp_installer_directory folder, the repository file can be found at mfp_installer_directory/MobileFirst_Platform_Server/disk1/diskTag.inf.
You might also want to apply the latest fix pack that can be downloaded from IBM Support Portal. Make sure to enter the repository for the fix pack. If you decompress the fix pack in fixpack_directory folder, the repository file is found in fixpack_directory/MobileFirst_Platform_Server/disk1/diskTag.inf.
Note: We cannot install the fix pack without the repository of the base version in the repositories of Installation Manager. The fix packs are incremental installers and need the repository of the base version to be installed.
- Select the file and click OK.
- Click OK to close the Preferences panel.
- After accepting the license terms of the product, click Next.
- Select the Create a new package group option to install the product in that new package group.
- Click Next.
- Select Do not activate
token licensing with the Rational License Key Server option
in the Activate token licensing section
of the General settings panel.
In this tutorial, it is assumed that token licensing is not needed and the steps to configure MobileFirst Server for token licensing are not included. However, for production installation, we must determine whether you need to activate token licensing or not. If you have a contract to use token licensing with Rational® License Key Server, select Activate token licensing with the Rational License Key Server option. After you activate token licensing, we must do extra steps to configure MobileFirst Server. For more information, see Install and configure for token licensing.
- Keep the default option (No) as-is in the Install IBM MobileFirst Platform Foundation for iOS section of the General settings panel.
- Select No option in the Choose configuration panel so that Application Center is not installed. For production installation, use Ant tasks to install Application Center. The installation with Ant tasks enables you to decouple the updates to MobileFirst Server from the updates to Application Center. For more information about installing Application Center, see Install and configure the Application Center.
- Click Next until you reach the Thank You panel. Then, proceed with the installation.
Results
An installation directory that contains the resources to install MobileFirst components is installed.
We can find the resources in the following folders:
- MobileFirstServer folder for MobileFirst Server
- PushService folder for MobileFirst Server push service
- ApplicationCenter folder for Application Center
- Analytics folder for MobileFirst Analytics
The goal of this tutorial is to install MobileFirst Server by using the resources in MobileFirstServer folder.
We can also find some shortcuts for the Server Configuration Tool, Ant, and mfpadm program in the shortcuts folder.
Create a database
This task is to ensure that a database exists in your DBMS, and that a user is allowed to use the database, create tables in it, and use the tables.
The database is used to store the technical data that is used by the various MobileFirst components:
- MobileFirst Server administration service
- MobileFirst Server live update service
- MobileFirst Server push service
- MobileFirst runtime
In this tutorial, the tables for all the components are placed under the same schema. The Server Configuration Tool creates the tables in the same schema. For more flexibility, you might want to use Ant tasks or a manual installation.
Note: The steps in this task are for DB2. If you plan to use MySQL or Oracle, see Database requirements.
Procedure
- Log on to the computer that is running the DB2 server. It is assumed that a DB2 user, for example named as mfpuser, exists.
- Verify that this DB2 user
has the access to a database with a page size 32768 or more, and is
allowed to create implicit schemas and tables in that database.
By default, this user is a user declared on the operating system of the computer that runs DB2. That is, a user with a login for that computer. If such user exists, the next action in step 3 is not needed. In the later part of the tutorial, the Server Configuration Tool creates all the tables required by the product under a schema in that database.
- Create a database with the correct page size for
this installation if you do not have one.
- Open a session with a user that has SYSADM or SYSCTRL permissions. For example, use the user db2inst1 that is the default admin user that is created by the DB2 installer.
- Open a DB2 command
line processor:
- On Windows systems, click Start > IBM DB2 > Command Line Processor.
- On Linux or UNIX systems, go to ~/sqllib/bin (or db2_install_dir/bin if sqllib is not created in the administrator's home directory) and enter ./db2.
- Enter the following SQL statements to create a database
that is called MFPDATA:
CREATE DATABASE MFPDATA COLLATE USING SYSTEM PAGESIZE 32768
CONNECT TO MFPDATA
GRANT CONNECT ON DATABASE TO USER mfpuser
GRANT CREATETAB ON DATABASE TO USER mfpuser
GRANT IMPLICIT_SCHEMA ON DATABASE TO USER mfpuser
DISCONNECT MFPDATA
QUIT
If you defined a different user name, replace mfpuser with your own user name.
Note: The statement does not remove the default privileges granted to PUBLIC in a default DB2 database. For production, you might need to reduce the privileges in that database to the minimum requirement for the product. For more information about DB2 security and an example of the security practices, see DB2 security, Part 8: Twelve DB2 security best practices.
Run the Server Configuration Tool
We use the Server Configuration Tool to run the following operations:
- Create the tables in the database that are needed by the MobileFirst applications
- Deploy the web applications of MobileFirst Server (the runtime, administration service, live update service, push service components, and MobileFirst Operations Console) to Liberty server.
The Server Configuration Tool does not deploy the following MobileFirst applications:
- MobileFirst Analytics
- MobileFirst Analytics is typically deployed on a different set of servers than MobileFirst Server because of its high memory requirements. MobileFirst Analytics can be installed manually or with Ant tasks. If it is already installed, we can enter its URL, the user name, and password to send data to it in the Server Configuration Tool. The Server Configuration Tool will then configure the MobileFirst apps to send data to MobileFirst Analytics. For more information about the installation of MobileFirst Analytics, see MobileFirst Analytics Server installation guide.
- Application Center
- This application can be used to distribute mobile apps internally to the employees that use the apps, or for test purpose. It is independent of MobileFirst Server and is not necessary to install together with MobileFirst Server. For more information, see Install and configure the Application Center.
Procedure
- Start the Server Configuration
Tool.
- On Linux, from application shortcuts Applications > IBM MobileFirst Platform Server > Server Configuration Tool.
- On Windows, click Start > Programs > IBM MobileFirst Platform Server > Server Configuration Tool.
- On Mac OS, open a shell console. Go to mfp_server_install_dir/shortcuts and
type ./configuration-tool.sh.
The mfp_server_install_dir directory is where you installed MobileFirst Server.
- Select File > New Configuration... to create a MobileFirst Server Configuration.
- Name the configuration Hello MobileFirst and click OK.
- Leave the default entries of Configuration Details as-is
and click Next.
In this tutorial, the environment ID is not used. It is a feature for advanced deployment scenario. An example of such scenario would be installing multiple instances of MobileFirst Server and administration service in the same application server or WebSphere Application Server cell.
- Keep the default context root for the administration service and the runtime component.
- Do not change the default entries in the Console Settings panel and click Next to install MobileFirst Operations Console with the default context root.
- Select IBM DB2 as a database and click Next.
- In the DB2 Database Settings panel,
complete the details:
- Enter the host name that runs your DB2 server. If it is running on your computer, we can enter localhost.
- Change the port number if the DB2 instance you plan to use is not listening to the default port (50000).
- Enter the path to the DB2 JDBC driver. For DB2, the file that is named as db2jcc4.jar is expected. It is also needed to have the db2jcc_license_cu.jar file in the same directory. In a standard DB2 distribution, these files are found in db2_install_dir/java.
- Click Next.
- In the DB2 Additional Settings panel,
complete the details:
- Enter mfpuser as DB2 user name and its password. Use your own DB2 user name if it is not mfpuser.
- Enter MFPDATA as the name of the database.
- Leave MFPDATA as the schema in which the tables will be created. Click Next. By default, Server Configuration Tool proposes the value MFPDATA.
- Do not enter any values in the Database Creation
Request panel and click Next.
This pane is used when the database that is entered in the previous pane does not exist on the DB2 server. In that case, we can enter the user name and password of the DB2 administrator. The Server Configuration Tool opens an ssh session to the DB2 server and runs the commands as described in Create a database to create the database with default settings and the correct page size.
- In the Application Server Selection panel, select WebSphere Application Server option and click Next.
- In the Application Server Settings panel,
complete the details:
- Enter the installation directory for WebSphere Application Server Liberty.
- Select the server where you plan to install the product in the server name field. Select mfp1 server that is created in step 7 of Install WebSphere Application Server Liberty Core.
- Leave the Create a user option selected
with its default values.
This option creates a user in the basic registry of the Liberty server, so that we can sign in to MobileFirst Operations Console or to the administration service. For a production installation, do not use this option and configure the security roles of the applications after the installation as described in Configure user authentication for MobileFirst Server administration.
- Select the Server farm deployment option for the deployment type.
- Click Next.
- Select Install the Push service option.
When the push service is installed, HTTP or HTTPS flows are needed from the administration service to the push service, and from the administration service and the push service to the runtime component.
- Select Have the Push and Authorization Service
URLs computed automatically option.
When this option is selected, the Server Configuration Tool configures the applications to connect to the applications installed on the same server. When we use a cluster, enter the URL used to connect to the services from your HTTP load balancer. When we install on WebSphere Application Server Network Deployment, it is mandatory to enter a URL manually.
- Keep the default entries of Credentials for
secure communication between the Administration and the Push service as-is.
A client ID and a password are needed to register the push service and the administration service as the confidential OAuth clients for the authorization server (which is by default, the runtime component). The Server Configuration Tool generates an ID and a random password for each of the service, that we can keep as-is for this getting started tutorial.
- Click Next.
- Keep the default entries of Analytics Setting panel
as-is.
To enable the connection to the Analytics server, you need to first install MobileFirst Analytics. However, the installation is not in the scope of this tutorial.
- Click Deploy.
Results
We can see a detail of the operations done in Console Window.
An Ant file is saved. The Server Configuration Tool helps you create an Ant file for installing and updating your configuration. This Ant file can be exported by using File > Export Configuration as Ant Files... . For more information about this Ant file, see Deploy MobileFirst Server to Liberty with Ant tasks in Install MobileFirst Server in command line mode.
Then, the Ant file is run and does the following operations:
- The tables for the following components are created in the database:
- The administration service and the live update service. Created by the admdatabases Ant target.
- The runtime. Created by the rtmdatabases Ant target.
- The push service. Created by the pushdatabases Ant target.
- The WAR files of the various components are deployed to Liberty server. We can see the details of the operations in the log under adminstall, rtminstall, and pushinstall targets.
If you have access to the DB2 server, we can list the tables that are created by using these instructions:
- Open a DB2 command line processor with mfpuser as described in step 3 of Create a database.
- Enter the SQL statements:
CONNECT TO MFPDATA USER mfpuser USING mfpuser_password
LIST TABLES FOR SCHEMA MFPDATA
DISCONNECT MFPDATA
QUIT
- Database user consideration
- In the Server Configuration Tool, only one database user is needed. This user is used to create the tables, but is also used as the data source user in the application server at run time. In production environment, you might want to restrict the privileges of the user that is used at run time to the strict minimum (SELECT / INSERT / DELETE / UPDATE), and thus provide a different user for deployment in the application server. For more information about the privileges required at run time, see Database users and privileges. The Ant files that are provided as examples also use the same users for both cases. However, in the case of DB2, you might want to create your own versions of files. As such, we can distinguish the user used to create the databases from the user that is used for the data source in the application server with the Ant tasks.
- Database tables creation
- For production, you might want to create the tables manually. For example, if your DBA wants to override some default settings or assign specific table spaces. The database scripts that are used to create the tables are available in mfp_server_install_dir/MobileFirstServer/databases and mfp_server_install_dir/PushService/databases. For more information, see Create the database tables manually.
The server.xml file and some application server setting are modified during the installation. Before each modification, a copy of the server.xml file is made, such as server.xml.bak, server.xml.bak1, and server.xml.bak2. To see everything that was added, we can compare the server.xml file with the oldest backup (server.xml.bak). On Linux, we can use the command diff --strip-trailing-cr server.xml server.xml.bak to see the differences. On AIX®, use the command diff server.xml server.xml.bak to find the differences.
- Modification of the application server settings (specific to Liberty):
-
- The Liberty features are added.
The features are added for each application and can be duplicated. For example, the JDBC feature is used for both the administration service and the runtime components. This duplication allows the removal of the features of an application when it is uninstalled without breaking the other applications. For example, if you decide at some point to uninstall the push service from a server and install it on another server. However, not all topologies are possible. The administration service, the live update service, and the runtime component must be on the same application server with Liberty profile. For more information, see Constraints on MobileFirst Server administration service, MobileFirst Server live update service and MobileFirst runtime. The duplication of features does not create issue unless the features that added are conflicting. Adding the jdbc-40 and jdbc-41 features would cause a problem, but adding twice the same feature does not.
- host='*' is added in the httpEndPoint declaration.
This setting is to allow the connection to the server from all network interfaces. In production, you might want to restrict the host value of the HTTP endpoint.
- The tcpOptions element (tcpOptions soReuseAddr="true")
is added in the server configuration to enable immediate rebind to
a port with no active listener and improve the throughput of the server.
- A keystore with ID defaultKeyStore is created
if it does not exist.
The keystore is to enable the HTTPS port and more specifically, to enable the JMX communication between the administration service (mfp-admin-service.war) and the runtime component (mfp-server.war). The two applications communicate via JMX. In the case of Liberty profile, restConnector is used to communicate between the applications in a single server and also between the servers of a Liberty Farm. It requires the use of HTTPS. For the keystore that is created by default, Liberty profiles creates a certificate with a validity period of 365 days. This configuration is not intended for production use. For production, you need to reconsider to use your own certificate.
To enable JMX, a user with administrator role (named as MfpRESTUser) is created in the basic registry. Its name and password are provided as JNDI properties (mfp.admin.jmx.user and mfp.admin.jmx.pwd) and are used by the runtime component and the administration service to run JMX queries. In the global JMX properties, some properties are used to define the cluster mode (stand-alone server or working in a farm). The Server Configuration Tool sets the mfp.topology.clustermode property to Standalone in Liberty server. In the later part of this tutorial about the creation of a farm, the property is modified to Cluster.
- The creation of users (Also valid for Apache Tomcat and WebSphere Application Server)
- Optional Users: The Server Configuration Tool creates a test user (admin/admin) so that we can use this user to log to the console after the installation.
- Mandatory Users: The Server Configuration Tool also creates a user (named as configUser_mfpadmin with a randomly generated password) to be used by the administration service to contact the local live update service. For Liberty server, MfpRESTUser is created. If your application server is not configured to use a basic registry (for example, an LDAP registry), the Server Configuration Tool is unable to request the name of an existing user. In this case, you need to use Ant tasks. For more information, see Install with Ant Tasks.
- The webContainer element is modified.
The deferServletLoad web container custom property is set to false. Both the runtime component and the administration service must start when the server starts. These components can thus register the JMX beans and start the synchronization procedure that allows the runtime component to download all the applications and adapters that it needs to serve.
- The default executor is customized to set large values to coreThreads and maxThreads if
we use Liberty V8.5.5.5 or earlier. The default executor is automatically
tuned by Liberty as of V8.5.5.6.
This setting avoids timeout issues that break the startup sequence of the runtime component and administration service on some Liberty versions. The absence of this statement can be the cause of these errors in the server log file:
Failed to obtain JMX connection to access an MBean. There might be a JMX configuration error: Read timed out
FWLSE3000E: A server error was detected.
- The Liberty features are added.
FWLSE3012E: JMX configuration error. Unable to obtain MBeans. Reason: "Read timed out".
The following applications are installed:
- mfpadmin, the administration service
- mfpadminconfig, the live update service
- mfpconsole, MobileFirst Operations Console
- mobilefirst, MobileFirst runtime component
- imfpush, the push service
The Server Configuration Tool installs all the applications on the same server. We can separate the applications in different application servers, but under certain constraints that are documented in Topologies and network flows.
For an installation on different servers, we cannot use the Server Configuration Tool. Use Ant tasks (Deploy MobileFirst Server to Liberty with Ant tasks) or install the product manually.
- Administration service
-
The administration service is the service for managing MobileFirst applications, adapters, and their configurations. It is secured by security roles. By default, the Server Configuration Tool adds a user (admin) with the administrator role, that we can use to log in to the console for testing. The configuration of the security role must be done after an installation with the Server Configuration Tool (or with Ant tasks). See Configure user authentication for MobileFirst Server administration. You might want to map the users or the groups that come from the basic registry or an LDAP registry that you configure in your application server to each security role.
The class loader is set with delegation parent last for Liberty profile and WebSphere Application Server, and for all MobileFirst applications. This setting is to avoid conflicts between the classes packaged in the MobileFirst applications and the classes of the application server. Forgetting to set the class loader delegation to parent last is a frequent source of error in manual installation. For Apache Tomcat, this declaration is not needed.
In Liberty profile, a common library is added to the application for decrypting passwords that are passed as JNDI properties. The Server Configuration Tool defines two mandatory JNDI properties for the administration service: mfp.config.service.user and mfp.config.service.password. They are used by the administration service to connect to the live update service with its REST API. More JNDI properties can be defined to tune the application or adapt it to our installation particularities. For more information, see List of JNDI properties for MobileFirst Server administration service.
The Server Configuration Tool also defines the JNDI properties (the URL and the OAuth parameters to register the confidential clients) for the communication with the push service.
The data source to the database that contains the tables for the administration service is declared, as well as a library for its JDBC driver.
- Live update service
-
The live update service stores information about the runtime and application configurations. It is controlled by the administration service and must always run on the same server as the administration service. The context root is context_root_of_admin_serverconfig. As such, it is mfpadminconfig. The administration service assumes that this convention is respected to create the URL of its requests to the REST services of the live update service.
The class loader is set with delegation parent last as discussed in the administration service section.
The live update service has one security role, admin_config. A user must be mapped to that role. Its password and login must be provided to the administration service with the JNDI property: mfp.config.service.user and mfp.config.service.password. For information about the JNDI properties, see List of JNDI properties for MobileFirst Server administration service and List of JNDI properties for MobileFirst Server live update service.
It also needs a data source with JNDI name on Liberty profile. The convention is context_root_of_config_server/jdbc/ConfigDS. In this tutorial, it is defined as mfpadminconfig/jdbc/ConfigDS. In an installation by the Server Configuration Tool or with Ant tasks, the tables of the live update service are in the same database and schema as the tables of the administration service. The user to access these tables is also the same.
- MobileFirst Operations Console
-
MobileFirst Operations Console is declared with the same security roles as the administration service. The users that are mapped to the security roles of MobileFirst Operations Console must also be mapped to the same security role of the administration service. Indeed, MobileFirst Operations Console runs queries to the administration service on the behalf of the console user.
The Server Configuration Tool positions one JNDI property, mfp.admin.endpoint, that indicates how the console connects to the administration service. The default value set by the Server Configuration Tool is '*://*:*/mfpadmin'. The setting means that it must use the same protocol, host name, and port as the incoming HTTP request to the console, and the context root of the administration service is /mfpadmin. If we want to force the request to go though a web proxy, change the default value. For more information about the possible values for this URL, or for information about other possible JNDI properties, see List of JNDI properties for MobileFirst Server administration service.
The class loader is set with delegation parent last as discussed in the administration service section.
- MobileFirst runtime
-
This application is not secured by a security role. It is not required to log in with a user known by the Liberty server, to access this application. The mobile devices requests are routed to the runtime. They are authenticated by other mechanisms specific to the product (such as OAuth) and the configuration of the MobileFirst applications.
The class loader is set with delegation parent last as discussed in the administration service section.
It also needs a data source with JNDI name on Liberty profile. The convention is context_root_of_runtime/jdbc/mfpDS. In this tutorial, it is defined as mobilefirst/jdbc/mfpDS. In an installation by the Server Configuration Tool or with Ant tasks, the tables of the runtime are in the same database and schema as the tables of the administration service. The user to access these tables is also the same.
- Push service
-
This application is secured by OAuth. The valid OAuth tokens must be included in any HTTP request to the service.
The configuration of OAuth is made through the JNDI properties (such as the URL of the authorization server, the client ID, and the password of the push service). The JNDI properties also indicate the security plug-in (mfp.push.services.ext.security) and the fact that a relational database is used (mfp.push.db.type). The requests from the mobile devices to the push service are routed to this service. The context root of the push service must be /imfpush. The client SDK computes the URL of the push service based on the URL of the runtime with the context root (/imfpush). If we want to install the push service on a different server than the runtime, you need to have an HTTP router that can route the device requests to the relevant application server.
The class loader is set with delegation parent last as discussed in the administration service section.
It also needs a data source with JNDI name on Liberty profile. The JNDI name is imfpush/jdbc/imfPushDS. In an installation by the Server Configuration Tool or with Ant tasks, the tables of the push service are in the same database and schema as the tables of the administration service. The user to access these tables is also the same.
The Liberty profile jvm.options file is modified. A property (com.ibm.ws.jmx.connector.client.rest.readTimeout) is defined to avoid timeout issues with JMX when the runtime synchronizes with the administration service.
Testing the installation
After the installation is complete, we can use this procedure to test the components that are installed.
Procedure
- Start the server by using the command server start mfp1. The binary file for the server is in liberty_install_dir/bin.
- Test MobileFirst Operations Console with
a web browser.
Go to http://localhost:9080/mfpconsole. By default, the server runs on port 9080. However, we can verify the port in the element <httpEndpoint> as defined in the server.xml file. A login screen is displayed.
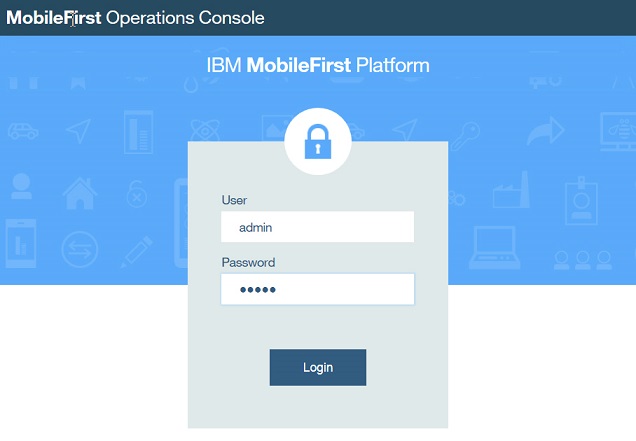
- Log in with admin/admin.
This user is created by default by the Server Configuration Tool.
Note: If you connect with HTTP, the login ID and password are sent in clear text in the network. For a secure login, use HTTPS to log to the server. We can see the HTTPS port of the Liberty server in the httpsPort attribute of the <httpEndpoint> element in the server.xml file. By default, the value is 9443.
- Log out of the console with Hello Admin > Sign Out.
- Enter the following URL: https://localhost:9443/mfpconsole in
the web browser and accept the certificate.
By default, the Liberty server generates a default certificate that is not known by your web browser, you need to accept the certificate. Mozilla Firefox presents this certification as a security exception.
- Log in again with admin/admin.
The login and password are encrypted between your web browser and MobileFirst Server. In production, you might want to close the HTTP port.
Create a farm of two Liberty servers that run MobileFirst Server
In this task, you will create a second Liberty server that runs the same MobileFirst Server and connected to the same database. In production, you might use more than one server for performance reasons, to have enough servers to serve the number of transactions per second that is needed for our mobile applications at peak time. It is also for high availability reasons to avoid having a single point of failure.
When we have more than one server that runs MobileFirst Server, the servers must be configured as a farm. This configuration enables any administration service to contact all the runtimes of a farm. If the cluster is not configured as a farm, only the runtime that runs in the same application server as the management service that runs the management operation is notified. Others runtimes are not aware of the change. For example, you deploy a new version of an adapter in a cluster that is not configured as a farm, only one server would serve the new adapter. The other servers would continue to serve the old adapter. The only situation where we can have a cluster and do not need to configure a farm is when you install your servers on WebSphere Application Server Network Deployment. The administration service is able to find all the servers by querying the JMX beans with the deployment manager. The deployment manager must be running to allow management operations because it is used to provide the list of the MobileFirst JMX beans of the cell.
When we create a farm, you also need to configure an HTTP server to send queries to all the members of the farm. The configuration of an HTTP server is not included in this tutorial. This tutorial is only about configuring the farm so that management operations are replicated to all the runtime components of the cluster.
Procedure
- Create a second Liberty server on the same computer.
- Start a command line.
- Go to liberty_install_dir/bin, and enter server create mfp2.
- Modify the HTTP and HTTPS ports of the server mfp2 so that they do not conflict with the ports of server mfp1.
- Go to the second server directory.
The directory is liberty_install_dir/usr/servers/mfp2 or WLP_USER_DIR/servers/mfp2 (if you modify the directory as described in step 6 of Install WebSphere Application Server Liberty Core).
- Edit the server.xml file. Replace
<httpEndpoint id="defaultHttpEndpoint"
    httpPort="9080"
    httpsPort="9443" />
with
<httpEndpoint id="defaultHttpEndpoint"
    httpPort="9081"
    httpsPort="9444" />
The HTTP and HTTPS ports of the server mfp2 do not conflict with the ports of the server mfp1 with this change. Make sure to modify the ports before you run the installation of MobileFirst Server. Otherwise, if you modify the port after the installation is made, you also need to reflect the change of the port in the JNDI property: mfp.admin.jmx.port.
- Go to the second server directory.
- Run the Server Configuration
Tool.
- Create a configuration Hello MobileFirst 2.
- Do the same installation procedure as described in Run the Server Configuration Tool but select mfp2 as the application
server. Use the same database and same schema.
Note:
- If we use an environment ID for server mfp1 (not suggested in the tutorial), the same environment ID must be used for server mfp2.
- If you modify the context root for some applications, use the same context root for server mfp2. The servers of a farm must be symmetric.
- If you create a default user (admin/admin), create the same user in the server mfp2.
[configuredatabase] Checking connectivity to MobileFirstAdmin database MFPDATA with schema 'MFPDATA' and user 'mfpuser'...
[configuredatabase] Database MFPDATA exists.
[configuredatabase] Connection to MobileFirstAdmin database MFPDATA with schema 'MFPDATA' and user 'mfpuser' succeeded.
[configuredatabase] Getting the version of MobileFirstAdmin database MFPDATA...
[configuredatabase] Table MFPADMIN_VERSION exists, checking its value...
[configuredatabase] GetSQLQueryResult => MFPADMIN_VERSION = 8.0.0
[configuredatabase] Configuring MobileFirstAdmin database MFPDATA...
[configuredatabase] The database is in latest version (8.0.0), no upgrade required.
[configuredatabase] Configuration of MobileFirstAdmin database MFPDATA succeeded.
- Test the two servers with HTTP connection.
- Open a web browser.
- Enter the following URL: http://localhost:9080/mfpconsole. The console is served by server mfp1.
- Log in with admin/admin.
- Open a tab in the same web browser and enter the URL: http://localhost:9081/mfpconsole. The console is served by server mfp2.
- Log in with admin/admin. If the installation is done correctly, we can see the same welcome page in both tabs after login.
- Return to first browser tab and click Hello, admin > Download Audit Log. You are logged out of the console and see
the login screen again.
This logout behavior is an issue. The problem happens because when you log on to server mfp2, a Lightweight Third Party Authentication (LTPA) token is created and stored in your browser as a cookie. However, this LTPA token is not recognized by server mfp1. Switching between servers is likely to happen in a production environment when you have an HTTP load balancer in front of the cluster. To resolve this issue, we must ensure that both servers (mfp1 and mfp2) generate the LTPA tokens with the same secret keys. Copy the LTPA keys from server mfp1 to server mfp2.
- Stop both servers with these commands:
server stop mfp1
server stop mfp2
- Copy the LTPA keys of server mfp1 to server mfp2.
From liberty_install_dir/usr/servers or WLP_USER_DIR/servers, run the following command depending on your operating system.
- On UNIX: cp mfp1/resources/security/ltpa.keys mfp2/resources/security/ltpa.keys
- On Windows: copy mfp1/resources/security/ltpa.keys mfp2/resources/security/ltpa.keys
- Stop both servers with these commands:
- Restart the servers. Switch from one browser tab to another other does not require you to relogin. In a Liberty server farm, all servers must have the same LTPA keys.
- Enable the JMX communication between the Liberty
servers.
The JMX communication with Liberty, is done via the Liberty REST connector over the HTTPS protocol. To enable this communication, each server of the farm must be able to recognize the SSL certificate of the other members. We need to exchange the HTTPS certificates in their truststores. Use IBM utilities such as Keytool, which is part of the IBM JRE distribution in java/bin to configure the truststore. The locations of keystore and truststore are defined in the server.xml file. See the keyStoreRef and trustStoreRef attributes in SSL configuration attributes. By default, the keystore of Liberty profile is at WLP_USER_DIR/servers/server_name/resources/security/key.jks. The password of this default keystore, as can be seen in the server.xml file, is mobilefirst.
Tip: We can change it with the Keytool utility, but we must also change the password in the server.xml file so that Liberty server can read that keystore. In this tutorial, use the default password.
- In WLP_USER_DIR/servers/mfp1/resources/security, enter keytool -list -keystore key.jks. The command shows the certificates in the keystore. There is only one named default. You are prompted for the password of the keystore (mobilefirst) before we can see the keys. This is the case for all the next commands with Keytool utility.
- Export the default certificate of server mfp1 with the command: keytool -exportcert -keystore key.jks -alias default -file mfp1.cert.
- In WLP_USER_DIR/servers/mfp2/resources/security, export the default certificate of server mfp2 with the command: keytool -exportcert -keystore key.jks -alias default -file mfp2.cert.
- In the same directory, import the certificate of server mfp1 with the command: keytool -import -file ../../../mfp1/resources/security/mfp1.cert -keystore key.jks The certificate of server mfp1 is imported into the keystore of server mfp2 so that server mfp2 can trust the HTTPS connections to server mfp1. You are asked to confirm that you trust the certificate.
- In WLP_USER_DIR/servers/mfp1/resources/security, import the certificate of server mfp2 with the command: keytool -import -file ../../../mfp2/resources/security/mfp2.cert -keystore key.jks. After this step, the HTTPS connections between the two servers are possible.
Testing the farm and see the changes in MobileFirst Operations Console
Procedure
- Start the two servers:
server start mfp1
server start mfp2
- Access the console. For example, http://localhost:9080/mfpconsole, or https://localhost:9443/mfpconsole in HTTPS. In the left sidebar, an extra menu that is labeled as Server Farm Nodes appears. If you click Server Farm Nodes, we can the status of each node. You might need to wait a bit for both nodes to be started.