IBM BPM, V8.0.1, All platforms > Authoring services in Integration Designer > Services and service-related functions > Access external services with adapters > Configure and using adapters > IBM WebSphere Adapters > FTP > Deploying the module > Deploying the module in a clustered environment
Deploying module at node level with embedded activation specification
The adapter is deployed at the node level, with the activation specification created during module creation. The adapter can be shared across multiple applications.
The following steps are a necessary prerequisite to configure and deploy the module.
- IBM Integration Designer version 7.5.0.0 or above.
- A clustered topology deployment environment on the IBM BPM or WebSphere Enterprise Service Bus available from IBM Integration Designer.
- Create a clustered topology deployment environment, as shown in the following Gold Topology configuration figure.
Figure 1. Deployment environment

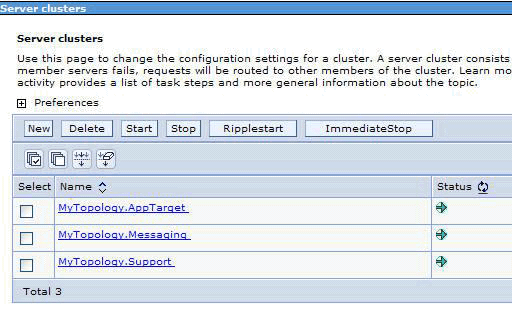
- Deploy the adapter and the adapter applications (EAR files) in the AppTarget (the target that hosts the SCA container).
Figure 2. Deployment environment showing server clusters

To create an application with the node level adapter and activation specification properties specified in the module itself, use the external service wizard.
Procedure
- In the Service Configuration Properties window, from the Deploy connector project property list, select On server for use by multiple applications.
- From the Connection properties list, select Use properties below.
- Create the module as described in the Business process management samples for WebSphere Adapters.
- In the Dependencies option for the module, ensure that the Deploy with module option is not selected for the adapter. Here, the adapter is not part of the module, therefore you must deploy the adapter before deploying the application.
- If the server is not running, right-click your server in the Servers view and select Start.
- When the server status changes to Started, right-click the server and select Administration > Run administrative console. Log on to the administrative console.
- To deploy the adapter at individual nodes, click Resources > Resource Adapters > Resource adapters. In the clustered environment, install the adapter in each node separately.
- In the Resource adapters page, click Install RAR.
- In the Install RAR file page, click Browse and navigate to the RAR file for your adapter. Deploy the RAR on each node.
The RAR files are typically installed in the following path: IID_installation_directory/ResourceAdapters/ adapter_name/ adapter.rar
- For deployment at node level, do not select any Scope because the scope is always Node. Click Next.
- Optional: In the Resource adapters page, change the name of the adapter and add a description. Click OK.
- Click Save in the Messages box at the top of the page.
- For node level deployment, check if the adapter RAR is deployed at the node level.
- To deploy the adapter at the cluster level, click Resources > Resource Adapters > Resource adapters.
- In the Resource adapters window, set the Scope to Cluster, and then click New.
- Select the RAR deployed at the node level.
- Check if the adapter RAR is now deployed at the cluster level. Deploy the application after the adapter is deployed at the node level on the individual nodes, and then at the cluster level.
- From the Deployment Manager Admin Console, click Install applications to deploy the application.
- On the Step 2: Map modules to servers window, select the module and click Next. The adapter is not part of the deployed application.
- In the Admin Console, click Resources > Resource Adapters > IBM WebSphere Adapter for FTP > J2C activation specifications to view the activation specification from the adapter deployed at the cluster level.
Results
The resource adapter is deployed at the node level, with the activation specification.