Upgrading WebLogic Application Environments
Upgrading Node Manager
If you are using a customized version of Node Manager in a pre-10.x environment, you can use the WebLogic Upgrade Wizard to upgrade Node Manager for use in a WebLogic Server 10.3 application environment.
The following sections describe how to use the WebLogic Upgrade Wizard for this purpose:
Before proceeding, make sure you have performed the prerequisite steps described in Prepare to Upgrade.
For more information about Node Manager, see “Node Manager Overview” in Node Manager Administrator's Guide.
What Happens During a Node Manager Upgrade
During a Node Manager upgrade, you specify the home directory of the Node Manager that you want to upgrade. The WebLogic Upgrade Wizard performs the following tasks:
- Upgrades Node Manager in the directory you specify so that Node Manager runs in a WebLogic Server 10.3 application environment. The Upgrade Wizard upgrades the nodemanager.properties file and converts the NodeManagerSerializedSystemIni.dat to nm_data.properties.
The nodemanager.properties file must be writable.
- Backs up existing log and state management files and stores them in a zip file, weblogic-nodemanager-backup.zip.
Any existing Node Manager files are overwritten during the upgrade process.
You are prompted to specify the username and password that will be used for Node Manager authorization when upgrading the domain. For more information, see Enter Node Manager Credentials. The listen port number used by Node Manager in the pre-10.0 installation is maintained during the upgrade process.
When installing the 10.3 product, you should, if possible, set the Node Manager listen port to the same port number used in any pre-10.0 installation, if applicable. The default listen port for Node Manager is 5556.
Once the upgrade process is complete, perform the following:
- Enroll the machine with Node Manager, as described in Step 4: Enroll the Machine with Node Manager.
- Verify that the username, password, and listen port settings for Node Manager are set as desired.
Upgrading Node Manager
You must upgrade each instance of Node Manager that you want to run in the WebLogic Server 10.x environment. Specifically, upgrade Node Manager on every machine in the domain. You perform an upgrade using the WebLogic Upgrade Wizard in either of the following modes:
- Graphical—For upgrading Node Manager interactively, using the graphical user interface.
- Silent—For upgrading Node Manager silently, by specifying upgrade requirements in a file.
You must upgrade Node Manager on each machine in the domain.
The following sections describe how to upgrade Node Manager, including:
Upgrading Node Manager in Graphical Mode
The following sections describe how to upgrade Node Manager using the WebLogic Upgrade Wizard in graphical mode:
- Starting the WebLogic Upgrade Wizard in Graphical Mode to Upgrade Node Manager
- Procedure for Upgrading Node Manager
The console from which you are running the Upgrade Wizard in graphical mode must support a Java-based GUI. If you attempt to start the Upgrade Wizard in graphical mode on a system that cannot support a graphical display, the invocation fails and an error message is displayed.
Starting the WebLogic Upgrade Wizard in Graphical Mode to Upgrade Node Manager
Before proceeding, make sure you have performed the prerequisite steps described in Prepare to Upgrade.
To start the WebLogic Upgrade Wizard in graphical mode and upgrade Node Manager:
- Verify that the WebLogic domain is not running.
- Open an MS-DOS command prompt window (on Windows) or a command shell (on UNIX) and set up the environment as described in Step 6: Set Up the Environment.
- If the Node Manager directory resides in a pre-10.0 installation directory, for example, in the default location, WL_HOME/common/nodemanager (where WL_HOME specifies the root directory of the WebLogic Server installation), copy the contents of the Node Manager directory to the 10.3 installation directory.
In this case, you will need to upgrade the copy Node Manager in the 10.3 installation directory.
Make sure you maintain the current directory structure. You do not need to copy the log (.log) files to the new location.
If the Node Manager directory resides outside of the pre-10.0 installation directory, you can skip this step.
- At a command prompt, enter the following command:
java weblogic.Upgrade -type nodemanager [-out file]
The -out argument is optional. It allows you to designate a file in which you want all standard output (stdout) and error messages to be written. By default, these messages are written to the command window and a summary of them is displayed at the end of the upgrade process.
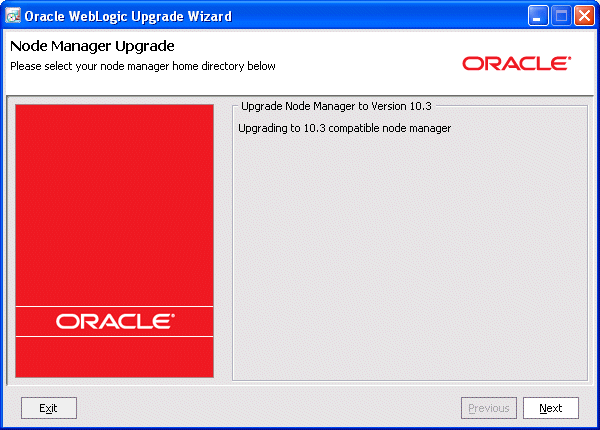
After you run the command, the WebLogic Upgrade Wizard opens, as shown in Figure 4-1. Figure 4-1 WebLogic Upgrade Wizard for Node Manager
- Click Next to proceed to the next window.
Procedure for Upgrading Node Manager
Table 4-1 summarizes the steps in the procedure to upgrade Node Manager using the WebLogic Upgrade Wizard.
| In this step ... | You ... |
|---|---|
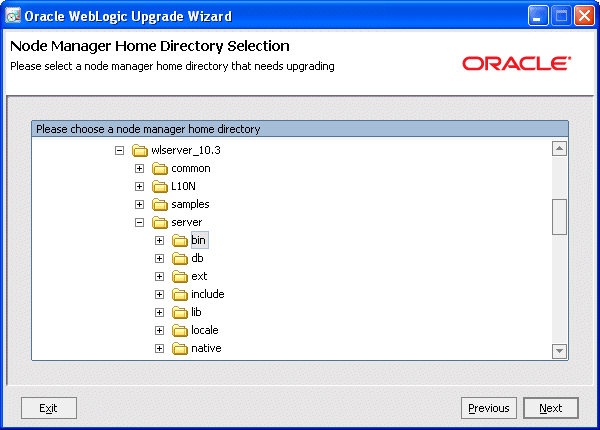
| Node Manager Home Directory Selection | Select a home directory for the instance of Node Manager to be upgraded by navigating the local directory hierarchy.
The Node Manager home directory contains the nodemanager.properties file, logs, and other related files. The exact set of files generated by Node Manager varies between releases and service packs.
By default, the Node Manager home directory is WL_HOME/common/nodemanager, where WL_HOME specifies the root directory of the WebLogic Server installation, as shown in Figure 4-2.
Figure 4-2 Node Manager Home Directory Selection
Click Next to proceed to the next window. |
| Upgrade Your Node Manager Home | Review progress of the wizard as it saves the upgraded configuration and deletes any temporary files that were created during the upgrade process. Progress messages are displayed in the window. After the process is complete, click Next to proceed to the next window. |
| Upgrade Complete | Review the upgrade results, including any important messages that require further consideration.
Click Done to close the WebLogic Upgrade Wizard.
Before using Node Manager, enroll the machine, as described in Step 4: Enroll the Machine with Node Manager. This step should be performed after you complete the WebLogic domain upgrade process. |
Upgrading Node Manager in Silent Mode
In some circumstances, for example, when Node Manager resides on a remote machine, it is not practical to use the WebLogic Upgrade Wizard in graphical mode. In such situations, you can use the wizard in silent mode to upgrade Node Manager.
Before proceeding, make sure you have performed the prerequisite steps described in Prepare to Upgrade.
To start the WebLogic Upgrade Wizard in silent mode and upgrade Node Manager:
- Verify that Node Manager and all instances of WebLogic Server in the domain are not running.
- Open an MS-DOS command prompt window (on Windows) or a command shell (on UNIX) and set up the environment as described in Step 6: Set Up the Environment.
- If the Node Manager directory resides in the pre-10.0 installation directory, for example, in the default location, WL_HOME/common/nodemanager (where WL_HOME specifies the root directory of the WebLogic Server installation), copy the contents of the Node Manager directory to the 10.3 installation directory.
In this case, you will need to upgrade the copy of Node Manager in the 10.3 installation directory.
Make sure you maintain the current directory structure. You do not need to copy the log (.log) files to the new location.
If the Node Manager directory resides outside of the pre-10.0 installation directory, you can skip this step.
- (Optional) Create an XML script to define the upgrade requirements. For more information, see Silent Upgrade XML Script Reference.
- Navigate to the Node Manager directory that you want to upgrade.
- At a command prompt, enter the following command:
java weblogic.Upgrade -mode silent -type nodemanager [-responses xmlfile] [-out file]
Two arguments are optional: -responses and -out. Include these arguments if you want to override the default values for the following:
- The location of an XML file that defines the upgrade requirements. If you do not specify a file with the -responses option, the wizard uses the default values during the upgrade process. For more information about the format of the XML file and the default values, see Silent Upgrade XML Script Reference.
- The output file in which all standard output (stdout) and error messages are written. If you do not specify a file with the -out argument, these messages are written to the command window.
Before using Node Manager, enroll the machine, as described in Step 4: Enroll the Machine with Node Manager. This step should be performed after you complete the WebLogic domain upgrade process.