Specify the expected content
Overview
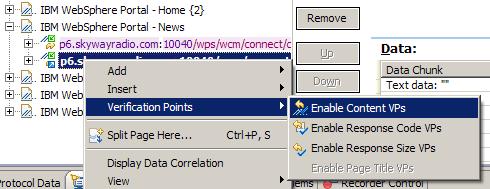
Content verification points verify that the response contains, or does not contain, an expected string. If the content returned is unexpected, the test log returns a failed verdict event. You can create a content verification point from specific response text.Create a content verification point from a response or a portion of a response
- Double-click a test
- Click the response containing the contents to use for the verification point.
If you do not see the contents, press Ctrl+Shift+Spacebar in the Test Element Details area, under Content.
- Select the content for the verification point, right-click, and select...
-
Verification Points | Enable Content VPs
The content verification point and the selected string are displayed in the Test Contents area.
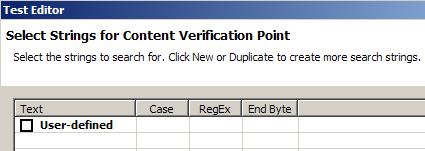
- Edit the new content verification point as needed.
For example, you can change part of the hard-coded response contents to a regular expression.
You can use the Add, Insert, and Remove buttons to manipulate content verification points and content verification point strings.
You can edit the verification points and strings by using the controls in the Test Element Details area.
Responses to HEAD requests, by definition, have no content. Therefore, a content verification point that attempts to match a string in a response to a HEAD request will fail.
See also