Copy tests
Contents
Copy tests within a project
To copy a test within a project...
- Open the the Navigator view
- Right-click the relevant .recmodel file, and select...
-
Generate Test | Performance Test Generator
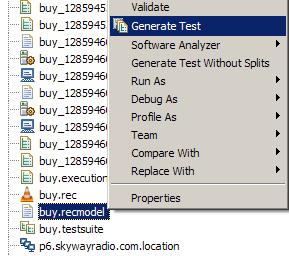
- For test generator, select Rational Test Generator...

- Enter a new name for the copied test

Copy tests between projects
To copy tests from one project to another, you can export test assets...
- projects
- schedules
- tests
- results
...and then import them into another project or workspace without losing any dependencies.
When you copy a test, datapools and custom code referred to by the test are also copied.
When you copy a schedule, locations or tests referred to by the schedule are copied.
When you copy results, schedules or tests referred to by the results are copied.
You cannot export test assets with dependencies if the test assets were created in a previous version of RPTv8 and the assets have not been migrated to the current version.
Copy test assets
- In the Test Navigator view, right-click the test assets to export, and then click Export.
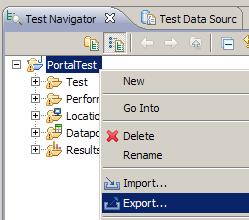
You can export projects, schedules, tests, and test results.
- In the Export window, expand the Test folder, and then click...
-
Test Assets with Dependencies

- Click Next.
- Specify the path and name of the archive file into which to export the selected test assets.
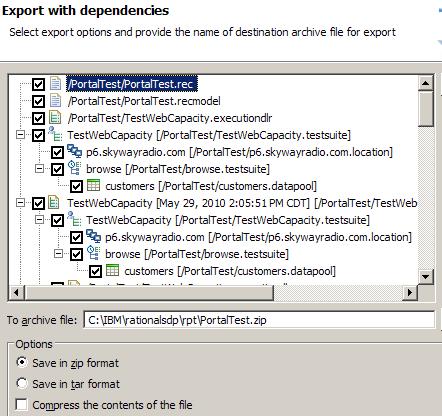
- Click Finish. The assets are exported to the archive file.
- If the target workspace is on a different computer, transfer the archive file to a location that is accessible to that computer.
- Create a project with the same name as the project to be imported.
The target project must have the same name as the source project.
Optionally, you can import test assets with dependencies into a workspace where no projects exist. The Import wizard creates projects based on information from the archive file.
To import test assets into a project with a different name...
- Import the test assets into a project with the same name
- Manually move the assets into the project with the different name
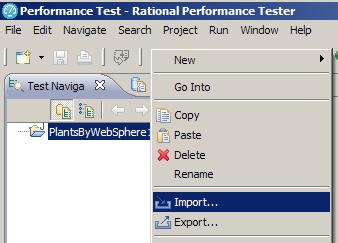
- To import the file, click...
-
File | Import
- In the Import window, expand the Test folder, and then click...
-
Test Assets with Dependencies
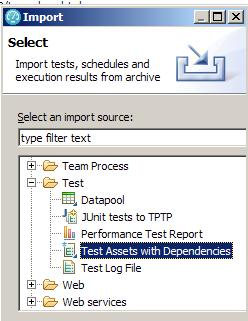
- Click Next.
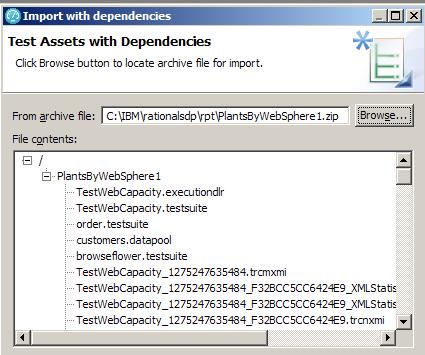
- In the window...
-
Import with dependencies
...click Browse, and then select the archive file. The test assets are displayed in the File contents list.
- Click Finish to import the test assets with dependencies from the archive file into the target project.
If a file that you are attempting to import already exists in the target workspace, you will be prompted to choose whether to overwrite the file. You can also choose to overwrite all files that already exist in the target workspace, or not to overwrite any files that already exist in the workspace. If you choose to overwrite all files that already exist in the target workspace, you will be prompted again if the import process encounters a .classpath or .project file in the source archive file.
See also