|
23.2.1 Creating HRPortlet
In this section, you create a portlet project name HRPortlet168. The portlet will be created based on a Basic portlet type using the provided wizard. This portlet will be published and executed in the Portal Test Environment.
If not already running, start the Rational Application Developer; select Start | Programs | IBM Rational | IBM Rational Application Developer V6.0 | Rational Application Developer.
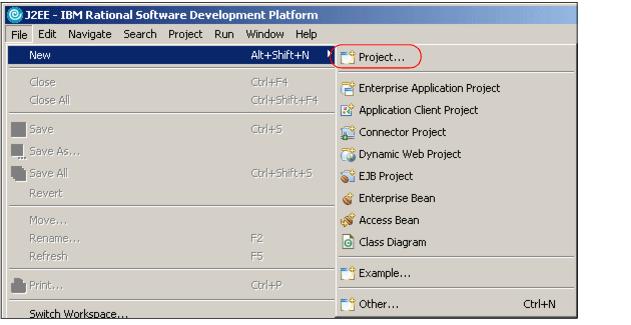
| 1.
| Select File | New | Project...
|
Figure 23-2 Creating a new project
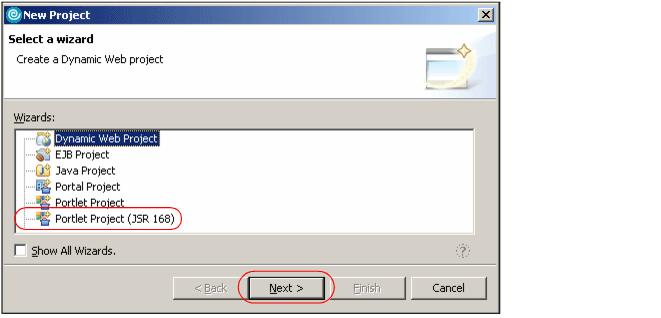
| 2.
| In the Select a wizard window, select Portlet Project (JSR 168). Click Next.
|
Figure 23-3 Select Portlet project
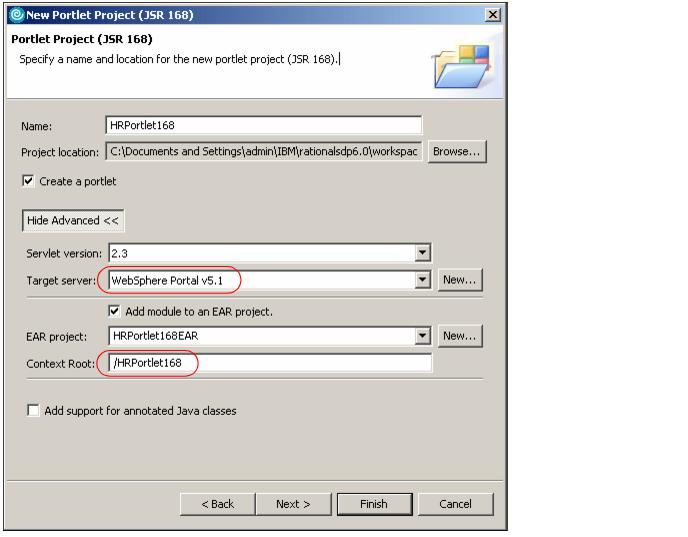
| 3.
| The Portlet Project window will appear; enter HRPortlet168 for the name of the project. Click Show Advanced >> and change Target Server to WebSphere Portal V5.1 stub and Context Root to /HRPortlet168. Click Next.
|
Figure 23-4 Portlet project configuration
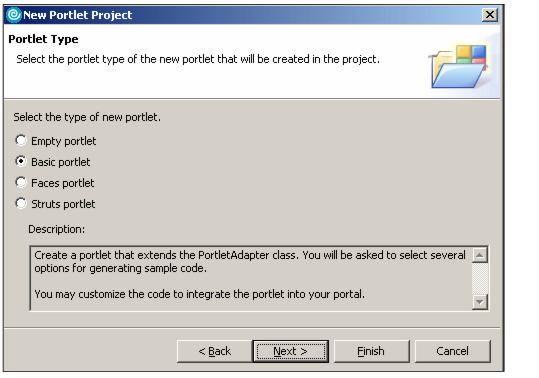
| 4.
| In the Portlet Type window, select Basic portlet. Click Next.
|
Figure 23-5 Basic portlet
| 5.
| In the Features window, leave the default values. Click Next.
|
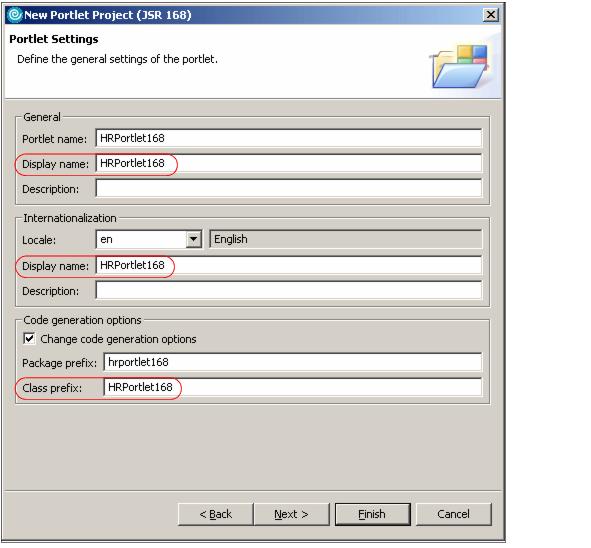
| 6.
| In the Portlet Settings window, click the Change code generations options checkbox. Remove the portlet word from the Portlet name, Portlet Title and Class Prefix fields, so they will look as in Figure 23-6. Click Next.
|
Figure 23-6 Portlet settings
| 7.
| Accept default values for the Event Handling window by clicking Next.
|
| 8.
| Accept default values for the Single Sign-on window by clicking Next. The Credential Vault is not used in this scenario.
|
| 9.
| Click Finish in the Miscellaneous window.
|
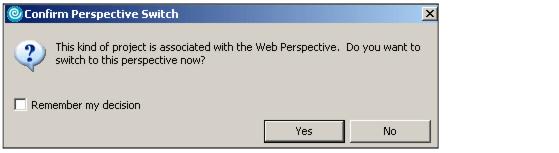
Note: If this is the first time that Rational Application Developer is used, you will be prompted to switch to the Web perspective. Click Yes.
|
Figure 23-7 Switch to Web perspective
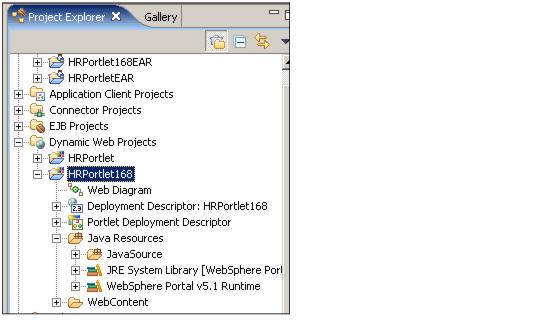
As a result of this process, you should see, in the Project Explorer view, all the project artifacts created by Rational Application Developer, under Dynamic Web Projects | HRPortlet168.
Figure 23-8 HRPortlet168 project
|