| Link your validator to the number2 field so it can be checked.
|
Execute the following steps:
| 1.
| Right-click the itso.jsf.calculator package
|
|
b.
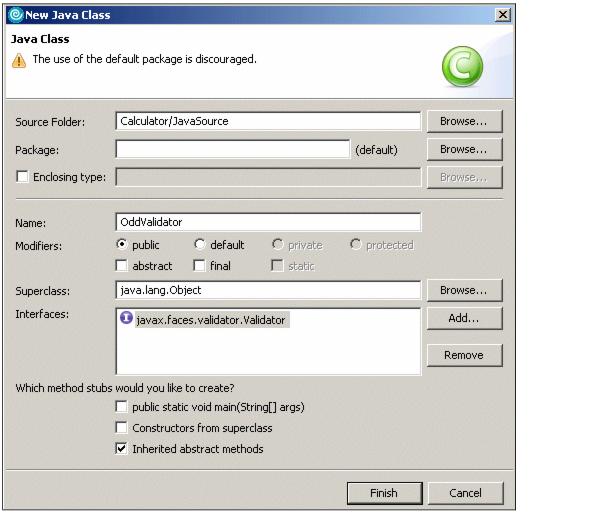
Enter OddValidator as name.
|
|
c.
Click Add for Interfaces.
|
|
d.
Locate the javax.faces.validator.Validator interface and click OK.
|
|
e.
Select Inherited abstract methods. Click Finish.
|
Figure 17-37 New Java class
| 2.
| The skeleton class is generated with this method skeleton:
|
public void validate(FacesContext arg0, UIComponent arg1, Object arg2)

  throws ValidatorException {

}
Where:
|
-
FacesContext arg0: provides access to all components
|
|
-
UIComponent arg1: component to be validated
|
|
-
Object arg2: value (of the component) to be validated
|
| 3.
| Replace the method body with the code below:
|
Example 17-4 The validator code

System.out.println("OddValidator start");
UIInput field = (UIInput)arg1;
int value = ((Long)arg2).intValue();
System.out.println("Field="+field.getId()+" Value="+value);
if (value%2 == 1) {
 field.setValid(true);
 System.out.println("OddValidator end: valid");
} else {
 System.out.println("OddValidator end: invalid");
 FacesMessage errmsg = new FacesMessage(FacesMessage.SEVERITY_ERROR,
   "2nd number not odd.", "Second number must be odd.");
 throw new ValidatorException(errmsg);
}

| 4.
| To resolve the classes, right-click in the code and select Source | Organize imports.
|
| 5.
| Review the validator code:
|
|
a.
Access the arg1 field to display its name, you can use UIInput or HtmlInputText classes.
|
|
b.
Obtain the value from arg2, you know its data type.
|
|
c.
Create an error message, a FacesMessage, to handle errors:
|
|
i.
The first message is the summary message (displayed in the global error message field).
|
|
ii.
The second message is the detailed message (displayed in an error message field attached to the input field). A detailed message has not been defined and therefore it will not be used in this case.
|
| 6.
| Save and close the OddValidator.
|
| 7.
| Register the validator. Open the faces-config.xml file and at the bottom ad the lines shown in Example 17-5.
|
Example 17-5 The validation registration in faces-config.xml

<validator>
 <description>Registers the OddValidator</description>
 <validator-id>oddValidator</validator-id>
 <validator-class>itso.jsf.calculator.OddValidator</validator-class>
</validator>

| 8.
| In the calculate.jsp, select the number2 field and go to the Source page in the Design view.
|
|
a.
Place the cursor before the end of the number2 field and just after the </f:validateLongRange> tag:
|
....</f:validateLongRange .......> PUT CURSOR HERE .......
|
b.
In the menu bar, select JSP | Insert Custom.
|
|
c.
In the Insert Custom Tag dialog select the "f" tag library (at left) and validator (at right) and click Insert.
|
|
d.
Click Close. The custom tag is inserted.
|
|
e.
Enter oddValidator for the validatorId attribute, either directly in the Source, or in the Properties view. This generate the following tag:
|
<f:validator validatorId="oddValidator"></f:validator>
|
f.
Save the calculator.jsp.
|
|
g.
Restart the enterprise application. Enter an even value and you should see the error message. Notice that the summary message is displayed.
|
|
h.
Notice also the test output in the Console.
|