12.10 Dynamically changing the languageIn the above sample scenarios when you want to see the application in other language you need to changes the user profiles. Here you learn how to use the ChangeLanguage command described in 12.4, Dynamically changing the language. Note that this command only change the language during the current session. Preferred language selected in the user's profile does not change.
Example 12-25 Adding links to the portal theme
 ............
    <%-- Admin link bar - New Page, Edit Page, Assign Permissions
                         Don't show these links in solo state --%>
                    <wps:if portletSolo="no">
                      <%@ include file="./AdminLinkBarInclude.jsp" %>
                    </wps:if>
     </td>
    </tr>
 <%-- supported languages --%>
 <tr>
 <td colspan="2">
 <table border="0" cellspacing="5" cellpadding"0">
 <tr>
  <td>
  <a href="<wps:url command='ChangeLanguage'><wps:urlParam name='locale' value='en'/></wps:url>"><wps:text key="lang_en" bundle="nls.Text"/></a>
  </td>
  <td>
  <a href="<wps:url command='ChangeLanguage'><wps:urlParam name='locale' value='es'/></wps:url>"><wps:text key="lang_es" bundle="nls.Text"/></a>
  </td>
  <td>
  <a href="<wps:url command='ChangeLanguage'><wps:urlParam name='locale' value='pt_BR'/></wps:url>"><wps:text key="lang_pt_BR" bundle="nls.Text"/></a>
  </td>
 </tr>
 </table>
 </td>
 </tr>
   <tr>
   <td colspan="2">
   <%-- Show navigation bars for first two levels of page navigation
                         Don't show navigation in solo state --%>
    <wps:if portletSolo="no">
     <%@ include file="./PlaceBarInclude.jsp" %>
     <%@ include file="./PageBarInclude.jsp" %>
    </wps:if>
   </td>
   </tr>
.............
Example 12-26 Text.properties (default)
lang_en=English
lang_es=Spanish
lang_pt_BR=Brazilian Portuguese
Example 12-27 Text_en.properties (English)
lang_en=English
lang_es=Spanish
lang_pt_BR=Brazilian Portuguese
Example 12-28 Text_es.properties (Spanish)
lang_en=Ingl\u00E9s
lang_es=Espa\u00F1ol
lang_pt_BR=Portugu\u00E9s de Brasil
Example 12-29 Text_pt_BR.properties (Brazilian Portuguese)
lang_en=Ingl\u00EAs
lang_es=Espanhol
lang_pt_BR=Portugu\u00EAs (Brasil)
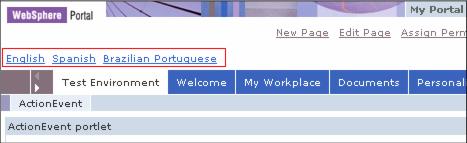
Figure 12-32 Portal theme Note: Since the preferred language selected by the user does not change, no text translated using the preferred locale for the user will display in the proper language. |


|
ibm.com/redbooks |