|
7.6.4 Running the portlet application
In this section, you will run the portlet application you have developed to send a message from the message sender portlet (ActionEventPortlet.java) to the message receiver portlet (MessageReceiverPortlet.java). Follow these steps:
| 1.
| Right-click the ActionEvent project and select Run | Run on Server.
|
| 2.
| In the Define new server window select Choose an existing server and select WebSphere Portal V5.1 Test Environment.
|
| 4.
| Be sure that the ActionEventEAR project is configured to run in the test environment (it appears in the right panel).
|
| 5.
| Click Finish. The project will be published and then started.
|
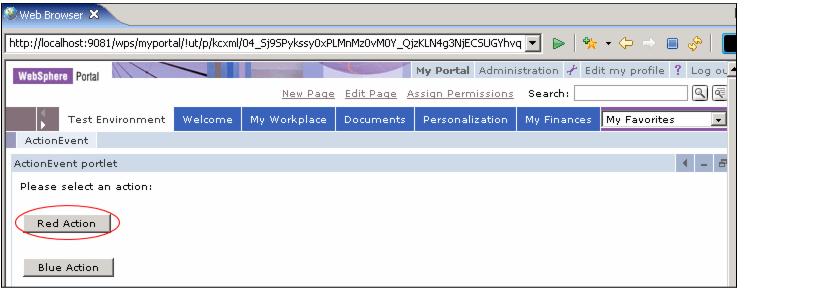
Note: You will see that the internal Web browser brings up the two portlets on your screen, as shown in Figure 7-7. Notice that the ActionEvent portlet indicates that no action has been performed and the MessageReceiver portlet indicates that it is ready to receive a message.

Figure 7-7 Running the messaging project in the Portal Server Test Environment
| 6.
| Choose the Edit mode of ActionPortlet. Click the Red Action button. This will both (a) create an action that you will see the action in ActionPortlet, and (b) broadcast a message which will be sent and shown in MessageReceiver.
|
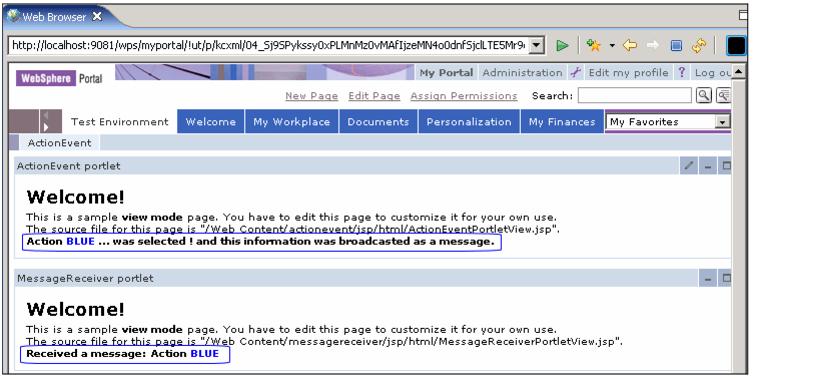
Figure 7-8 Creating an action and broadcasting the message
| 7.
| You will see the value shown in both the ActionEvent portlet and the MessageReceiver portlet.
|
Note: In summary, you have seen how the IBM portlet API implements message events which can be useful for passing data between portlets that need to be notified of other portlets's actions and events. This is a very useful feature of the API when building portlet applications that contain multiple portlets.
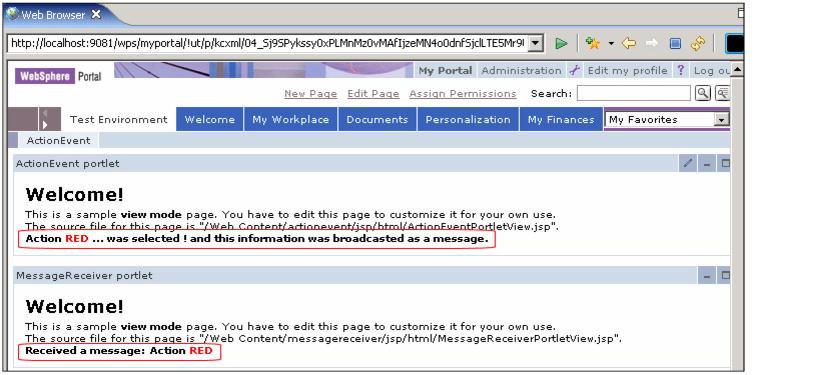
Figure 7-9 Red action and Red message broadcast
| 8.
| You can enter Edit mode again and select the Blue Action button.The results will again be displayed accordingly.
|
Figure 7-10 Blue action and message broadcast
|