Copy themes
Create custom themes from copies of Portal 80 theme
We create copies of the Portal 80 theme in order to develop our own custom themes. Steps involved...
- Copy theme static resources
- Copy theme dynamic resources
- Link static resources to dynamic resources
- Make custom skin the default
Copy theme static resources
- Enable development mode
-
cd /opt/IBM/Portal/WebSphere1/wp_profile/ConfigEngine
./ConfigEngine.bat enable-develop-mode-startup-performance -DWasPassword=password - Install a WebDAV client, such as WebDrive or AnyClient.
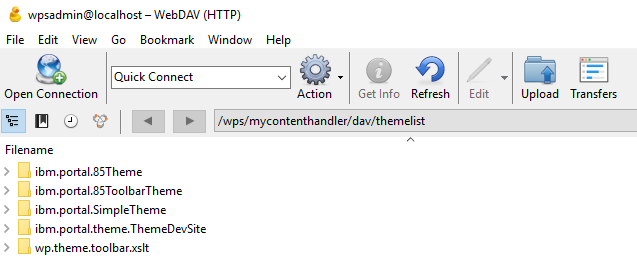
- Connect client to...
-
http://host:port/wps/mycontenthandler/dav/themelist/
- Copy ibm.portal.80Theme folder to local disk.
- Rename the folder to the name of the theme, such as MyCoTheme.
- In the metadata folder, edit localized_en.properties, or your default locale file, and change the value of the title key to the display name of the theme, such as MyCo Theme. Save the file and repeat any other locale files.
- Edit metadata.properties and change the Portal8.0 part of the value...
-
com.ibm.portal.layout.template.href
...to MyCoTheme.
- Verify you have properties similar to...
-
com.ibm.portal.layout.template.href=dav\:fs-type1/themes/MyCoTheme/layout-templates/2ColumnEqual/resourceaggregation.profile=profiles/profile_deferred.json
com.ibm.portal.theme.aggregationmodes=ssa
com.ibm.portal.theme.dnd.sources=ibmDndColumn:com.ibm.pb.dnd.layout.LayoutColumnSource:vertical, ibmDndRow:com.ibm.pb.dnd.layout.LayoutRowSource:horizontal - Save the file.
- Delete the skins folder from the MyCoTheme to remove the extra copies of the skins that are shipped with IBM WebSphere Portal.
- MyCoTheme/skins
- Copy the entire MyCoTheme folder into the themelist folder.
- Compare each subfolder in MyCoTheme to the corresponding subfolder in ibm.portal.80Theme to verify the the correct number of files were copied.
- Double-check the contents of the metadata.properties file in the themelist.
- Verify the following files existing in the profiles folder...
-
profile_admin.json
profile_deferred.json
profile_full.json
profile_lightweight.json
- Enable development mode
- Copy skin static resources
- Connect the WebDAV client to...
-
http://host:port/wps/mycontenthandler/dav/skinlist/
- Copy the ibm.portal.80Hidden folder to a local disk.
- Rename the folder to the name of the skin, such as mySkin.
- In the metadata folder, edit localized_en.properties, or your default locale file, and change the value of the title key to the display name of the skin, such as MyCo Skin. Save the file and repeat any other locale files.
- Copy the entire mySkin folder into the skinlist.
- Double-check the contents of the mySkin folder in the skinlist to ensure that everything copied correctly. Compare each subfolder in mySkin to the corresponding folder in ibm.portal.80Hidden to ensure that it looks like the correct number of files were copied. Recopy any files or subfolders that are missing.
- Connect the WebDAV client to...
Copy theme dynamic resources
- Install Eclipse, IBM Rational Application Developer or RTC with the Java EE developer tools add-on.
- Switch to the Java EE perspective, and select...
-
File | New | Dynamic Web Project
- If it is not already selected, select 2.4 for the Dynamic Web Module version.
- Select...
-
Add project to an EAR
...and click Next to the Web Module page.
- On the Web Module page, change Context Root to MyCoTheme
- Expand the new MyCoTheme project and find and expand the WebContent folder.
- Find the folder...
-
PORTAL_HOME/theme/wp.theme.themes/default80/installedApps/DefaultTheme80.ear/DefaultTheme80.war/skins
...and drag it onto the WebContent folder.
- Find the folder...
-
PORTAL_HOME/theme/wp.theme.themes/default80/installedApps/DefaultTheme80.ear/DefaultTheme80.war/themes
...and drag it onto the WebContent folder.
- In the MyCoTheme project, find the WEB-INF folder inside the WebContent folder.
- Copy...
-
PORTAL_HOME/theme/wp.theme.themes/default80/installedApps/DefaultTheme80.ear/DefaultTheme80.war/WEB-INF/decorations.xml
...to the WEB-INF folder.
- Copy...
-
PORTAL_HOME/theme/wp.theme.themes/default80/installedApps/DefaultTheme80.ear/DefaultTheme80.war/WEB-INF/tld
...to the WEB-INF folder.
- The previous files and folders are the only ones that you need. Do not copy any others from the DefaultTheme80.war file.
-
MyCoThemeEAR (right-click) | Export | EAR file | Browse
- Select a folder to export the EAR file to.
- Click Save and click Finish.
- Log on to the WAS admin console and go to...
- Applications | Application Types | WebSphere enterprise applications
- Click the Install toolbar button.
- Click Browse and select the EAR file that you exported and click Next.
- Select...
-
Fast Path | Choose | Generate Default Bindings | Next
- Change any installation option values you want, or use the default values, and click Next.
- For Map Modules to Servers, select the MyCo Theme module in the table, select the entry...
-
server=WebSphere_Portal
...in the list, click Apply, and click Next.
- Click Finish.
- When the EAR file is done installing, click Save directly to the master configuration.
- Check the MyCoTheme EAR in the table of enterprise applications and click the Start toolbar button.
- On the file system, expand the folder...
The unique copy of the dynamic resources for the theme are located in the themes and skins folders. Change files to that location. Do not modify ThemeModules.war.
- Install Eclipse, IBM Rational Application Developer or RTC with the Java EE developer tools add-on.
Link static resources to dynamic resources
- Bind the theme to the context root of the web app
- Modify the dynamic resource references for the theme
- Modify the dynamic resource references for the skin
Make custom skin the default
Add the custom skin to the skins list to set it as the default skin for the theme. If it is the only custom skin it is automatically set as the default skin for the theme.
- Restart the portal server.
- Log on to the WAS admin console for the portal and set...
-
Administration Themes and Skins | MyCo Theme Edit | MyCo Skin | Set as Default | OK
- To verify the theme is available for use on the portal, create a page, edit page properties, and assign the theme to the page.
The custom theme uses ready-use modules, shared across themes, and not uncopied in the Theme Modules web application. These Theme Modules need to remain started in addition to the web application for the theme.
- Optional: Deploy the theme with cacheable resources
Manually update dynamic theme resources
- Export theme...
-
cd C:/IBM/WebSphere/wp_profile/bin
wsadmin.bat -user wpsadmin -password mypassword -c "$AdminApp export MyThemeEAR C:/tmp/MyAppThemeEAR.ear"
cd c:\temp - Expand theme...
-
C:/IBM/WebSphere/wp_profile/bin/EARExpander.bat -ear MyThemeEAR.ear -operationDir /temp/MyAppThemeEAR -operation expand -expansionFlags all
- Make changes to theme
- Rename theme
- Change context root
- Repackage theme
-
cd C:\temp
C:\IBM\WebSphere\wp_profile\bin\EARExpander.bat -ear /temp/MyAppThemeEAR.ear -operationDir /temp/MyAppThemeEAR -operation collapse - Deploy the updated MyAppThemeEAR.ear back to portal
- Stop Portal
- Clear contents of...
- WP_PROFILE\temp
- WP_PROFILE\wstemp
- WP_PROFILE\tranlog