Install WebSphere Portal v6.1
If you have already installed Portal Server v6.1 on the same machine where you are about to install Rational Application Developer, the installation wizard of RAD v7.5 automatically integrates the installed Portal Server as a target runtime.
Most of you are installing the Portal test environment after you have installed RAD v7.5. The best way to do this is to use the Launchpad for RAD v7.5.
- In the Launchpad dialog, click WebSphere Portal V6.1 test environment.
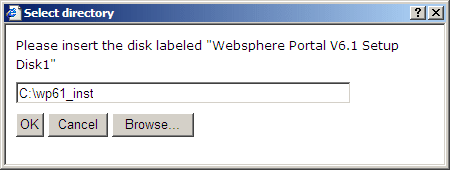
- A dialog prompts the user to insert the Disk 1, which is the setup disk for WebSphere Portal v6.1. You can either do this or extract all the downloaded zip files for Application Developer v7.5 into a temporary directory and specify the path of that folder in this dialog.

- Click Next on the Welcome Page.
- Click Next on the Software license agreement (if you agree).
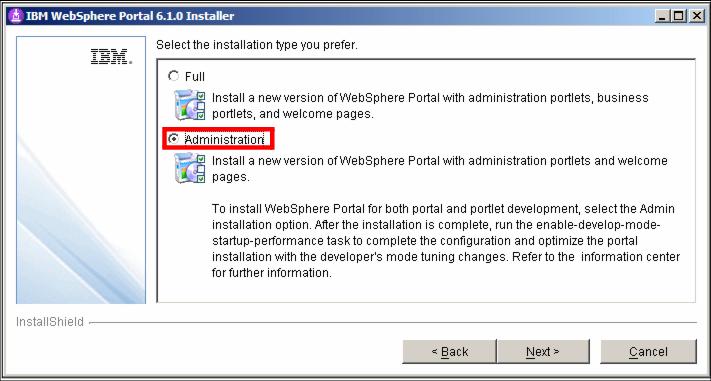
- In the next page, select Administration as the Installation type and click Next.

- In the next page, specify the WebSphere Portal installation directory. Accept the default (C:\IBM\WebSphere), and click Next.
- In the next page, you have to select if you want to install a new instance of WebSphere Application Server or use an existing instance. We use an existing server installed with Application Developer v7.5.
Select Install on top of an existing instance and click Next.
- In the next page, select the location of the existing WebSphere Application Server, for example...
C:\IBM\SDP75\runtimes\base_v61
...and click Next.
- In the next page, specify the node name and the fully qualified hostname of the machine). Accept the defaults, and click Next.
- In the next page, enter the user ID and password for the Portal Server administrator user. Type the values that were used for the servers installed with Application Developer v7.5 (admin/admin), and click Next.
- In the next page, optionally select to start the server as a Windows Services. We suggest to clear the option. Click Next.
- In the next page, the wizard displays the summary screen. Read and verify, and if everything is as desired, and click Next to start the install process. This can take a long time (up to 2 hours), depending on the machine resources.
- When the wizard has completed installing the product, it displays the final summary dialog. Click Finish.
