Creating messages
A message describes the kind of communication that occurs between two lifelines. A message is sent from a source lifeline to a target lifeline to initiate some kind of action or behavior such as invoking an operation on the target, or the creation or destruction of a lifeline. The target lifeline often responds with a further message to indicate that it has finished processing.
A message is visualized as a labeled arrow that originates from the source lifeline and ends at the target lifeline. The message is sent by the source and received by target and the arrow points from source to target. The label is used to identify the message. It contains either a name or an operation signature if the message is used to call an operation. The label also contains a sequence number that indicates the ordering of the message within the sequence of messages.

| To create a message between two lifelines, hover the mouse pointer over the source lifeline so that the modeling assistant is available. Then click the small box at the end of the outgoing arrow and drag the resulting connector on the desired target lifeline. In the context menu that appears when you drop the connector on the target, click the desired message type such as synchronous or asynchronous and enter either a name or select an operation from the drop-down combo box. Only if the target already has available operations will you be able to select one. |

| You can also use the tool palette to create a message. Select the desired message type by clicking the solid triangle right next to the Message category, then click the source lifeline and drag the cursor to the target lifeline. |

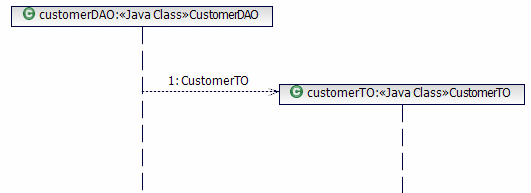
| Selecting Create Message from the Palette allows the source lifeline to create a new lifeline. The new lifeline starts when it receives this message. The symbol at the head of this lifeline is shown at the same level as the message that caused the creation. The message itself is visualized as a dashed line with an open arrowhead. This type of message is used to highlight that a new object is created during an interaction. |

Figure 7-36 Sending a create message to create a new lifeline

| In contrast, a Destroy Message enables a lifeline to delete an existing lifeline. The target lifeline is terminated at that point when it receives the message. The end of the lifeline is denoted using the stop notation, a large X. A destroy message is drawn in a similar way to a Create Message. You can use this type of message to describe that an object is destroyed during an interaction. After a lifeline has been destroyed, it cannot be the target of any messages. |

Figure 7-37 Destroying a lifeline during an interaction

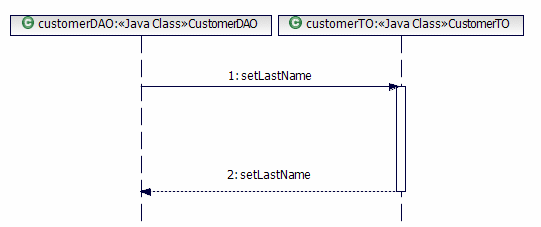
| A Synchronous Message enables the source lifeline to invoke an operation provided by the target lifeline. The source lifeline continues and can send more messages only after it receives a response from the target lifeline. When you create a Synchronous Message RAD places three elements in the diagram: |

 A line with a solid arrowhead representing a synchronous operation invocation
|

 A dashed line with a solid arrowhead representing the return message
|

 A thin rectangle called an activation bar or execution occurrence representing the behavior performed
|

Figure 7-38 Synchronous message invocation
By default, only the operation's name is shown. To see the full operation signature, right-click the message arrow and select Filters Æ Show Signature.

| An Asynchronous Message allows the source lifeline to invoke an operation provided by the target lifeline. The source lifeline can then continue and send more messages without waiting. When an asynchronous message is sent the source does not have to wait until the target processes it. An Asynchronous Message is drawn similar as a synchronous message, but the line is drawn with an open arrowhead, and the response is omitted. You can send another kind of asynchronous message, the Asynchronous Signal Message. This is a special form of a message that is not associated with a particular operation. |
|
ibm.com/redbooks |