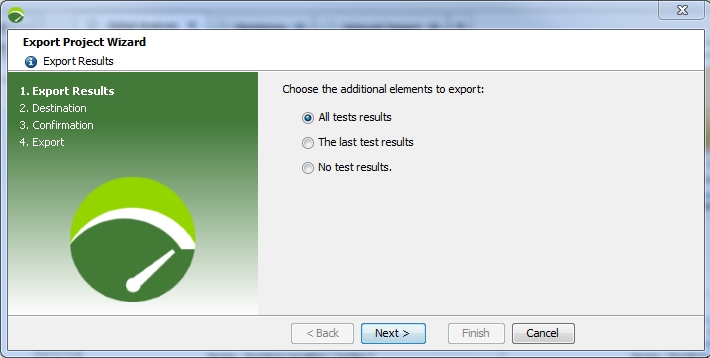
Export a project
The Export Project wizard allows you to:
- Export and automatically send a project to Neotys Technical Support.
As well as the project itself, the exported archive may also include configuration files, log files and one User Path validation result. The exported archive is directly uploaded to our FTP server. - Export a project for backup or transfer to another machine.
The archive can then be imported into an existing project. See Import a project.
- To export a project
- In the menu bar, choose File > Export Project....
- In the Export Results step, choose the additional elements to export.
- Click Next.
- In the Destination step, choose:
- Export to the file: NeoLoad will export and zip your project into an archive file and store it in the location you specify.
- Export to Neotys Technical Support: NeoLoad will export the project and any debug item to an archive that will be automatically uploaded to the Neotys Support FTP server.
- Click Next.
- If exporting to our Support server, select which items to include:
- Log files (recommended)
- Configuration files (recommended)
- a User Path validation result: NeoLoad takes the last validation result for the selected User Path, or launches a validation if the User Path has yet to be validated.
- For identification purposes, enter the ID number supplied by Neotys Technical Support or your company name.

- Click Next.
- When you click Next, NeoLoad creates the archive and uploads it to the FTP site. You may continue to use NeoLoad normally during the upload process. Once the archive has been uploaded, the Neotys Support is automatically informed of its reception.