Tutorial: Customizing the appearance of the IBM Sales Center
 Attention: This tutorial is currently under revision. The content might contain errors or inaccuracies. Subscribe to this page to be notified when an updated version is available.
This tutorial shows you how to customize the appearance of the IBM Sales Center client with the default business logic. The modifications outlined in this tutorial do not require any corresponding changes on the WebSphere Commerce Server.
Learning objectives
This tutorial will show you how to make the following changes to the log on process:
- Change the text of the title bar
- Change the graphic used on the logon screen
- Change the text shown on the logon screen
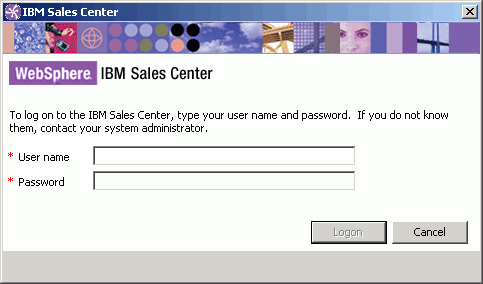
In this tutorial we will modify the logon dialog as shown in the following screen capture :

After completing this tutorial, you should be able to complete the following tasks:
- Determine extension points
- Create a new plug-in
- Create a new resource bundle
- Update a manifest file with a new plug-in
You can load the completed tutorial code instead of performing each step in the tutorial.
Time required
Expect this tutorial to take 2 hours to complete.
Audience
This tutorial is aimed at those people who are responsible for customizing the appearance of the IBM Sales Center client user interfaces.
Prerequisites
To complete this tutorial you should be familiar with the following terms and concepts:
Before beginning this tutorial, ensure you have completed the following tasks:
- Installed IBM Sales Center development environment.
Resources
Download the zip file to access the sample code used in this tutorial.
Lessons in this tutorial
- Determine extension points
In this step of the tutorial, we will determine what parts of the IBM Sales Center client need to be modified. The text used on the user interface of the IBM Sales Center is contained in a single resource bundle called telesalesResources.properties. You will need to examine this resource bundle, locate the text that to change, and make note of the key that is used to represent that text. You will also need to locate the images that to replace and make note of both the names of the files as well as their directories. - Create a new plug-in
In this step we will begin to implement the customization by creating a new plug-in to contain the customized assets. - Deploy the assets
This section refers to deploying the assets.