Tutorials > Content management > Manage content with workspaces using the Management Center
Approve content
In this step, we will assume the role of Elle, the content approver that is assigned to approve the Product Introductions task group. You will use the Tasks tool in the Management Center to validate the changes made for this task group.
Procedure
- Log on to the Management Center as user elle. Access Management Center at the following URL:
https://host_name:8000/lobtools where host_name is the fully qualified WebSphere Commerce Web server host name. You will automatically be in the Tasks tool.
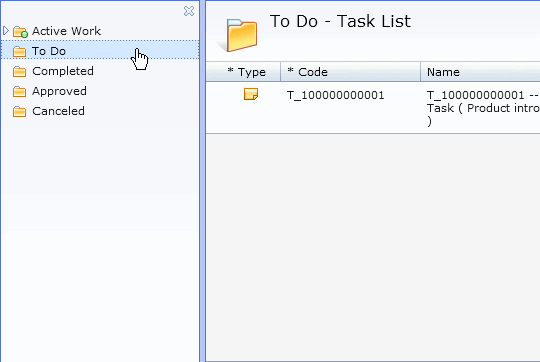
- In the explorer view, click the To Do folder.

The list of tasks assigned to you are displayed.
- In the list view, right-click the Product Introductions task; then click Work On.
- Double-click the task; then in the properties view, click the Comments tab to view any comments made by the Content Contributors.
- Verify the changes made to the product:
- From the Management Center menu select the Catalogs tool; then select the Sample B2B Store.
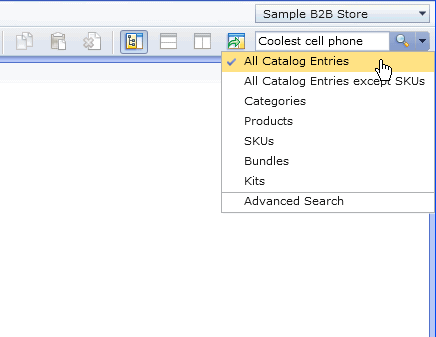
- Navigate to the find area; then type in Coolest cell phone, and from the list, select All Catalog Entries as the search object type.

- Click Search

.
- Double-click the product in the search results view. The product properties view displays.
- Verify that all information has been completed.
- On the toolbar, click
 .
.
- On the Store Preview Options dialog, in the Store Address field, select the store home page, or enter the store URL of the first page that to see in the preview. For example, enter a product display URL.
- From the Management Center menu select the Catalogs tool; then select the Sample B2B Store.
- Approve the work done:
- Click the Tasks tab.
- Click the To Do tab in the explorer view.
- Right-click the Product Introduction task, then in the context menu click Approve.

The approved tasks can be viewed by clicking the Approved folder in the explorer view.
- Click the Tasks tab.
- Click Logout.
- Check the status of the task group commit in the Workspace Administration Tool:
- Log in to the Workspace Administration tool as the user Jim at the following URL:
https:// host_name:8000/webapp/wcs/wkspcadmin/servlet/ToolsLogon?XMLFile=workspaceadmin.WorkspaceAdminLogon where host_name is the fully qualified WebSphere Commerce Web server host name.
- Select Workspaces > Manage Workspaces.
- Change the view to show current, completed, and canceled objects in the Workspace Administration Tool.
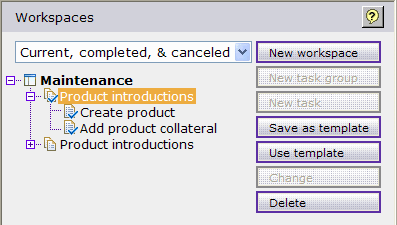
- Locate the Product introductions task group in the Maintenance work space:

This image indicates that the Production introductions task group was successfully committed and that the new task group and tasks have been created. The new task group and tasks were created because the task group was created as a recurring task group. This task group and its tasks are ready to be used to introduce different products.
- Log in to the Workspace Administration tool as the user Jim at the following URL:
Tutorial Summary
This tutorial illustrated the capabilities of workspaces in WebSphere Commerce.
In this tutorial you learned how to:
- Create a workspace with task groups and tasks to manage a content change process.
- Create content within the product management and attachment tools within WebSphere Commerce Accelerator.
- Monitor workspace and task group status within the Workspace Administration Tools.
With the knowledge you have gained in this tutorial, you can now start to see how workspaces can be used in the content management scenarios.