Tutorials > Content management > Manage content with workspaces using the Management Center
Contribute content
In this task, we will assume the role of the Content Contributor Joe who is assigned to work on the Product introductions task group. You will use the Tasks tool in the Management Center to complete the work for the task group.
The Management Center images in this section are based on a B2B store.
Procedure
- Log on to the Management Center as user joe. Access Management Center at the following URL:
https://host_name:8000/lobtools where host_name is the fully qualified WebSphere Commerce Web server host name. You will automatically be in the Tasks tool.
- Select the workspace task on which to work:
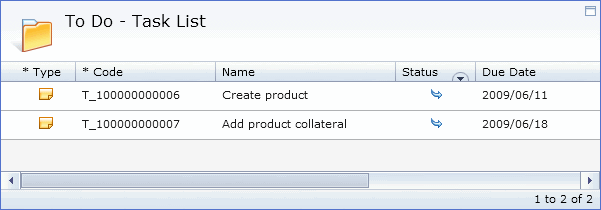
- Select the To Do folder from the explorer view. A list of all active tasks that are assigned to you is displayed.

- Right-click the Create product task.
- In the context menu, click Work On.
The status icon changes to Work in progress
 , and the Management Center changes from read-only mode to working mode.

- Select the To Do folder from the explorer view. A list of all active tasks that are assigned to you is displayed.
- Review any additional information provided about the task groups to which the task belongs:
- Double-click the task in the list view, or right-click and select Open. The General Properties view of the task displays:

- Click the Comments tab to view any comments.
- Double-click the task in the list view, or right-click and select Open. The General Properties view of the task displays:
- Create a new product in the master catalog:
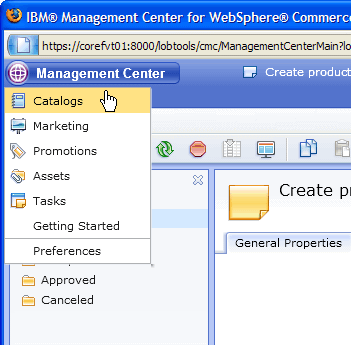
- From the Management Center menu select the Catalogs tool.

- Select the B2B store.

- From the File menu, click File > New > Product
The Manage Product tab displays in the Product Properties view.
- Enter the following information in the Product Properties view:
- Expand the General Product Information section.
Complete the following information:
Field Description Code Type a unique code to identify the product: cell_phone_123. Name Type a name that is displayed in the store: Coolest cell phone Short Description Type a short description of the product: Cell phone with pink chasis. Parent Select a category under the Store Master Catalog. The new product will be put in the catalog under the selected category. Ignore the other fields in this section. They are not required for this tutorial.
- Expand the Publishing section; then select the For purchase check box to indicate that customers can include the product in their shopping carts and order it. Ignore the other fields in this section. They are not required for this tutorial.
- Expand the Display section; then select the Display to customers check box to indicate that customers can view this product in the storefront. Ignore the other fields in this section. They are not required for this tutorial.
- Expand the General Product Information section.
Complete the following information:
- Click Save and Close .
- From the Management Center menu select the Catalogs tool.
- Find the new product:
- Navigate to the Find area.

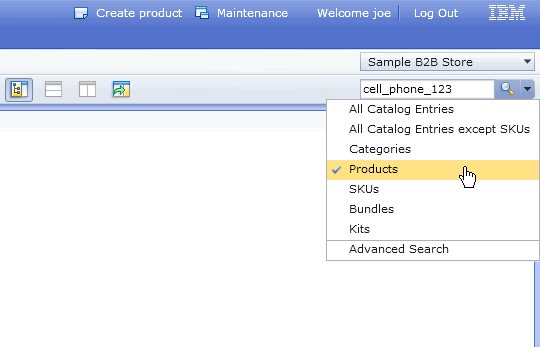
- Type in the keyword cell_phone_123 ;
then from the object list click Products.
- Click Search

.

The product displays in the Search Results view.
- Navigate to the Find area.
- Update the new product with pricing information:
- In the Search Results view, right-click the product;
then in the context menu select Open. The Product Properties view displays.
- Expand the Pricing section.
- In the List Price table, click the USD field and type 19.99.
- In the Offer Price table, click

; then in the USD field type 19.99.

- Click Save and Close.
- In the Search Results view, right-click the product;
then in the context menu select Open. The Product Properties view displays.
- Update the new product with SKU information:
- In the explorer view, right click the product you created in the Active Work folder; then select New Product-level SKU.

The SKU properties view displays.
- In the Code field, type coolest_phoneSKU.
- Click Save and Close.
- In the explorer view, right click the product you created in the Active Work folder; then select New Product-level SKU.
- Complete the task:
- Click on the Tasks tab.
- In the explorer view, click the To Do folder.
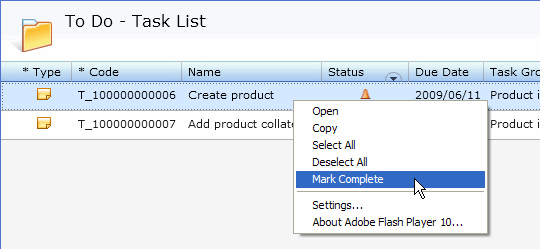
- Right-click the task you were working on in the list view, then click Mark Complete in the context menu.

The task status icon changes from work in progress
 to completed
  .
.
- Let others working on tasks in the same task group know what you have done by adding a comment:
- In the explorer view, click the Completed folder.
- In the list view, double-click the task you just completed.
- In the Comments tab, click

. A new row is added to the Comments table.

- Select the new row and type in the following comment:
Created new product and SKU for cell phone product. Also added price information.
- Click Save and Close.
- In the explorer view, click the Completed folder.
Joe would now go on to complete the next task. For the interest of this tutorial, we assume that the task has been completed. In the list view, right-click the Add product collateral task; then click Mark Complete.
- Click on the Tasks tab.
- Log out of the Management Center.