Activate remote Web server management
Once the WebSphere Commerce instance is federated to a Network Deployment cell, the Web server is configured as an unmanaged Web server node. As we use IBM HTTP Server, IBM WebSphere Application Server Network Deployment can still manage the Web server, for example, starting and stopping it and propagating the IBM HTTP Server Plug-in configuration file to the Web server after generating that file. (See 3.4, "Web server topology in a Network Deployment cell," in the WebSphere Application Server V6 Scalability and Performance Handbook, SG24-6392, for more information about managing Web servers.)
Network Deployment Manager needs remote access to the Web server node for administrating it. For remote administration to work, you need to create an administrative user for IBM HTTP Server and start the administrative server as follows:
1. As wasuser, on Web server node 1, create the administrative user ID:
# IHS_Install_Dir/bin/htpasswd -cb IHS_Install_Dir/conf/admin.passwd
ihsadmin ihsadmin_passwd
2. Modify IHS_Install_Dir/conf/admin.conf, and change the run user and group settings from nobody to wasuser, as shown in Example 10-5.
Example 10-5 Setting the run user and group for IBM HTTP Server administrative server

# Default user and group settings for the server
User wasuser
Group wasgroup

3. As root, start the administrative server:
# IHS_Install_Dir/bin/adminctl start
Note: The administrative server is not needed at runtime, so IBM recommends not adding this command to any system startup scripts. If you still want to run the administrative server automatically, you may do so, but you need to be aware of the security implications of running the administrative server and configure your firewalls to restrict access to the administrative server.
To be able to use Network Deployment Manager to start and stop your Web server and to update the IBM HTTP Server Plug-in configuration, you also need to configure remote Web server management in the Network Deployment Manager administrative console as follows:
1. Navigate to Servers Ć Web servers Ć webserver1 Ć Remote Web server management.
2. Enter the user name and password for the IBM HTTP Server administrative server, which we configured and started in Activate remote Web server management (optional), as shown in Figure 10-4. The default port is 8008. This can be changed in IHS_Install_Dir/conf/admin.conf on Web server node 1, where the port is specified as the parameter of the listen directive.
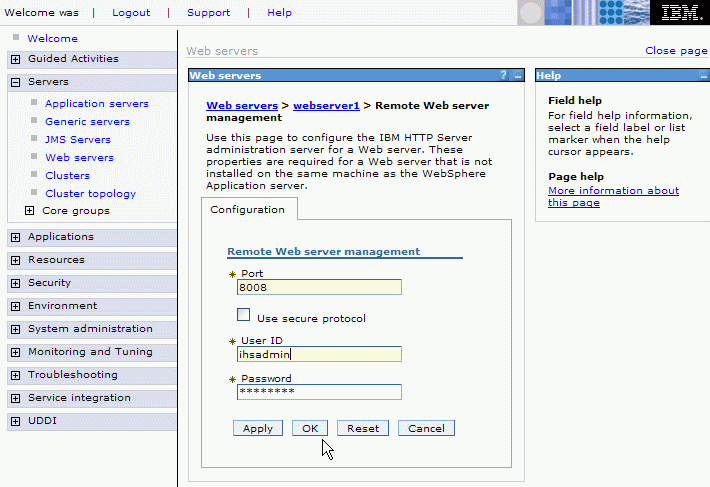
Figure 10-4 Configuring remote Web server management
3. Click OK. A message will be displayed about changes having been made to the configuration, as shown in Figure 10-5.
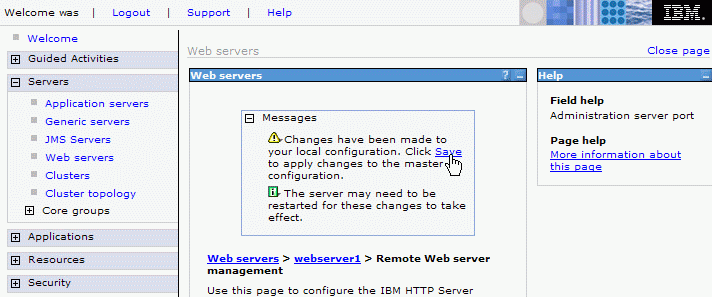
Figure 10-5 Going to the Save workspace changes dialog
4. Click the hyperlinked word Save. The configuration saving dialog is displayed (Figure 10-6).
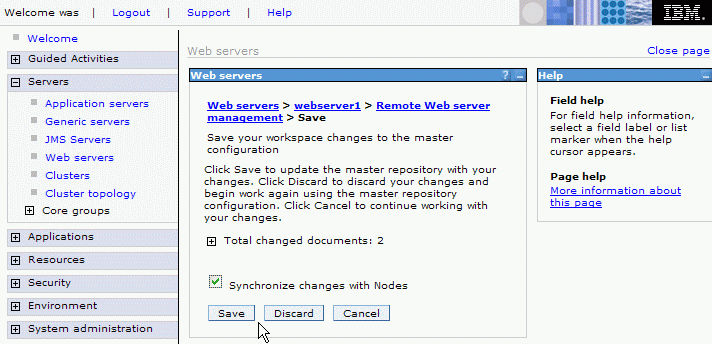
Figure 10-6 Save workspace changes dialog
5. Check Synchronize changes with Nodes, then click Save.
The Web server can now be started and stopped, and the IBM HTTP Server Plug-in configuration can be propagated to it through the Server Ć Web servers panel in the administrative console.