11.3.2 Adding reach targets
A reach target is like a heartbeat, but another machine is used as the destination for the ping packet. The same reach targets are added to the configuration of both primary and backup servers.
If the active Load Balancer cannot reach this target (it does not receive a response from the ping packet), but the standby server still receives responses from it, the standby server will force a failover. Therefore, it is very important that you choose a stable server or network appliance as the reach target. We usually recommend using the default router of the local network (use the IP of the interface that is directly connected to the local network).
If you configure more than one reach target, the Standby Load Balancer will fail over if it receives responses from more reach targets than the active Load Balancer.
In our MAC scenario, we used the IP address of our local router, which is 9.26.126.2. For our NAT scenario we used 9.26.52.1.
To add this IP address as a reach target IP address, right-click High Availability in the left pane of the window and select Add Reach Target. A pop-up window is displayed, as shown in Figure 11-56.
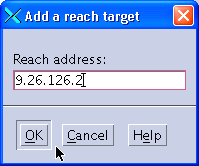
Figure 11-56 Adding a reach target
Note: Make sure to add the reach targets to the active Load Balancer first, and then to the one in standby state. Otherwise, the standby machine could force a failover during the process of setting up the reach targets, because it detects that it can reach more targets than the active machine.
We also recommend that you add the reach target after you have already tested the High Availability configuration (including takeover and failover) and the load balancing. The reason for this is that you could experience unwanted failovers during your initial High Availability tests if the reach target system is unstable.
Save the configurations on both Load Balancer machines after adding the reach targets.
| xxxx |