Deploying the client library
The client library for a WebSphere Commerce service can be deployed in one of three possible environments:
- A WebSphere J2EE environment. The generated JAX-RPC client proxy code is required to leverage the Web services capabilities provided by WAS.
- A local J2EE environment (using local EJB components).
- A J2SE environment (for testing purposes).
Prerequisite:
- Set up the development environment for creating WebSphere Commerce services.
- Create a WebSphere Commerce service module.
- Create the client library.
- Understand and select your client library authentication mechanism.
To deploy the client library:
- Start WebSphere Commerce Developer.
- Package the client library:
- If you are packaging your own client application, include
the following JAR files in the class path of your client application:
- MyServiceModule-Client.jar, where MyServiceModule is the name of your service module
- MyServiceModule-DataObjects.jar
- workspace_dir\WC\Foundation-Core.jar
- workspace_dir\WC\Foundation-DataObjects.jar
- If you are packaging your own client application, include
the following JAR files in the class path of your client application:
- Copy WCDE_installdir\xml\config\com.ibm.commerce.foundation\wc-config-mapping-registry.xml to any \config directory in the client application class path. (The file must be in a directory called config).
- In the class path of the client application, create an empty file called config\ component-id\ wc-component-client.xml file, where component-id is the identifier for your component, for example: com.myco.commerce.myservicemodule.
- Select one of the following binding methods, based on the authentication
mechanism you have chosen:
Option Description Generated Web service client proxy binding: - Open Preference > Web Services > Code Generation > IBM WebSphere runtime. Select the Disable data binding and use SOAPElement option.
- Open the J2EE module that will use the client library in the Deployment Descriptor editor.
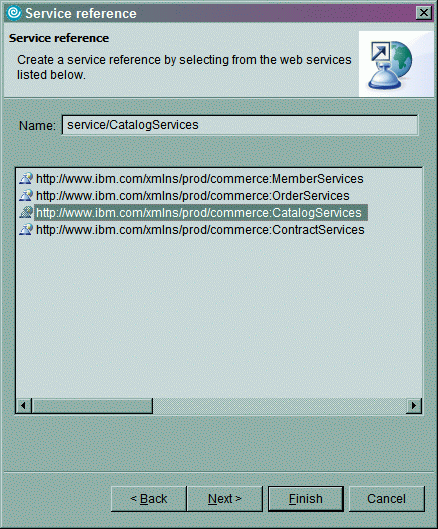
- Click the Reference tab and add a service reference.
Then select the Next button.

- Select the service reference and select the Finish button.
 This generates the client proxy code to communicate with the
WebSphere Commerce service. This client proxy has methods for each service.
Each method takes a SOAPElement as input and returns a SOAPElement. This also
generates the deployment configuration and JAX RPC mapping to create the client
proxy.
- Click the Web service Handler tab and create a new handler for the newly created service reference. The handler class should be com.ibm.commerce.foundation.internal.client.services.invocation.impl.JAXRPCWebServiceProxyHandlerImpl. The purpose of this handler is to include authorization information within the SOAP request for guest and register user support.
- Open the file you created in step 4 and use the generated proxy class
by changing the invocation binding implementation to com.ibm.commerce.foundation.internal.client.services.invcation.impl.JAXRPCWebServiceProxyInvocationBindingImpl. Add a proxy to this binding element named proxyClass with
the value of the generated proxy class. For example
<_config:invocationservice>
<_config:invocationbinding bindingImpl="com.ibm.commerce.foundation.internal.client.services.invocation.imp
l.JAXRPCWebServiceProxyInvocationBindingImpl">
<_config:property name="proxyClass" value="com.ibm.www.CatalogServicesPortTypeProxy"/>
</_config:invocationbinding>
</_config:invocationservice>
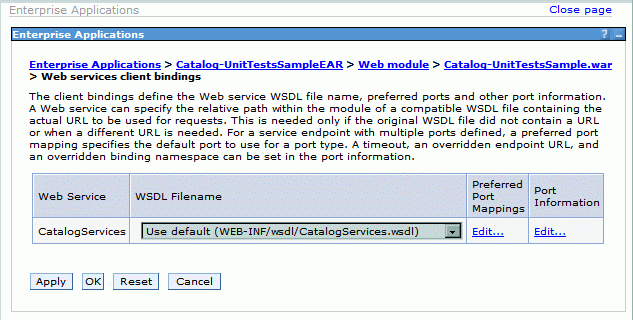
- Use the console to manage the URL binding and security
setting to associate it with the Web service configuration.

Local EJB binding When the WebSphere Commerce service and the client of that service are in the same application, then for performance reasons, the client should not have to make a Web service request to that service. Instead the client and component communication should be local to the application to avoid unnecessary overhead.
- Open the wc-component-client.xml file you created in step 4 and change the invocation binding to use: com.ibm.commerce.foundation.internal.client.services.invocation.impl.LocalEJBInvocationBindingImpl
- Add a jndiName property of the binding to point to the
global name of the local EJB component. For example
<wc:InvocationBinding
bindingImpl="com.ibm.commerce.foundation.internal.client.services.invocation.impl.LocalEJBInvocationBindingImpl">
<wc:Property name="jndiName"
value="ejb/com/ibm/commerce/catalog/facade/server/CatalogLocalFacadeHome"/>
</wc:InvocationBinding>
- Save the file.
- Deploy the changed configuration.
- Restart the server.
Web services binding in a J2SE application When the client of the WebSphere Commerce service is deployed in a J2SE environment, there is no naming service to resolve the reference to the Web service. Instead, the URL binding of the Web service is defined in the binding configuration of the client.
- Open the wc-component-client.xml file you created in step 4 and change the invocation binding to use: com.ibm.commerce.foundation.internal.client.services.invocation.impl.J2SEWebServiceInvocationBindingImpl
- Add a URL property to the binding to specify the URL where the Web service
can be found. For example
<wc:InvocationBinding
bindingImpl="com.ibm.commerce.foundation.internal.client.services.invocation.impl.J2SEWebServiceInvocationBindingImpl">
<wc:Property name="url"
value="http://localhost:81/webapp/wcs/component/catalog/services/CatalogServices"/>
</wc:InvocationBinding>
- Save the file.
- Deploy the changed configuration.
- Restart the server.
Service binding using the WebSphere Commerce JCA Messaging subsystem When the client of the service is deployed in the WebSphere Commerce application the JCA infrastructure of the messaging sub system can be used to issue the service request. With this configuration the existing messaging admin UI can be used to determine the transport and target of the system to receive the message.
- Open the wc-component-client.xml file you created in step 4 and change the invocation binding to use: com.ibm.commerce.foundation.internal.client.services.invocation.impl.JCAInvocationBindingImpl
- Save the file.
- Deploy the changed configuration.
- Create a new message type for the component ID used to create an instance
of the invocation service object, for example com.myco.commerce.myservicemodule.
To do so, add a row into the MSGTYPES table to assign a new msgtype_id. Use
a message type ID number above 1000. For example
insert into MSGTYPES (MSGTYPE_ID, MSGTDIR, NAME, VIEWNAME,
DESCRIPTION)
VALUES (1001, 1, '
com.myco.commerce.myservicemodule' , '', 'My Service
Component' );
- Assign a message type to a transport method for the site or store.
- Restart the server.
Related concepts
WebSphere Commerce services
WebSphere Commerce service module
Client library for WebSphere Commerce services
Related tasks
Create the client library
Extending the client library
Deploying the component facade
Related Reference
Client library exceptions